Outcome
Goal
The goal of this project is to provide an ambient glanceable indicator if the home is too cold (blue LED), too hot (red LED), or just right (green LED). For control, set-point configuration would be completed through the Particle REST API. Lastly, logging the data in Ubidots provides a historical view of temperatures over time.
Process
Process Step 1: Reading from the Temperature Sensor
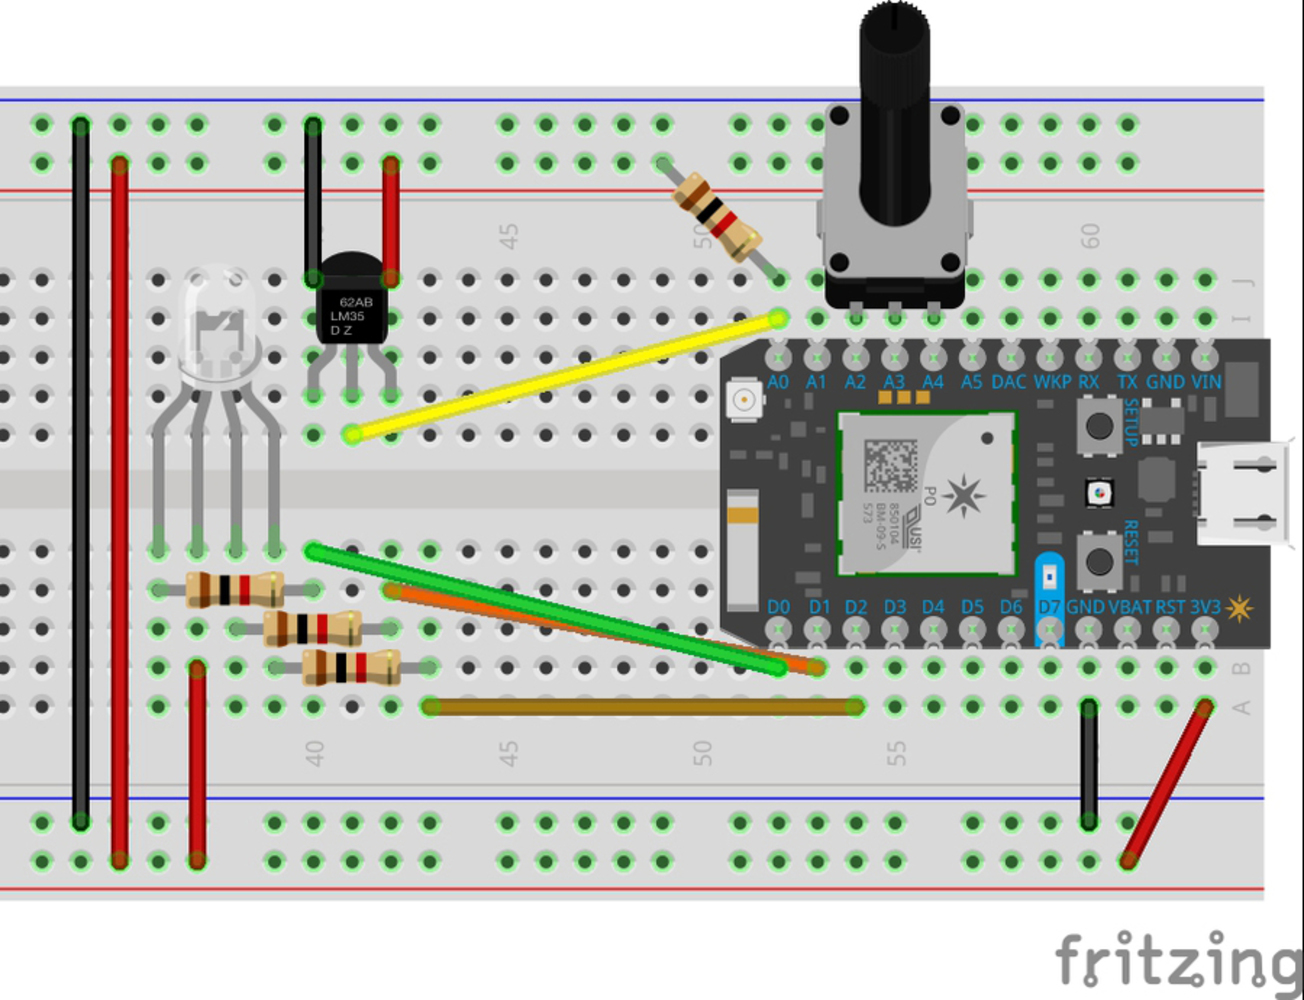
Initially, work on this project began be developing a circuit and support code to gather temperature data from a Dallas DS18B20 direct to digital temperature sensor. This was completed utilizing readily available libraries from Github (OneWire.h and DS18B20.h). Example code was reviewed for guidance from the code posted by krvarma (https://github.com/krvarma/Dallas_DS18B20_SparkCore). This step involved significant challenges in locating and utilizing libraries which would compile in the Particle Dev desktop environment.
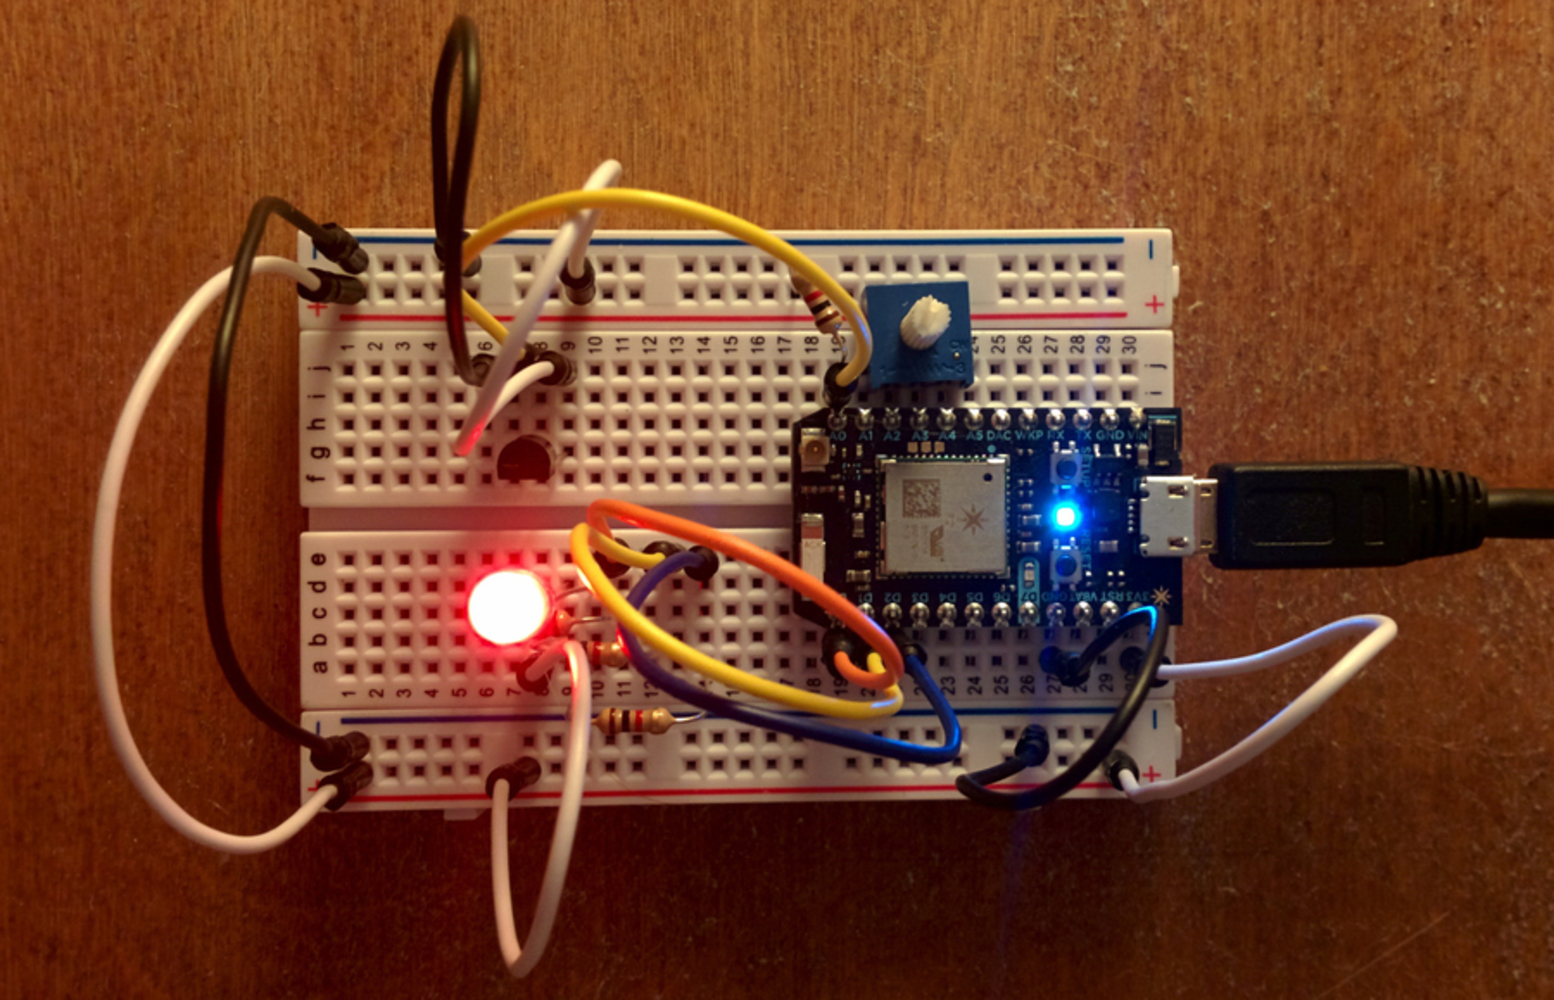
Process Step 2: Incorporating the dimmable RGB LED and Set-point Controls
Next, an RGB LED was incorporated to provide the ambient in-situ feedback. This was wired to the Particle Photon in a traditional manor. Additionally, code for cloud variables and functions for setting and displaying the high and low temperature set-points was incorporated. Further, a potentiometer was installed to reduce the brightness of the RGB LED when desired.
Process Step 3: Posting to Ubidots for Visualization
Lastly, the configuration of the Ubidots.com data storage and HTTP posting was completed. This step involved including the HTTPClient library and associated code to publish data points to Ubidots. In this case, the setup guide on Ubidots was used for sample code and instruction (http://ubidots.com/docs/devices/particle.html). Additionally, code to limit the frequency of data posting to Ubidots (one data point per 20 seconds) was implemented.
Outcome
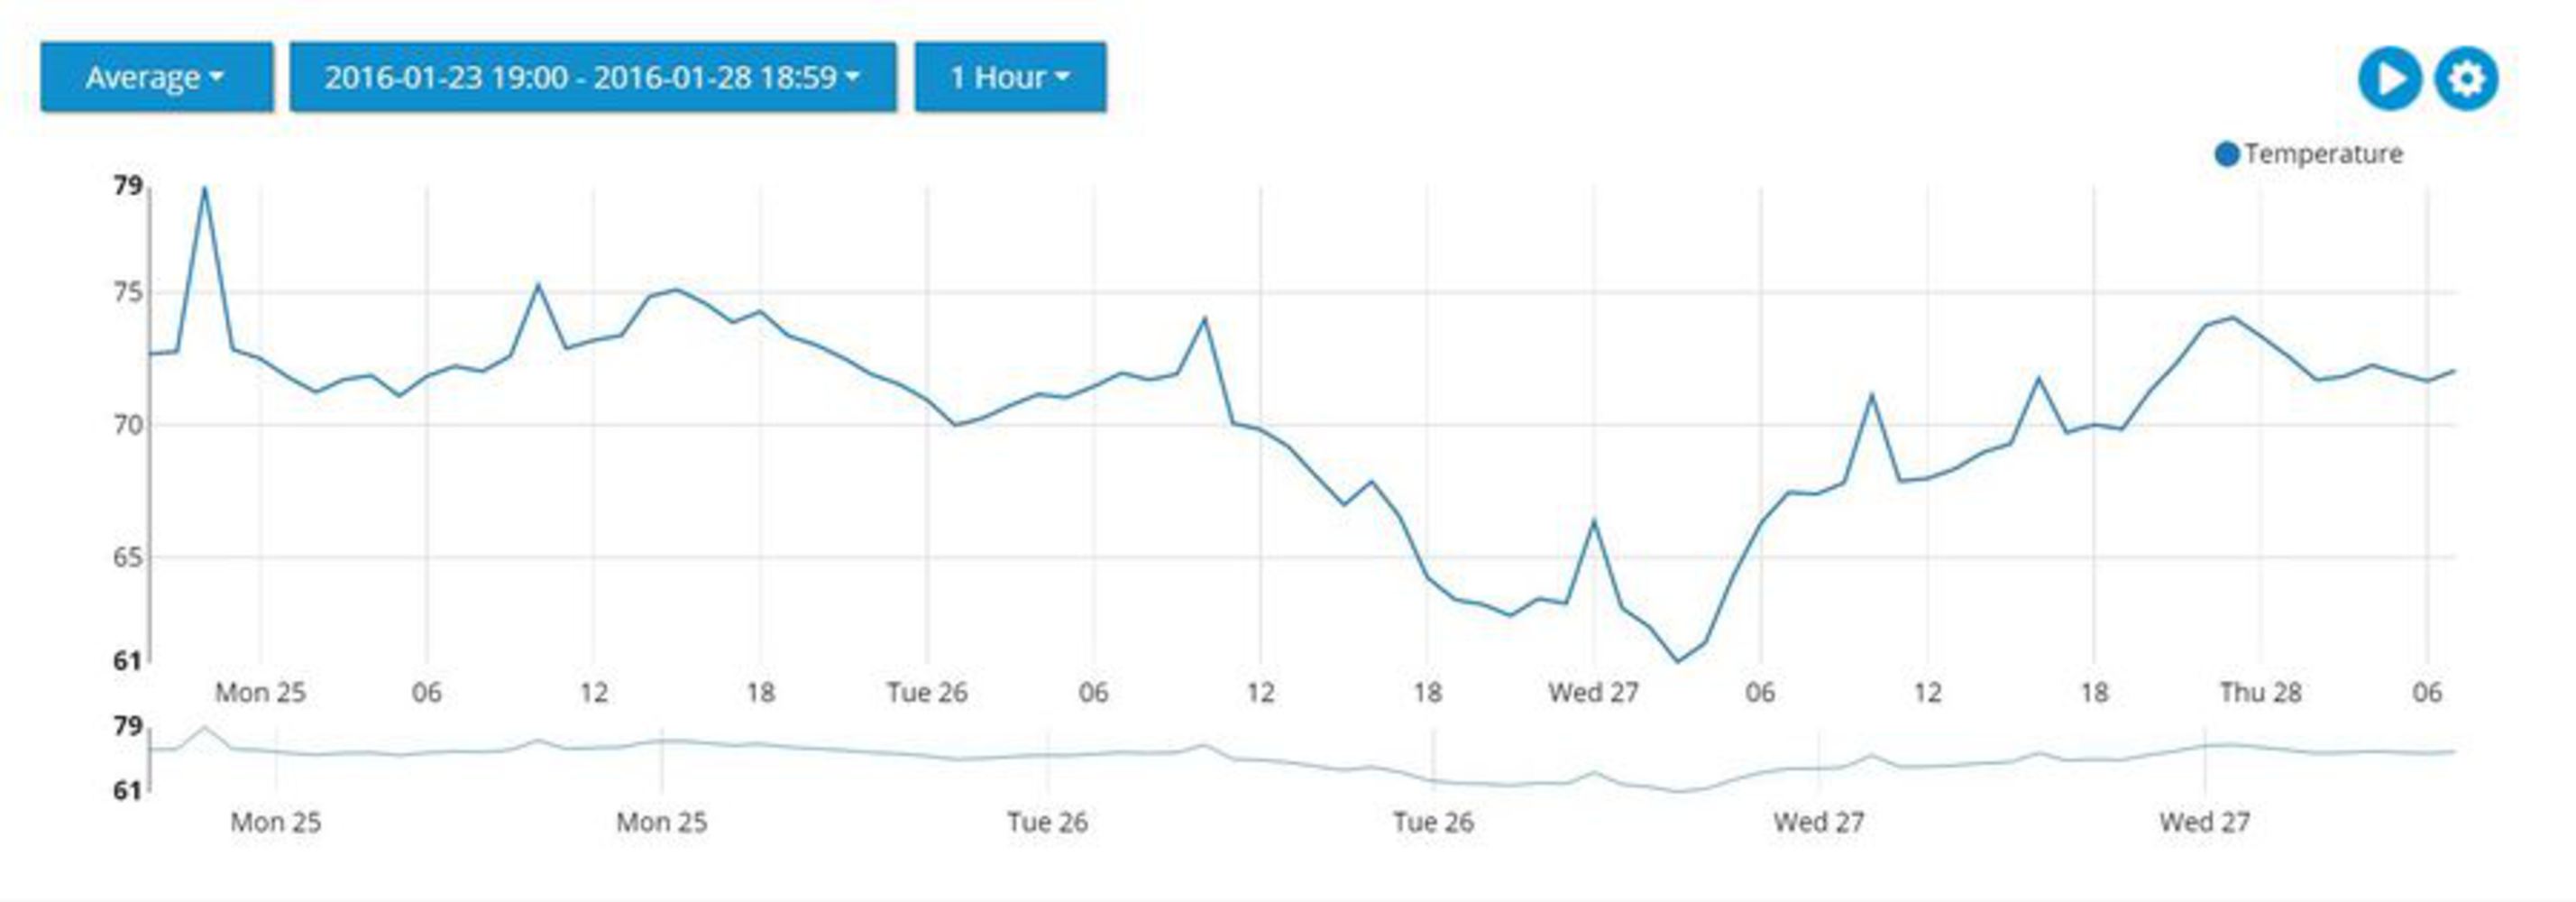
Ultimately, the above process yielded a fully functional working prototype which was operating and logged temperature from 10pm Sunday 1/24 through 7:30am Thursday 1/28. With the Ubidots data logging, we witnessed that the temperature over this 4 day period ranged from a high of 79F (radiators on) to a low of 61F (windows open). At those times both my wife and I were prompted into action (closing/opening windows and turning on/off the radiators) by the indicator LED. The LED became a low cognitive effort method for us to judge if the apartment temperature was in our mutually agreed temperature range.
Thought this device is fully functional, additional development would be necessary to encase the prototype to blend in better with the home environment.
Note: In the code posted below, my personal Ubidots DeviceID and Variable Token have been replaced with XXXX and YYYY respectively.
HomeTemp_Files.zip
79.072 KB · Download / View
Reflection
Ultimately, this project was a great exercise in iterative development and exercising the strength of online documentation/resources. Learning the basics of the HTTPClient library for the purposes of posting data to Ubidots was especially rewarding. Further, exploring the pros and cons of online data management options (Particle Publish, Ubidots, Xively, etc…) was insightful to the public vs private key data posting methods. The only lingering challenge, though unnecessary to complete this project, is that I am as yet unable to address multiple DS18B20 temperature sensors on a single one-wire bus. There are limited examples of this practice online, particularly for the Particle/Spark platform. Further instruction or sample code to address multiple one-wire bus devices would help resolve this challenge.
You can upload files of up to 20MB using this form.