Back to Parent

Outcome


Show Advanced Options

Problem Statement

Due to ease of purchase and a higher willingness to pay with credit cards, online shopping can pose a significant financial issue for even casual shoppers. That being said, e-commerce often represents a cheaper and more convenient method of shopping. Consumers therefore need a visual indicator to identify when they have passed a self-imposed limit for online shopping.

Goal

Our team wanted to create an ambient, anthropomorphic device that provides the online shopper a quick and effective notification of their online shopping trends. If the shopper stays under their target limit within a specified timeframe, the device should appear happy (i.e., using colors and facial expressions). If the shopper goes over their limit, the device should appear sad or upset. A warning color will let the shopper know when they are close to their limit.

Process

Process Step 1: Controlling a Servo and RGB LEDs

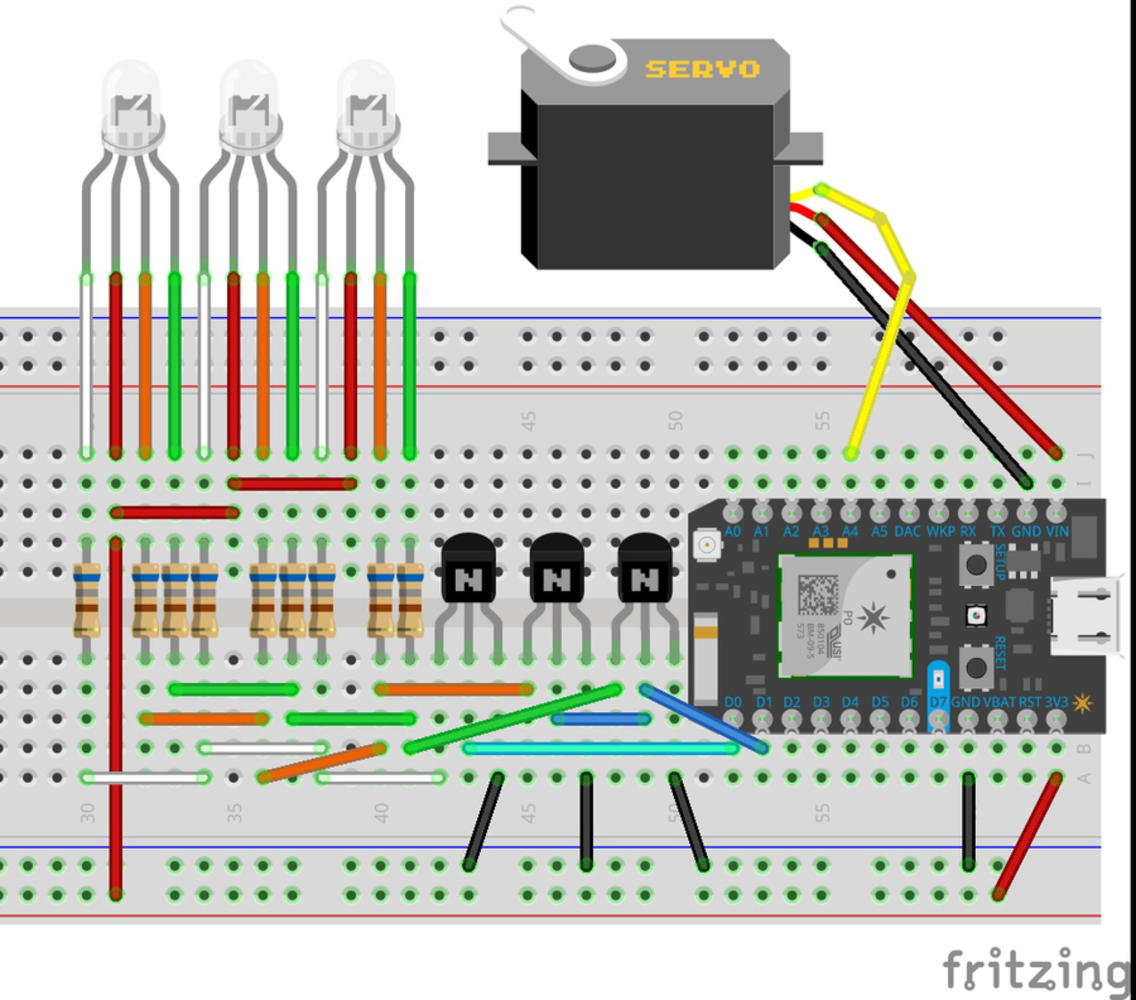
First, we utilized the tutorials written on the DIoT Lab Site (http://daraghbyrne.github.io/diotlabs/6-controlling-outputs/servo/) to set up servo control. There was no issues with the implementation of the servo. Subsequently, had a need to control the RGB values of multiple RGB LEDs, so to minimize the number of GPIO pins required, we built out an RGB LED control matrix utilizing 3x NPN transistors, 3x 5mm RGB LEDs, and 9x 680 ohm resistors. This allows for PWM signals to actuate the transistors as switches powering the three LEDs R, G, and B channels simultaneously and independently.

Process Step 2: Calling a Particle.function through Gmail / IFTTT trigger

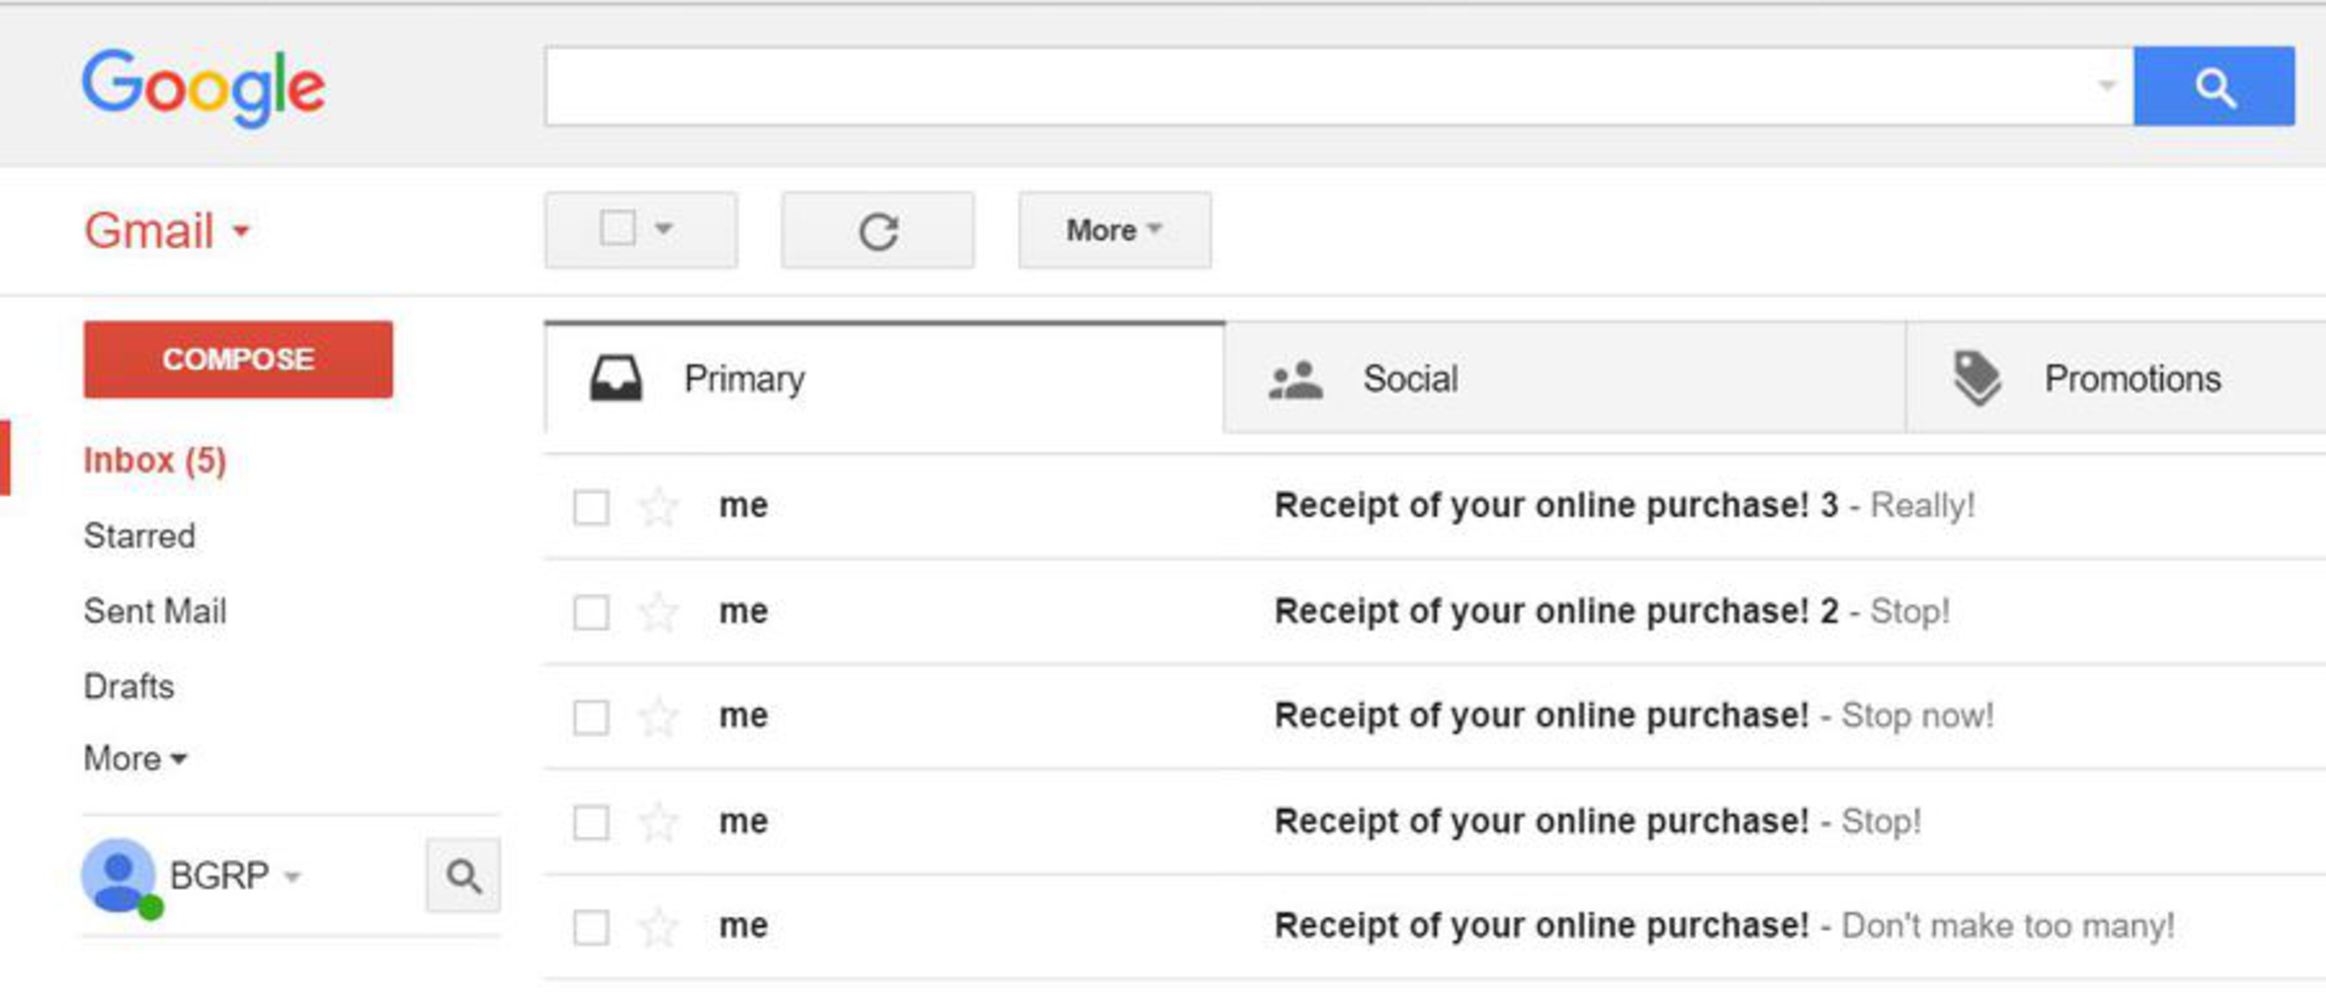
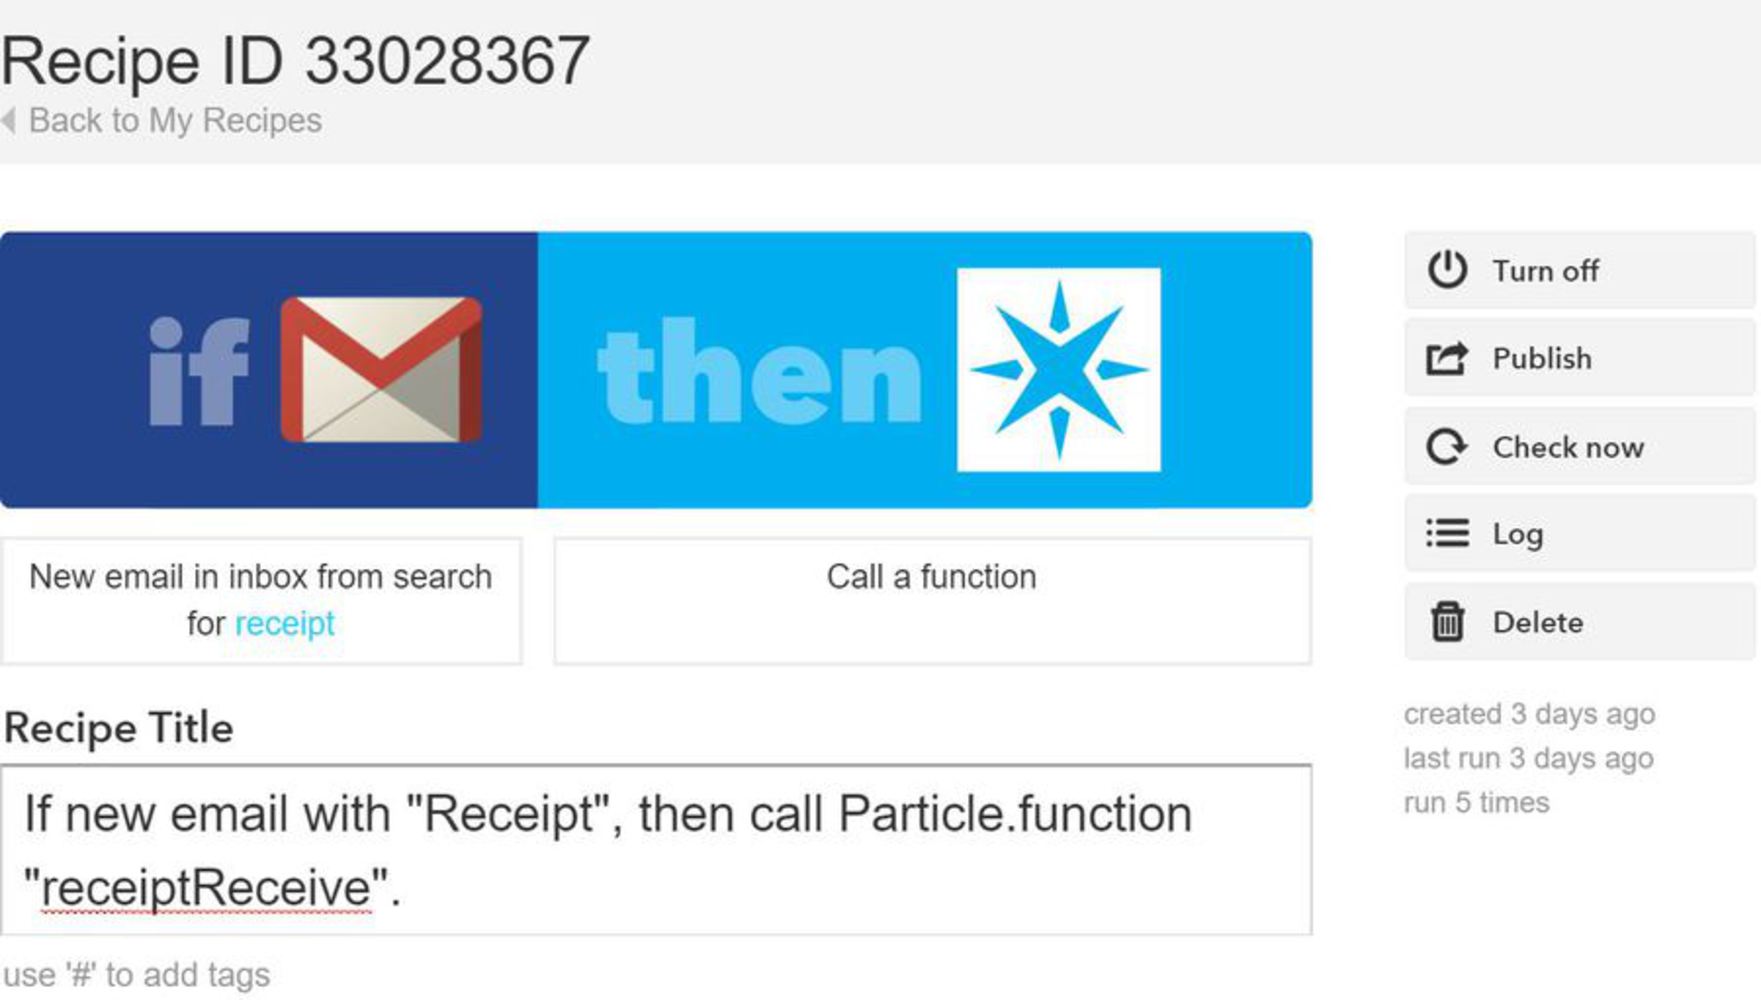
Next we generated the IFTTT rule set to call a receipt count function on the Photon whenever an email was received with “receipt” in the subject line. We utilized the onboard D7 LED flashing to indicate success of the function call. So far so good.

Process Step 3: Combining the Code Elements

Next, we brought all of the independently working code elements together. This generated a considerable amount of trouble, all associated with conflicts around PWM pins. There was some conflict in controlling PWM on D0, D1, D2, D3 simultaneously, with either D2 or D3 (red LED channel or Servo) not functioning. Ultimately, this was resolved by triggering the Green and Blue channels both from D0 (not independent) and controlling Red from D1 and the servo on A4.

Process Step 4: Calibration and Build Up

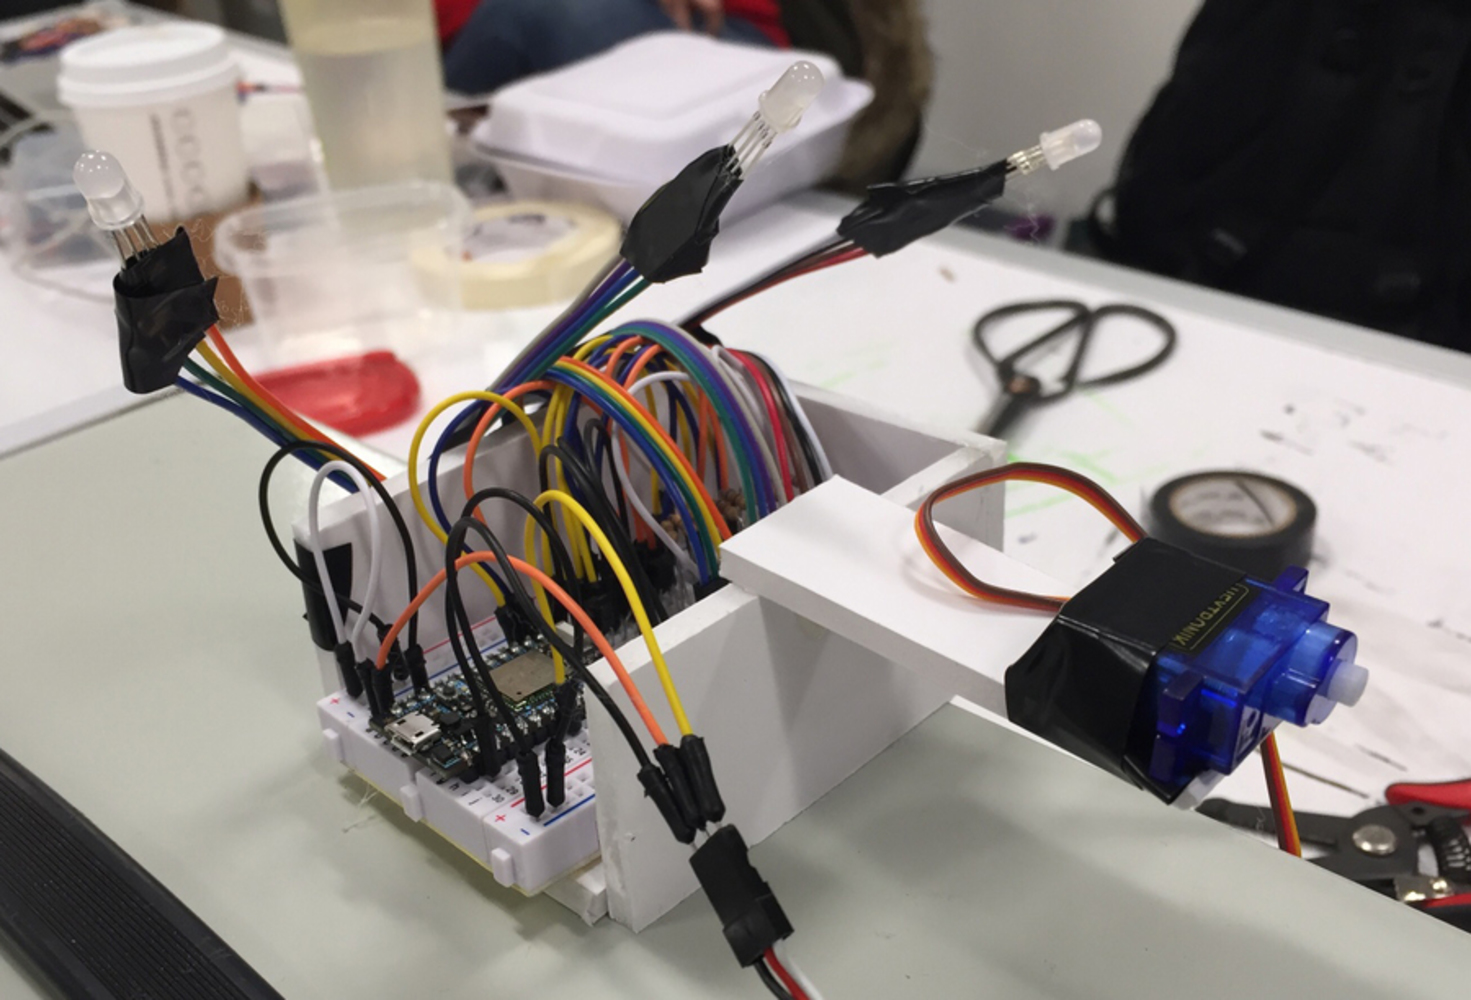
Finally, we built up the cloud structure and encased the control board and electronics within. This required mounting the servo at the front of the cloud and arranging the LED throughout the structure to create the necessary glow. Simple foam core and electrical tape were utilized for this purpose. Once built, we had to set the final calibration variables for the servo to align the smile horizontally when in the smile and frown position.

Outcome

Our final product, Avery™, notifies the user when they have surpassed their online shopping limit by reading online shopping receipts sent to the user's Gmail. To activate the device, the user would set an arbitrary time limit and several purchase delimiters (i.e., happy = 1 or fewer purchases, warning = 2 purchases, sad = 3 or more purchases).

For example, the user might want to make less than 3 online purchases in a week. If the user makes 1 or fewer online purchases, the cloud smiles, remaining a bright white hue. If the user makes a second purchase, the cloud would continue to smile, but the LEDs would change to a blue-green color. Finally, if the user makes a third purchase that week, the smile turns to a frown and the LEDs turn red. The device would reset after the week was up (smiling / white hue).

In terms of next steps, we'd like to build out the features of the cloud (i.e., the face and the cloud materials) and make it hang-able. We would also like to find a better way to hide the circuitry.

Documentation

Below is the final electrical schematic, Particle code, and screen captures from the test Gmail and IFTTT recipe.

Fritzing final.thumb
Show Advanced Options
Prototype final.thumb
Show Advanced Options
Gmail.jpg.thumb
Show Advanced Options
Ifttt.jpg.thumb
Show Advanced Options

Reflection

Development ultimately required segmentation. We did not expect every individual to participate fully in every step of the process. Accordingly, individuals volunteered to code, build the circuit, and create the aesthetic components of the device. These steps did require some coordination, but everyone understood their individual jobs and prepared accordingly.

In terms of the process, we (i) prepared individually, (ii) met as a group to discuss potential solutions and finalize our direction, (iii) met again to ensure individual progress, and (iv) conducted one build session to finish and test the device. Generally, this process—and the abovementioned segmentation—worked well. We were able to troubleshoot and correct any incompatibilities during the final build / test phase. 

Drop files here or click to select

You can upload files of up to 20MB using this form.