Concept
We will be making a toy that will teach kids the basics of coding by manipulating the color of an RGB LED inside of a clear acrylic structure.
The kids, on a computer through our GUI, will be able to click and drag lines of code (that are syntactically correct but are significantly simpler) that they will be able to scroll over to understand what is going on. If there are any numerical values, the kid will have the opportunity to change that number (change the range of colors, change the number of iterations of a loop, etc.). Then the kid will be able to see the coding pattern they made by seeing the colors of the RGB led change on the acrylic model.
We thought that we would engage the child's curiosity by the main acrylic frame - we hope that the frame will be very fancy looking and changing color so as to attract children to our booth. We are also planning to have different levels of the "click and drag" code, which could change based on child's age/previous knowledge.
The project should be quite safe (not necessarily durable if smashed to the ground), but for a range of 7-8. We will be using acrylic, RGB LEDs, a power supply, and a computer, so the technology is decently appropriate and sustainable. We will be able to use the principles of universal design in the manufacturing of the model as well as the GUI (the GUI will be also using the principles of how to teach someone something).
The frame will be completely manufactured by us by laser cutting, as well as the circuit for the LED and the GUI which will control the LED, so there isn't much manufacturing going on outside of the team's abilities.
The main acrylic frame will simply be laser cut and superglued together (as our previous models have been as that has worked quite well). We will need RGB leds that we can manipulate, as well as a 9 V power supply.
The GUI and the integration between the GUI and the Arduino is undoubtedly going to be the majority of the work on the project. We need to figure out a way that the GUI will be able to immediately produce and run Arduino code (or else make it very easy to produce and run Arduino code) such that the child will immediately be able to see the results on the project.
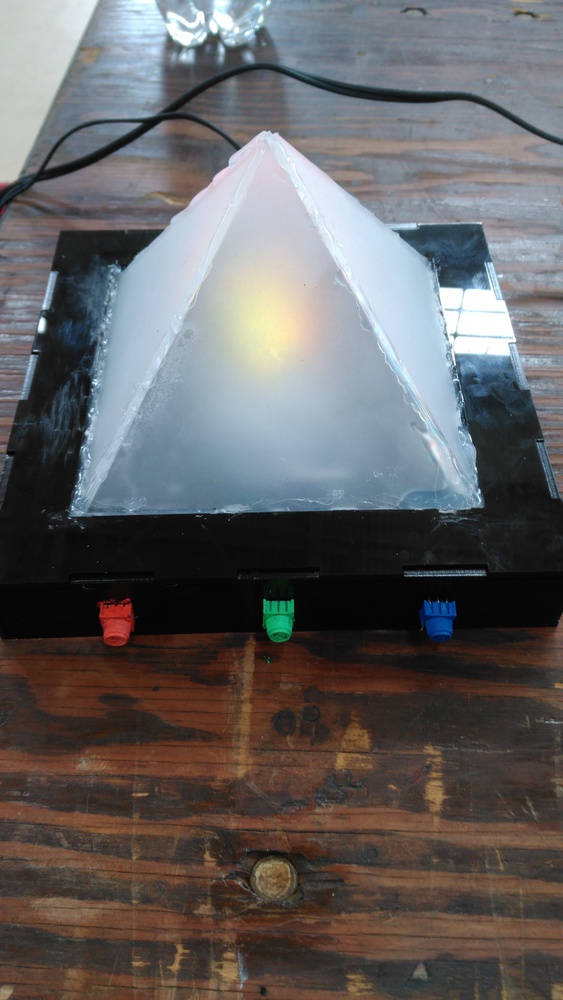
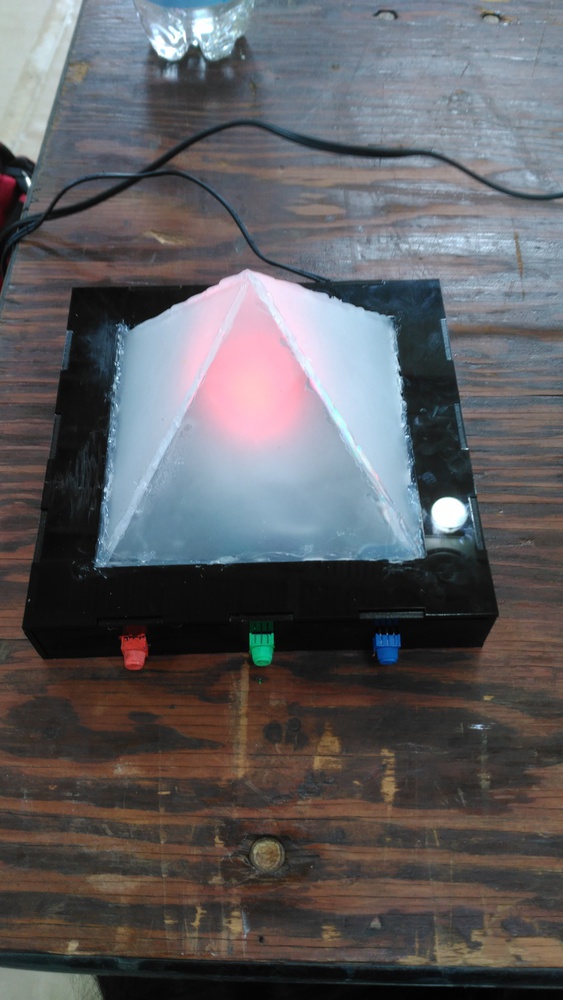
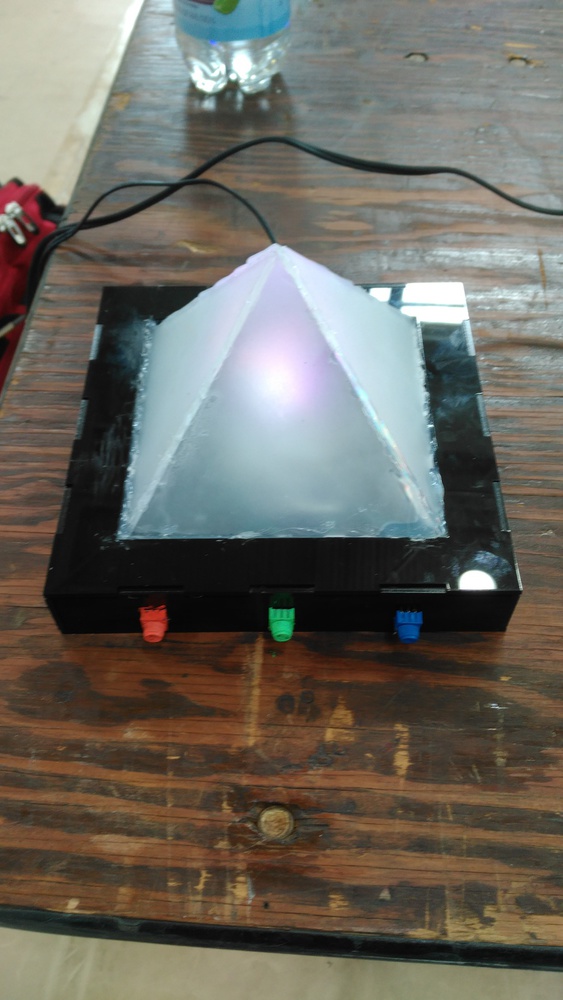
Due to our limited understanding of arduinos and GUIs combined with our limited time to complete project 3, we went with a simpler design for RGB glow. We were able to implement a glowing pyramid with three knobs to control the RGB values. By turning each knob, you can increase or decrease the amount of red, green, and blue in the glowing light inside the pyramid. Our intent with this amended version is to teach children how color mixing works. We would have liked to have had digital readouts of all of the values, but despite this omission, we were able to successfully complete the difficult circuitry in order to show kids how color mixing works.
It was really cool to be able to flesh out our idea of mixing LED colors, especially with all the tools that were given to us in IDEATE. Our color-mixing circuit works well, and if we were to iterate again, we would try to add in a digital display of the RGB values or an interactive GUI. We loved the ability to have an idea and quickly make it come to life, and the people at Meeting of the Minds seemed to enjoy our project and tinkering with color mixing. We had many questions on what we would do to improve it and what our design intent was, and it was a good experience to be able to explain to people about our work and design.
You can upload files of up to 20MB using this form.