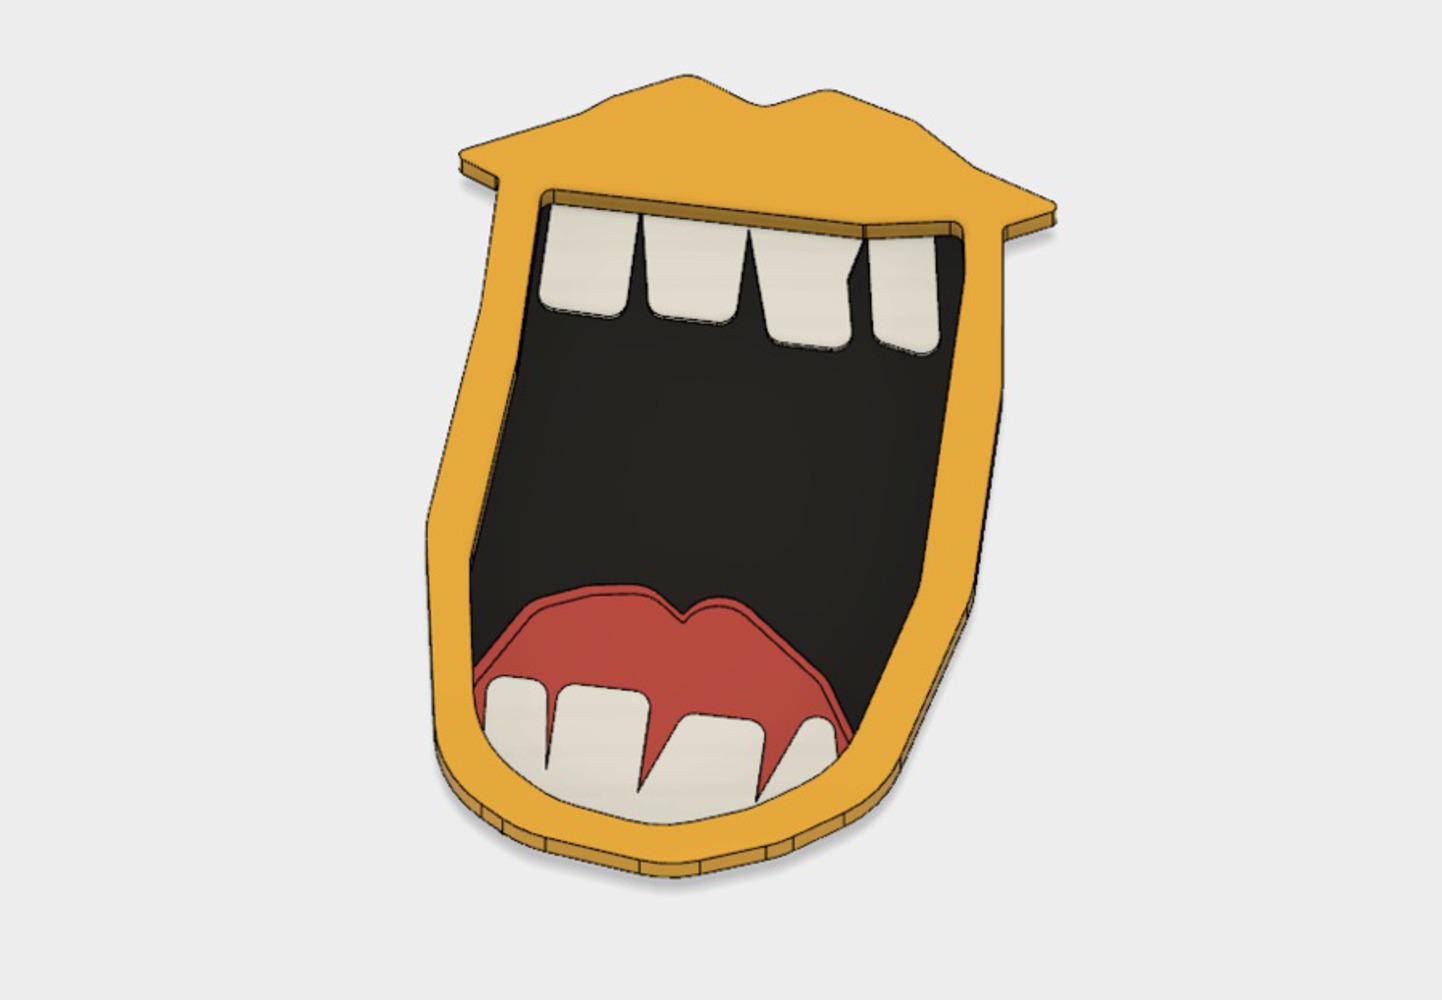
Intention
My intention was to capture elements of an animated mouth by experimenting with acrylic materials, 3D modeling software, and laser cutting techniques; this was my first time laser cutting a personal concept.
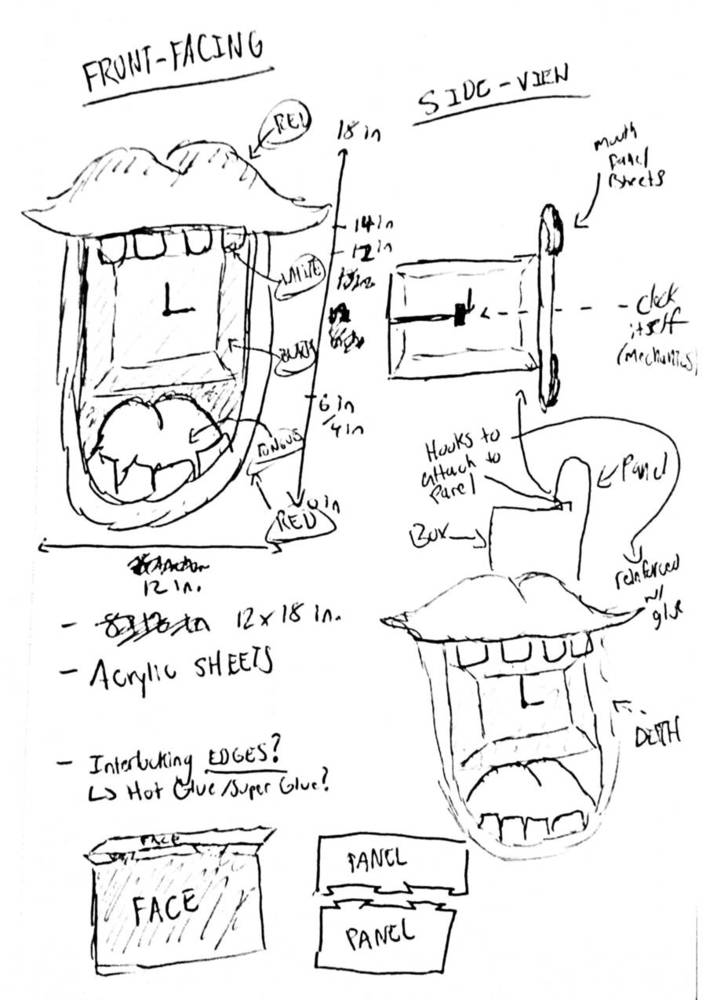
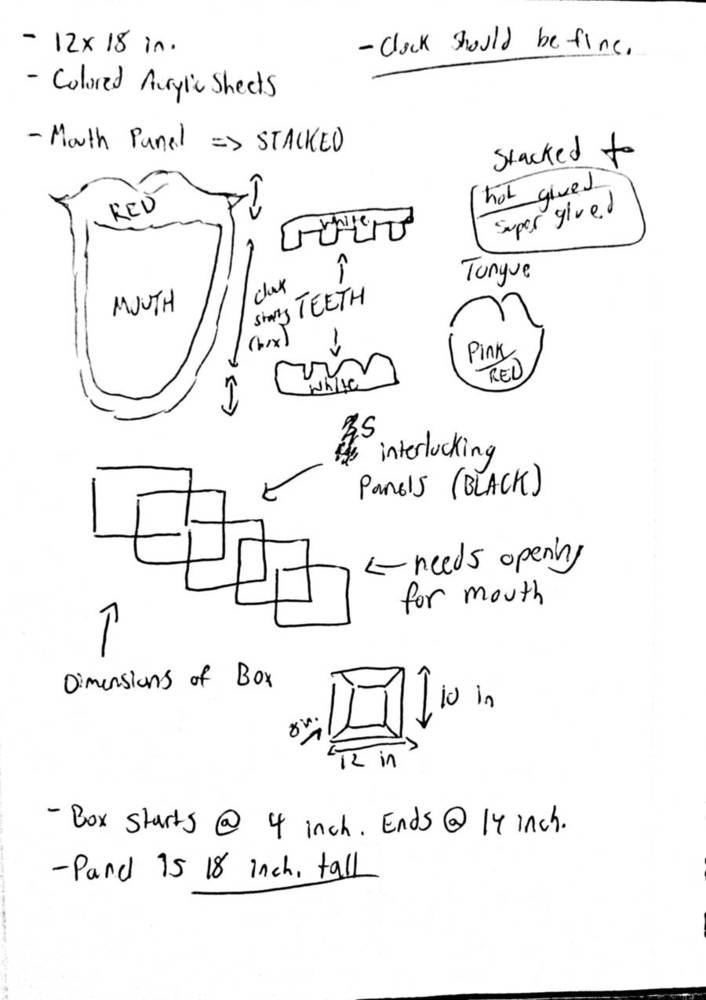
- (12in x 18in) Mouth Panel (Broken into 4 other parts, which will be stacked and glued for extra security)
- (12in x 10in x 8in) Face-Open Box = 5 Black Acrylic Sheets
- 2 hook openings will be cut in the back so that it can be placed on a wall
- 2 edges/hooks will be placed on the top of the box (near opening) so the Mouth Panel can fit on (will be reinforced with glue)
- Acrylic Sheets (i.e. - Red, White, Pink, Black)
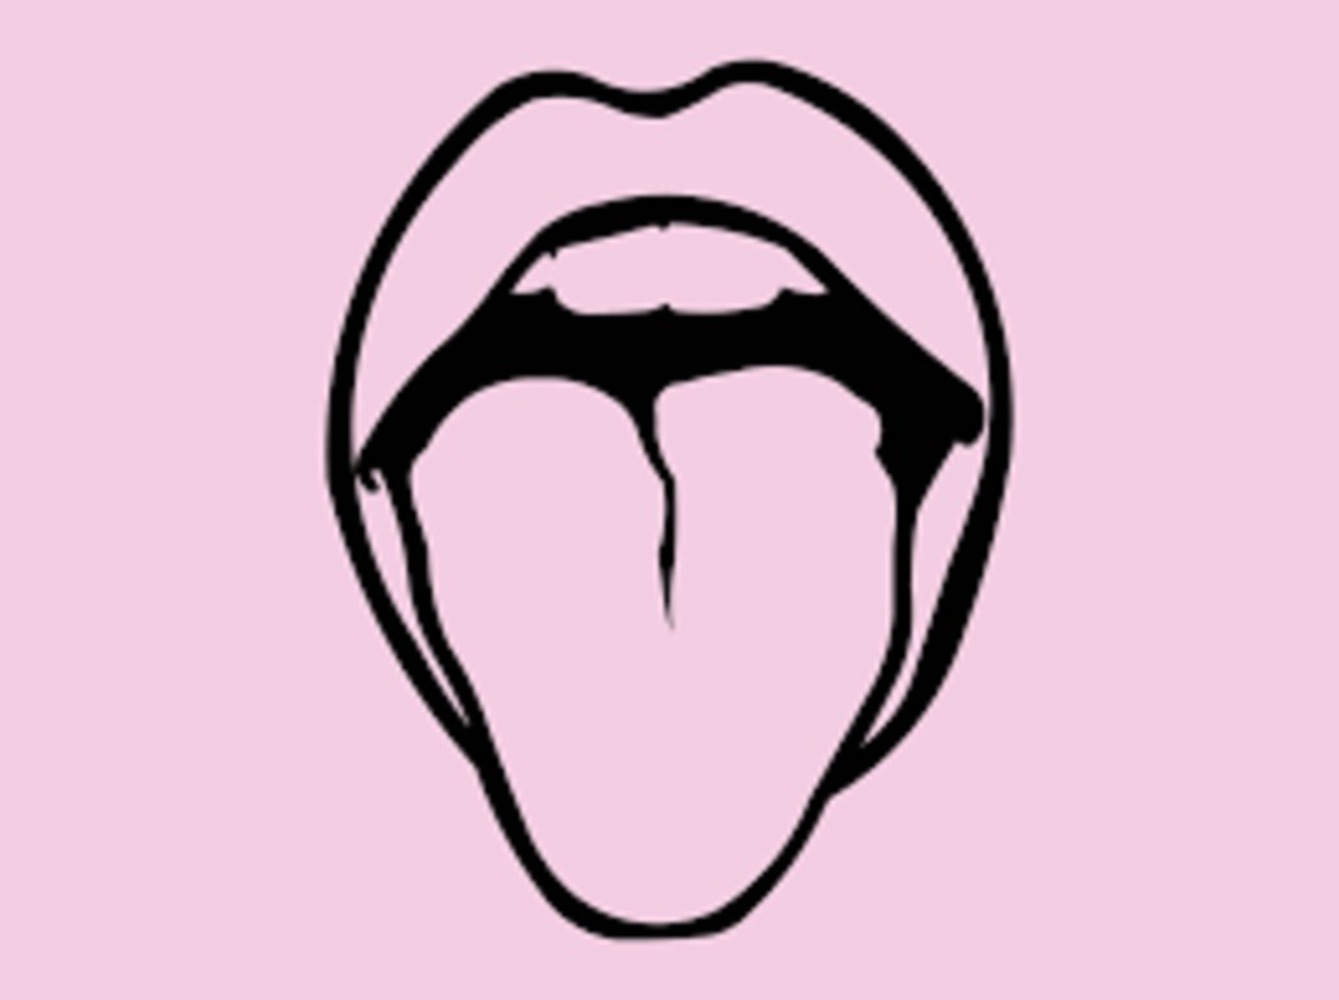
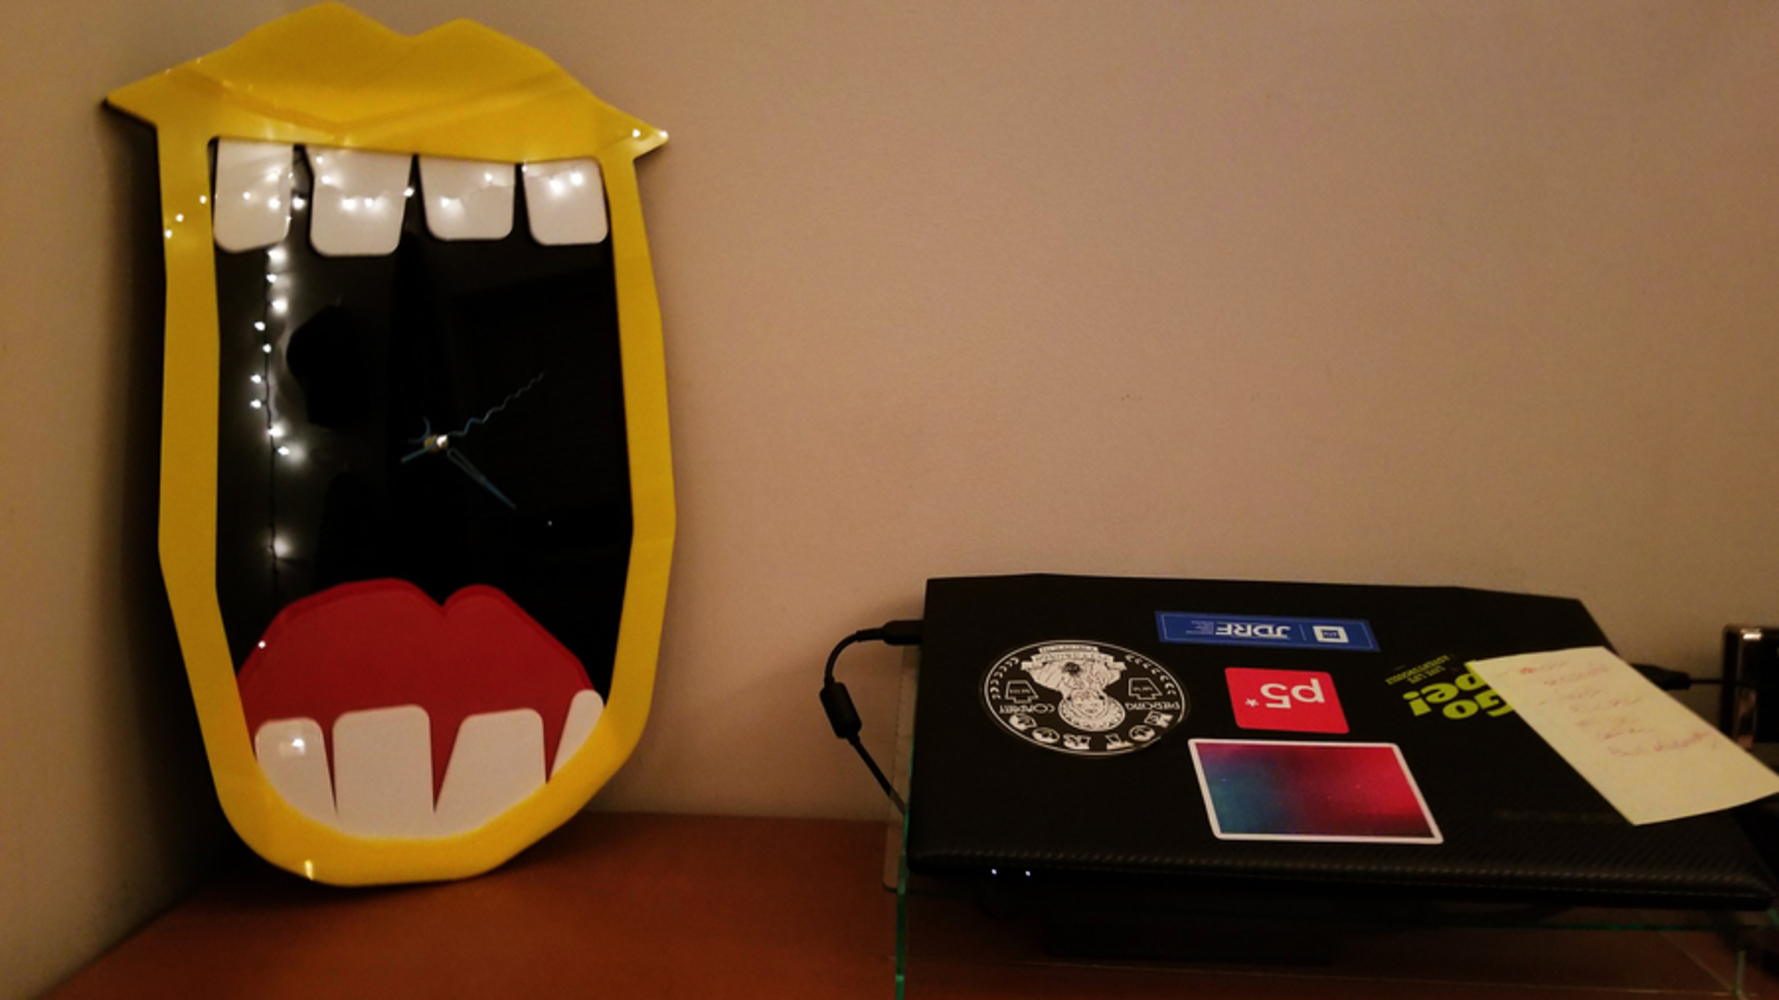
The state of one's mouth, as odd as that sounds, can give us a lot of information about how an individual is doing. They may be frowning, smiling, laughing, resting, etc. Personally, I find myself assuming the "tongue's out" position, in which I open my mouth, stick my tongue out, and shake my head back and forth repeatedly - signifying that I'm ready to have some fun or that I'm currently exhausted. When given the clock assignment, this concept instantly came to mind because of its odd aesthetic and my continued fascination for expression.
My process ended up deviating from my original project intentions. I originally planned on making the clock 3D in that the analog hands and mechanism would be set inside the black space of the mouth. After starting to model my design and continued thinking about how I would fit everything together, I realized that simplifying would be best, especially since the time frame was so short.
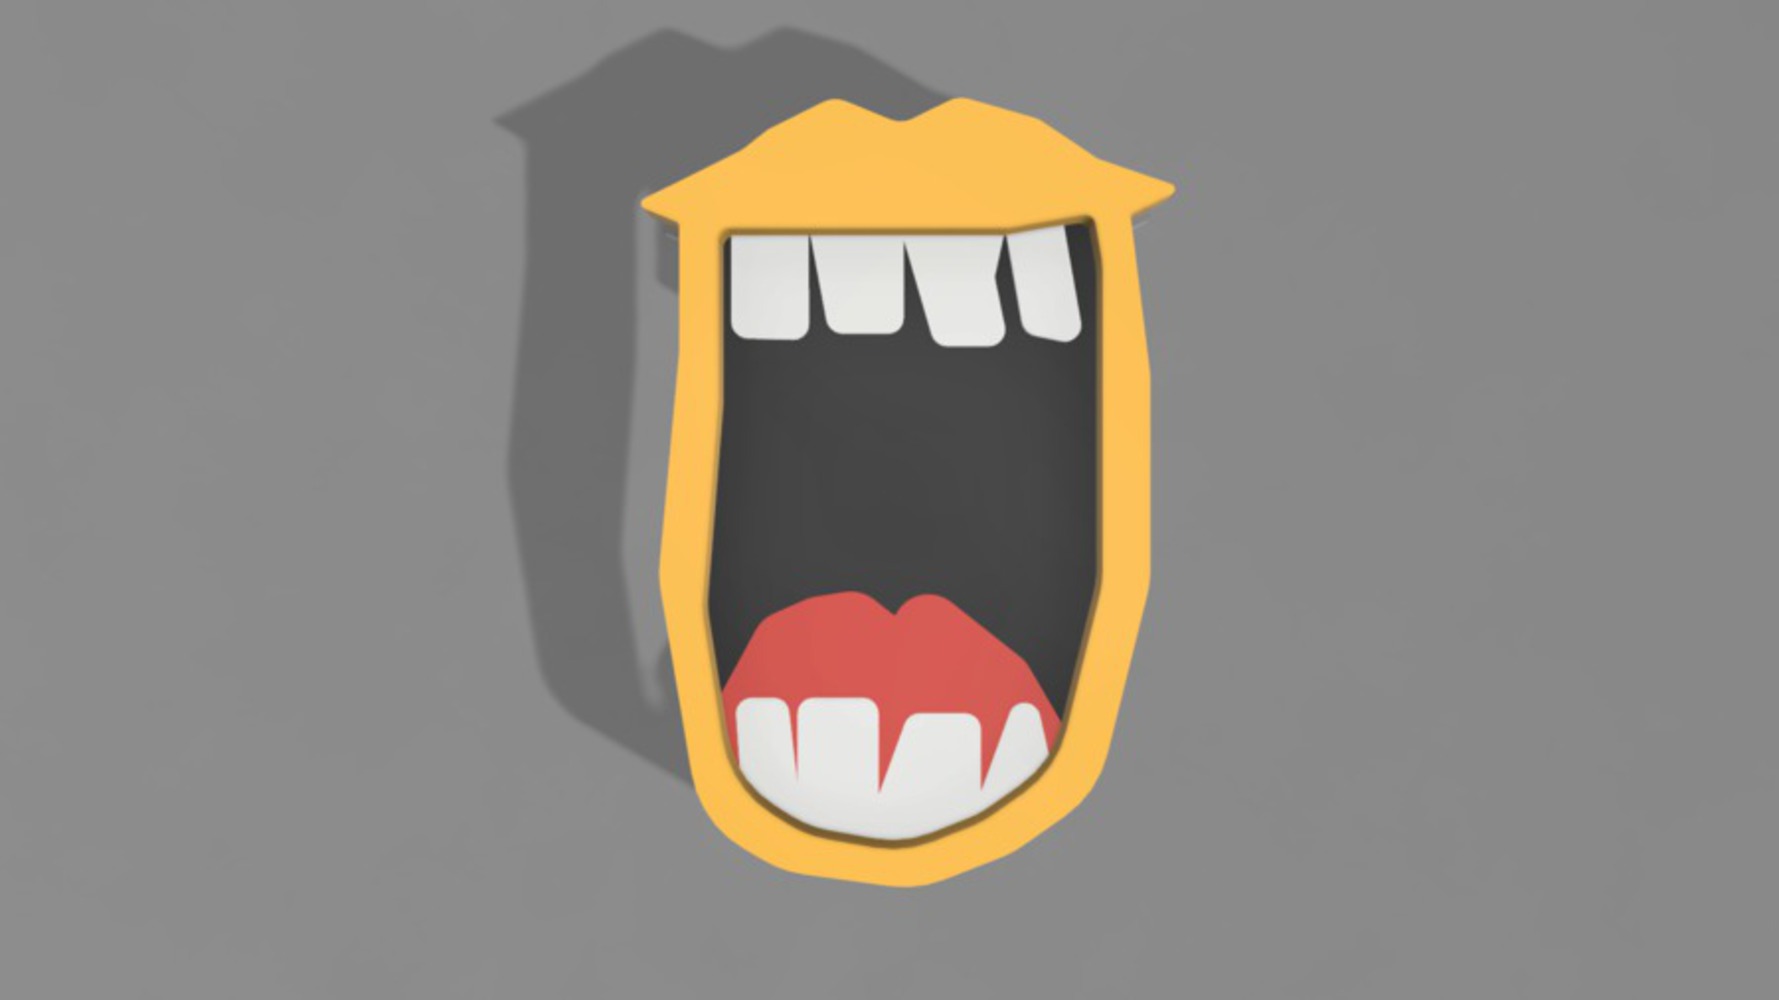
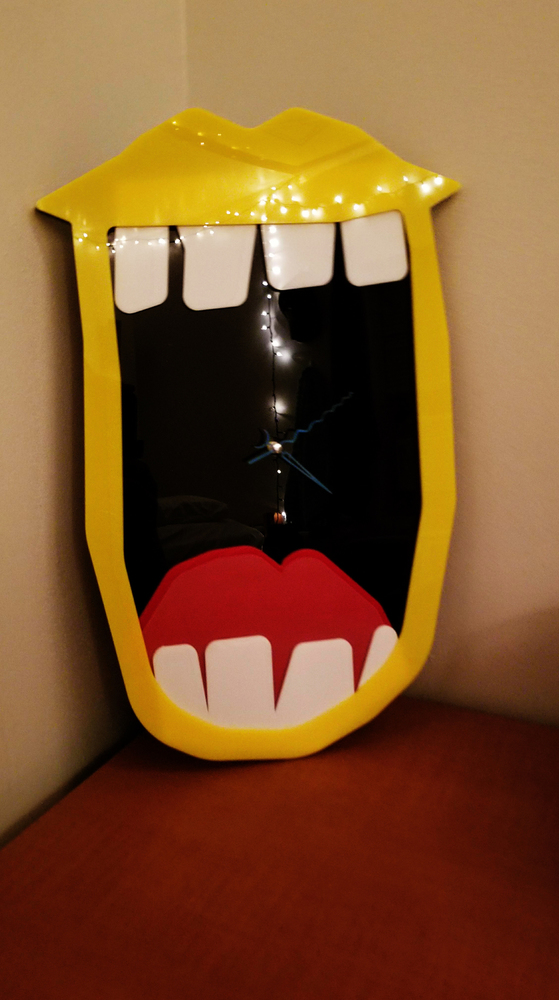
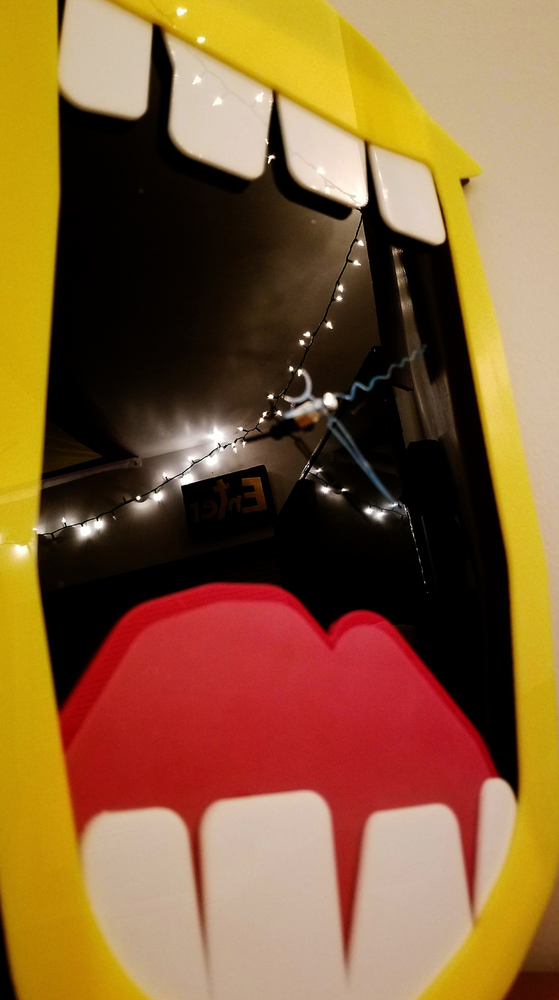
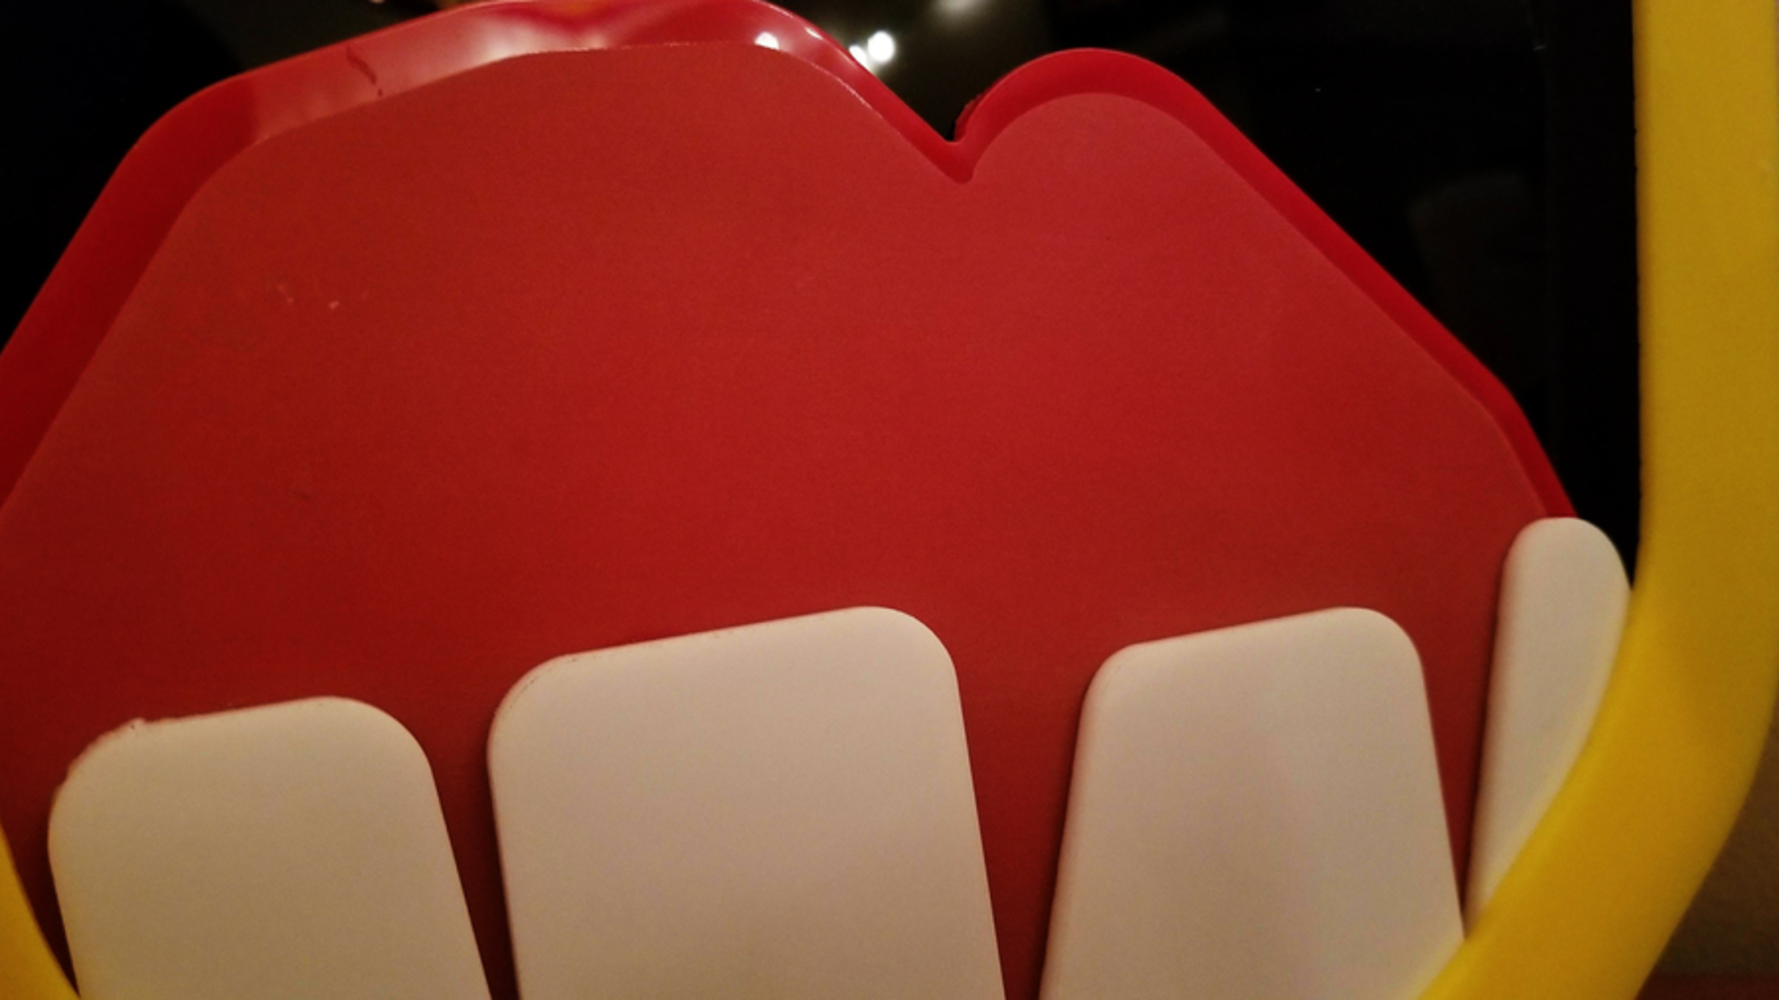
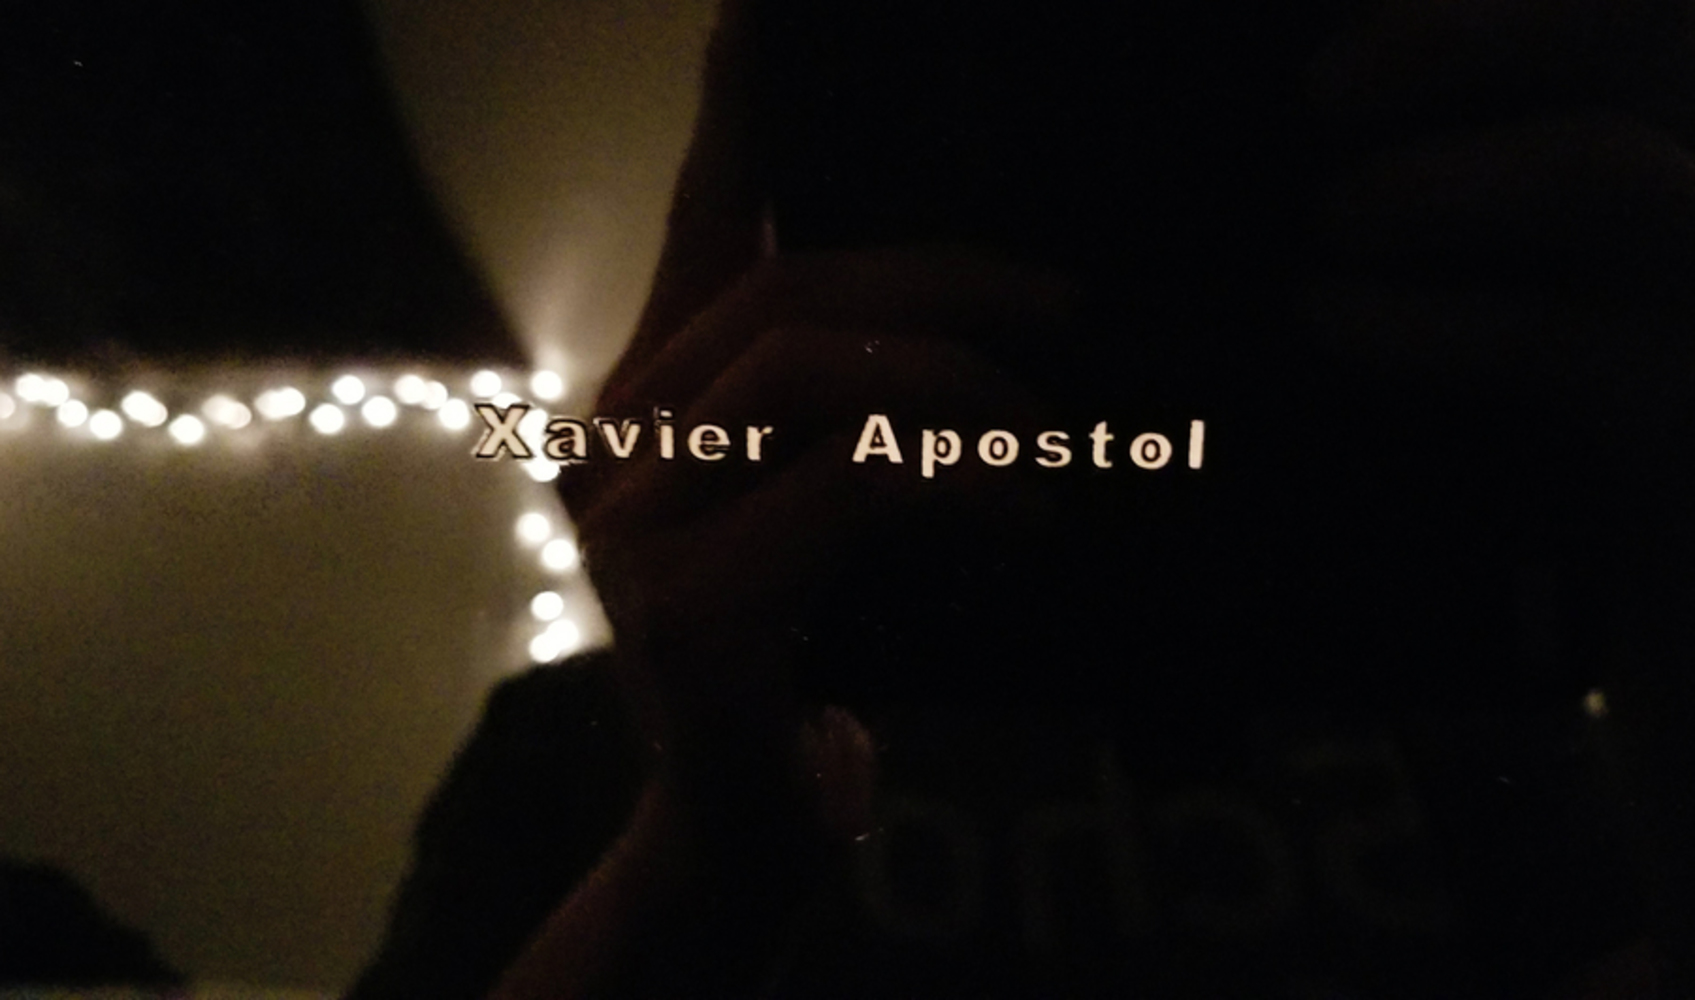
I decided to maintain all materials and general shapes/measurements (the clock ended up being 17in x 11in in the end), and got rid of the 3D box I was planning on making. Instead, I would layer my elements together using acrylic cement and would open a whole in the center to allow the hand mechanism to fit through. I also decided to get rid of the hook-openings, as a result of the sheer size and weight distribution of the clock itself. I decided to engrave lightly on the tongue, allowing for a rougher, tongue-like texture. I was going to score around the edges of the mouth's shape, but thought it look TOO cartoon-ish; I ended up scoring my name in the back instead.
With these new changes in mind, I began to laser cut. For the most part, things went pretty well. The elements within the mouth came out fine (i.e. - tongue, mouth, and background). It wasn't until I got to the mouth's shape that things went unplanned - initially my cut paths were not united, so the laser cutter would outline the shape I desired, but wouldn't cut through the actual acrylic material. After a few more tests, I finally realized this problem and was able to correct.
Overall, I thought the project came out alright. It was difficult figuring out solutions to my problems (i.e. - reviewing and fixing the initial plan) and although I found answers, I think it would have been cool to create the initial form (something I will attempt in the future with more time). I've learned a lot about laser cutting and how to troubleshoot DXF files - I think this was probably the most valuable thing I've taken from this project. Also, I've learned a lot about how materials function with each other (i.e. - how acrylic differs from wood and what's the best way to go about combining similar materials). Laser cutting is a process I definitely see myself doing in the future and hope to get better at with more practice and challenges.
17.555 KB · Download / View
You can upload files of up to 20MB using this form.