Back to Parent

Outcome


Intention

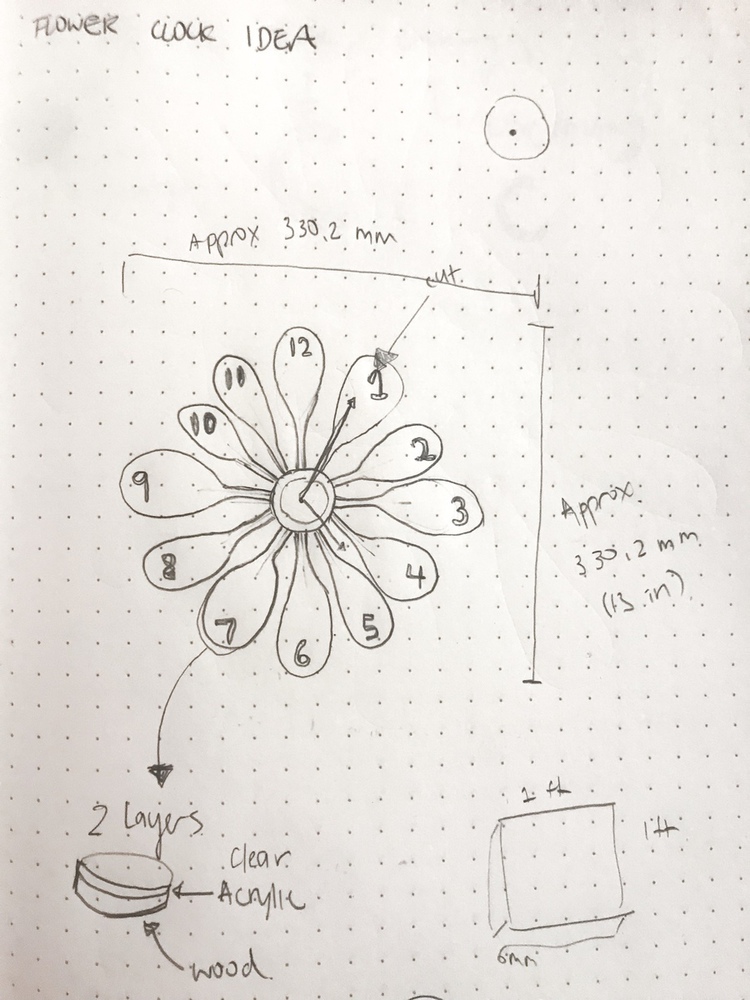
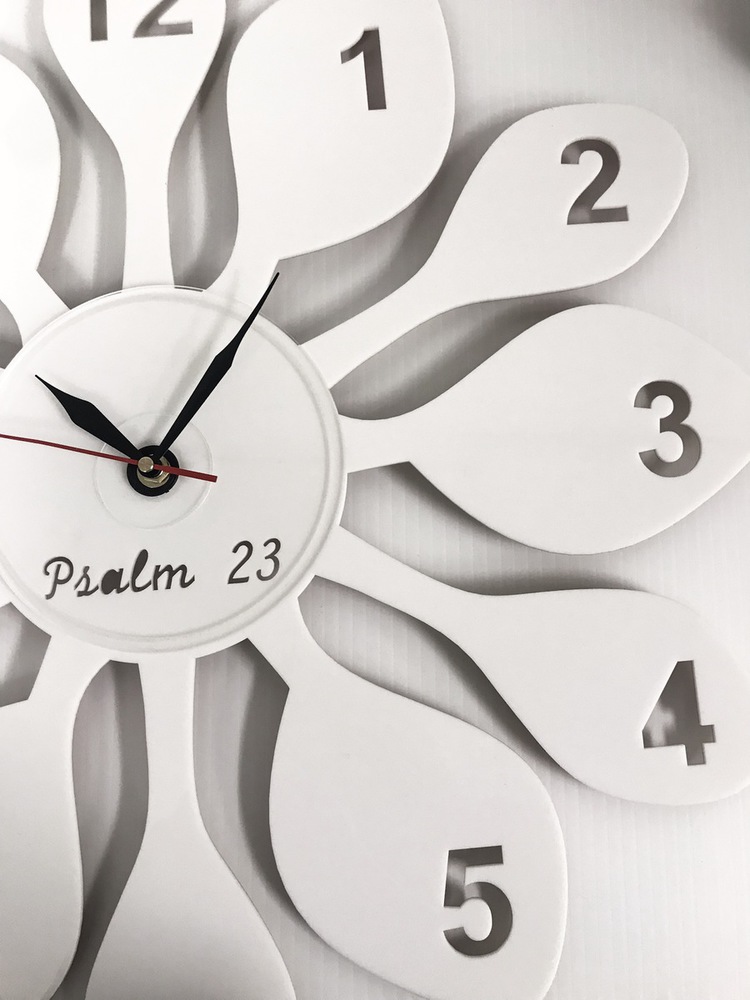
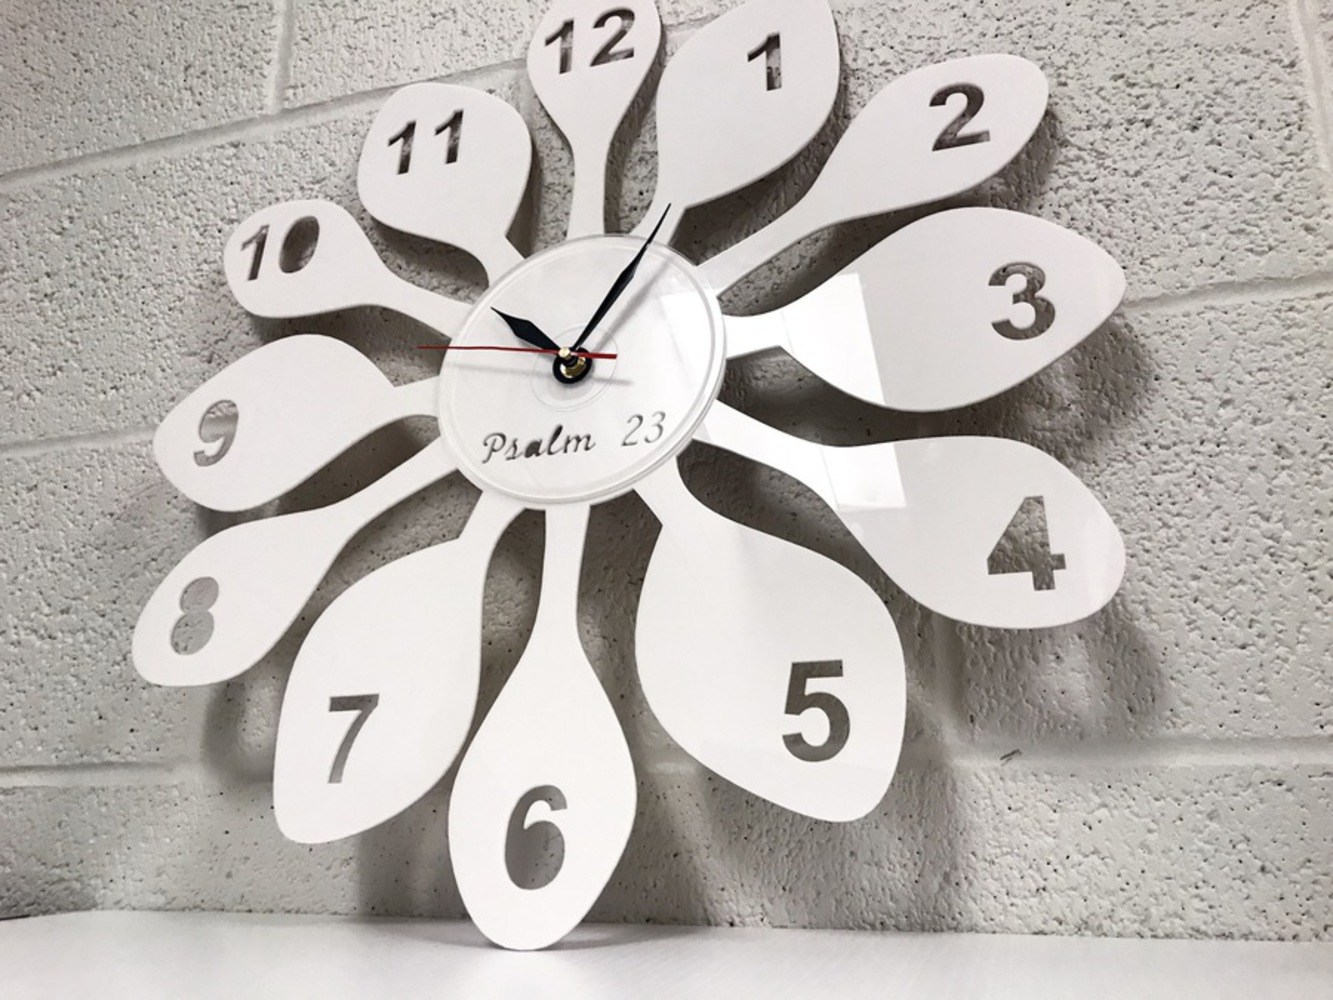
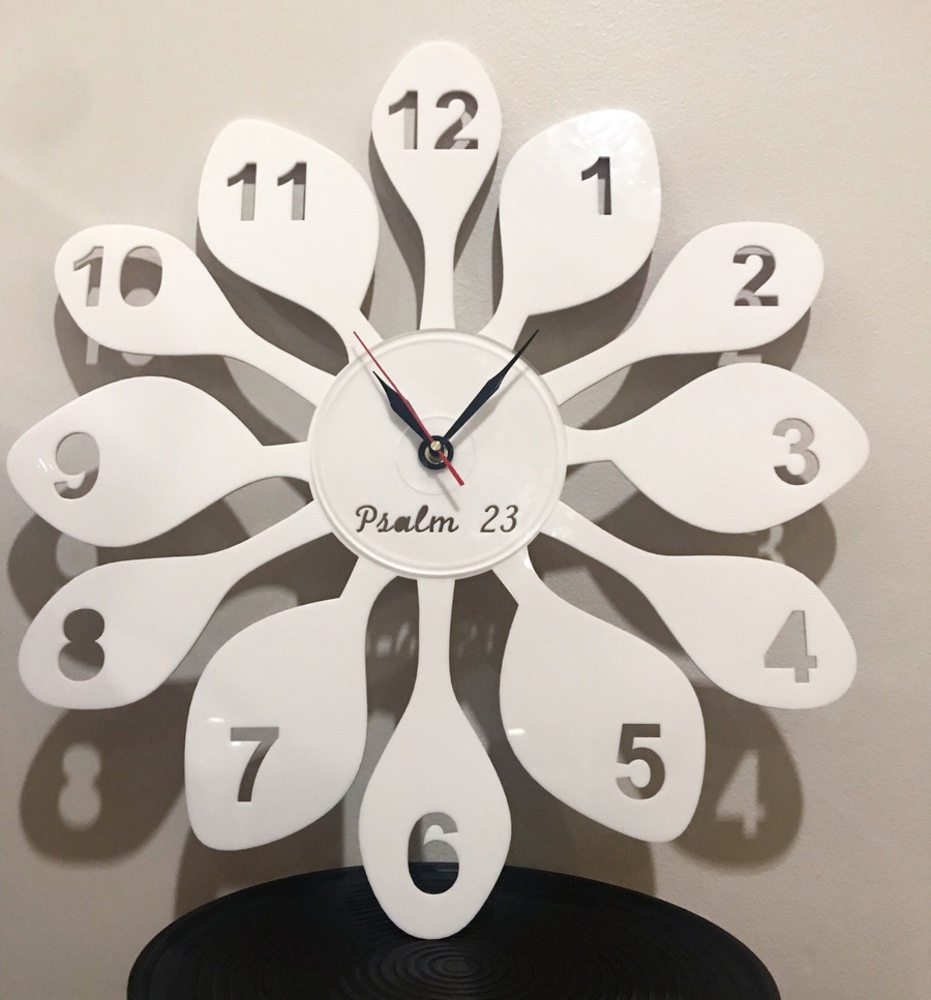
My goal in this project was to design a clock that would fit exactly to a specific person's taste, along with mine. I designed this clock with the intention to gift it to my mom. Although we do have a family clock at our home, it looks a bit old outdated. This is why I wanted to design something that had a more modern touch. I also wanted to include a flower in my design as flowers are one of my mom's favorite patterns to wear, keep in her home, and garden in her backyard. My intention was to design something I would have fun making but would also fit my mother's tastes. 

Img 4461.thumb
Show Advanced Options

Research & Context

Upon research of acrylic clocks, I found that many designs kept use of colors and negative space to create unique shadows and forms. Below is an example that I found in my research, that became very helpful for me to decide which direction to take my clock design. This minimalist design helps accomplish my goal of making a more modern looking clock than the one that my mom currently has in our living room at home. 

Screen shot 2018 02 14 at 10.47.27 pm.thumb
Show Advanced Options

Aesthetic & Inspiration

I started my research with looking at minimalist designs for all kinds of things. This included looking at living room interior designs with a minimalist approach. Although the living room in the home I grew up in doesn't have a minimalist interior design, I thought that envisioning the type of room that a minimalist clock would hang was good inspiration. The motto of a minimalist approach is "less is more." Because I am not as used to this kind of an approach, I had to step out of my comfort zone to try and achieve this inspiration design.  

Screen shot 2018 02 14 at 10.56.51 pm.thumb
Show Advanced Options
Screen shot 2018 02 14 at 11.03.35 pm.thumb
Show Advanced Options

Process & Procedure

I mostly used the same design that I started with (shown in sketch above). However, I had a bit of trouble in choosing where to etch and score. I wanted the numbers and my mother's favorite Bible memory verse to stand out. This was why I knew that I would cut these out, to play with some shadows on the white acrylic surface. However, I wanted to keep my clock simple and was more reluctant to make distracting designs with etching and scoring. That is why I decided to make 2 small rings in the middle of the clock that showed some etching and scoring. However, when I first printed out the clock, I realized that these designs would be covered by a piece of the clock piece that keeps the hands together. Additionally, the etching was too subtle to be visible, unless seen from a close distance. I then decided to make an additional clear acrylic layer in the middle that would feature some more visible etching and scoring. I was able to accomplish this in the end, especially when I made the etching in a different power setting in the laser cutting machine. 

Img 4433.thumb
Show Advanced Options
Img 4431.thumb
Show Advanced Options

Two Renderings

[Two renderings on complete project styled with finished background, lighting, positioning, reflection]

Img 4455.jpg.thumb
Show Advanced Options
Img 4444.jpg.thumb
Show Advanced Options

Five semi-pro photos

[Five semi-professional photos with care given to context, lighting, staging, scene]

Img 4449.jpg.thumb
Show Advanced Options
Img 4459.jpg.thumb
Show Advanced Options
Img 4463.thumb
Show Advanced Options
Img 4469.jpg.thumb
Show Advanced Options
Img 4455 2.thumb
Show Advanced Options

Reflection

Looking back, I really learned how to express my creativity confidently through laser-cutting art. In my last project, it was the first time I had ever worked with laser-cutting. It was very difficult for me to print anything out from my own creative ideas, as I didn't know how to use the tools to make them. 

If I could do anything differently, I would consider putting a third layer in my clock. It may have given it a bit more 3D dimension. 

Overall, I am very content with my final product. 

I also want to give a special thanks to Professor Louise Larson for all her help and feedback throughout the whole project. Additionally, I would like to give a special thanks to classmate Irina Javed for her help in helping me use the laser printing machine in this project. 

Include final DXF files

Show Advanced Options
Drop files here or click to select

You can upload files of up to 20MB using this form.