Back to Parent

Outcome


Intention:

My PlayStation 4 controller was constantly falling onto the ground. It is very smooth and falls off of tables, couches, etc. I wanted to create a holder for it so that it would no longer be falling onto the floor and potentially breaking. The current holders for controllers require them to be snapped into place or use hooks and can often be difficult to use. I wanted to create a holder that only required the controller to be placed on top and would still effectively hold it in place.

Research and Context:

   In my research of this object I did not find too many other products like it. My object is different than other objects because it is not going to have a hooking or clamping device that latches onto the controller. Instead it will have a base that matches the contour of the controller, and the controller will lay on top. This will make it easy to pick up and place the controller back down on the holder.

I chose these two examples because I want to incorporate the feature of both into one design. I want to make a holder that allows the controller to lay in it without clamping into place like the one pictured on the left, but I want to have a pedestal design like the one on the right.

Holder onlinr.thumb
Show Advanced Options
Holder online 2.thumb
Show Advanced Options

Aesthetic Design:

I wanted to use Corinthian Columns as the main feature of my design. I decided for the final project to use 3 separate columns that held the controller in 3 separate places. This allowed me to effectively hold and balance the controller while really highlighting the intended focal point of my design, the column. The column that I used was modeled after the bottom of the columns pictured here.

Column corinth 112706375 56aadeb63df78cf772b499f5.thumb
Show Advanced Options

Process and Procedure:

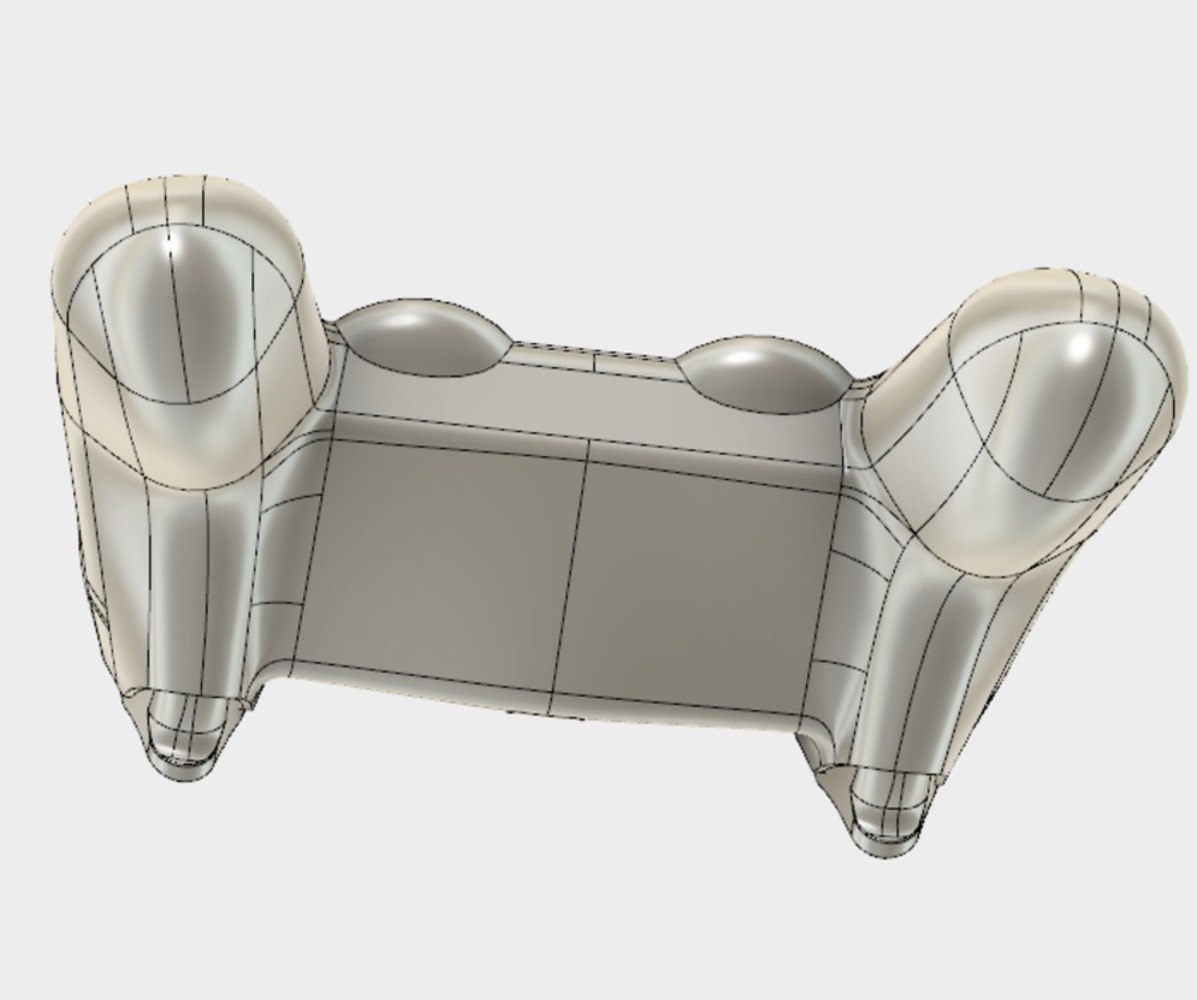
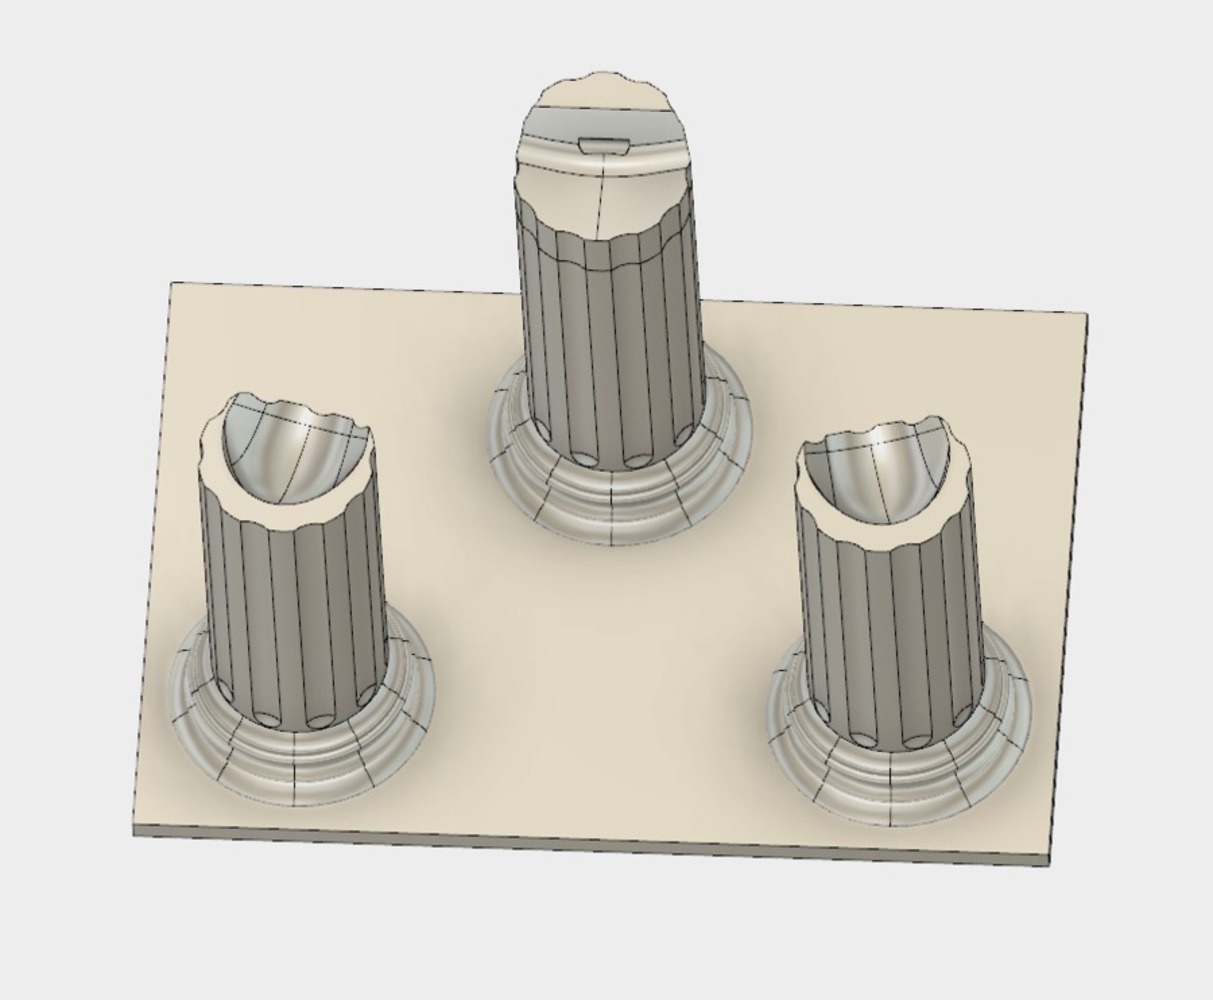
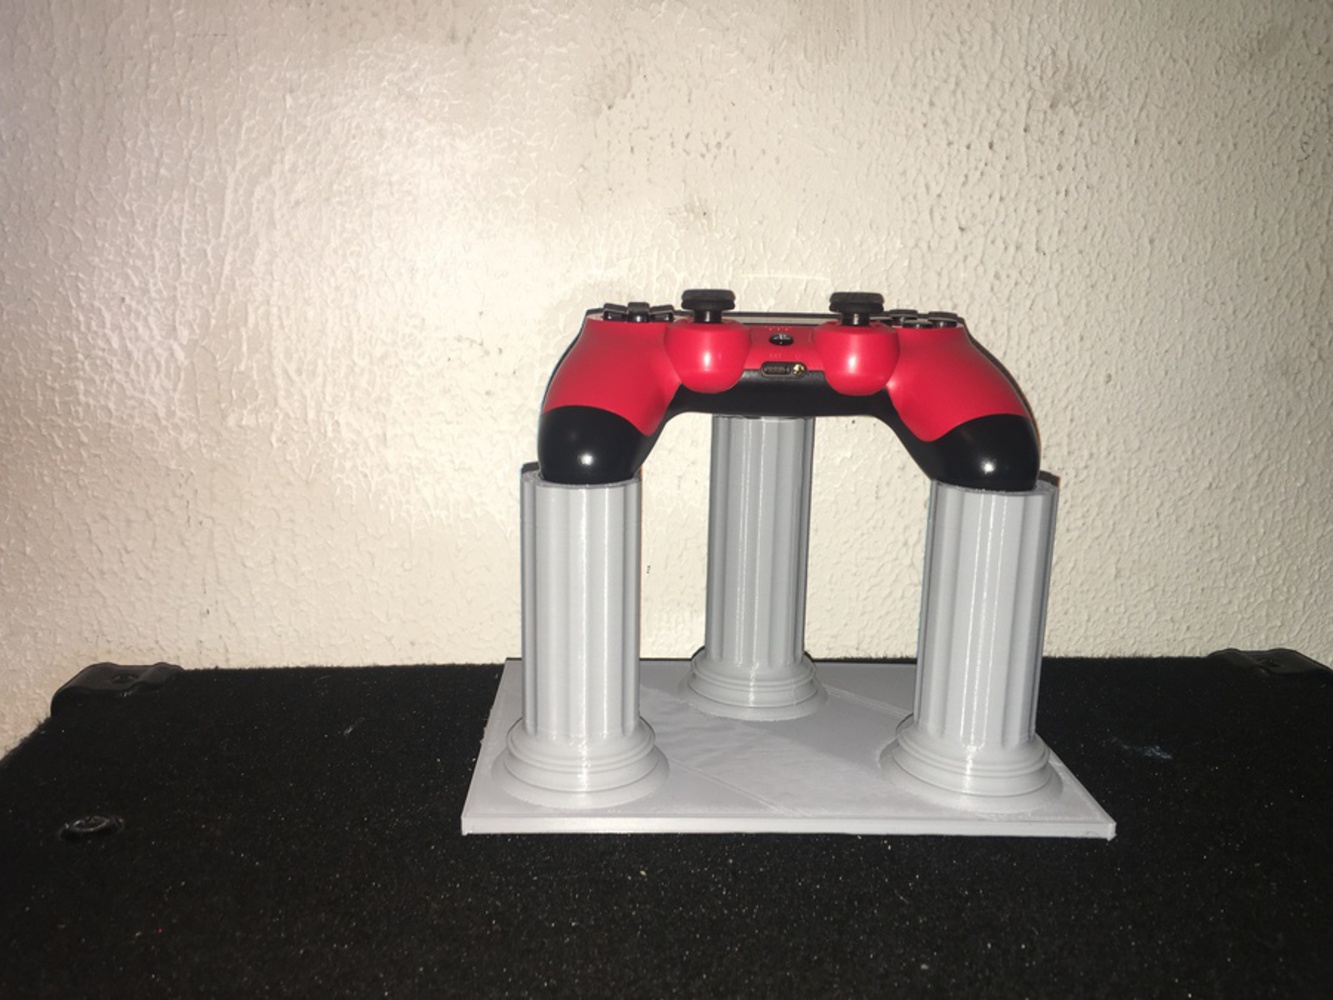
Initially I planned on making the holder with one column that then branched out like a tree at the top to hold the controller. After thinking about this design I decided it would be a more stable structure and would print better on a 3D printer if i used 3 separate columns instead of one large one with "branches" stemming off of it at small angles. To aid in my design I found a CAD model of a controller online.

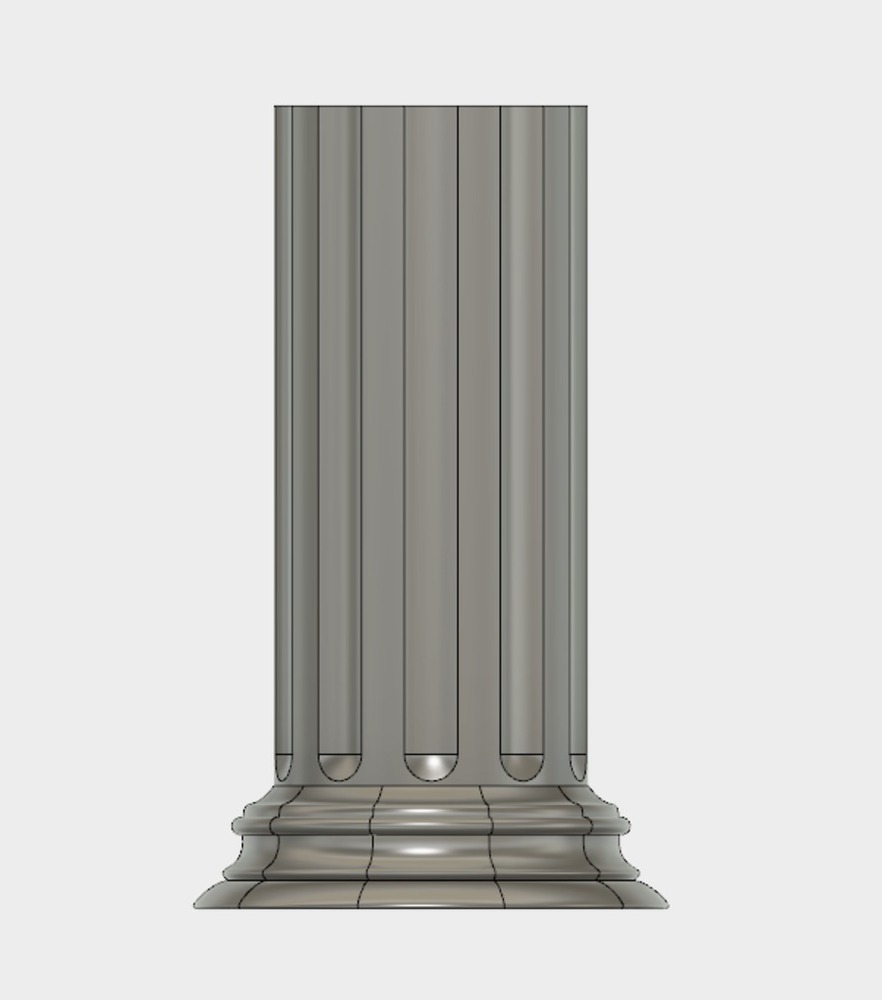
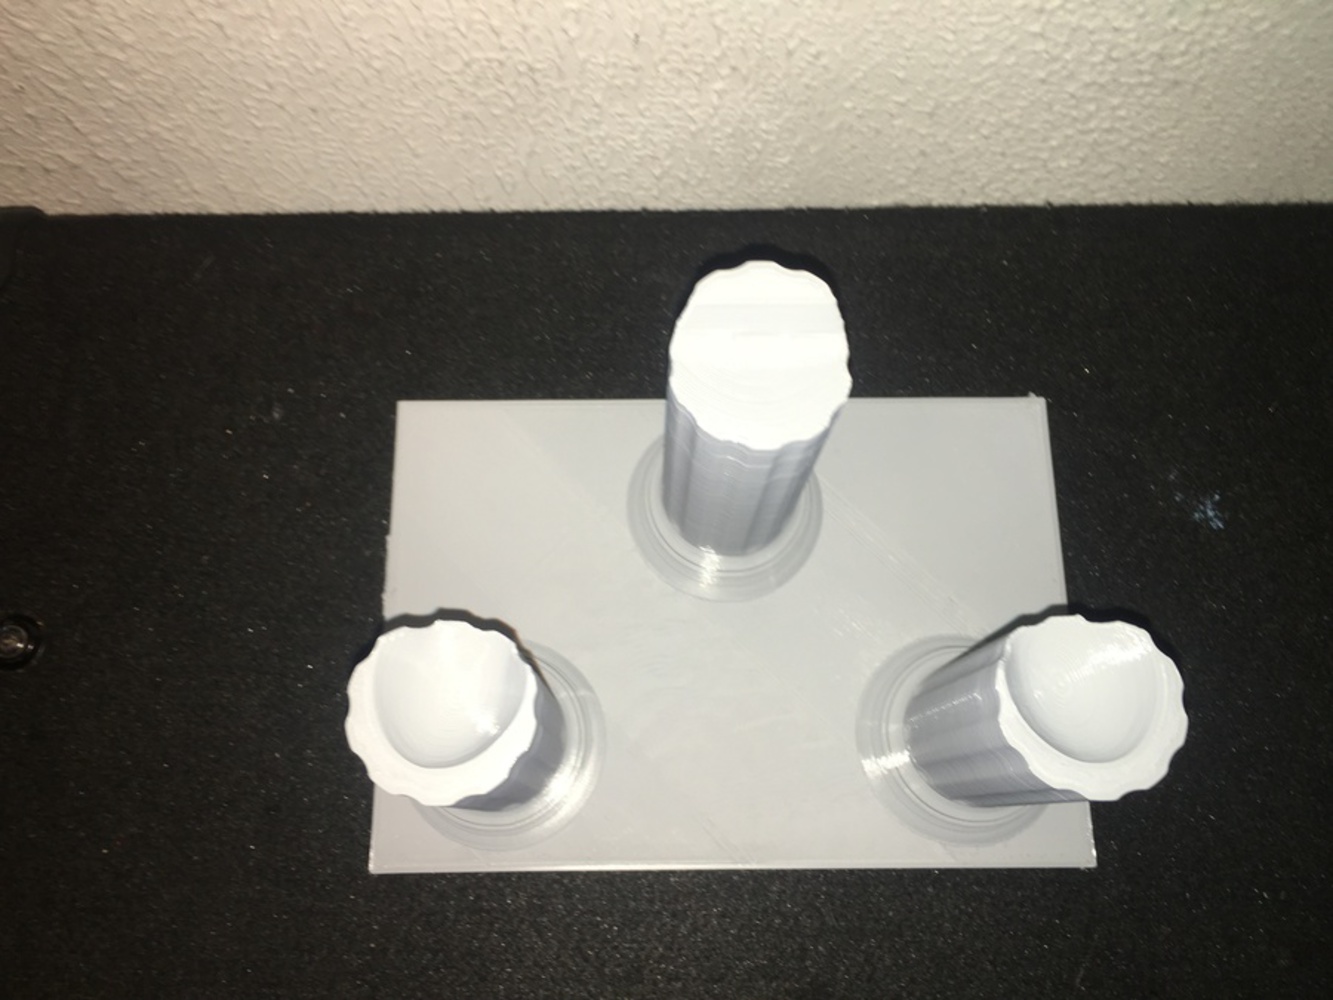
When modeling the holder, the first thing I needed to do was model the column I was going to use. I found an image for the column that I liked (picture above), I then used the image and the spline tool in Fusion to creat an outline of half of the column. I then used the revolve tool to make the column 3 dimensional. I then designed the top and extruded it.

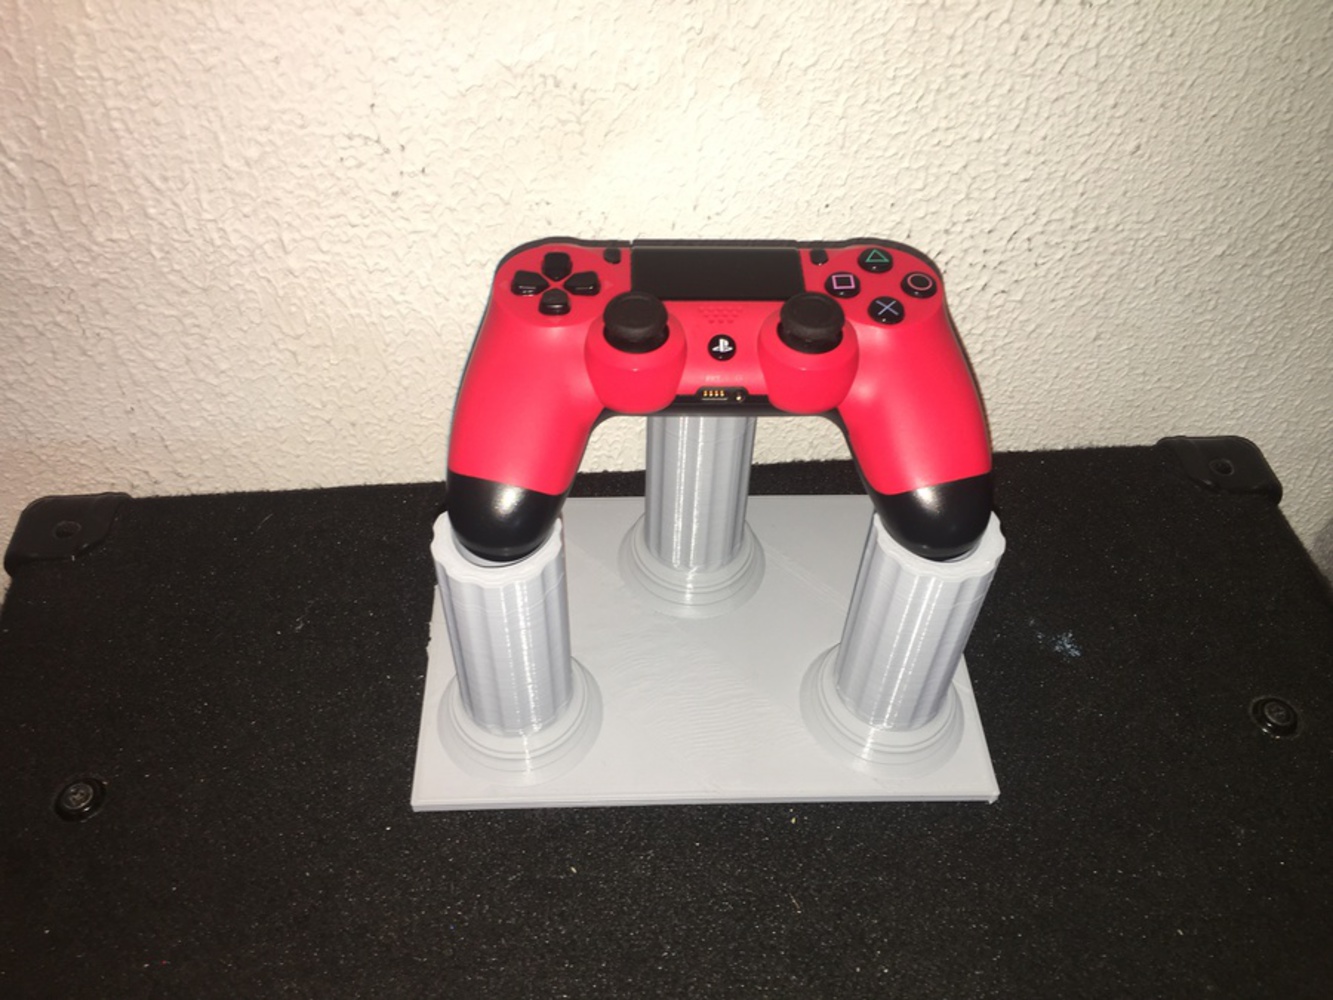
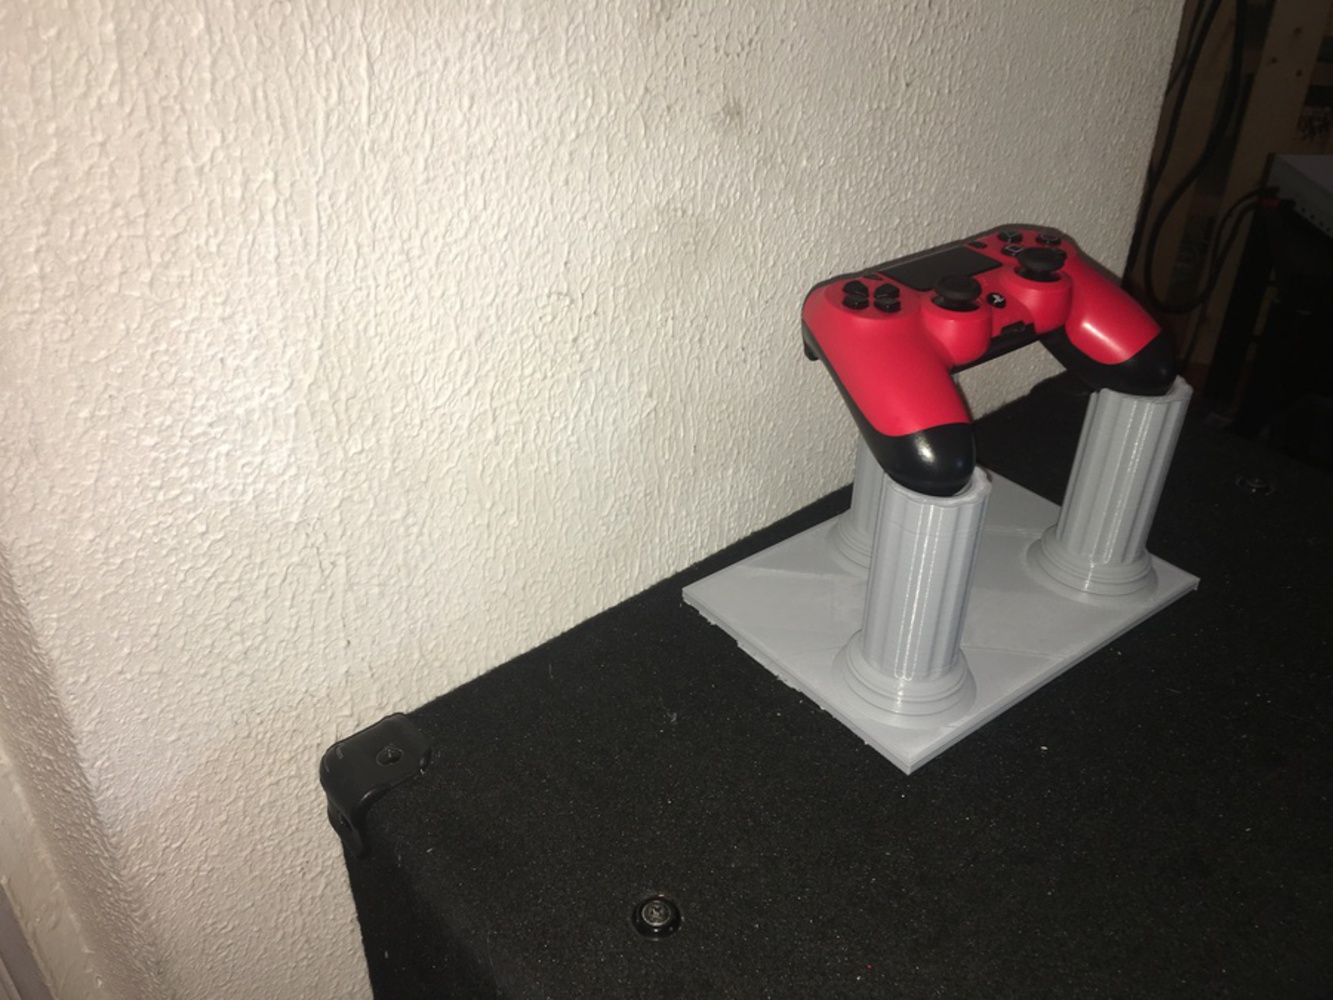
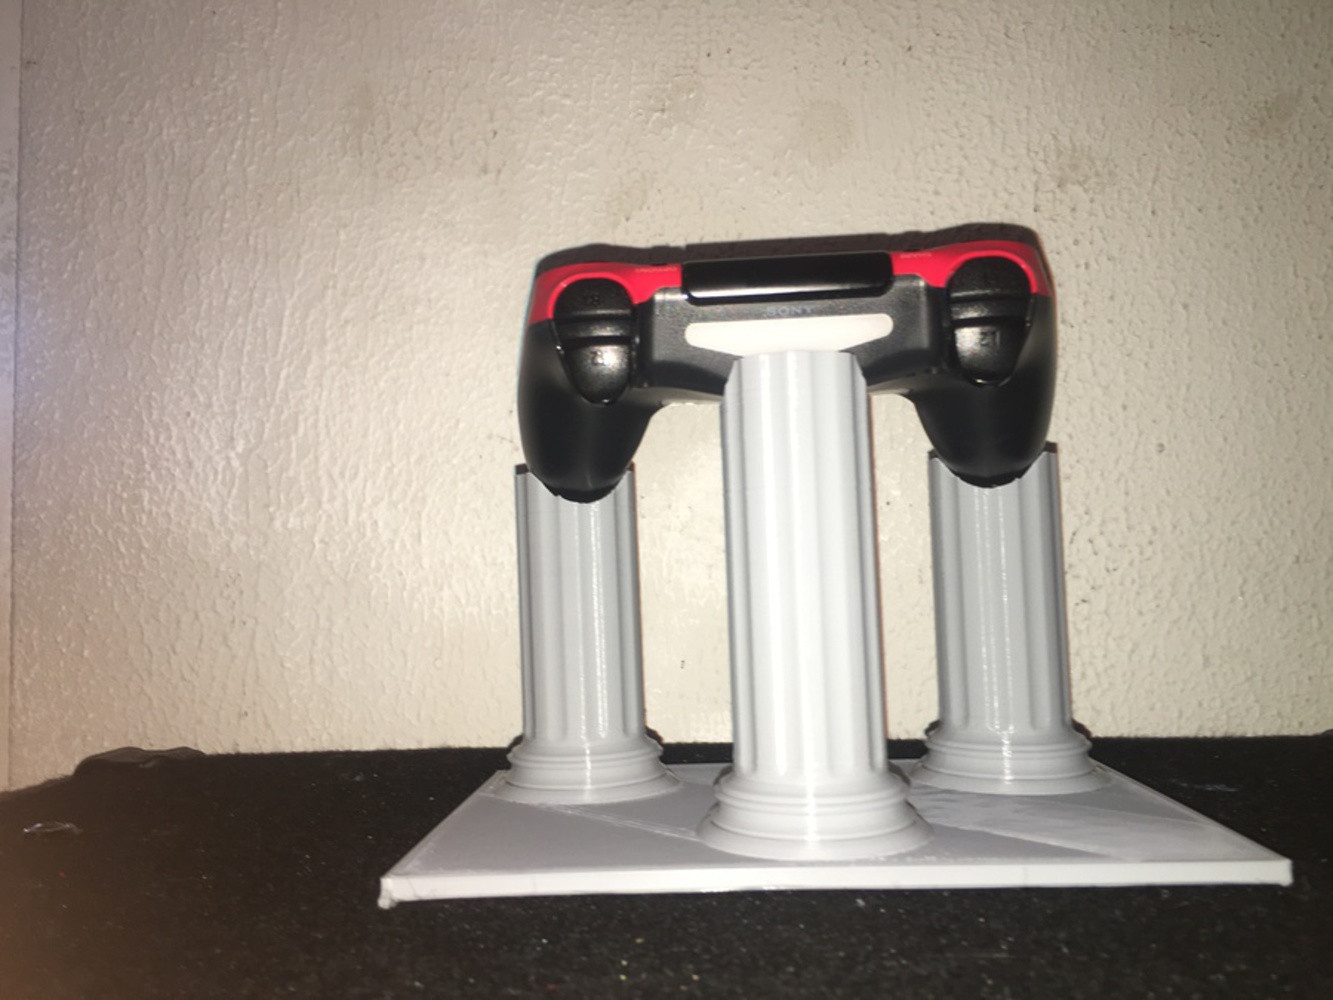
Once the column was designed I was able to take the column and the CAD model of the Controller and combine them to make the holder. I first made a base for the columns and used joints to fasten the columns to the base. Then I extruded the columns past the bottom of the controller at each point. Then I used the combine tool to cut the columns to the contour of the controller, leaving me with the finished holder that I then exported to be 3D printed.

Controller bottom.png.thumb
Show Advanced Options
Column.thumb
Show Advanced Options
Finished holder cad snip.png.thumb
Show Advanced Options
Img 4878.jpg.thumb
Show Advanced Options
Img 4880.jpg.thumb
Show Advanced Options
Img 4882.jpg.thumb
Show Advanced Options
Img 4884.jpg.thumb
Show Advanced Options
Img 4879.jpg.thumb
Show Advanced Options

Reflection:

As a Mechanical Engineer at CMU, 3D printers have been a large part of the some of the group projects that I have completed.  Despite this, I myself had not submitted and printed anything on them until now. I never took the initiative of using them because it was something I did not know how to do. Now, thanks to this project I will not shy away from taking the responsibility of 3D printing any components for projects because I am confident in my ability to design and print 3D objects.

Drop files here or click to select

You can upload files of up to 20MB using this form.