Back to Parent

Outcome


Intention

The goal of this project was to create something which moves. My primary inspirations were poseable figurines and Sinosaurus, a dinosaur with its back shaped like a sine wave. Sinosaurus was created at my high school Math Club, and since then I have made many things (shirts, charms, plushies, cards) related to Sinosaurus, so I thought it would be really nice to make something of Sinosaurus which can actually move!

Research & Context

Since I needed to figure out how to create a poseable figurine and I certainly would not be able to find a base model for Sinosaurus, I focused on trying to understand how joints work. I spent a lot of time looking up various joints, how to model them, and what features might be necessary to assemble them. At first, I considered many variants of ball joints, looking into how to knurl them, and how to shape the socket to have enough flexibility for assembly (and perhaps restrict the motion from every direction). Realizing that I really only wanted motion around one axis, I changed to considering hinge/pin joints, which would probably be simpler to print and design.

The actual design of Sinosaurus was based on my previous creations and thus didn't require additional research.

Sineplush.thumb
Show Advanced Options
20180304 095531.thumb
Show Advanced Options

Sketch

Since I knew the approximate overall design from the start, my sketches focused on what kinds of joints I wanted in the figurine and how I might make/assemble them.

Moveable presketch.thumb
Show Advanced Options
Moveable sketch.thumb
Show Advanced Options

Process and Procedure

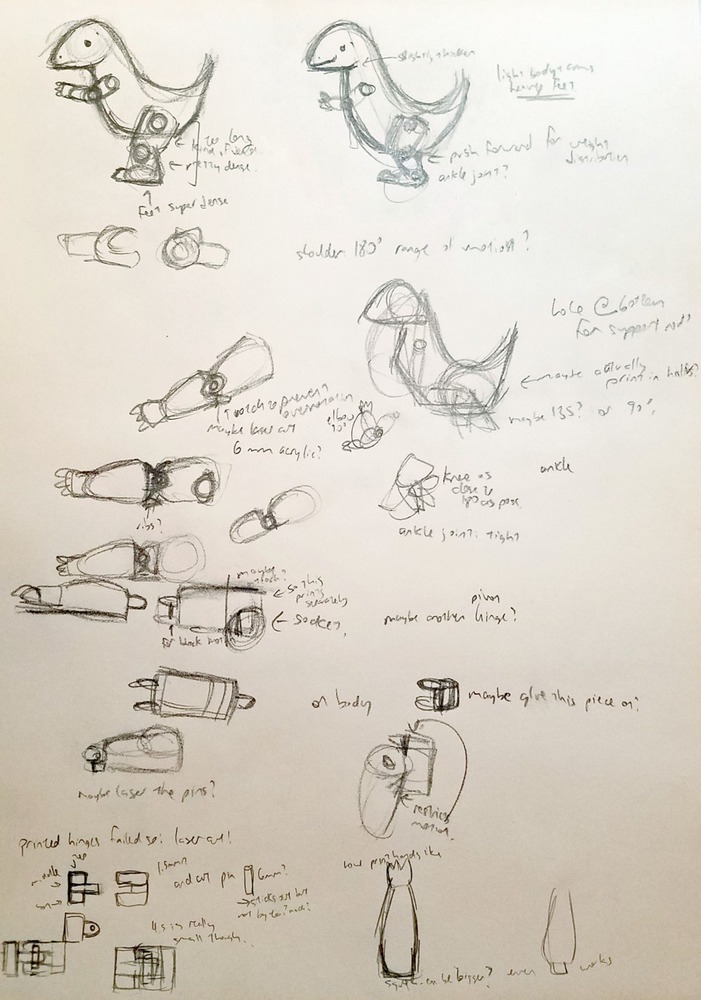
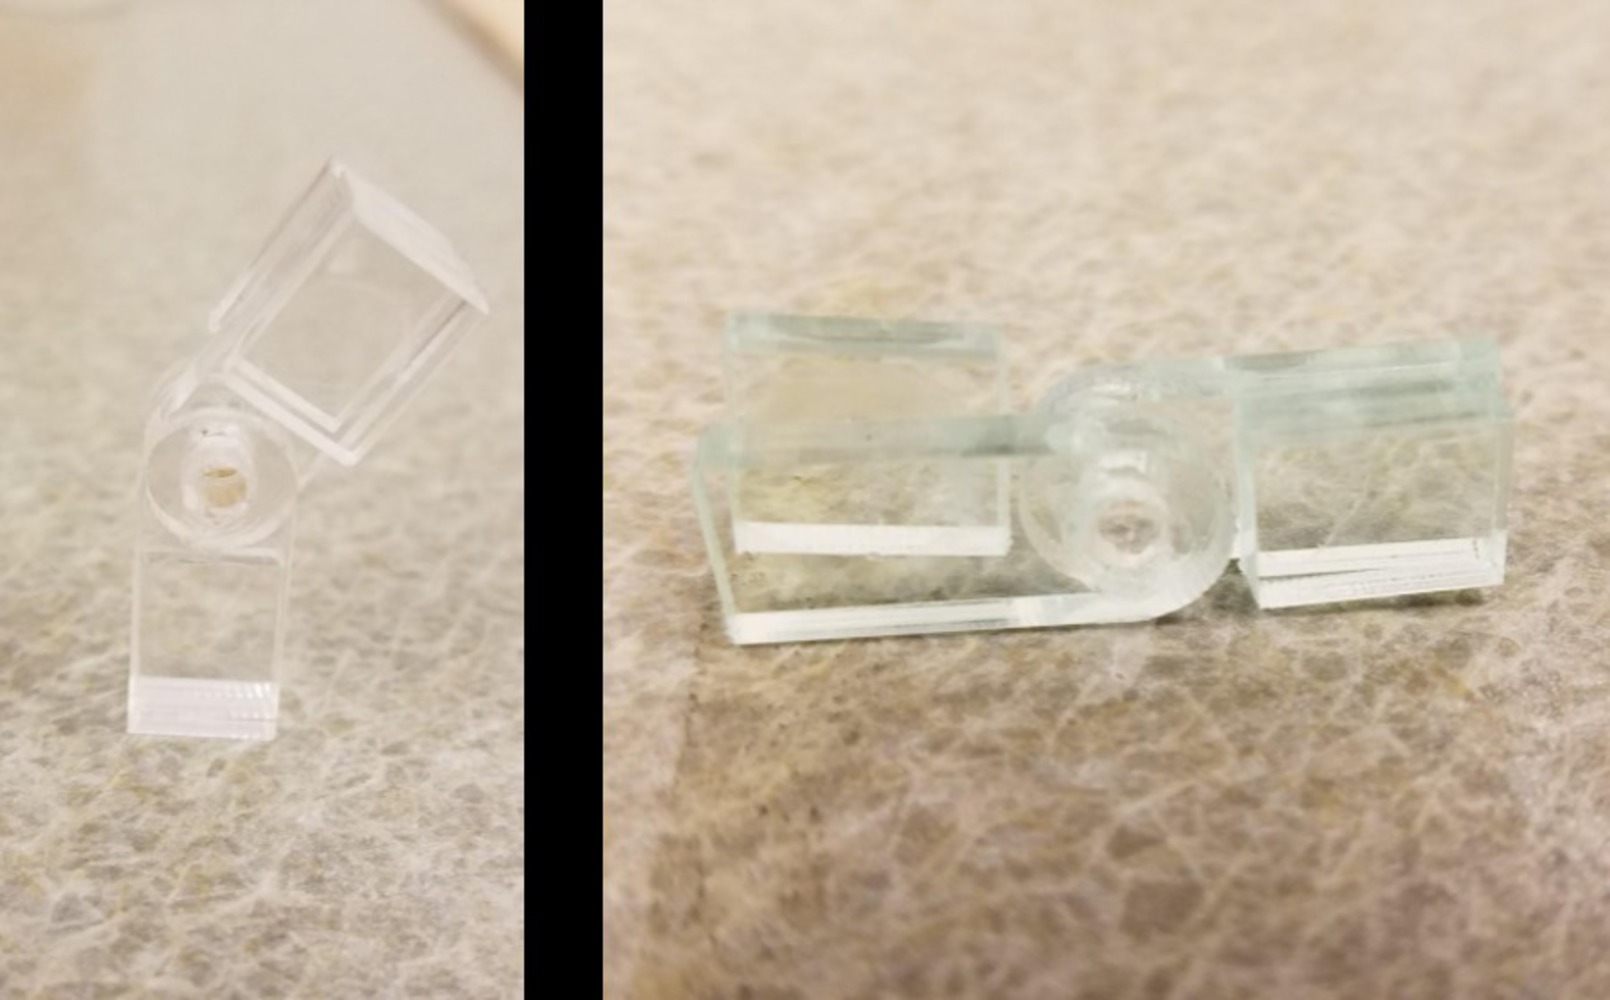
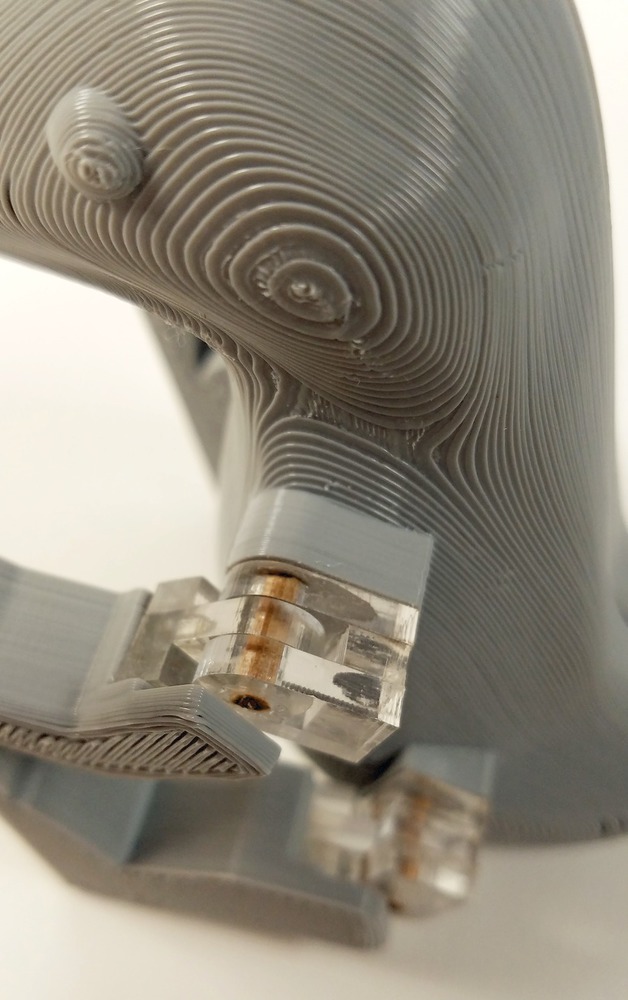
After some initial research and sketches, I began by testprinting some hinge/pin joints with the NVBOTS. Unfortunately, they were unusable. Removing the supports and raft was extremely difficult, and the pins weren't printed straight. Noting that my joints were essentially created in three layers, I decided that lasercutting multiple pieces and gluing them would make more accurate joints. Furthermore, I would be able to make quick test cuts and adjustments. With that, I did a fairly successful test cut/gluing (coupled with a bad attempt, because super glue dries very fast), and I was confident enough that this would work, so I began to model the figure itself.

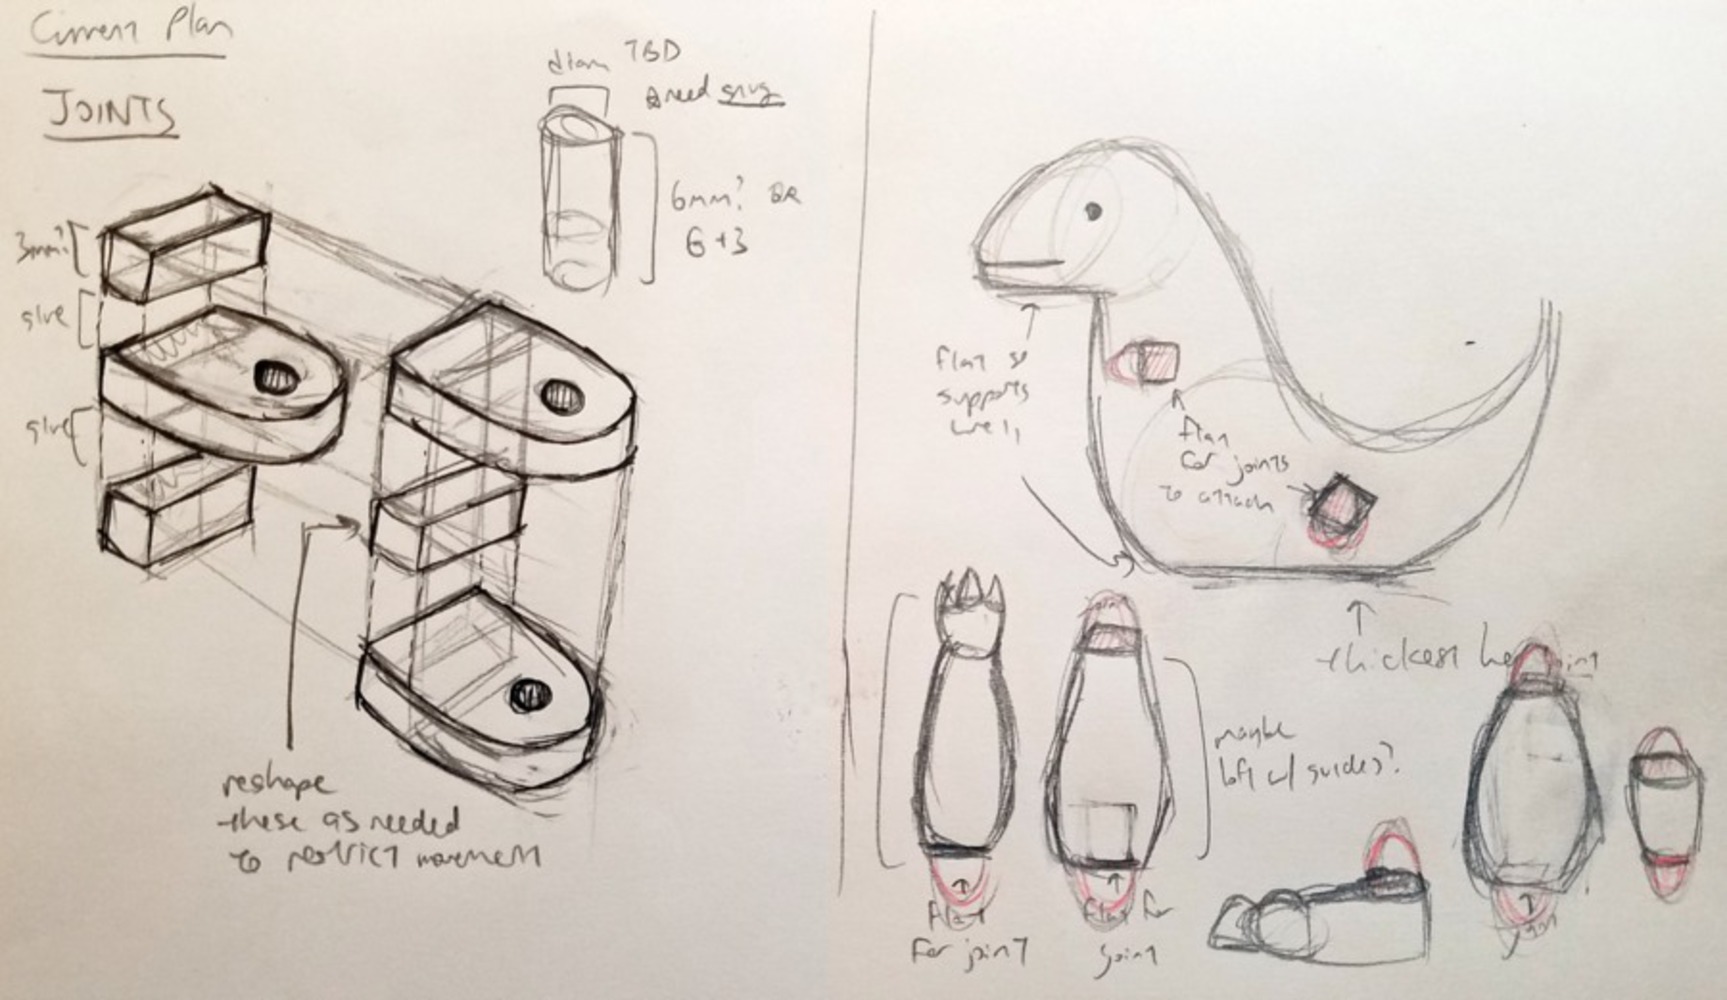
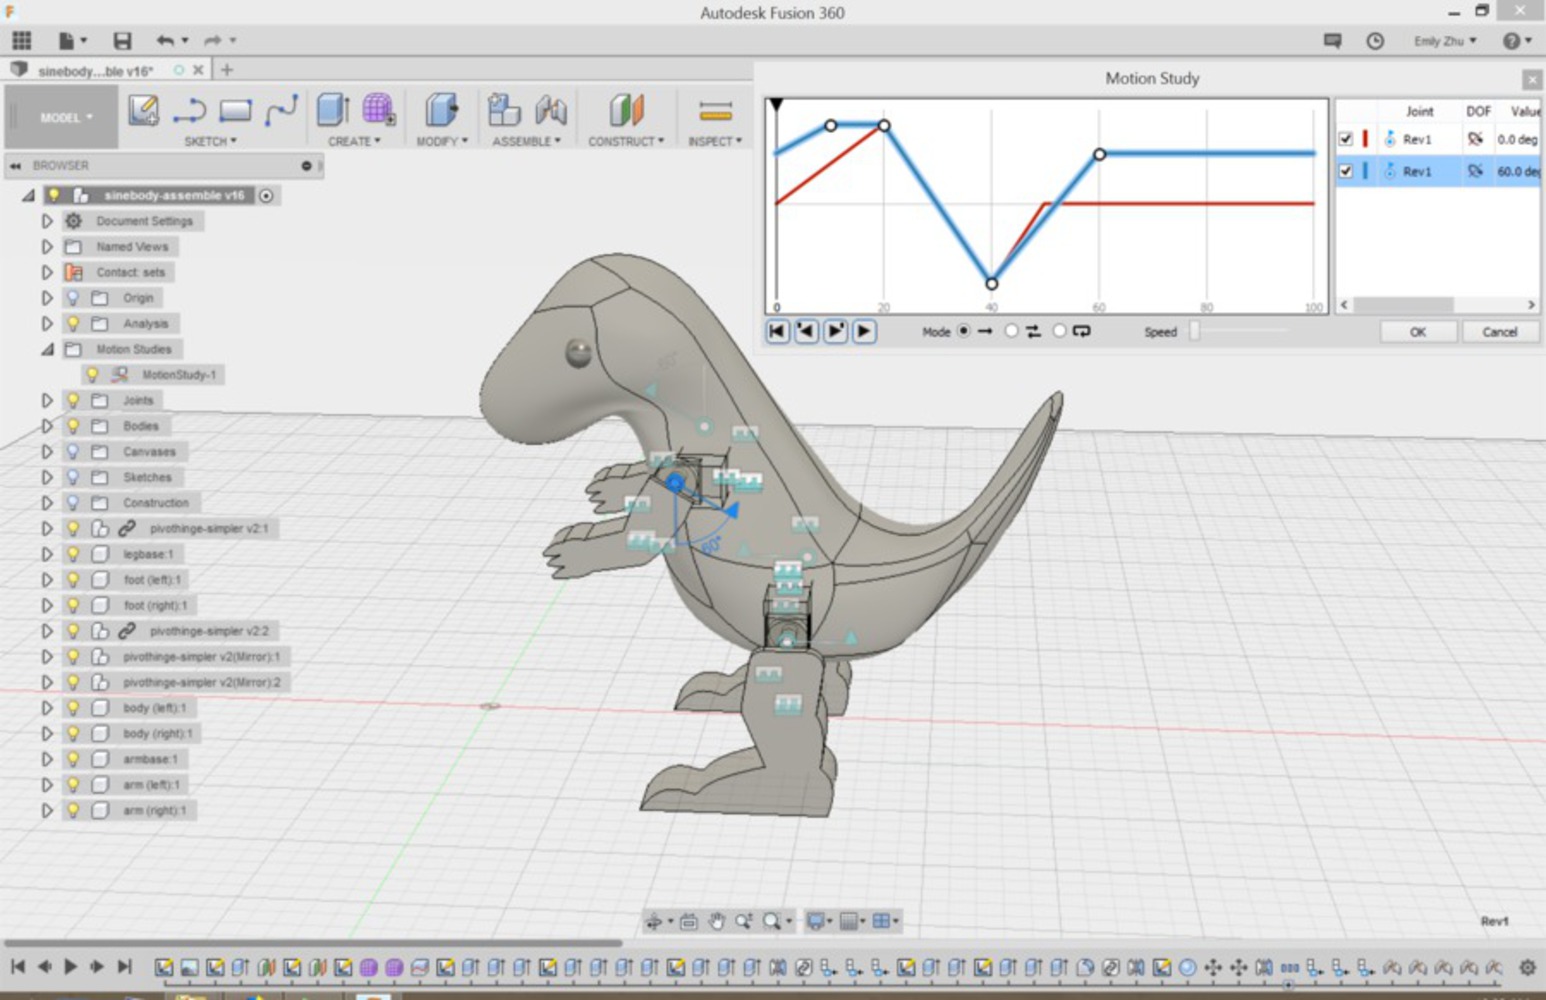
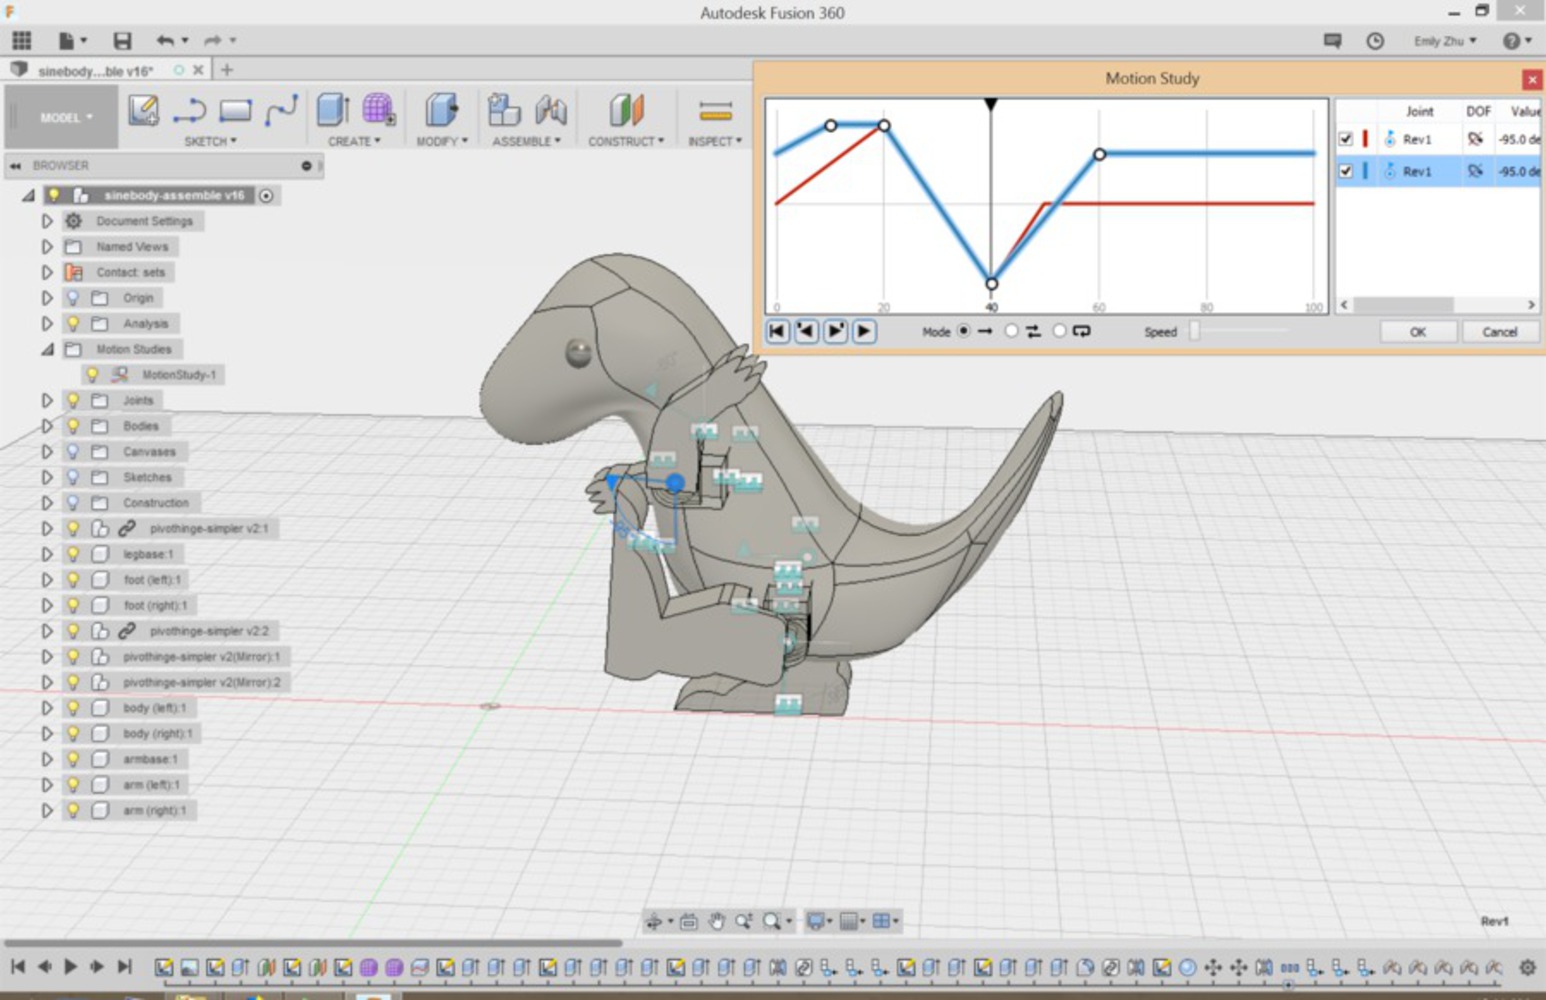
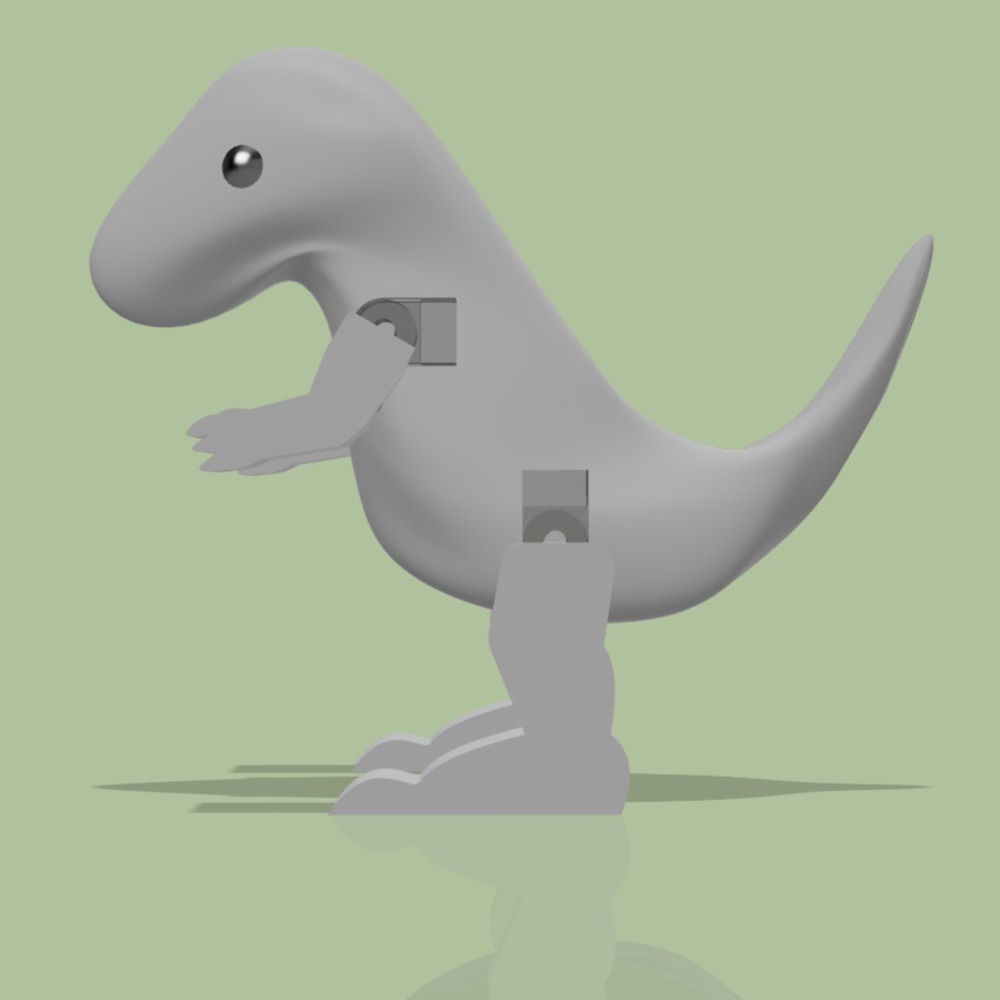
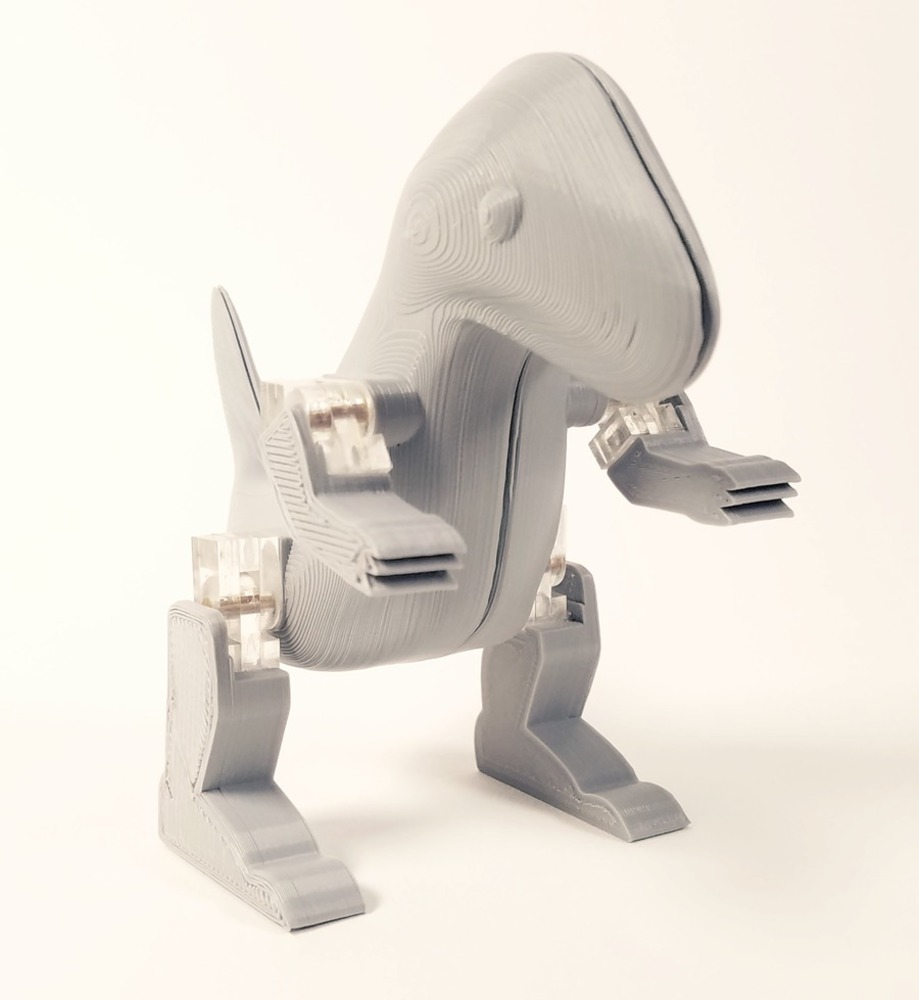
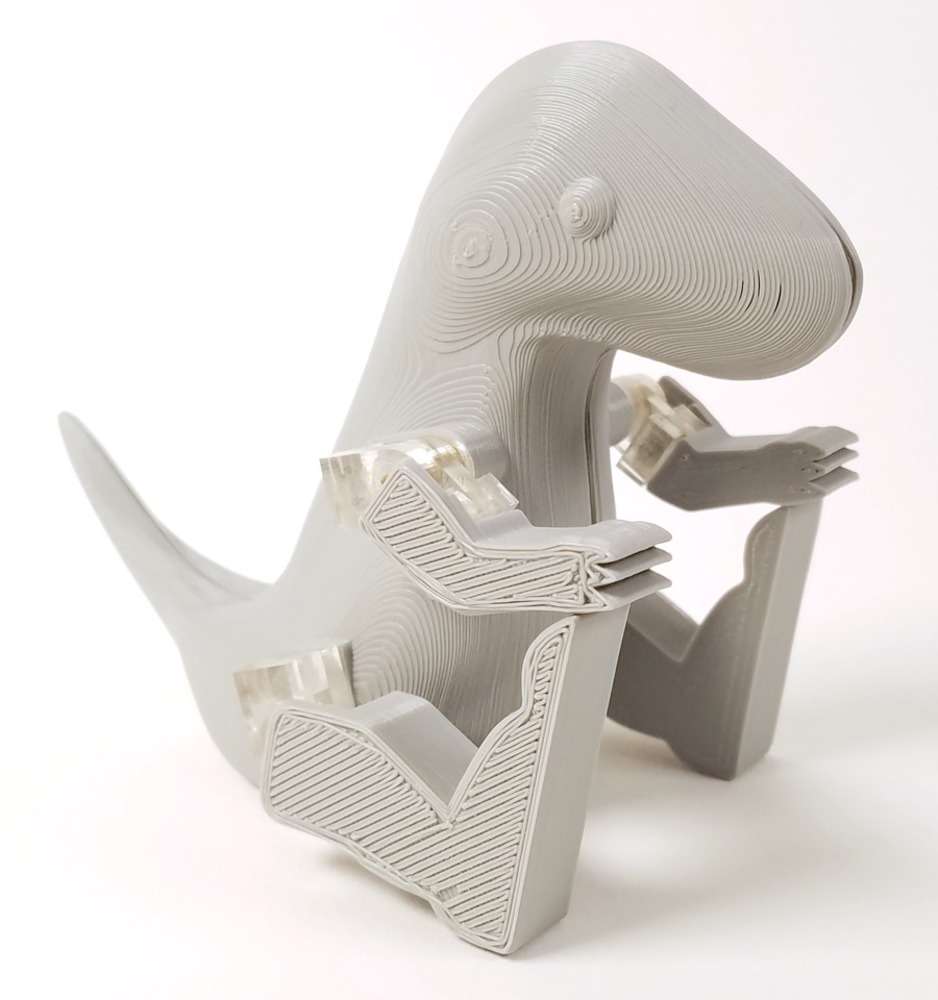
I modeled the body and limbs in Fusion 360, where the body was constructed by attaching a canvas of an old drawing, using lines and splines to approximate the base shape, adding a polygon on an offset plane, lofting them and adding faces in the sculpt environment, and adjusting the shape (with a symmetry to mirror the resulting half-figure). Then, when I began to make the limbs, I quickly discovered that the joints were comparatively very long! Thus, I ended up reducing to just a shoulder joint and hip joint, and I added "bases" to the body for the joints to attach to.

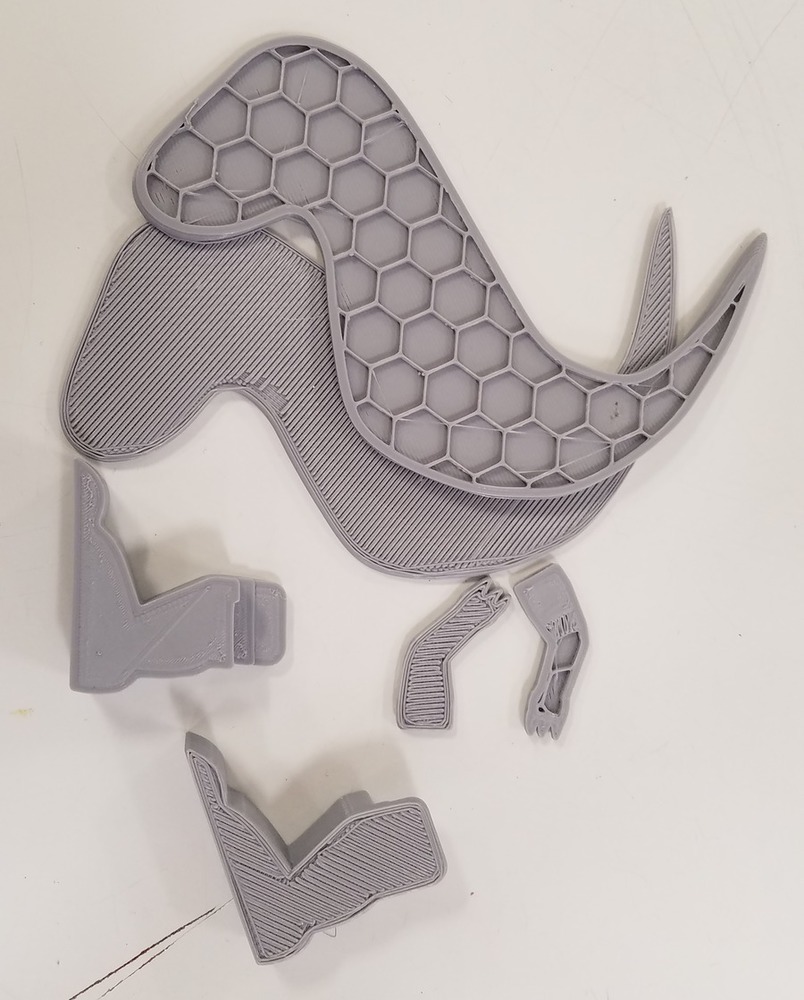
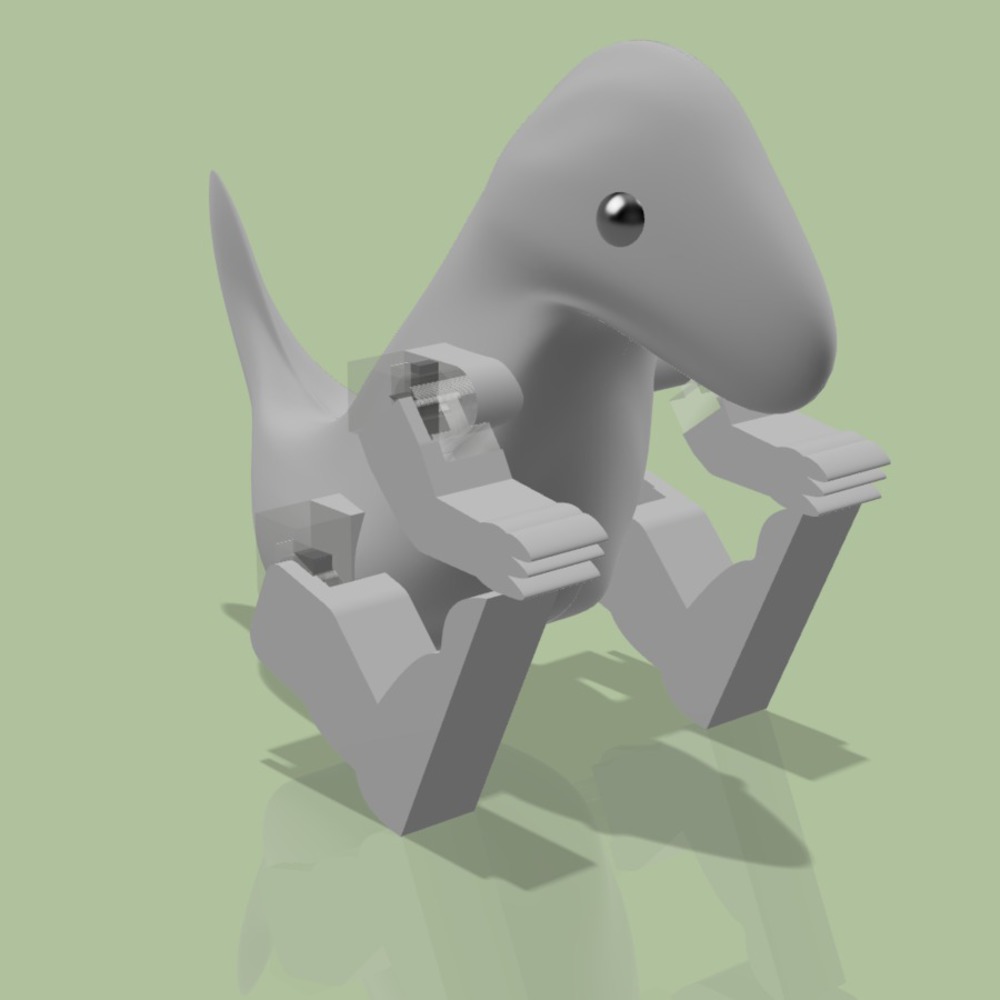
Since originally the many joints would allow me to print each limb on the flat surface where it would attach to the joint, I was planning on making the shape more 3D than an extrusion. I decided that simplifying the design to allow the limbs to print on their sides would result in a cleaner print and also reduce the amount of time to model them. Because of the length of the joints, I still hid part of the joint behind the limbs. The limbs were created through a series of extrusions, where I added notches to make sure they wouldn't get stuck against/block the joint and so they would be positioned appropriately upon being glued to the joints.

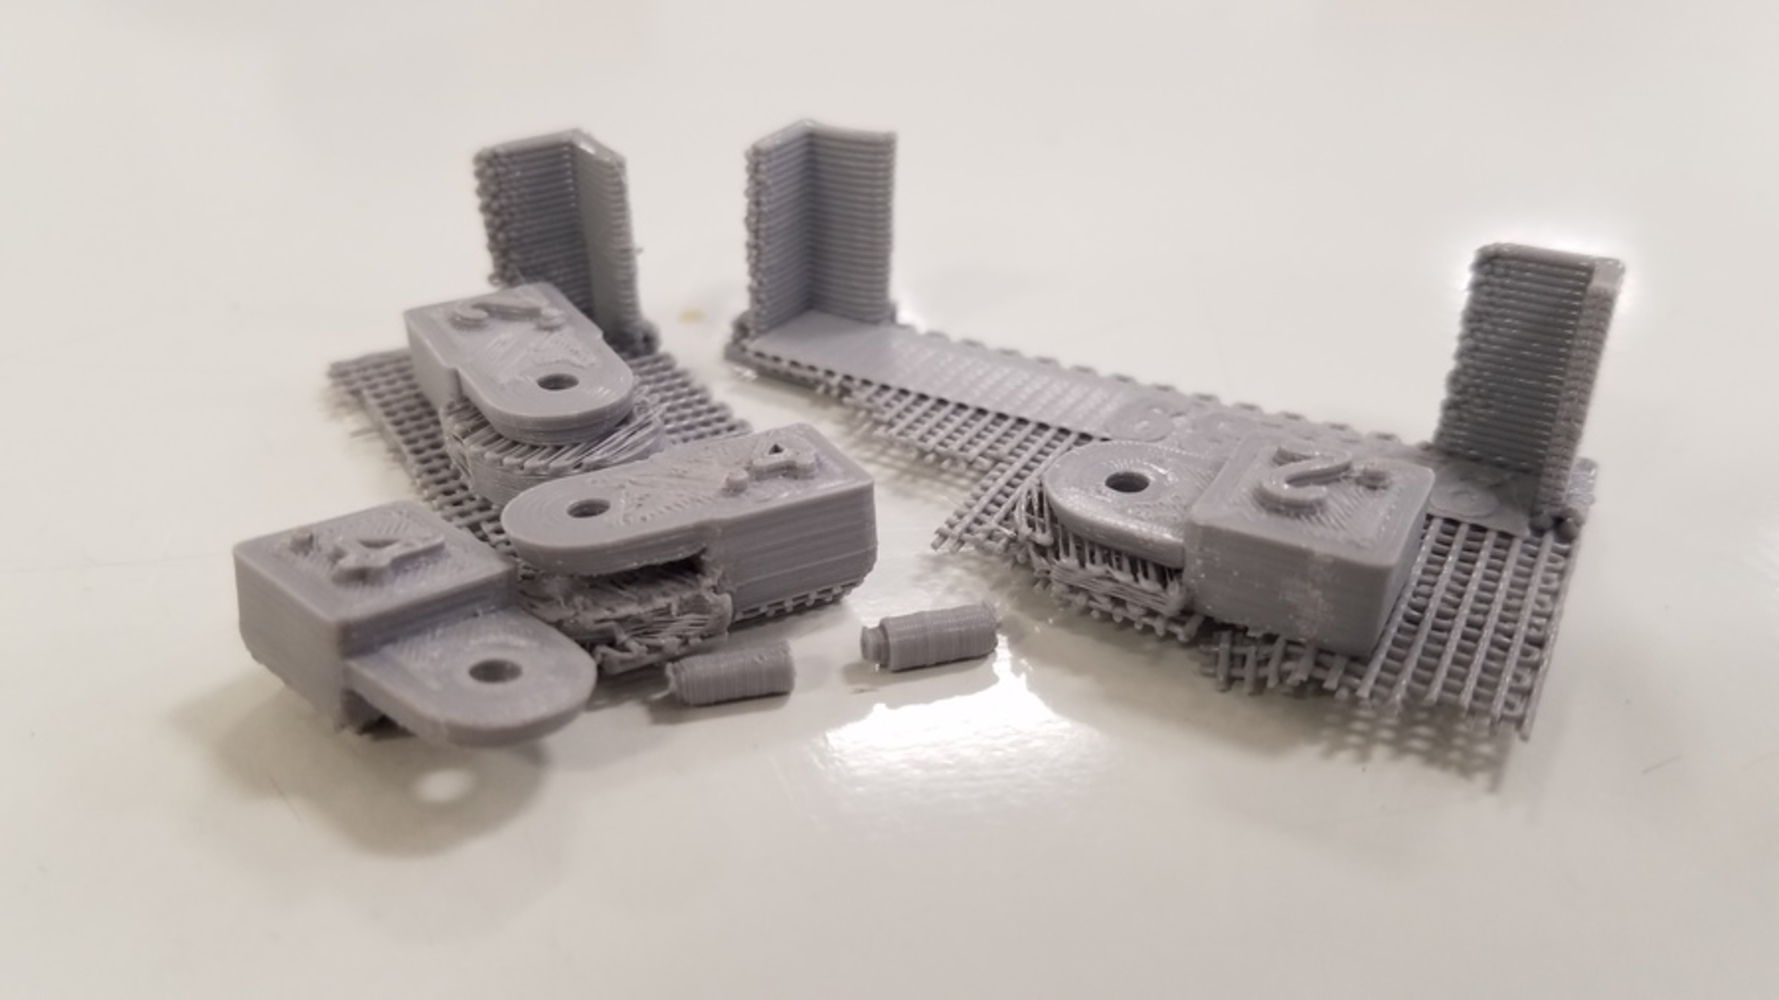
With everything roughly modeled, I inserted copies of my model of the joint and converted bodies to components so I could see the range of motion of the joints. I downloaded the STL files of appropriately combined bodies, putting some in a single print in Cura (legs were printed separately from everything else, since I wanted them to be denser, and the main body was split in half to print), and sent my models to print... until I discovered two days later, when everything was finally printing, that in playing with the joints, I managed to kick/tilt a leg base! I then had to cancel the print, go back to a position before I kicked the base, fix that, rotate the arm base appropriately (I originally positioned it in the wrong direction), recombine the files in Cura, and send them back to print.

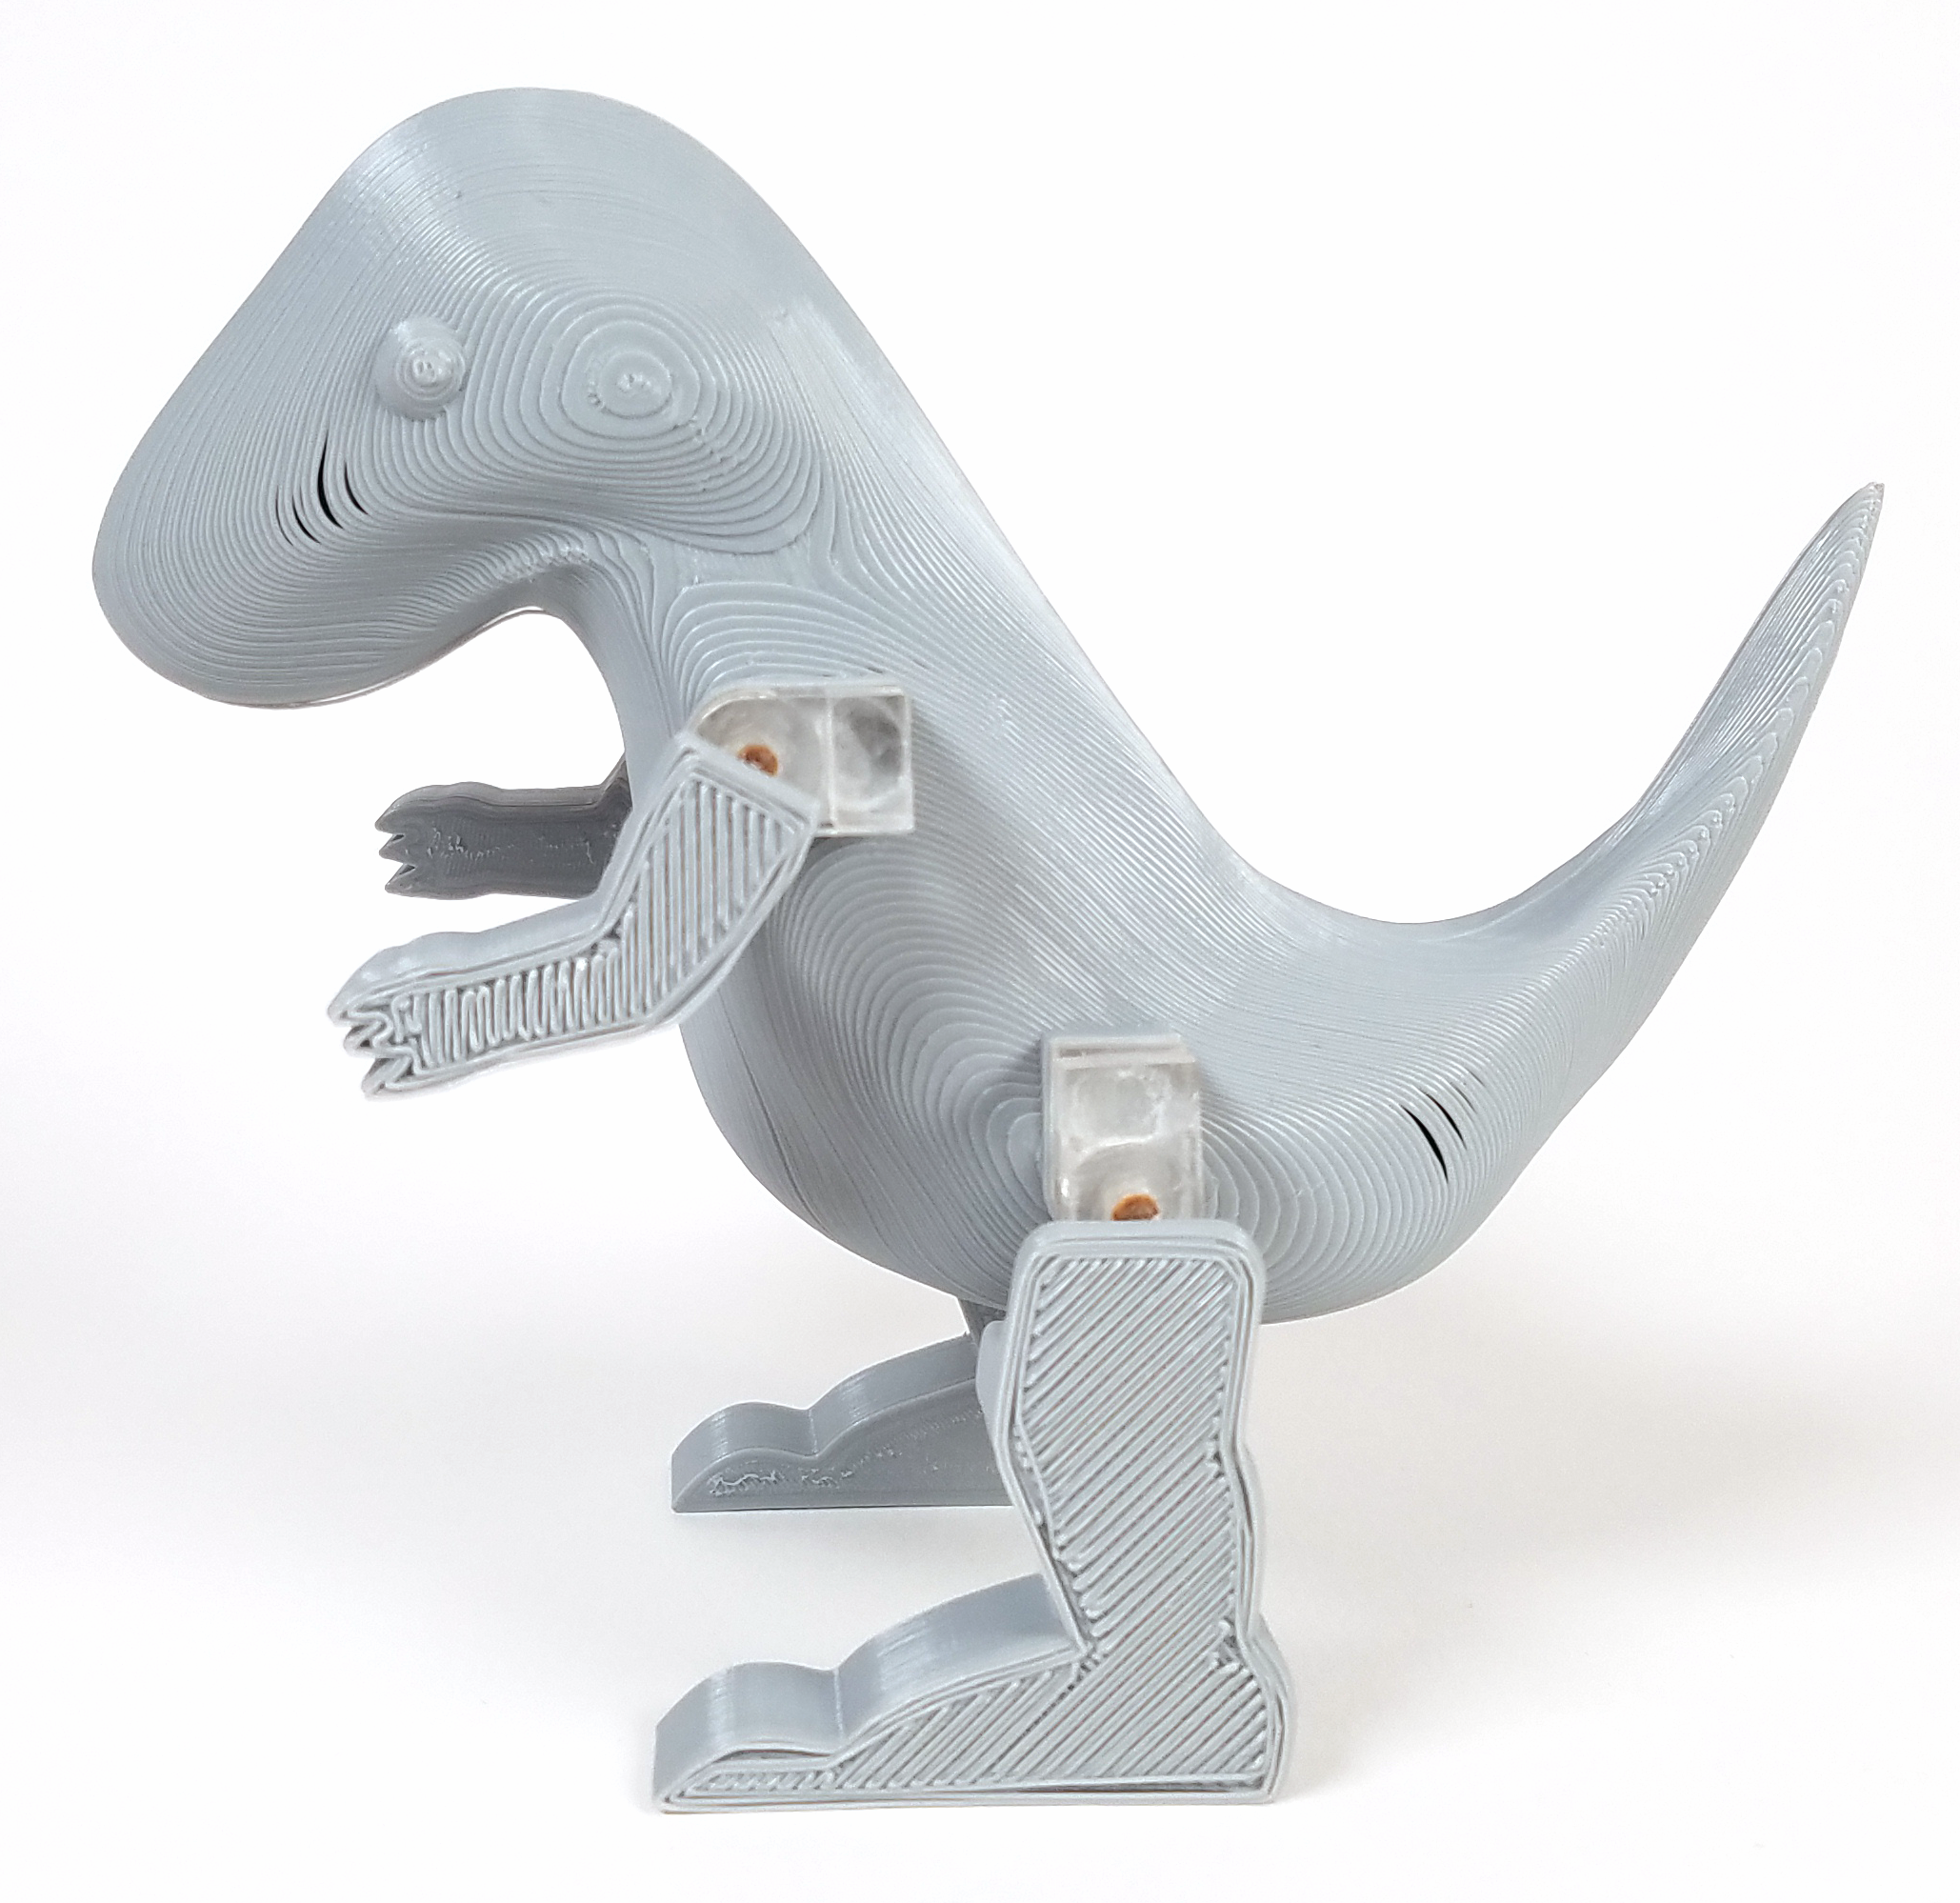
While I waited for the new figure to finish printing, I continued to test workflows for making joints and attempt to glue PLA together with the super glue, discovering that if I used enough super glue and held the pieces together long enough, they would eventually bond. Finally, I finished making joints (I would laser cut the pieces, orient them appropriately, glue them, and insert/trim a wooden dowel for the pin), sanded down some of the pin, and very carefully glued all the pieces together. The figurine then managed to stand and was soon complete!

20180304 161843.thumb
Show Advanced Options
Laserjoint.thumb
Show Advanced Options
Mot1.png.thumb
Show Advanced Options
Mot5.png.thumb
Show Advanced Options
Badprints.thumb
Show Advanced Options
20180304 221702.thumb
Show Advanced Options
Sinebody render1 4.thumb
Show Advanced Options
Sinebody render2 1.thumb
Show Advanced Options

Five Semi-professional photos

Sineside
Show Advanced Options
Sinefront.thumb
Show Advanced Options
Sinesit.thumb
Show Advanced Options
Sinejoint.thumb
Show Advanced Options
Sinemeetsmall.thumb
Show Advanced Options

Reflection

I again struggled with the sculpt environment in Fusion 360 (I had to manually add faces after lofting, which was annoying). The joints definitely required a lot of testing to be decent and I'm glad that I left a lot of time to adjust them. I was pretty surprised that the 3D printed joints didn't work (maybe now with the Ultimakers, I could 3D print joints?), but I think changing to laser cutting helped speed up the final process.

If I were to do another iteration of this project, I would polish both the model and the physical product more. I was very worried about the assembly and if the figurine would be able to stand, so I didn't bother with painting/otherwise finishing the result. I think that sanding parts which I meant to glue would make the bond stronger/faster and reduce the size of the seams (like the center one). I also think that the acrylic may have expanded from the lasercutting while I was working with it (joints were pretty tight when I assembled it, but some seem looser already), so I would try to be more mindful of leaving time between the finished cut and assembly/testing for dowel width. I would also want to try a different material for the pin, since the dowel width is inconsistent and I had discovered that even .1mm makes a big difference in fit.

Overall, I'm very happy to have succeeded in this personal project to add to my collection of Sinosaurus items. I would also like to thank Professor Larson for all of her support during this class, which was an amazing class to learn/experiment with different tools!

Drop files here or click to select

You can upload files of up to 20MB using this form.