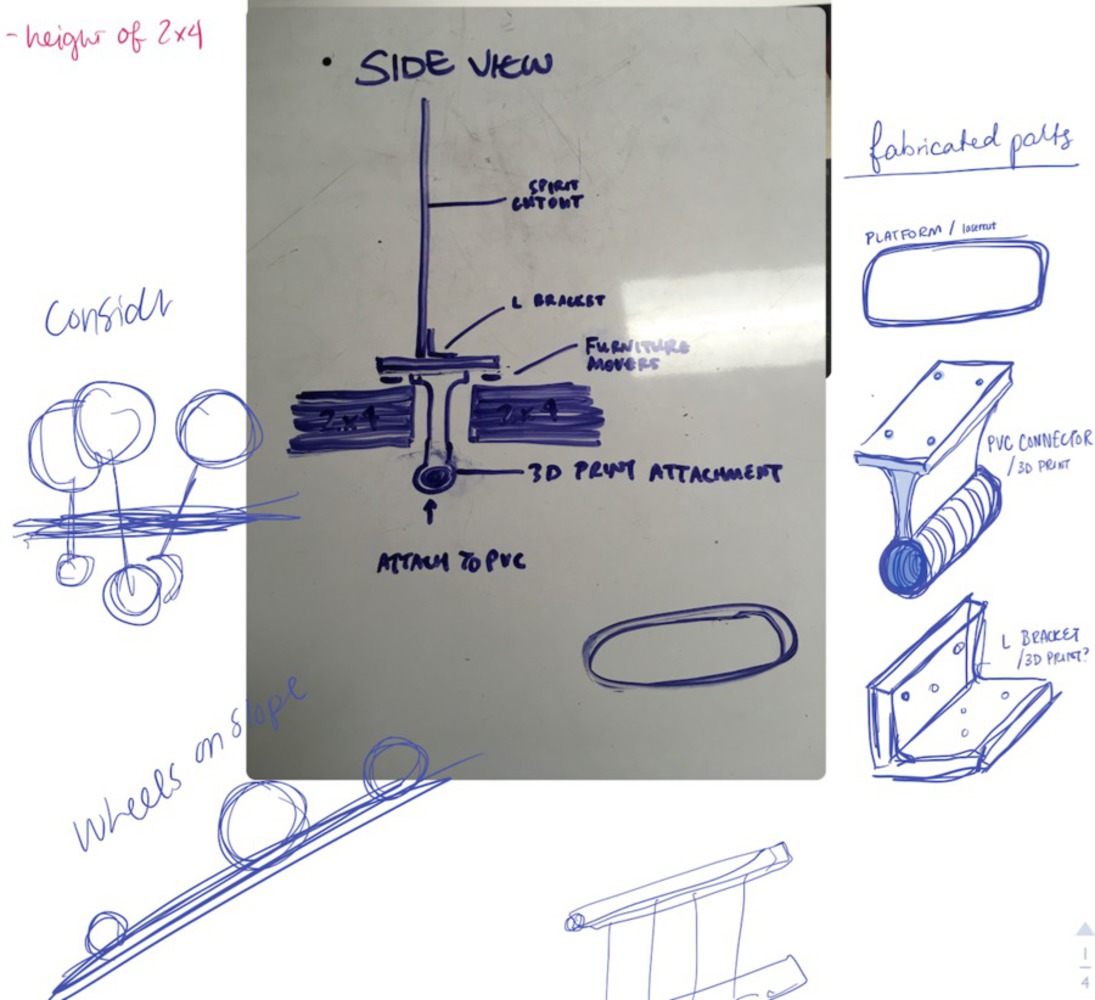
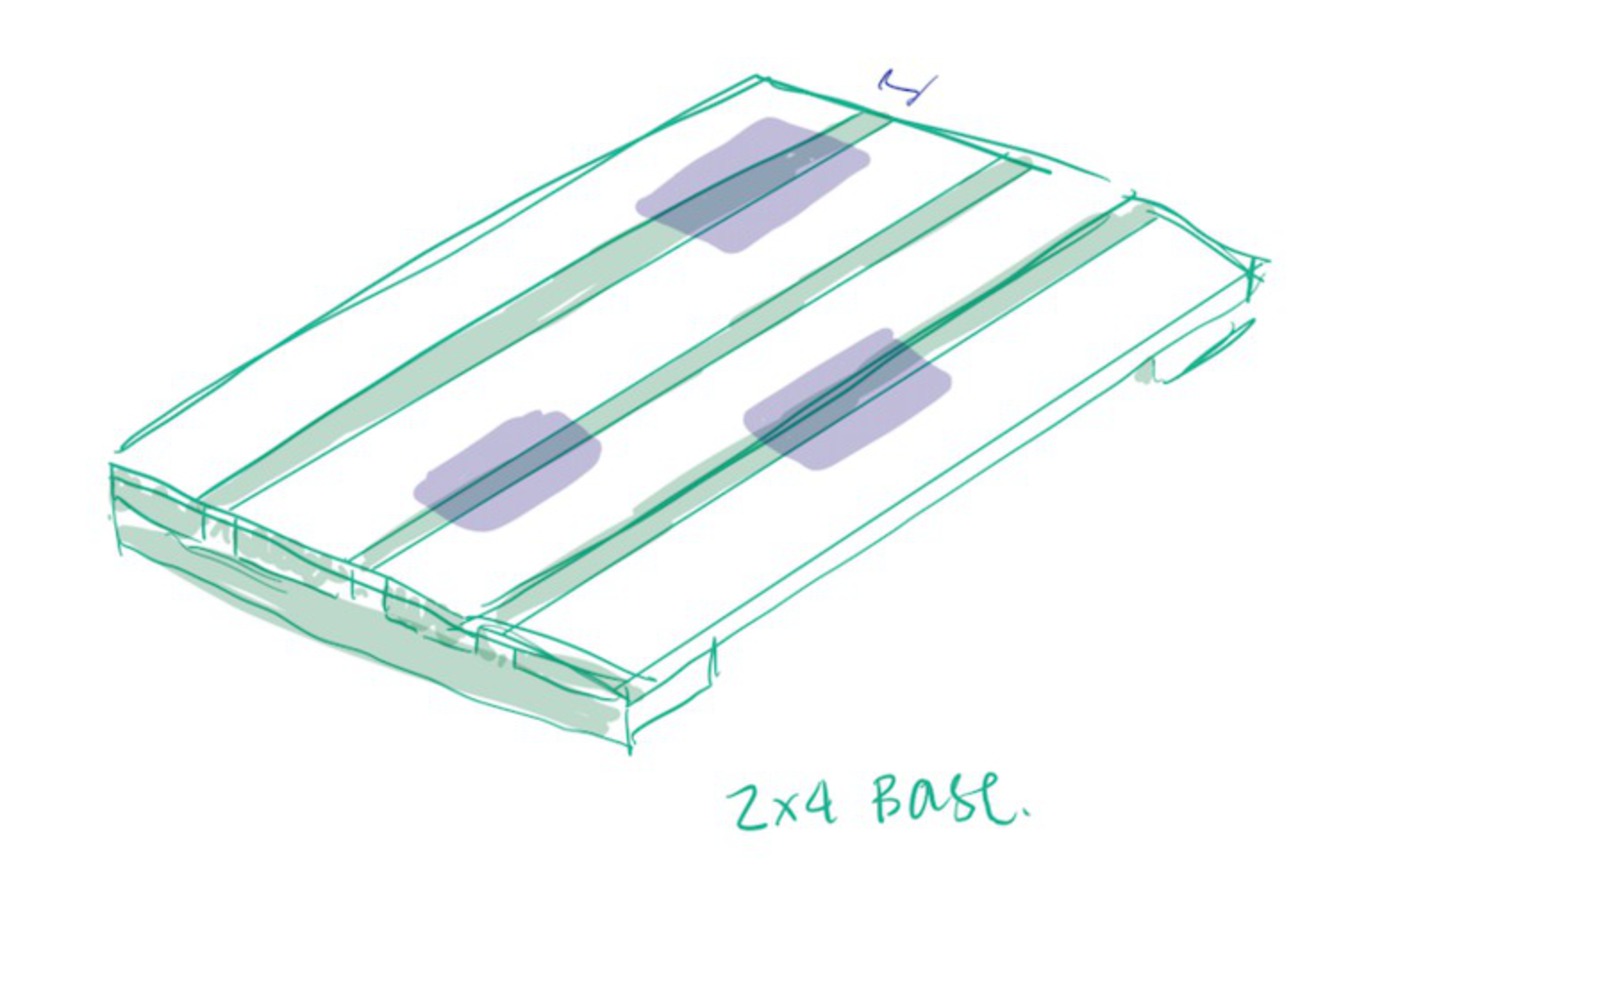
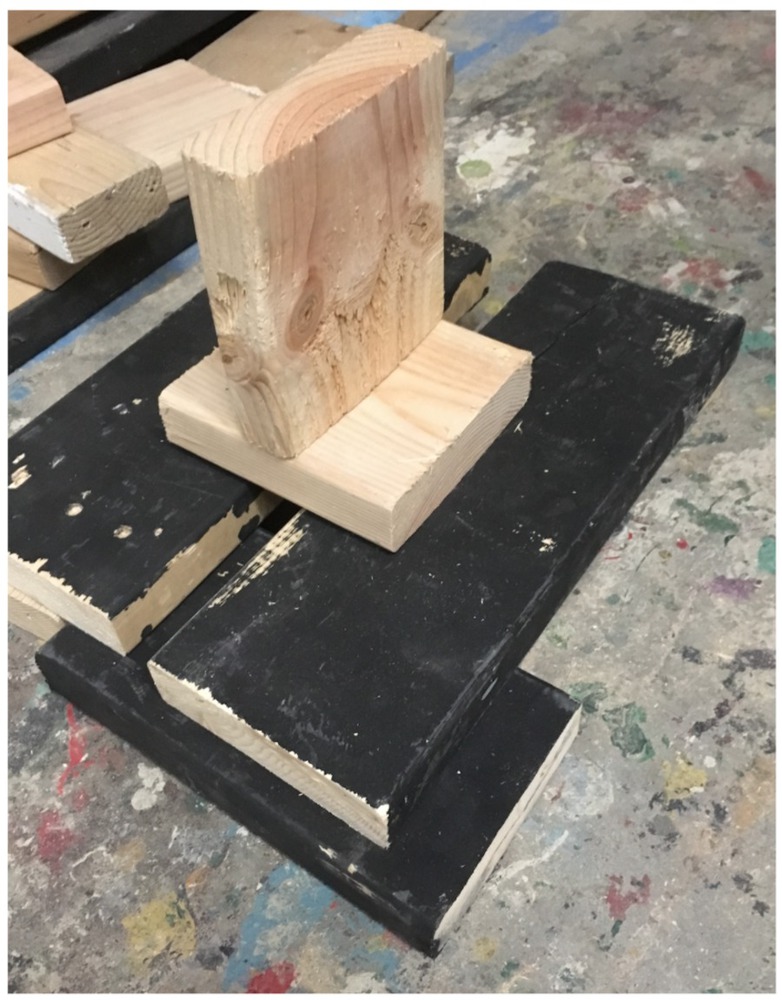
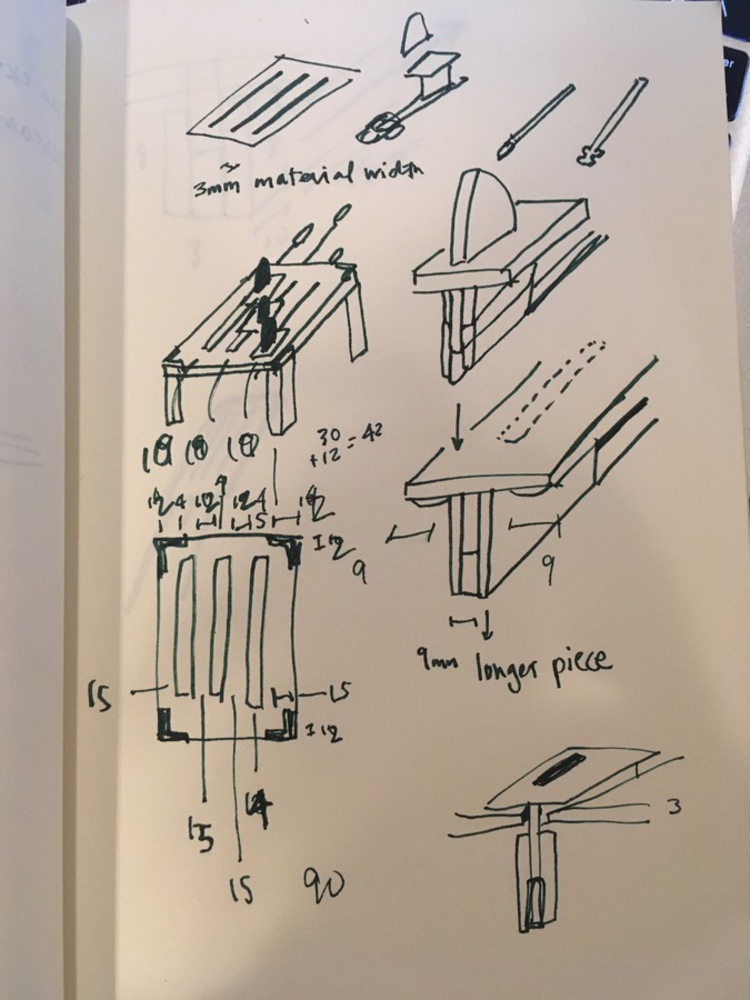
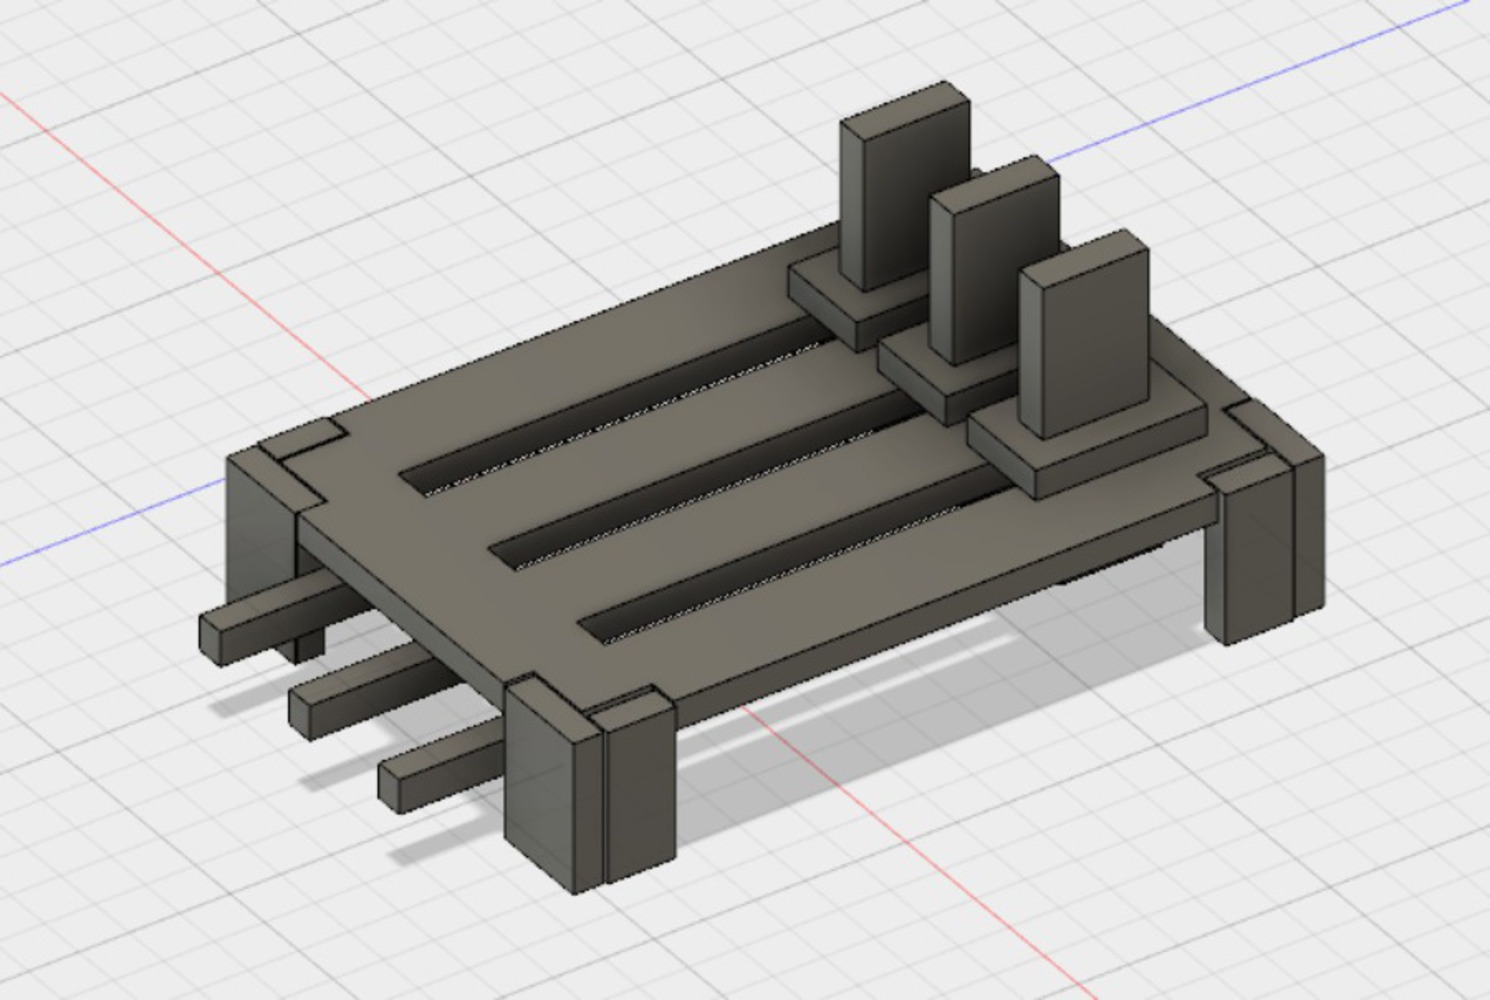
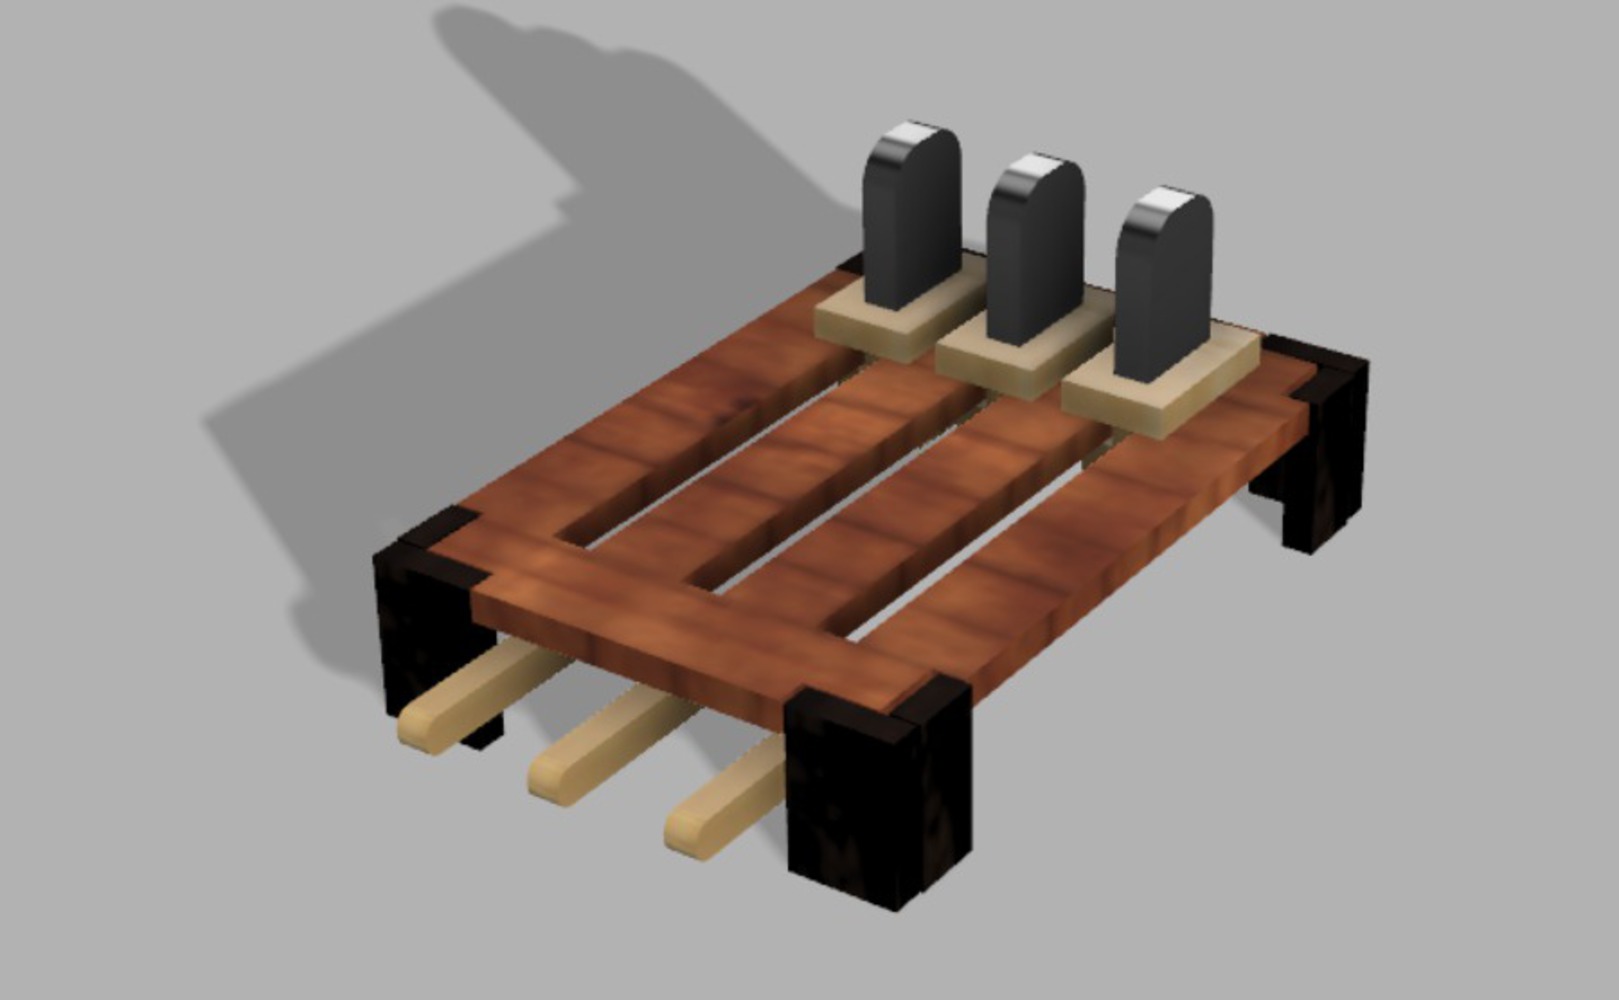
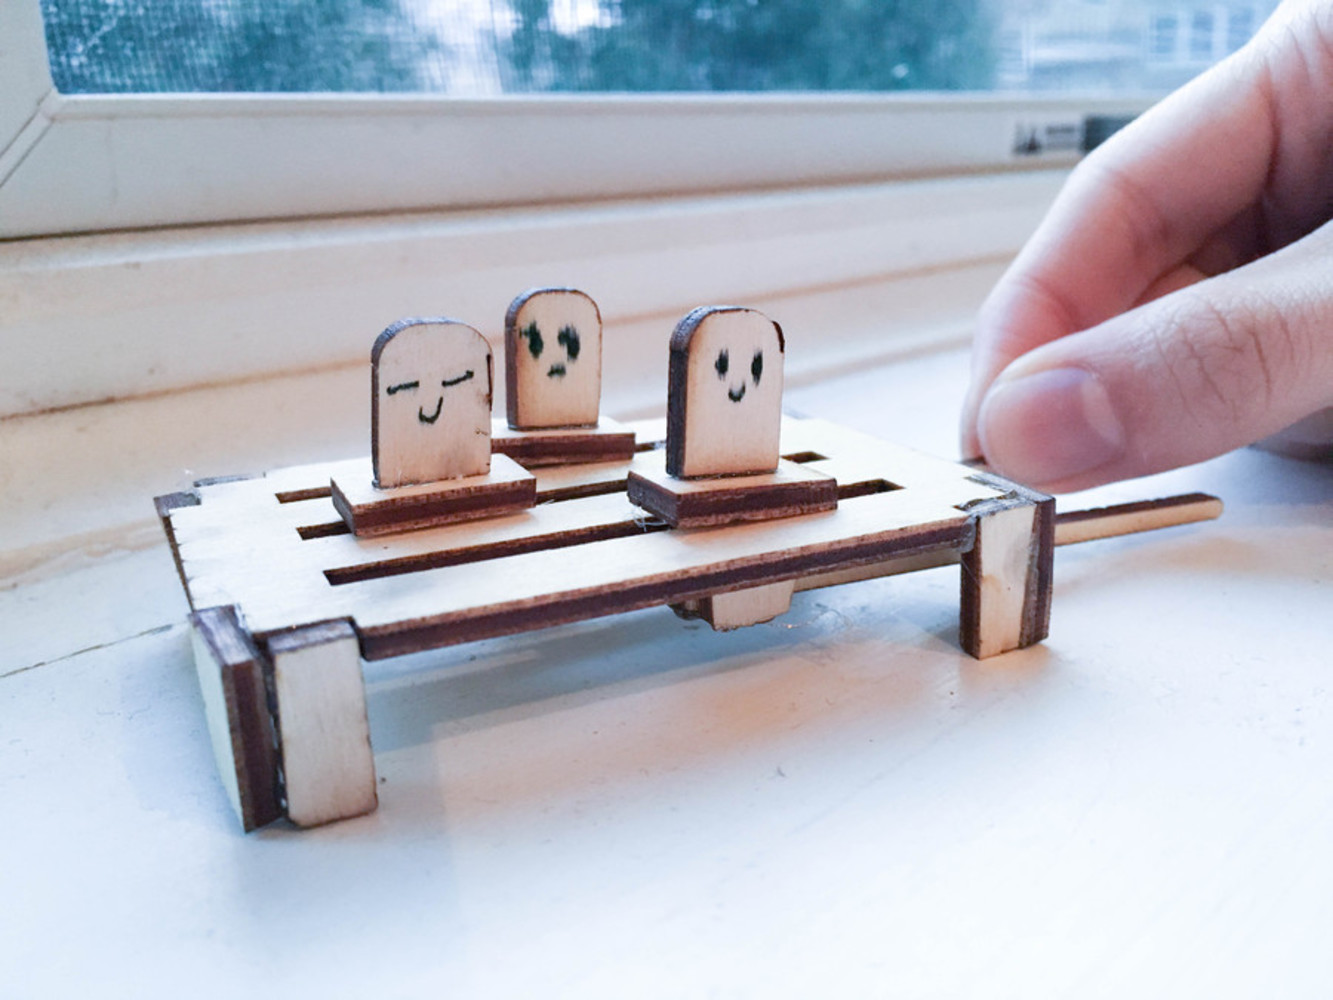
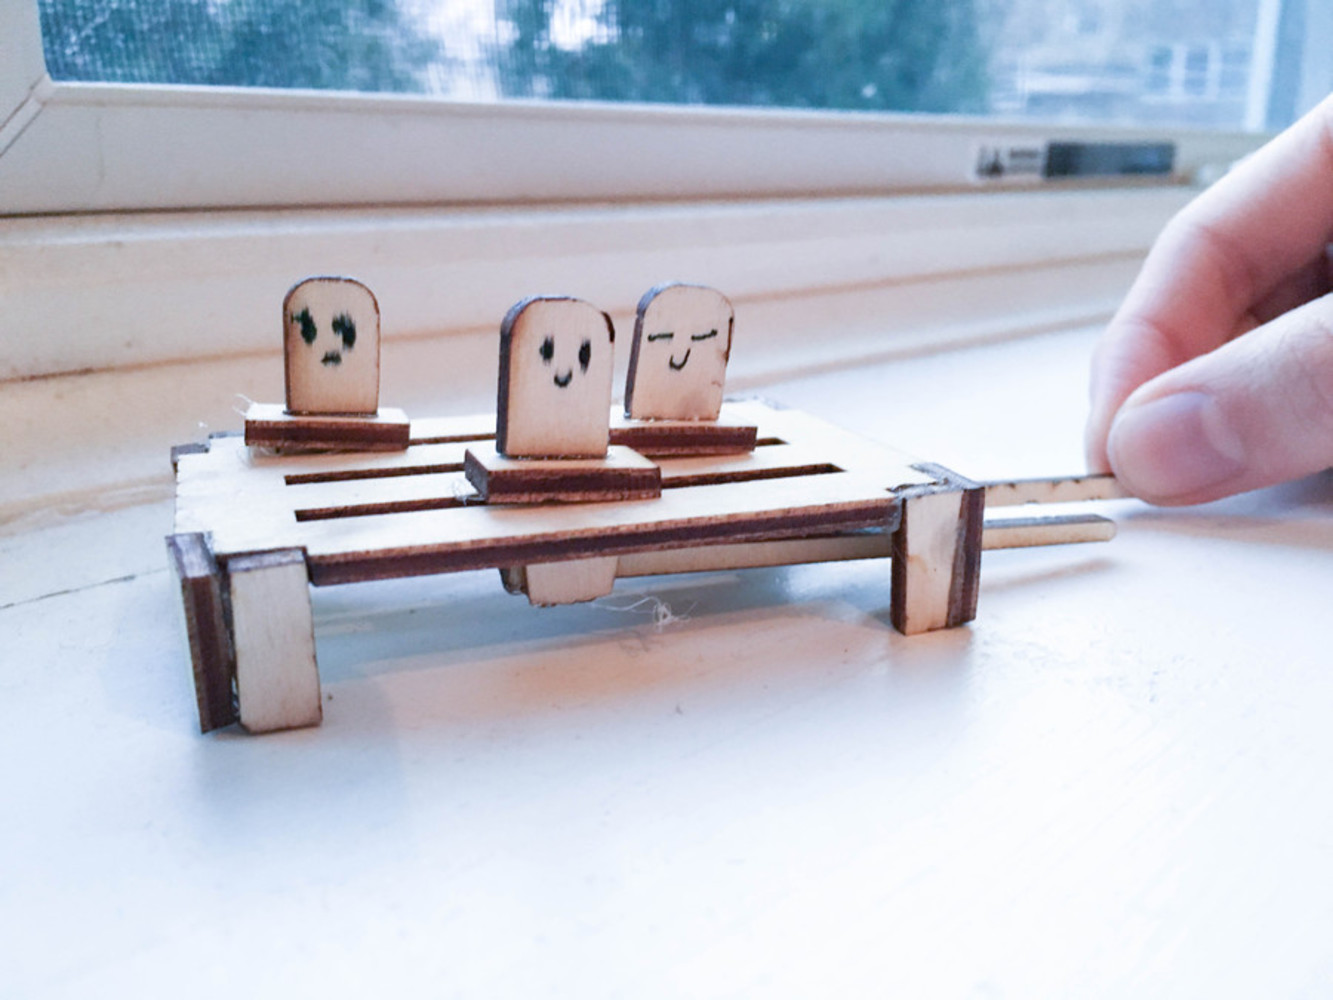
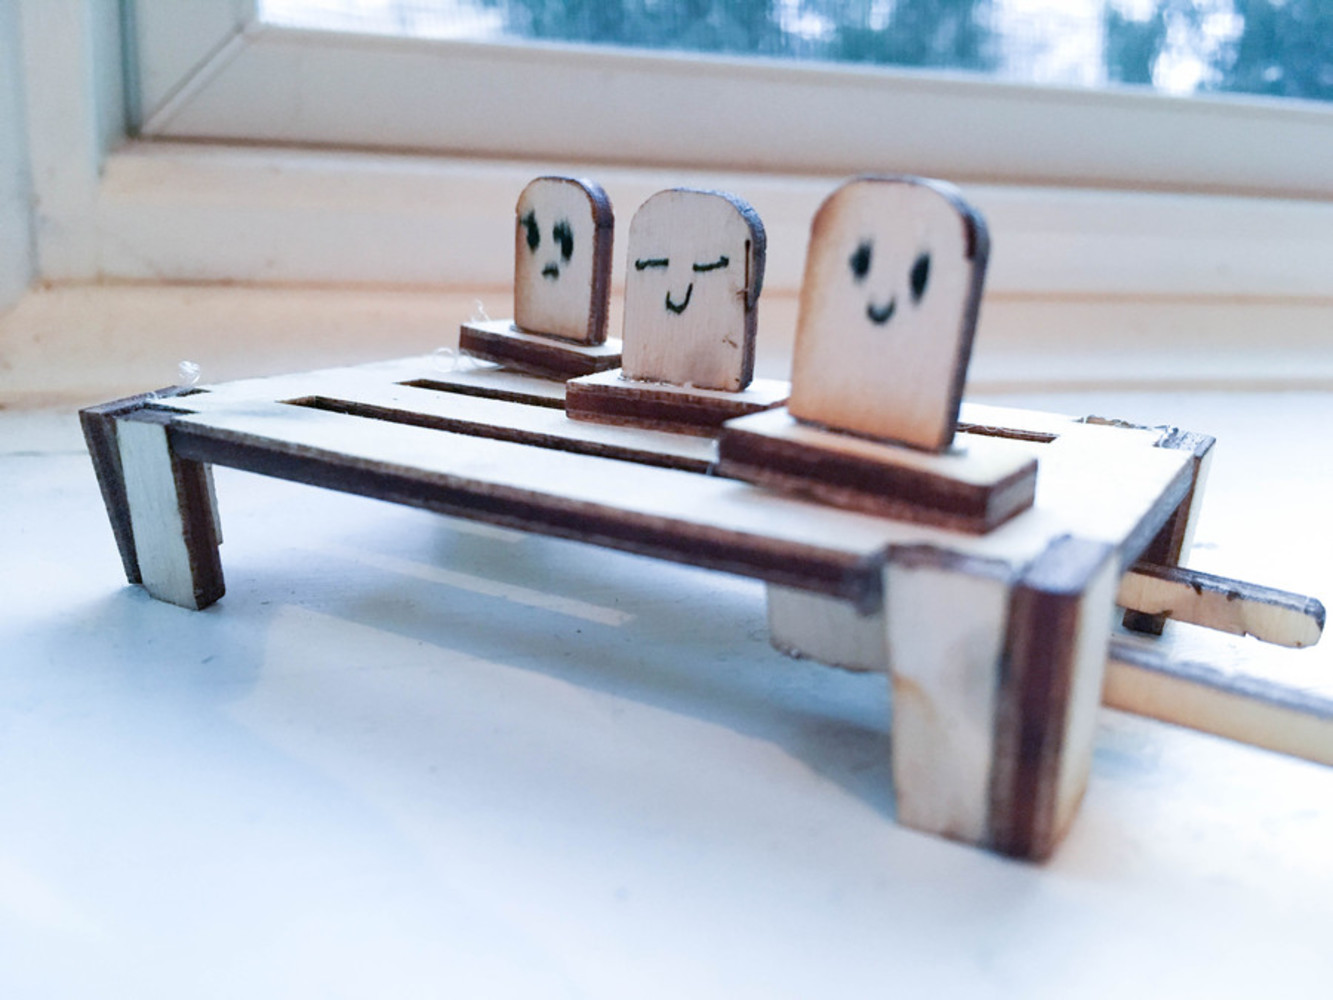
Back to Parent

Outcome


Intention

I have always wanted to create a large project involving moving parts, so for DigiTOOL I am aiming to create a miniature MVP of the final project (that will be created in time for Spring Carnival and Booth!).

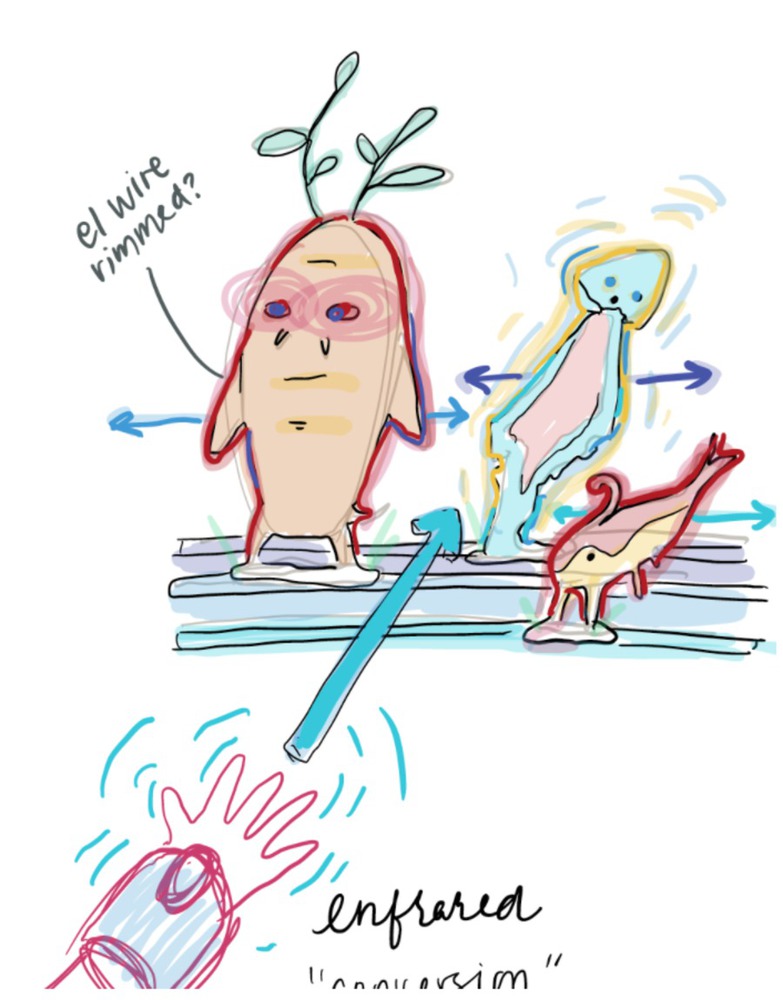
This year, my booth’s theme is The Legend of Korra (part of the Avatar Nickelodeon series), an animated show featuring magic-like powers and spiritual creatures. I will be heading the development of our booth’s game (an interactive required element for judging), and wanted to elevate this year’s game by having moving parts. Our game essentially consists of wearing an infrared glove you can aim at different “spirit characters” to “spirit bend” them into being good spirits, which will be indicated by light.

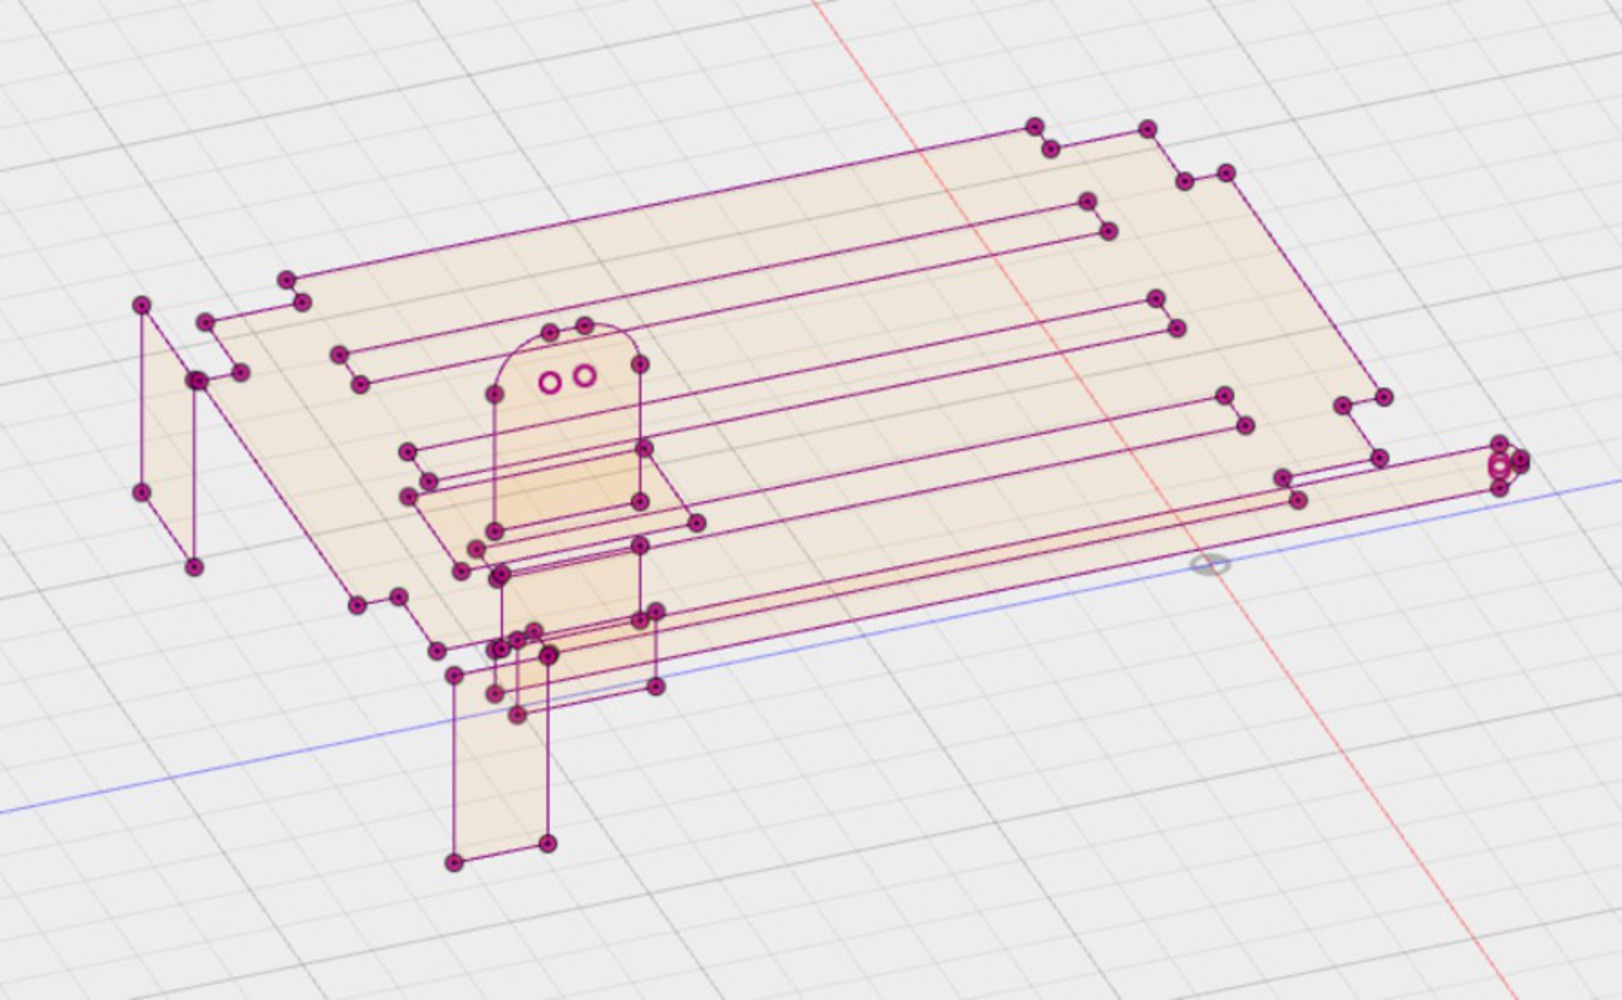
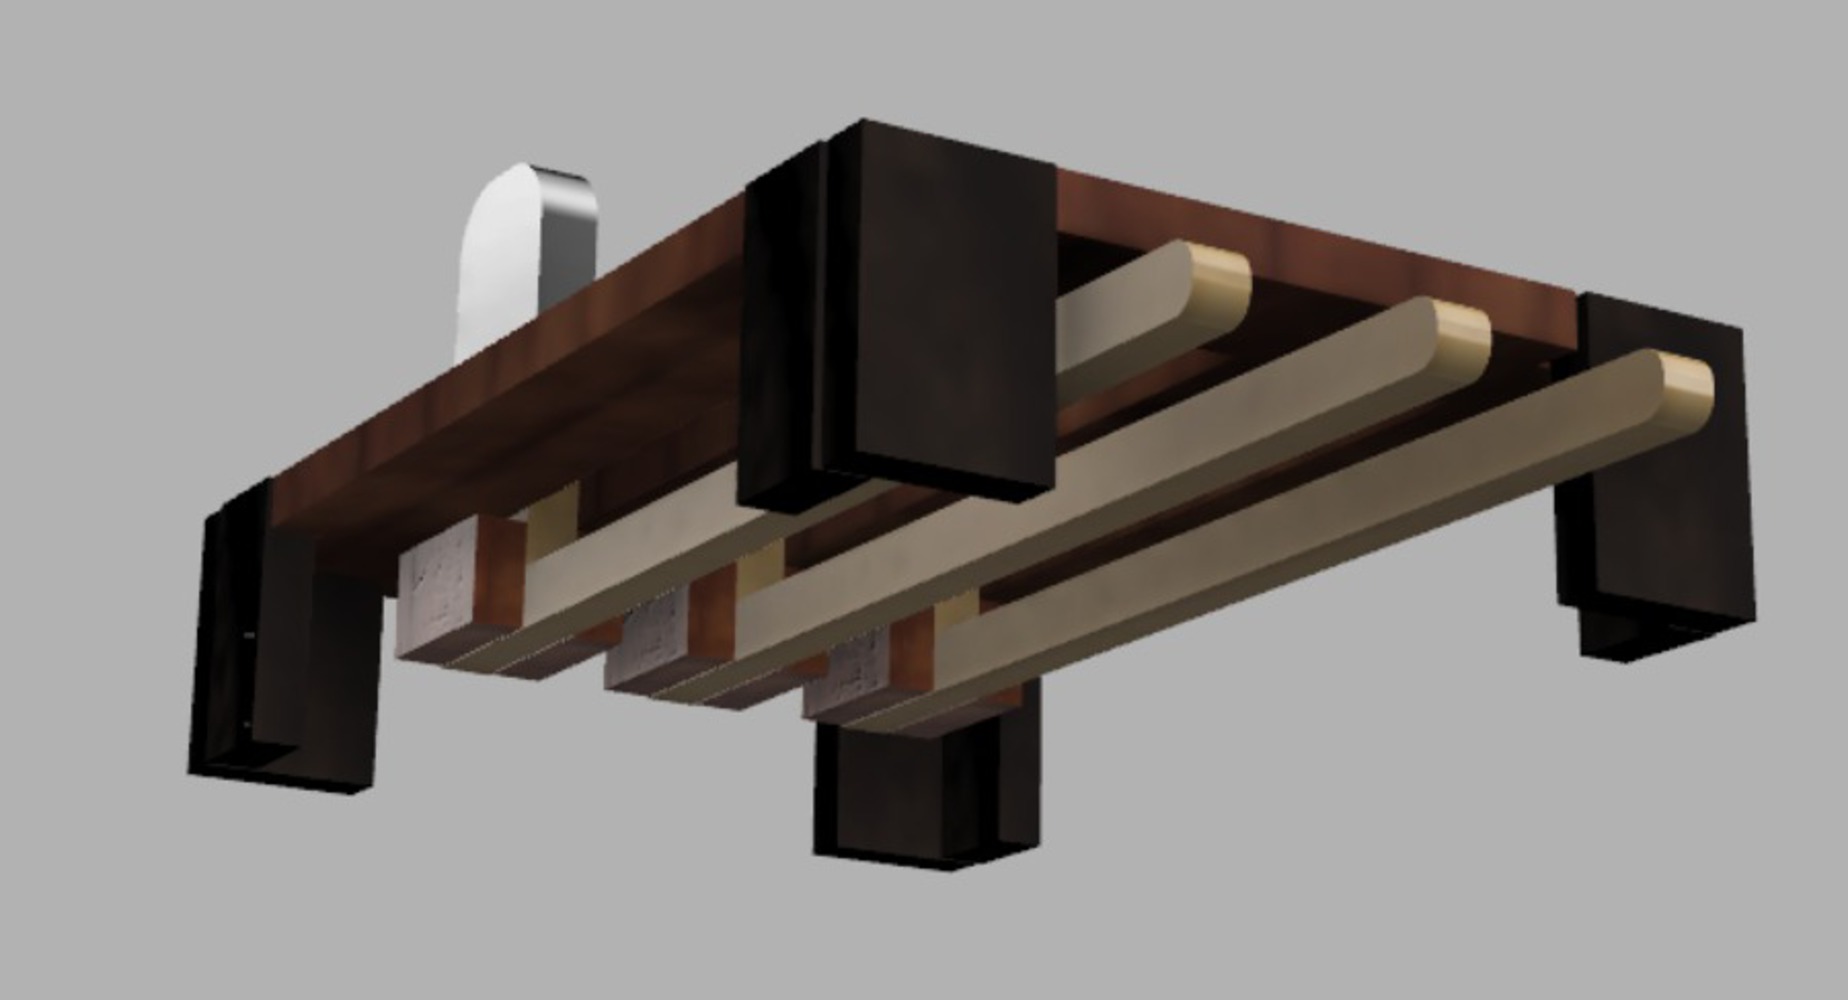
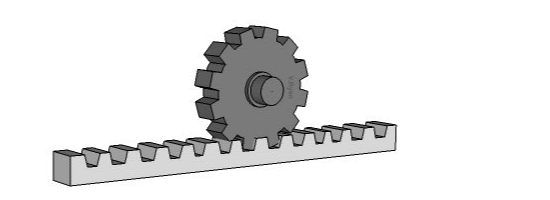
For the purposes of this project, I want to create a small model of the overall function of the game. It will be used to better inform the full piece to be constructed with a team of ECE and Mech E students.

Screen shot 2018 03 08 at 9.38.06 pm.thumb
Show Advanced Options

Research & Context

This whole process was a bit tricky for me. I originally started out wanting to create the whole system - with gears and motors and everything. 

I had looked into pinion and gear tracks, looking at how smaller LEGO models showed how it might not be too hard.  I looked into how other people had created things that could move along a flat (and limited plane). I found the following CAD model (and GIF! Linked here: http://www.technologystudent.com/gears1/pin1a.gif )

Originally, I had thought of a pinion moving atop of a rack gear, so that some sort of “vehicular” creation would hold a plywood character cutout. However, upon further research and seeing models like this:

I then moved on from that idea, thinking that it might be better to have a motor with a gear at the middle of the model, and the plywood character cutouts are supported on the rack gear itself. That way there is no need to create a complicated structure to move atop a rack gear. This can be seen below as well (another LEGO model of the idea).

As time went on, however, I realized that my lack of experience was definitely hurting my process - I didn't really know how to attach motors or support the weight of something that would be pretty heavy later on.

I decided to consider manual movement - something that whoever was manning the game would be able to control. This could potentially be better, as electronics in booths don't always go so well (rain, weather, electricity failure... these can all get in the way).

Screen shot 2018 03 08 at 9.42.00 pm.thumb
Show Advanced Options

Process & Procedure

I worked through a number of different designs, a lot of them included below. I scrapped at least five pretty different ideas along the way, taking into consideration my own personal opinions and that of others I was constantly asking for feedback.

From here, I began to prototype basic forms and ideas in Cages (where my organization builds our booth). Here we had an excess of lumber (2x4s, 2x6s) that I was able to play around with while creating the shape of the game. I was also importantly able to keep size in mind, as it was important for me to play with the whole prototype spatially. I have included a photo of some of the prototyping below, but it was a bit messy. 

With feedback from other members of my organization's booth group, I proceeded to sketch out formal dimensions and start building the CAD model.

Screen shot 2018 03 08 at 9.42.12 pm.thumb
Show Advanced Options
Screen shot 2018 03 08 at 9.42.07 pm.thumb
Show Advanced Options
Screen shot 2018 03 08 at 9.46.07 pm.thumb
Show Advanced Options
Screen shot 2018 03 08 at 9.50.00 pm.thumb
Show Advanced Options
Screen shot 2018 03 08 at 9.49.51 pm.thumb
Show Advanced Options
Screen shot 2018 03 08 at 9.50.06 pm.thumb
Show Advanced Options
Screen shot 2018 03 08 at 9.46.16 pm.thumb
Show Advanced Options
Img 4111.jpg.thumb
Show Advanced Options
Screen shot 2018 03 08 at 12.53.41 pm.thumb
Show Advanced Options
Screen shot 2018 03 08 at 1.21.05 pm.thumb
Show Advanced Options
Screen shot 2018 03 08 at 12.57.52 pm.thumb
Show Advanced Options
Screen shot 2018 03 08 at 12.59.53 pm.thumb
Show Advanced Options

Final Product

My final product was a miniature proof of concept for my organization's Booth game (for Spring Carnival). It focuses on the physical / mechanical task of coming up with a way to move targets while Booth visitors wear an IR shooting armband that changes the color of the spirits that move around the table. While we have previously tested the technology and electronics and got them working, we had not yet planned out the physical table. The product below shows an example of how it might live in our booth come mid-April.

Finalphoto.thumb
Show Advanced Options
Finalphoto 3.thumb
Show Advanced Options
Finalphoto 2.thumb
Show Advanced Options

Reflection

This project was especially tricky for me as there was a lot of involvement of outside feedback. Instead of this project existing just for the digiTOOL final, I wanted to create something that could help utilize all the new things I learned in the class and put them towards making a more immersive and creative game for Spring Carnival and Booth.

Going forward, I think that having a funcitonal miniature proof of concept will be pretty helpful. I have already shown one of the booth chairs, and he can now visualize the game a lot better now. 

I definitely learned a lot through iterating through many designs, and learning to leave them behind if they didn't seem to be going down the right path.

Excited to keep working on this project!

Drop files here or click to select

You can upload files of up to 20MB using this form.