Back to Parent

Outcome


Intention

[Write about the big ideas behind your project? What are the goals? Why did you make it? What are your motivations?]

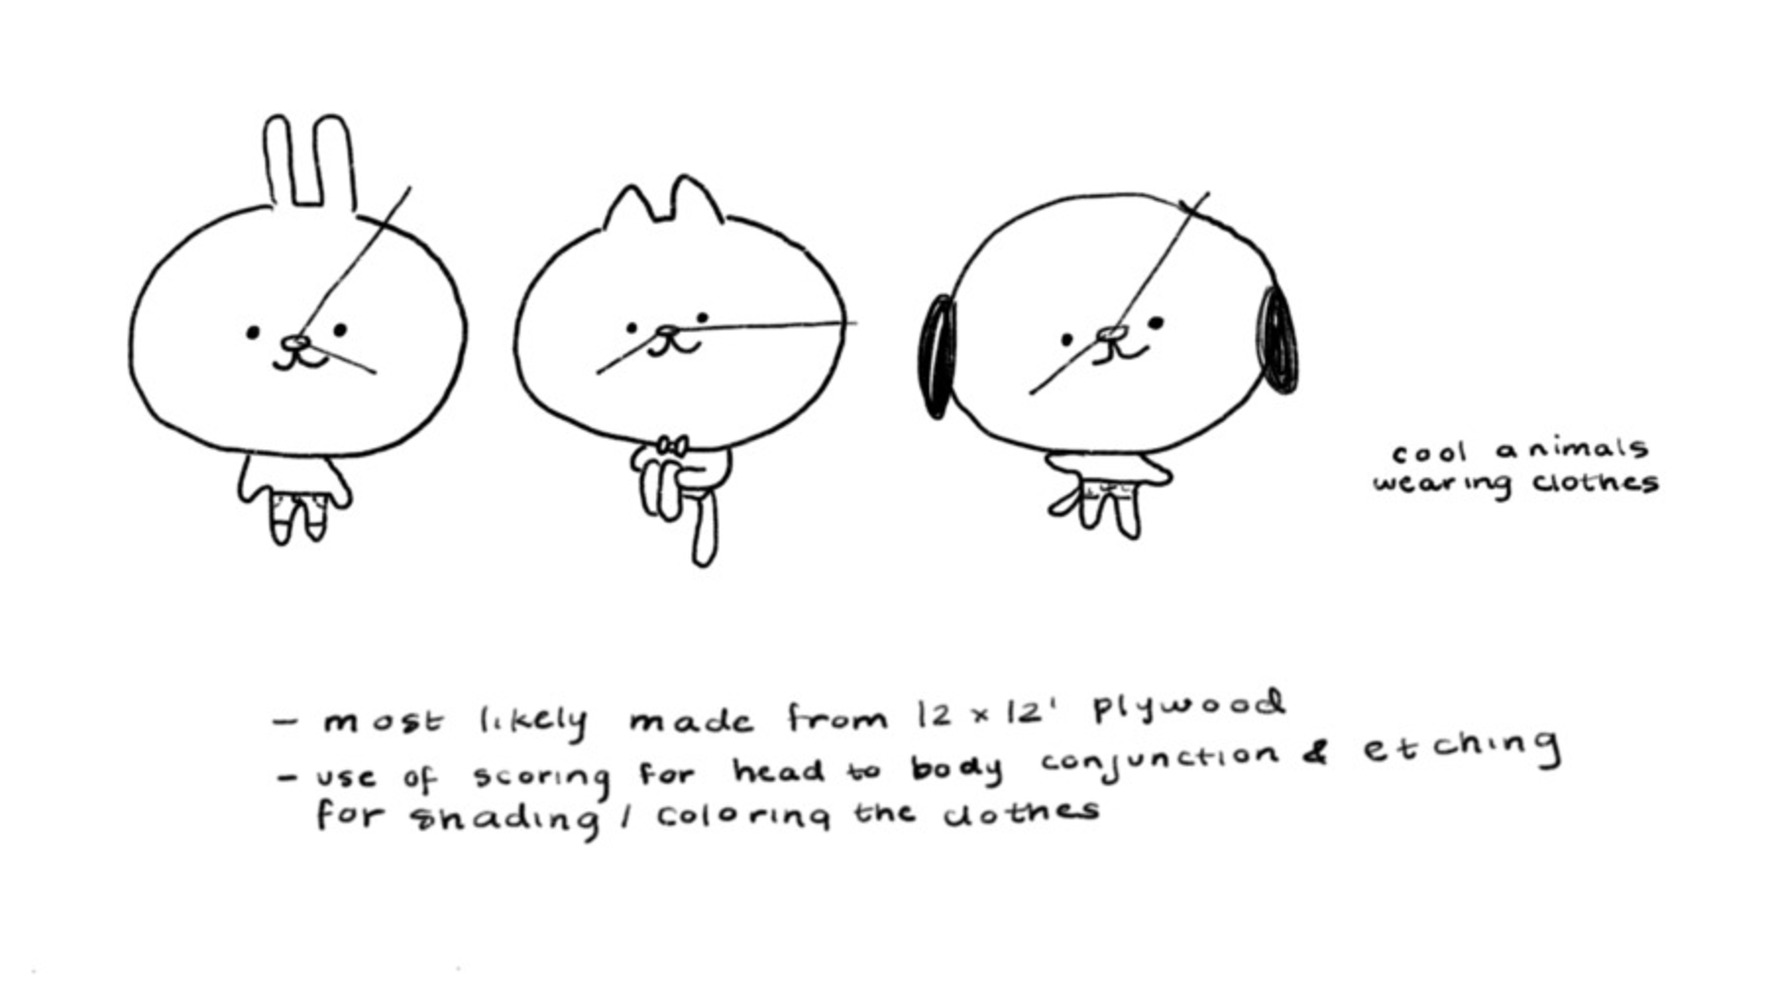
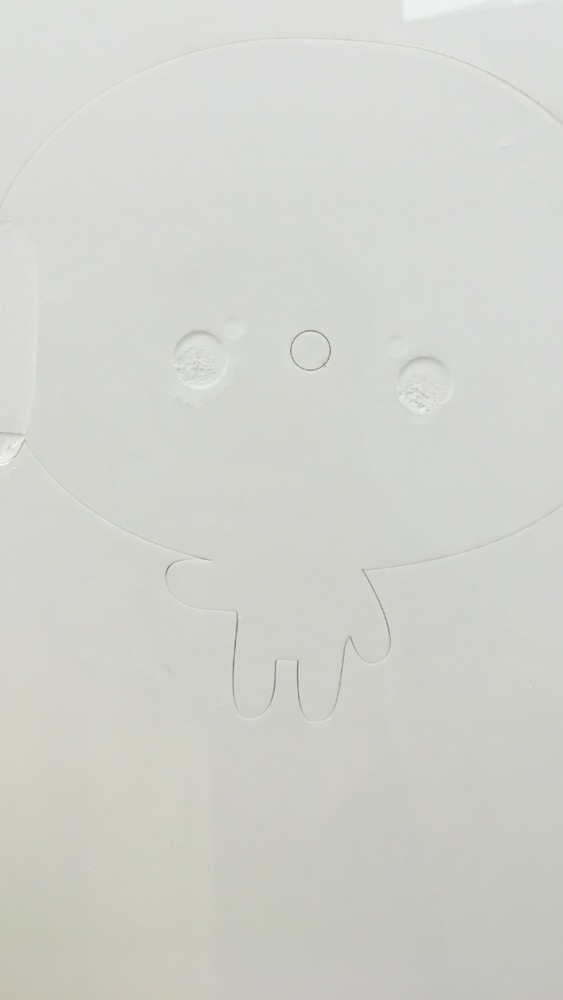
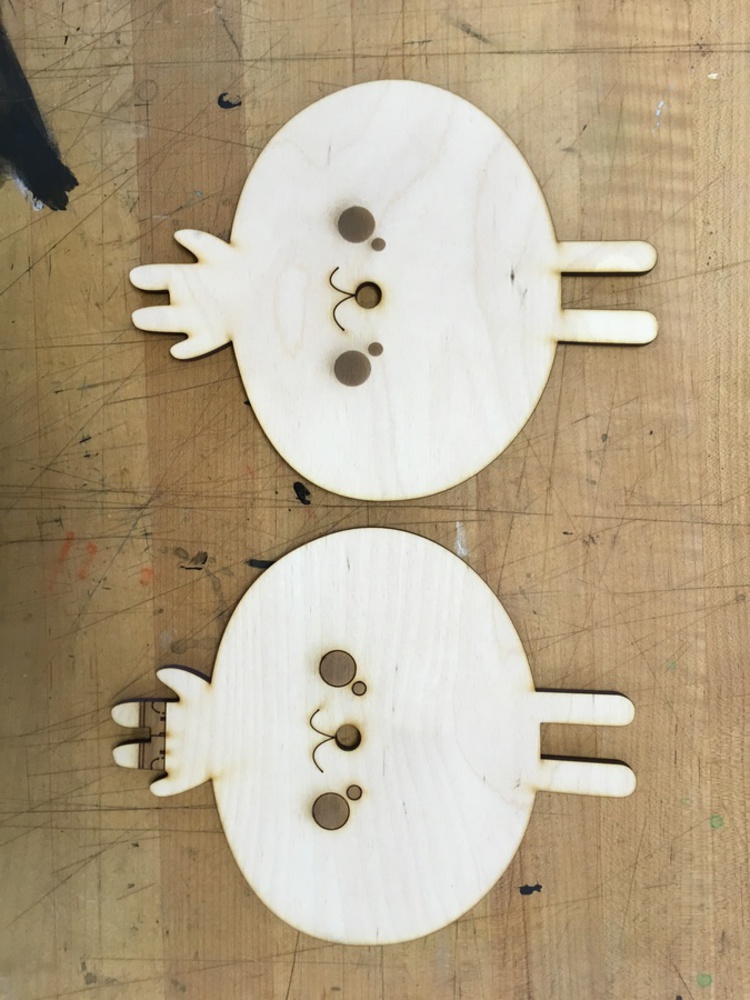
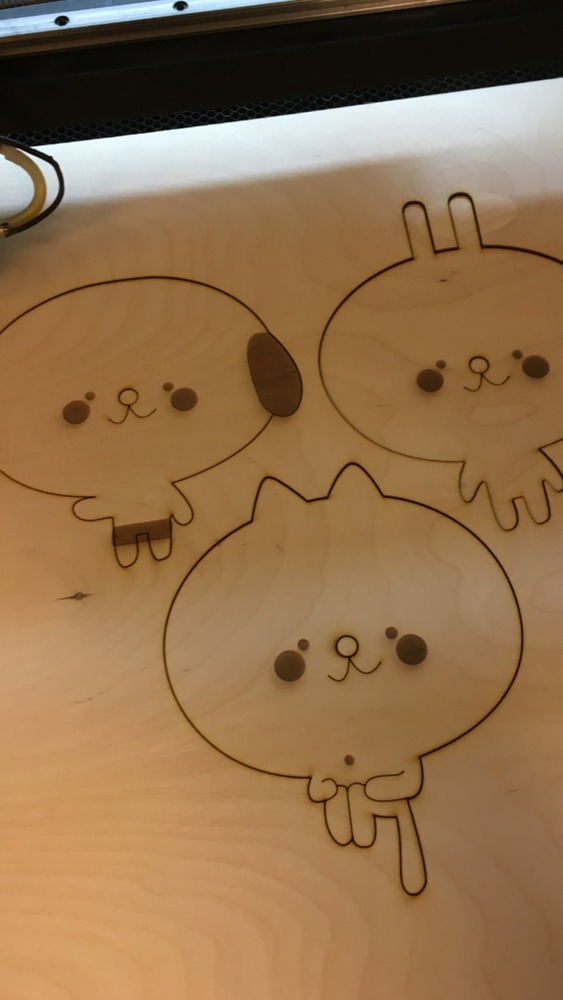
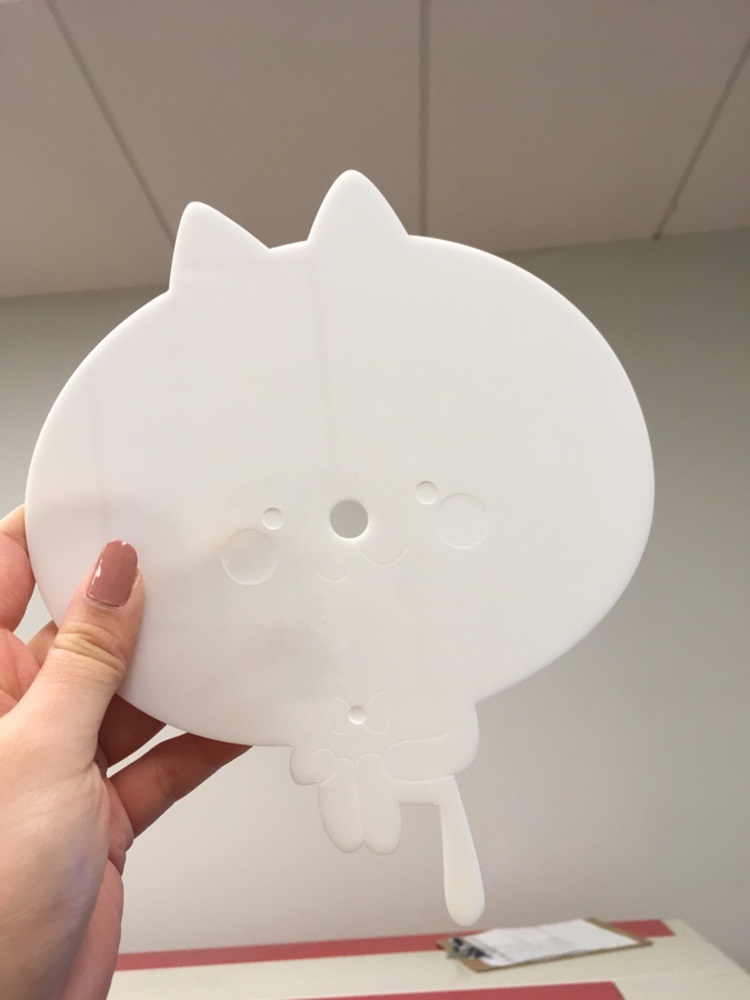
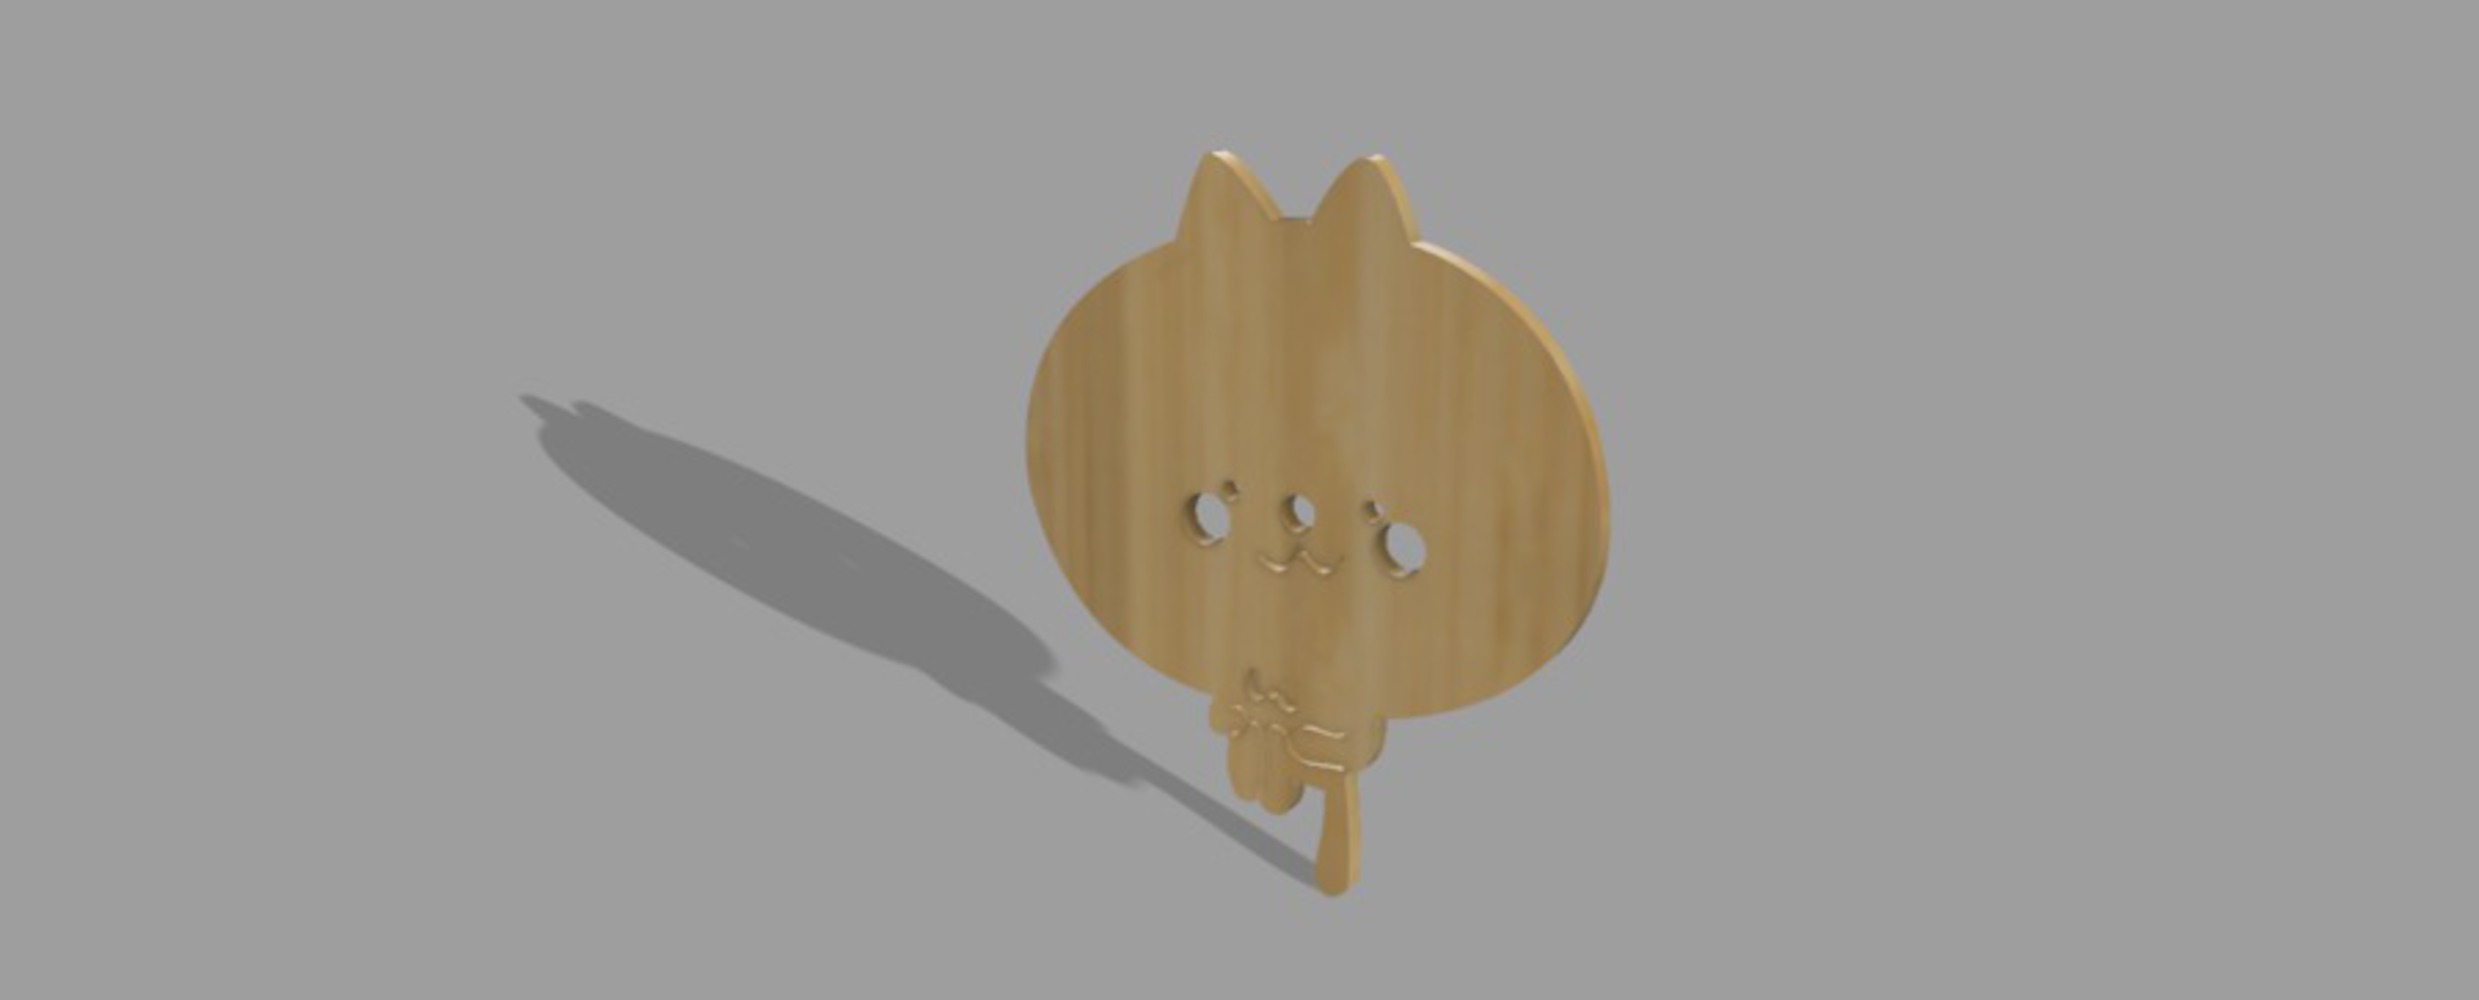
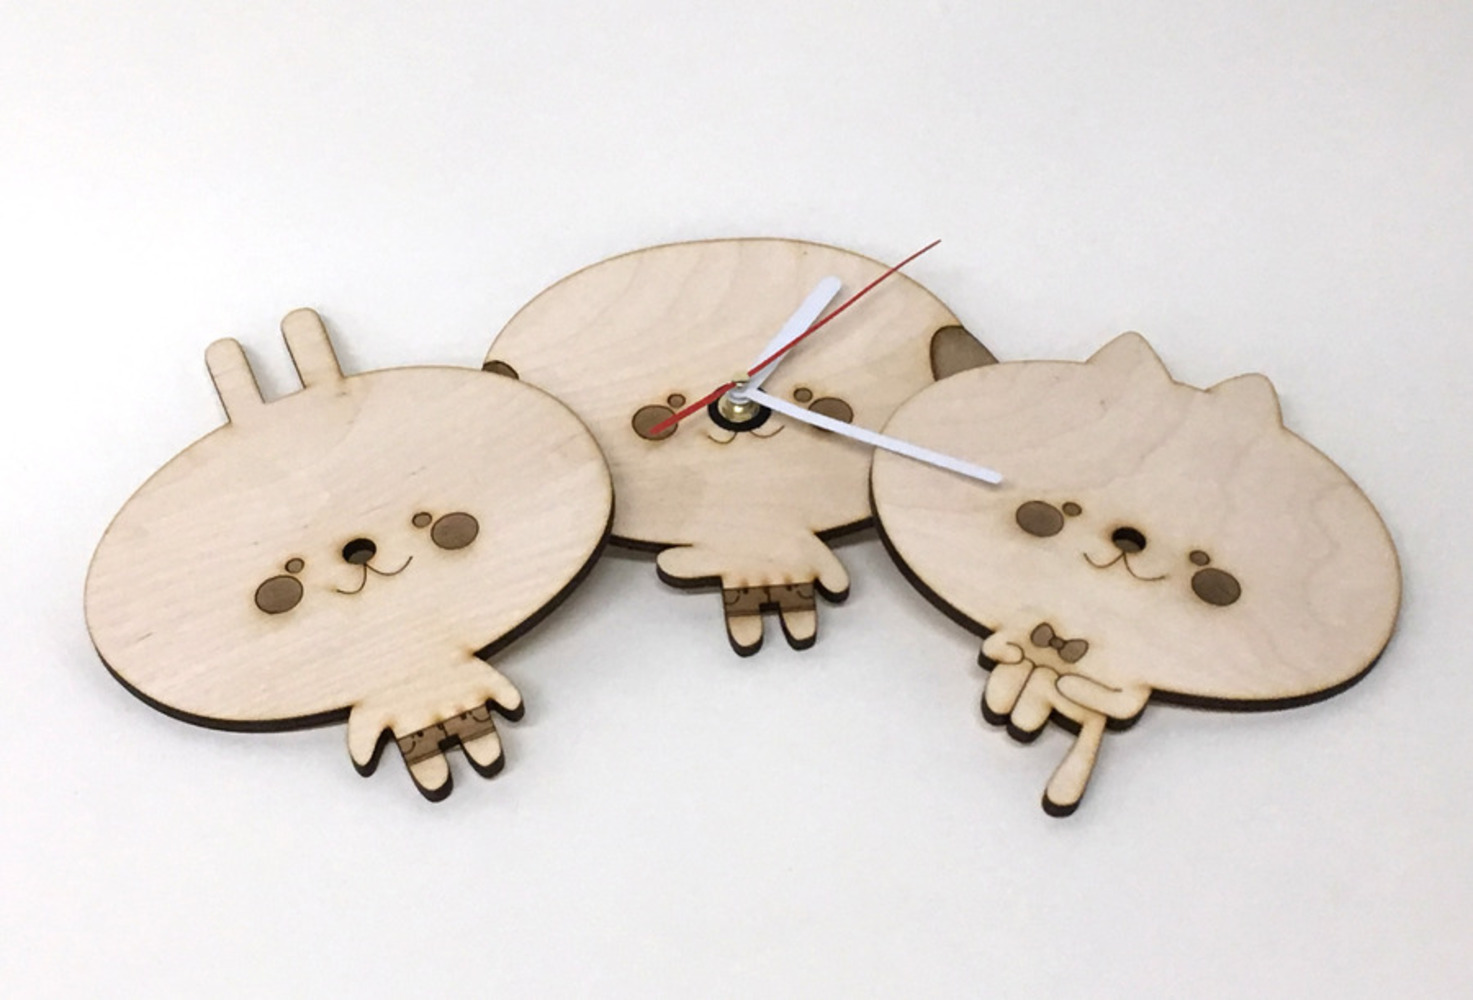
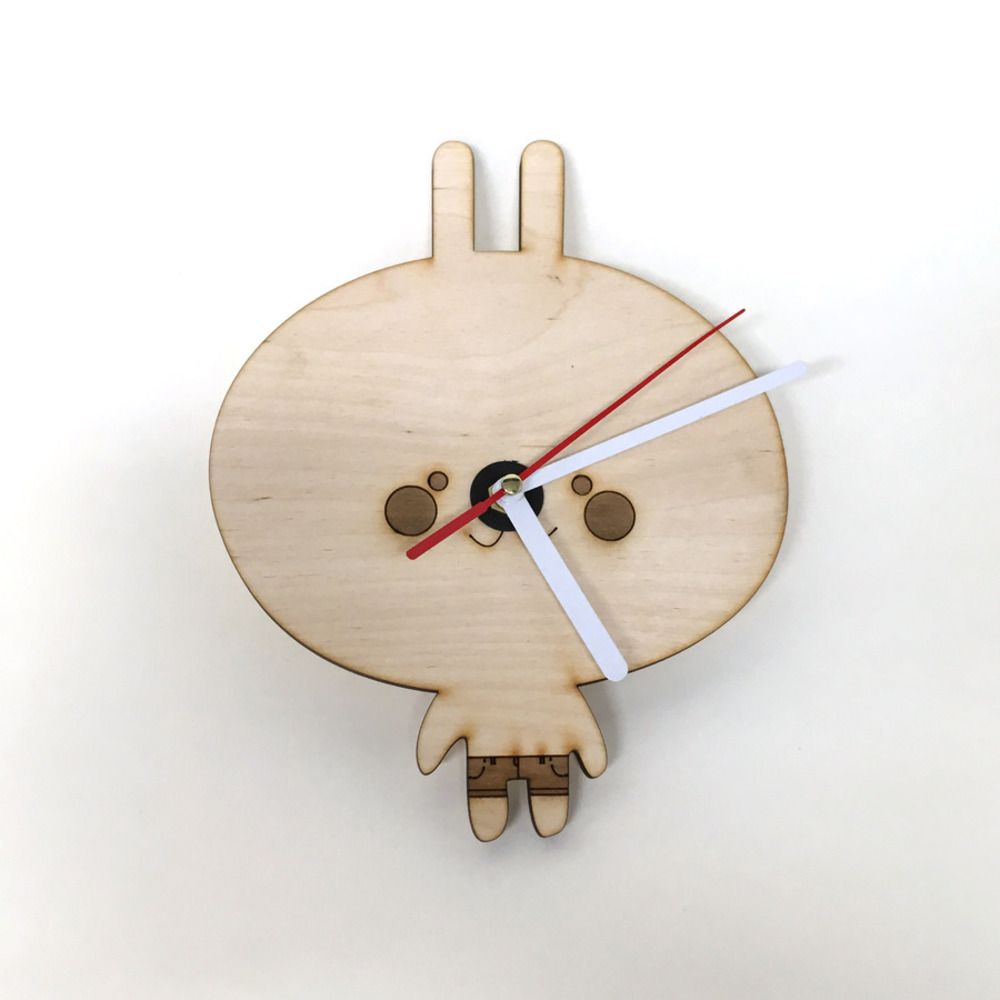
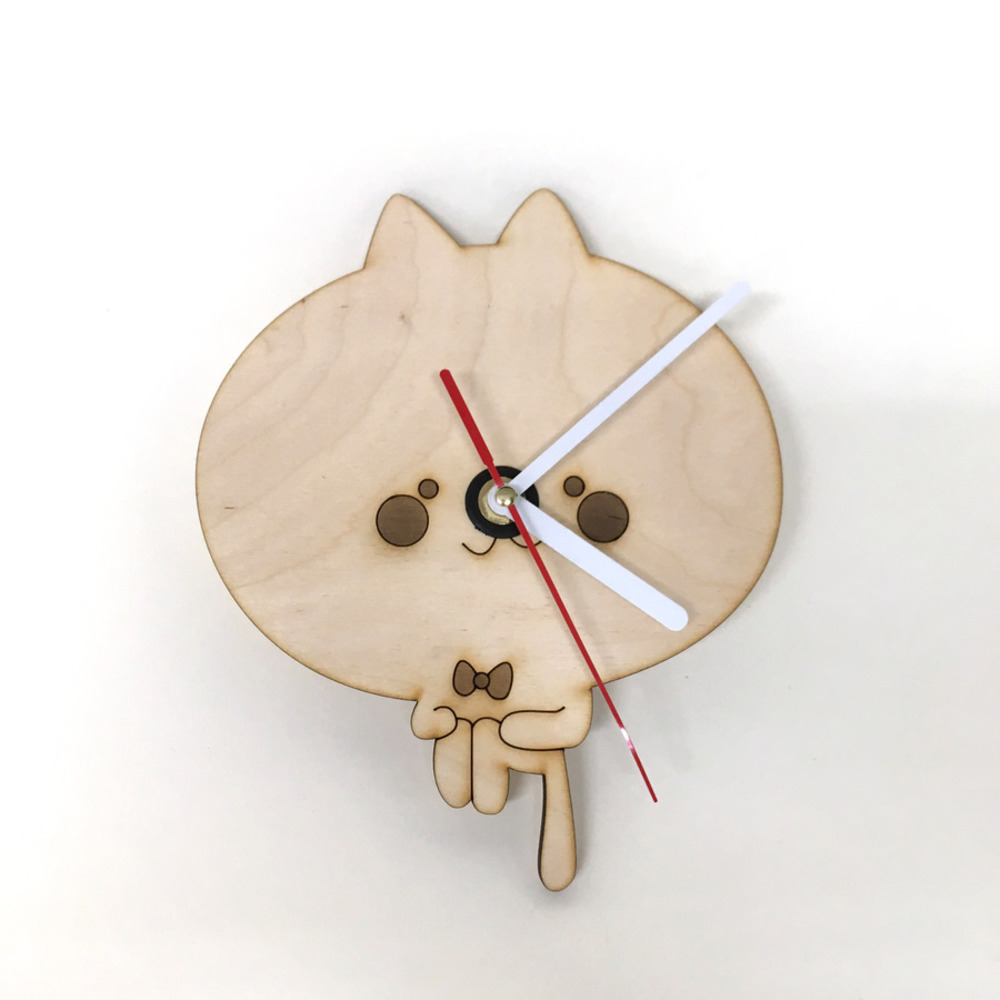
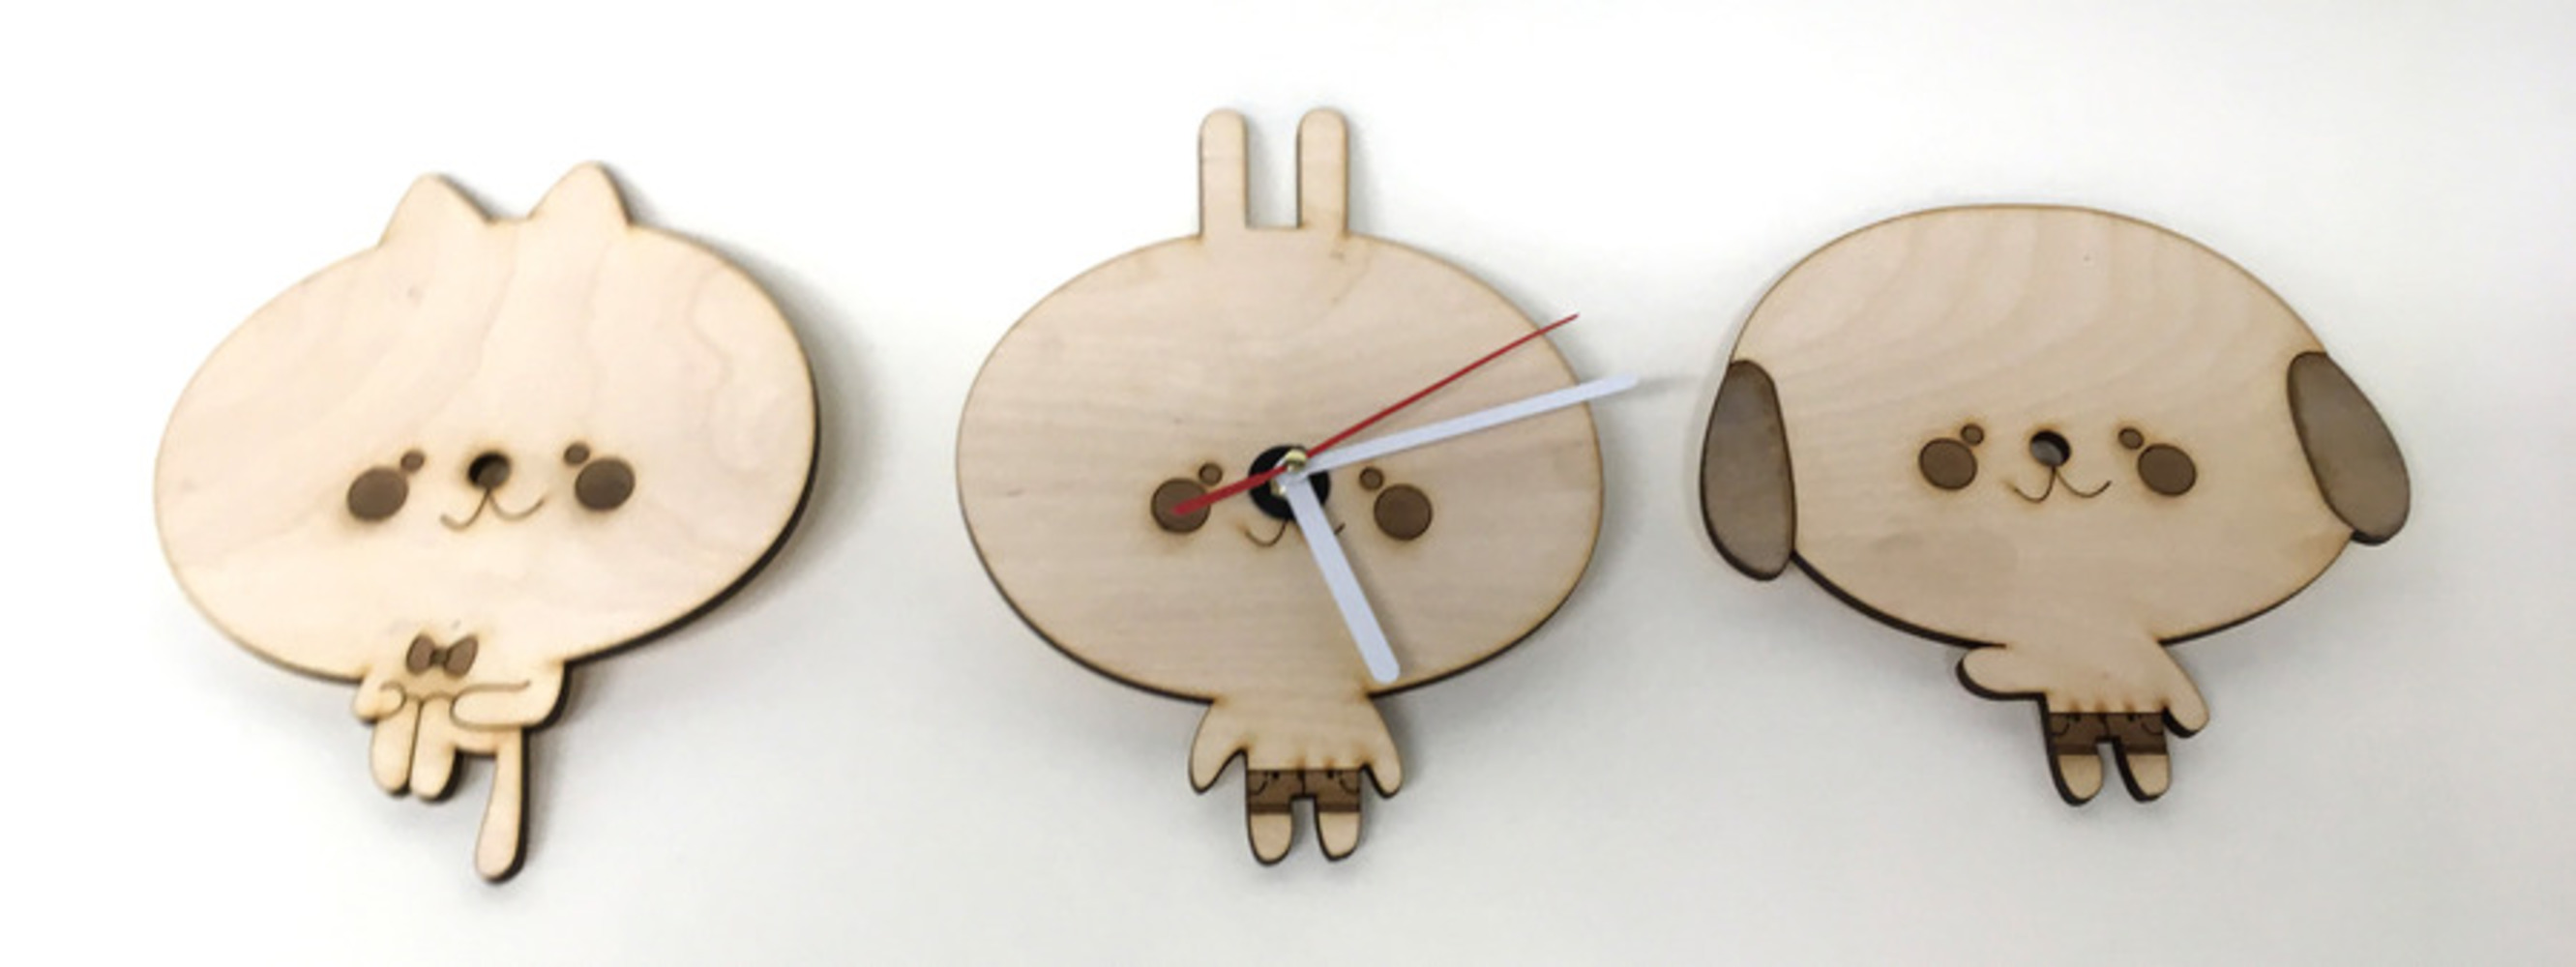
For this project, I decided that I wanted to create designs for clocks that I could display in my house for next year. As the house is unfurnished, I have no way of telling the time without my phone. Not only this, but the walls are completely bare. I hope to be able to create wall clocks that will be pleasant to look at in minimalistic settings. Additionally, as my house will have three floors, I thought it would be interesting to create a series of clocks that shared similar characteristics in terms of design.

Besides the motivation of learning how to laser cut through a variety of software in order to rapidly prototype, I want to be able to create something visually enjoyable that I can use to decorate my house. I hope that this project will allow me to manufacture something that I am proud of that I can display at a low cost so I won’t have to buy myself a clock.

Research & Context

[How does your outcome relate to other work in the field? What makes it similar or different to other objects of the same genre? How have other objects failed to solve the problem you have identified?]

As I have looked at different clock designs, I have found that the most unique ones are extremely expensive. Not only this, but more playful and illustrative clocks seem to be obviously geared towards children. I want to be able to make clocks that have an illustrative nature but are still sophisticated.

Sketch

[Include sketch with as much details as possible, like: approximate dimensions, materials, layers, textures, colors, and aesthetic influences.]

Untitled artwork.thumb
Show Advanced Options

Aesthetic & Inspiration

[What influenced your design? Is there a specific style, art movement, or natural phenomena? Include at least one example. Can be a still image, video, or music.]

I was inspired by the character designs from the game Night in the Woods. I wanted to create something that seemed fun, yet simple. I also thought it was really cute that the animals were given clothes, and I thought it would be funny to include that in mine as well.

Preview screenshot4 134561.thumb
Show Advanced Options

Process & Procedure

[Outline your approach to the project. What steps did you take to design, model, sketch, and prototype this projects? What ideas did you generate and how did you refine or reject them? How did you use cutting, etching, scoring? What challenges were encountered and how did you resolve them? Include photos of prototypes, redesigned sketches, design worksheets, and failed trails.]

When I first started laser cutting my files, I tried to use white acrylic instead of the plywood I was originally planning on. Unfortunately, I attempted a few times, and could not get it so that the features I wanted to stand out would show. Additionally, I found that it was harder for me to get the look I wanted with such sterile seeming material.

After moving on to the wood, I had issues with figuring out the settings I wanted to use on each element of my clock. For instance, I wasn't sure whether or not I wanted to score and etch the blush, eyes, etc. so I worked on different iterations through laser cutting. I ended up having to go back and edit my Illustrator files in order to create closed geometries (as features such as the bowtie on the cat were not engraving properly as an open geometry) as well as pass the file through the laser cut software multiple times. I started by engraving all of the parts using different colors on the laser cutter, and then going back with new commands for these colors to cut/score.

Img 7782.png.thumb
Show Advanced Options
Img 0457.jpg.thumb
Show Advanced Options
Img 7781.png.thumb
Show Advanced Options
Img 0971.jpg.thumb
Show Advanced Options
Two Renderings

[Two renderings on complete project styled with finished background, lighting, positioning, reflection]

Catconnected7 v3.thumb
Show Advanced Options
Catconnected7 v2.thumb
Show Advanced Options
Five semi-pro photos

[Five semi-professional photos with care given to context, lighting, staging, scene]

Img 6801 copy.thumb
Show Advanced Options
Img 2064 copy.thumb
Show Advanced Options
Img 2013.jpg.thumb
Show Advanced Options
Img 8460.jpg.thumb
Show Advanced Options
Img 4471.jpg.thumb
Show Advanced Options
Reflection

[Reflect on the process of making this project. What did you learn? What would you do differently?]

What I found to be the hardest part of this project was utilizing both Fusion 360 and Illustrator in order to create the designs from this project. I had started creating the main bases in Fusion 360 an transferring the sketches as .dxf files into Illustrator to add details. Unfortunately, getting these Illustrator files back into Fusion 360 in order to create the renderings was difficult, due to all of my open geometries. I had to go back and alter the sketch in order to make them closed extrusions.

I think that for next time, I would probably be more careful with creating closed geometries in both Fusion 360 and Illustrator, as it caused me difficulty in both rendering and actually cutting (as I had issues with the laser not recognizing some of my engraving commands at first).

Drop files here or click to select

You can upload files of up to 20MB using this form.