Back to Parent

Outcome


Why?

Having the ability to rapidly create tabbed acrylic assemblies has proved really helpful for me in a variety of cases! I've been able to rapidly design and create robots, rovers, sculptures, chairs, a dress, and a variety of other artifacts - all without using a screw.

Wckm 183 preview copy.thumb
Show Advanced Options

Measuring Kerf

When designing any laser cut part or assembly, it's important to consider kerf! 

Pastedimage0.thumb
Show Advanced Options

Non-zero kerf thicknesses (the reality of laser cutting) mean that holes have a larger diameter and edges are further inside than you've designed in CAD or Illustrator.

Kerf charts exist! Many manufacturers will provide kerf values for the materials they create. 

However, kerf can vary from cutter to cutter and material batch to material batch; it depends on real material thicknesses, how defocused the laser is, and how precise the laser beam is. The best thing to do is test a small sample of the material yourself (using something simple like a 1" x 1" square) and measure it. Take several measurements and average them to get a very good, local, immediate approximation of the kerf. 

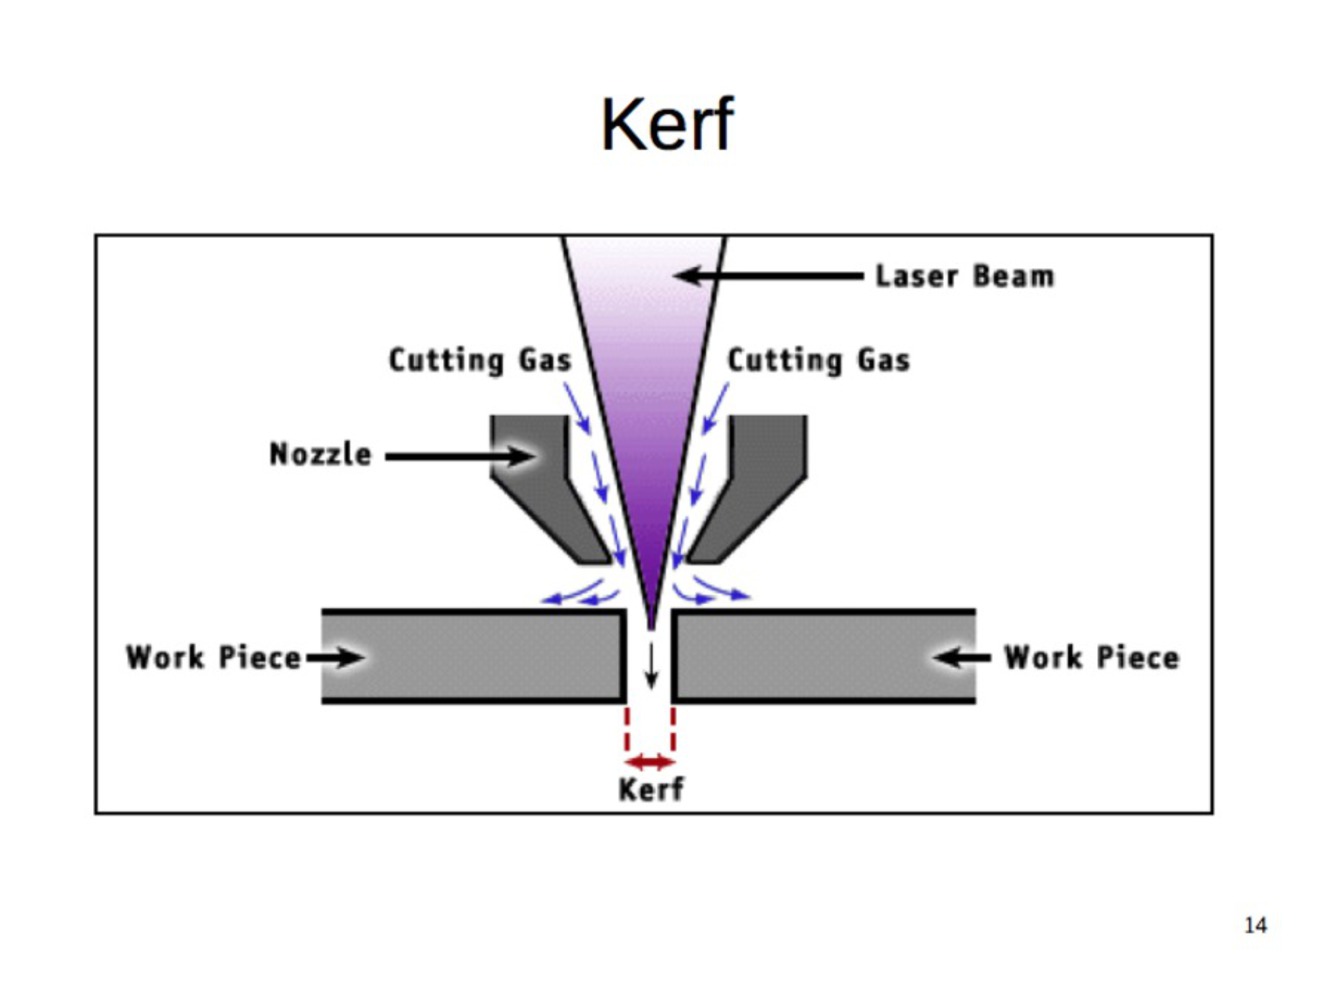
Designing Around Kerf

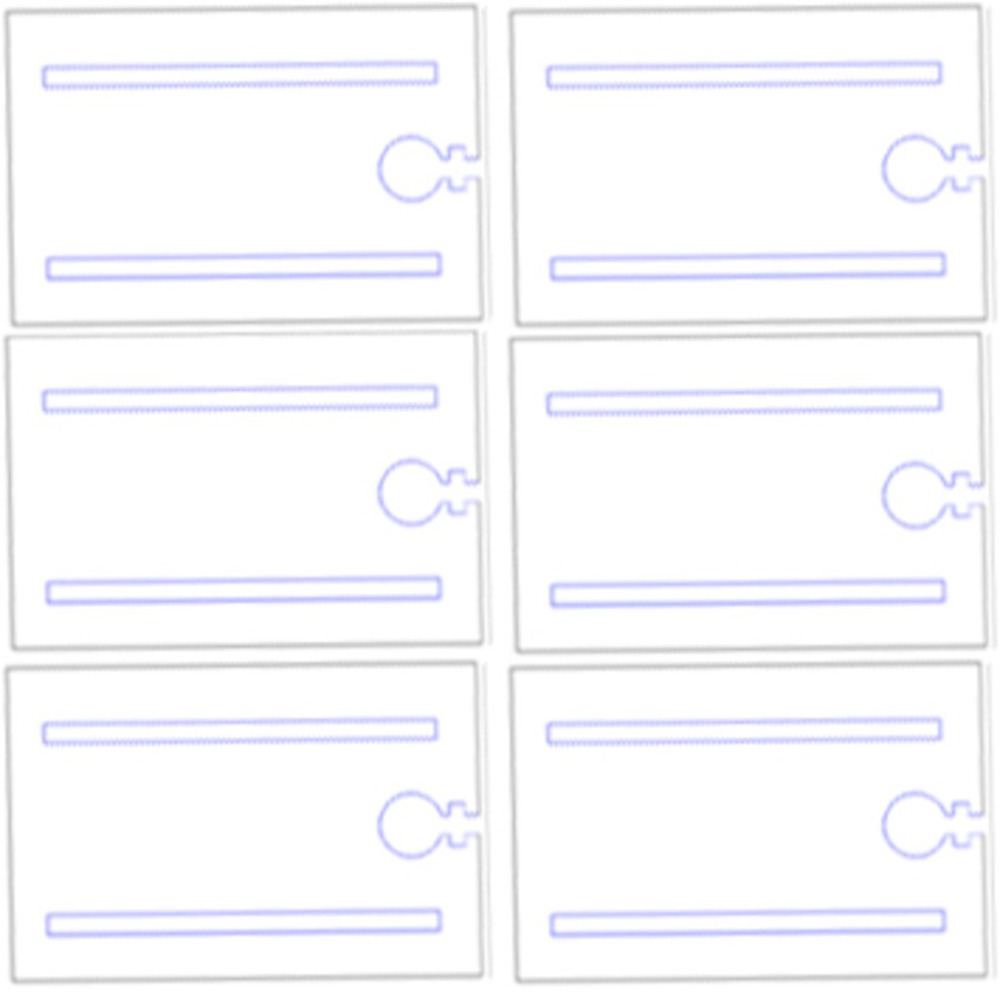
Now that you know the kerf on your material, you need to know how to design around it! I like to design all of my parts as if kerf doesn't exist. This assumption lets me design any interlocking or tabbing section parametrically since I can make tab holes the same size as the tab itself.  As you never know when or how many times your design or material might change, it's really advantageous to design as parametrically as possible. This might mean making tab hole widths equal to the width of other parts or assuming a hole is the perfect size to correctly press fit a dowel.

Right before laser cutting, expand the outer surfaces of each part in the CAD software (Inflate in Maya & Rhino, Offset in SolidWorks) by the kerf value that you measured earlier. The diagram below illustrates how this might look. 

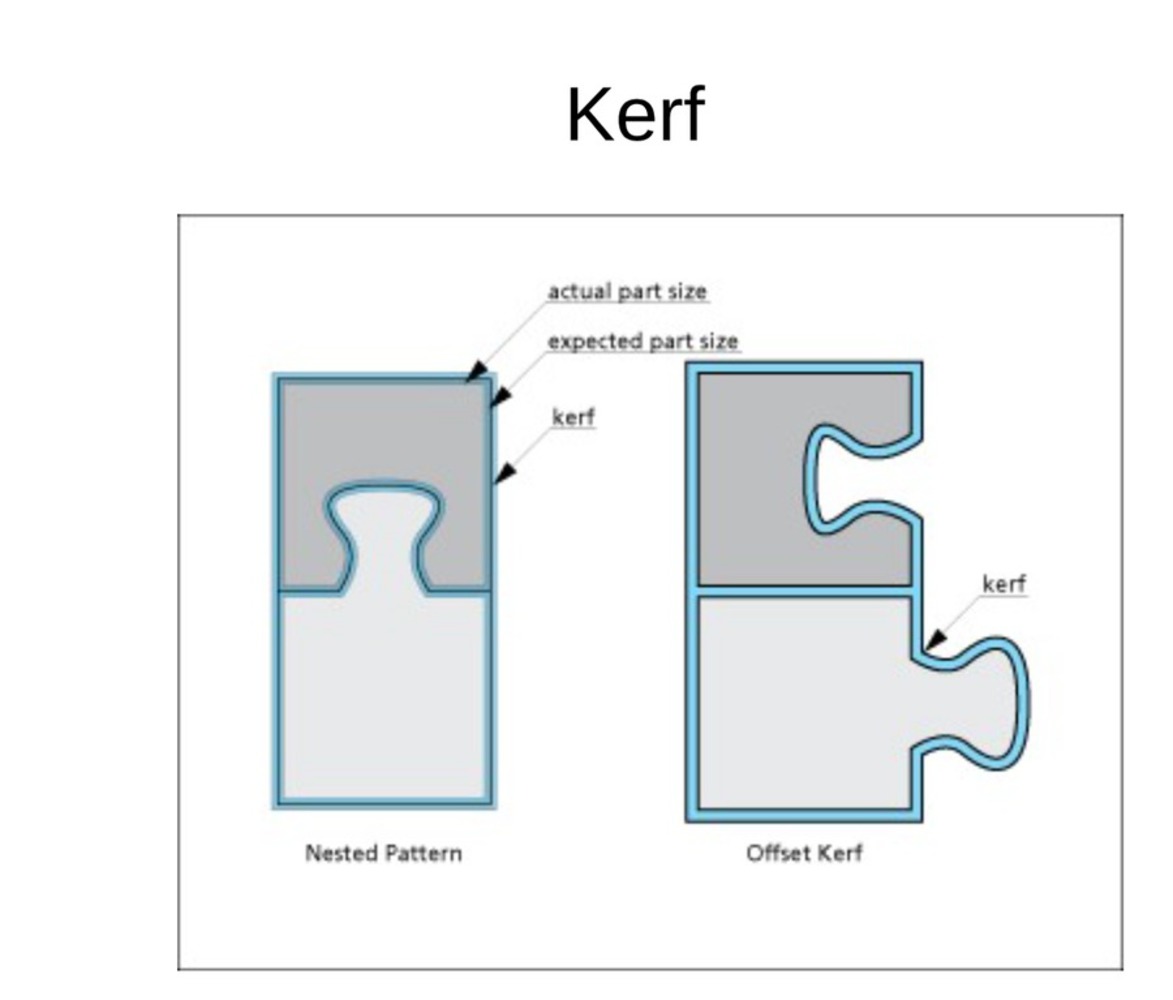
If you're using a compressible material (like wood, hardboard, or cardboard), the average of the kerf values you measured should work well. If you're using something more rigid or likely to crack (like acrylic) and having pieces interlock or tab into one another, it might be beneficial to increase the outer surface by a value a little less than kerf. 

This means your parts in the real world may end up a little smaller than in your design. This can be good! If you overestimated kerf, some of the widths or heights of your parts may have ended up too large (or the holes may have been too small). Even if you didn't overestimate kerf, the variability in the laser cutter could still cause these errors. If the assembly ends up having any interaction between two pieces that is too tight, the materials can crack.

Screen shot 2018 04 30 at 6.00.21 pm.thumb
Show Advanced Options

Laying out Parts

  • Be thoughtful about how you use material! Pieces break. Designs change. Laser cutters fail. Just because you don't think you need more material now doesn't mean you won't later. Save money. Save time. Help the environment. Help others (or yourself). 


Layout.thumb
Show Advanced Options
Pastedimage0 %281%29.thumb
Show Advanced Options
Pastedimage0 %282%29.thumb
Show Advanced Options

Also, be sure to consider kerf when you lay out parts. If, for example, you were to cut a set of pieces that are meant to interlock, you might lay them out in this orientation:

Pastedimage0 %283%29.thumb
Show Advanced Options

You feel proud of how efficiently you've laid out your parts. You're pleased with how little material you're wasting. However, when you cut your pieces out, they're all substantially smaller than expected. This is because you didn't consider kerf in your layout, so all of your parts are smaller than expected and several are even smaller than if you had cut them individually as their edges were hit twice by the laser.

Img 0452.thumb
Show Advanced Options

Burn sides

First of all, listen to this song by R. L. Burnside: https://www.youtube.com/watch?v=XXvf12Bi6v8&ab_channel=AlanLomaxArchive 

Second of all, the face material pointing downwards (the side the material is sitting on) may get some scorch marks! Think carefully about which side (or sides) of your material will be visible before picking the orientation of the cut file. This can prevent your project from looking dirty and can save you time and material.

Weddingcake2.thumb
Show Advanced Options

Conclusion

Laser cutting can be a really useful tool! 

I hope you've learned some interesting tricks that will let you feel more comfortable building in the future. Feel free to reach out to me and check out my website below:

Show Advanced Options
Drop files here or click to select

You can upload files of up to 20MB using this form.