Back to Parent

Outcome


Process

I used the double diamond methodology to come up with the final design. First I went through the discovery phase. Since this was a personal project to improve the drinking experience of the drink that I drink every day, I started by understanding what I drink, how I drink them and questioning why I did certain actions. Then, I started to go through the define phase where I worked on figuring out which problems to work on. The problem I decided to tackle was around the tea bag interaction. I started to develop different ideas to help keep the tea bag from falling in. I then realized that I could combine it with a place to put the tea afterward. The last step I took was to deliver the final tea bag holder which was created out of sheet acrylic. 

Process.thumb
Show Advanced Options

Discover Phase 

Since the goal of this project was to design the perfect accessory that is missing from my daily drink interaction, I decided to focus on drinking tea because that was the interaction that I felt that had the potential to be improved the most since there were the most steps and other objects integrated in the experience. 

As I reviewed my interaction with the tea bag, I realized that I actually disliked the experience associated with it. By really evaluating my interactions with the tea, I was able to find a few key areas that I thought were lacking 

Problems 

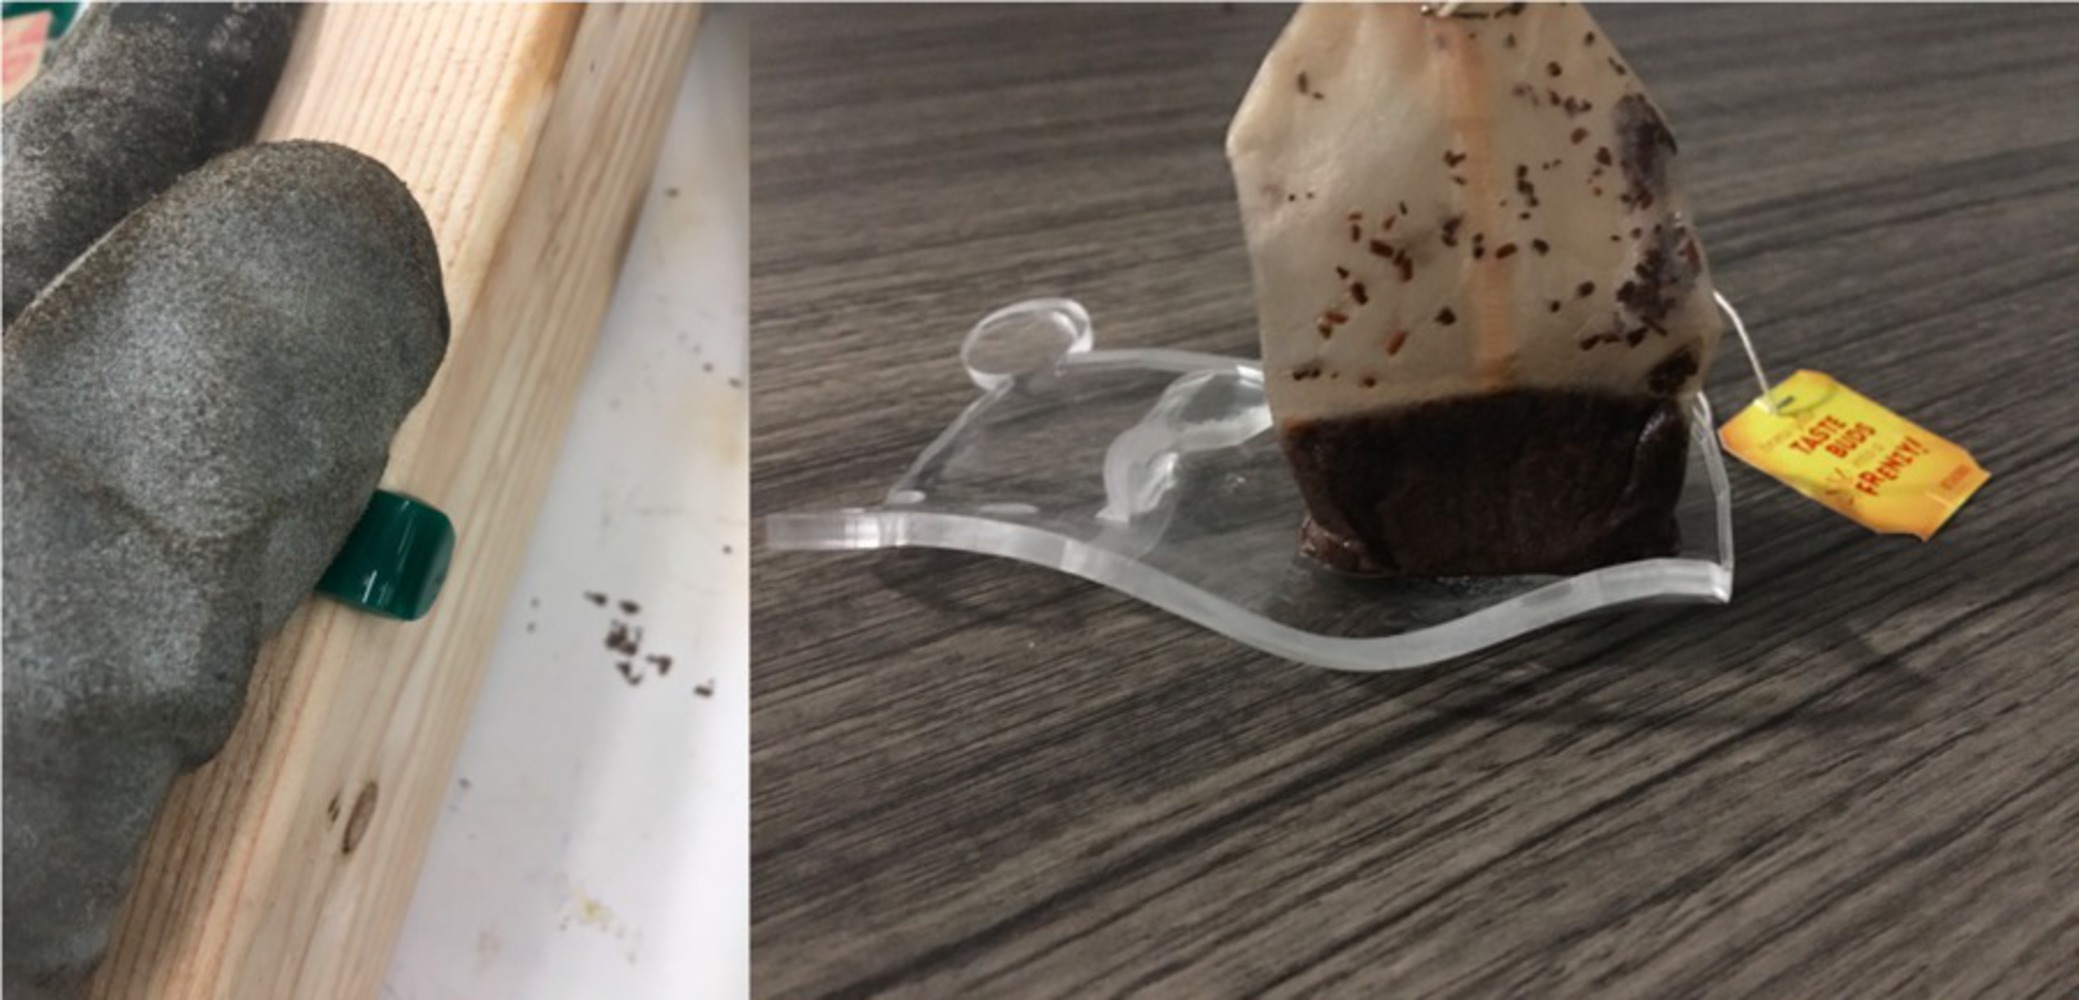
  • Tea would leave circles on the table and sometimes would get my paper wet 
  • Worried tea bag would fall in 
  • No way to chill drink quickly as I had no ice cubes 
  • There was no place to put my tea bag after I used it, so it was only good for one use
  • I would throw away the tea bag before I realized the drink was not strong enough


Idea Generation

  • Coasters
  • Ice Cube Tray
  • Storing The Tea
  • Tea Bag Holder
  • Tea Bag Coaster
  • Cup Holder For Hot Drinks
  • Cup To Make Plantation Iced Tea -- my favorite drink from back home in Hawaii 


Define Phase

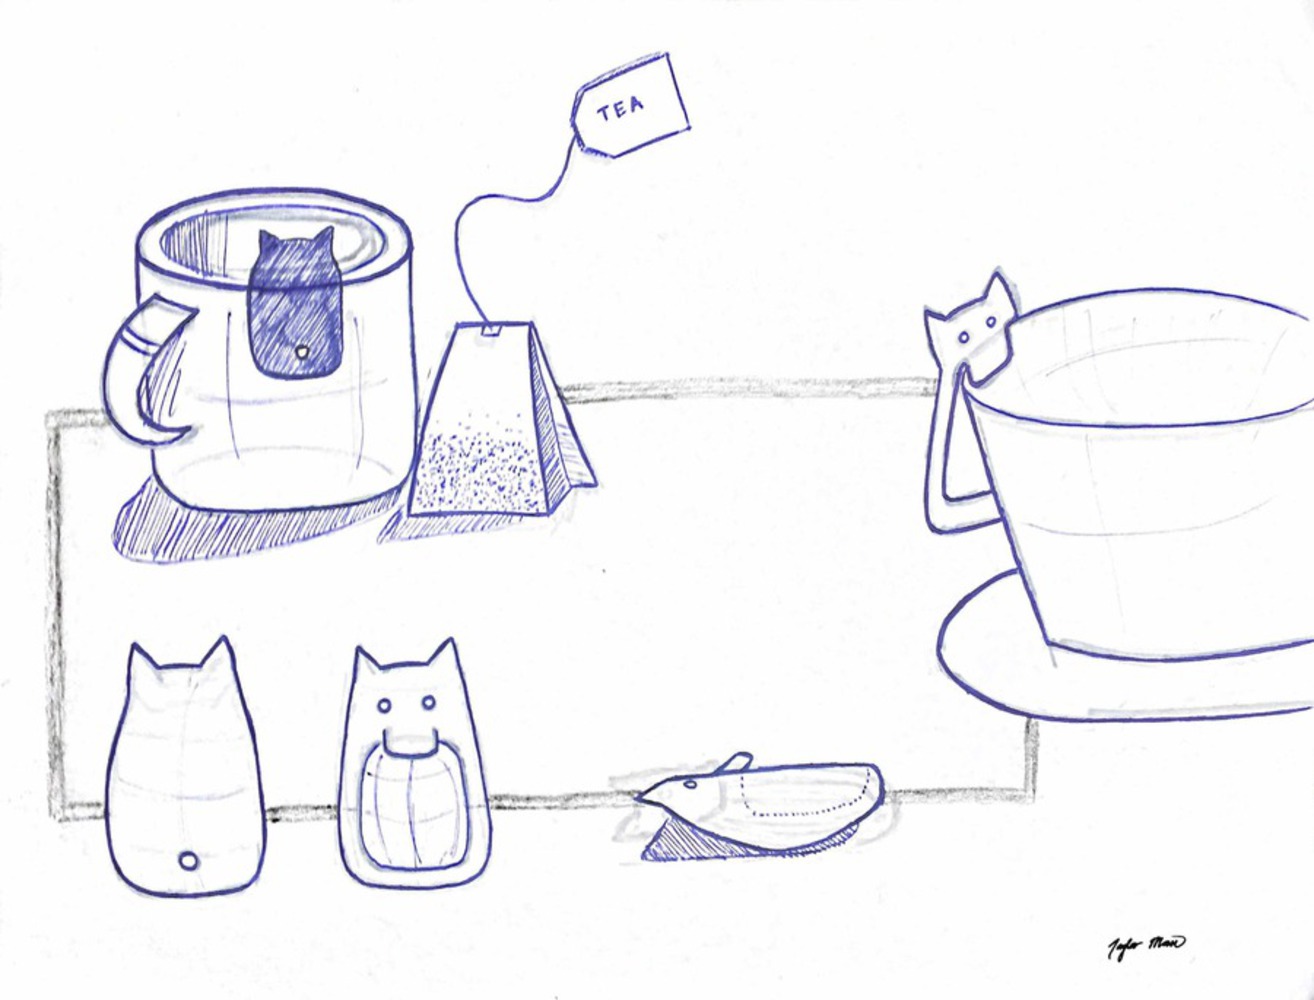
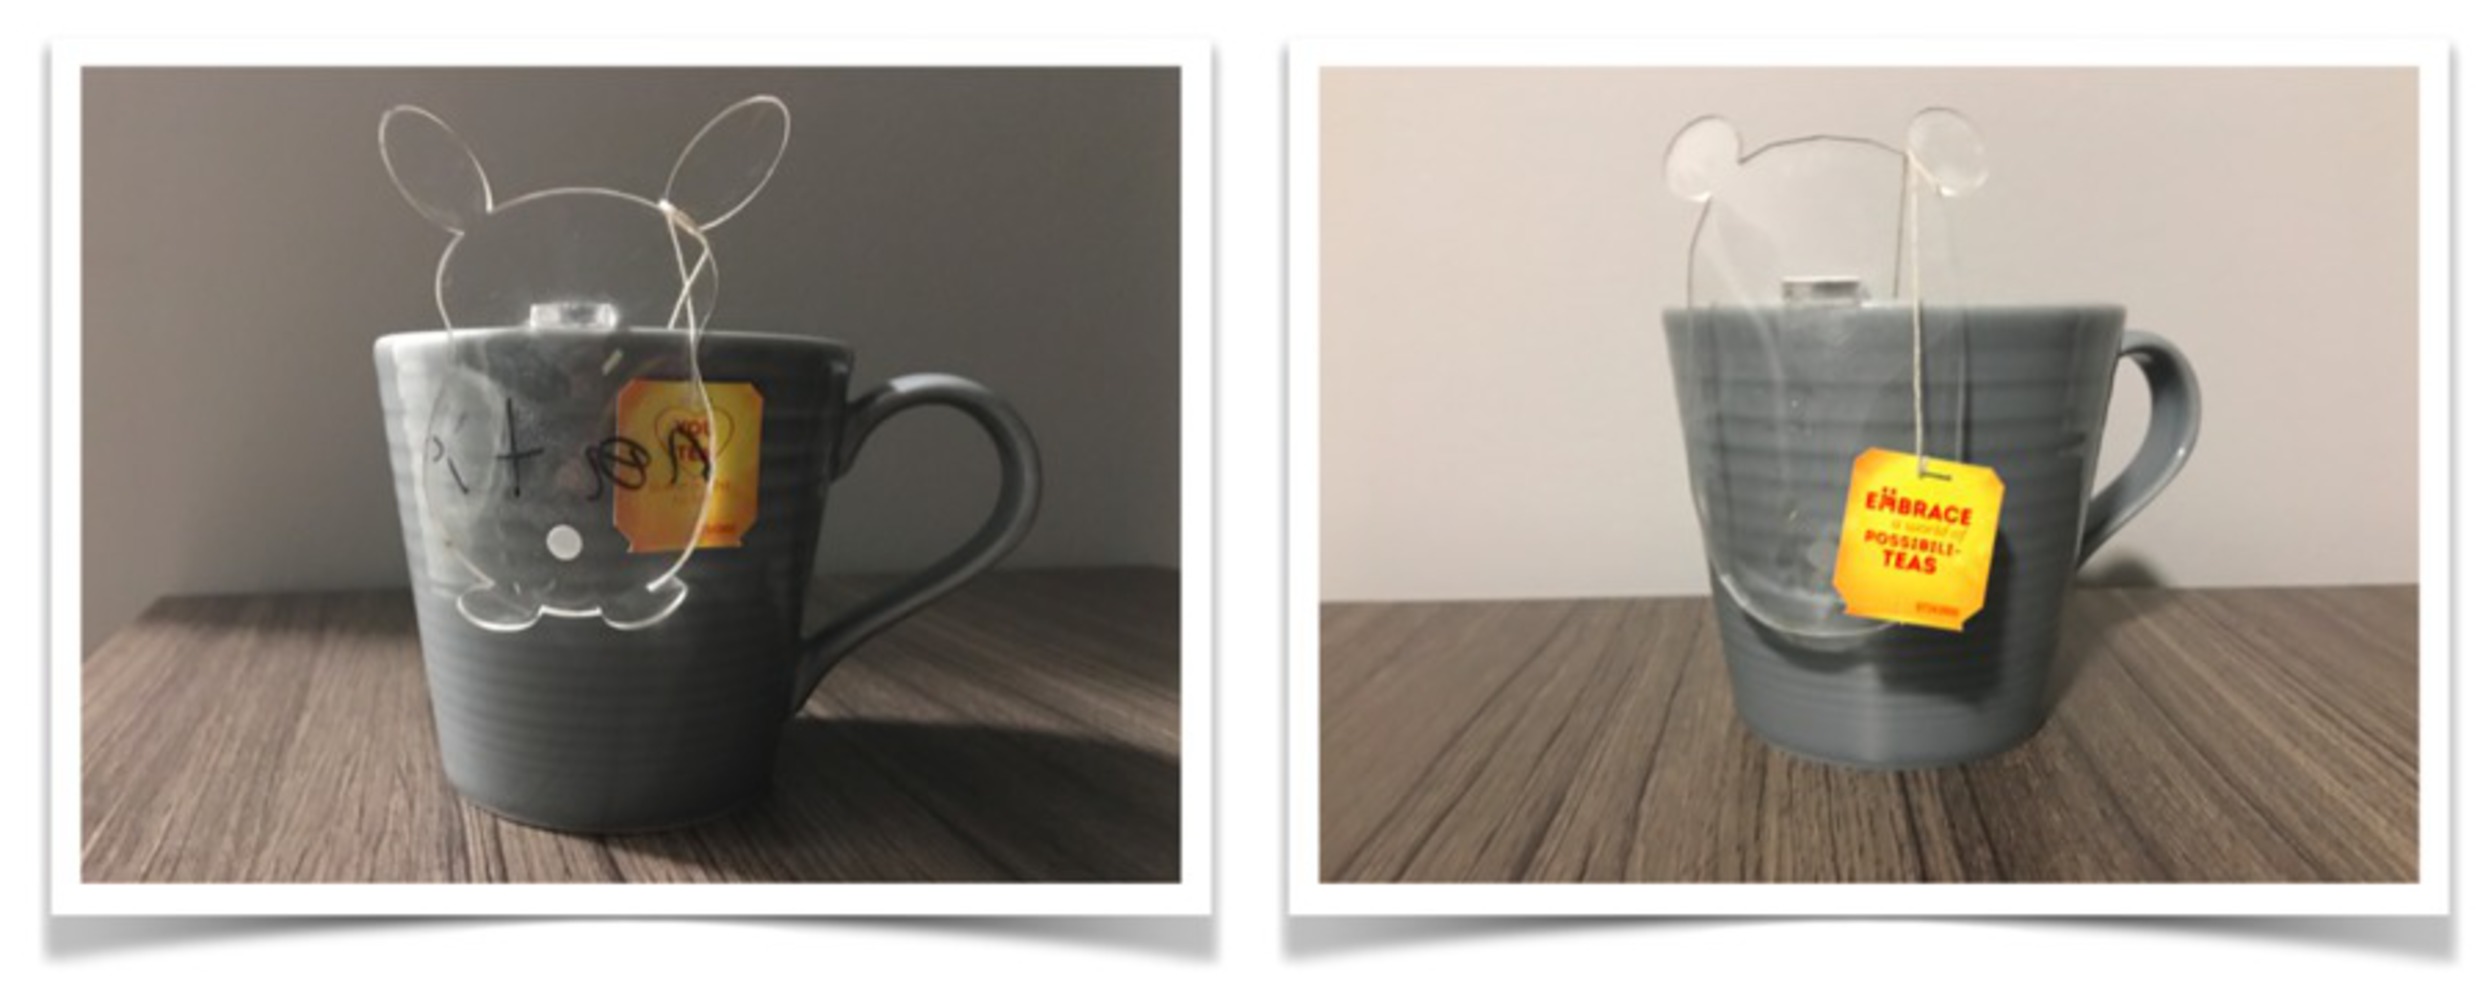
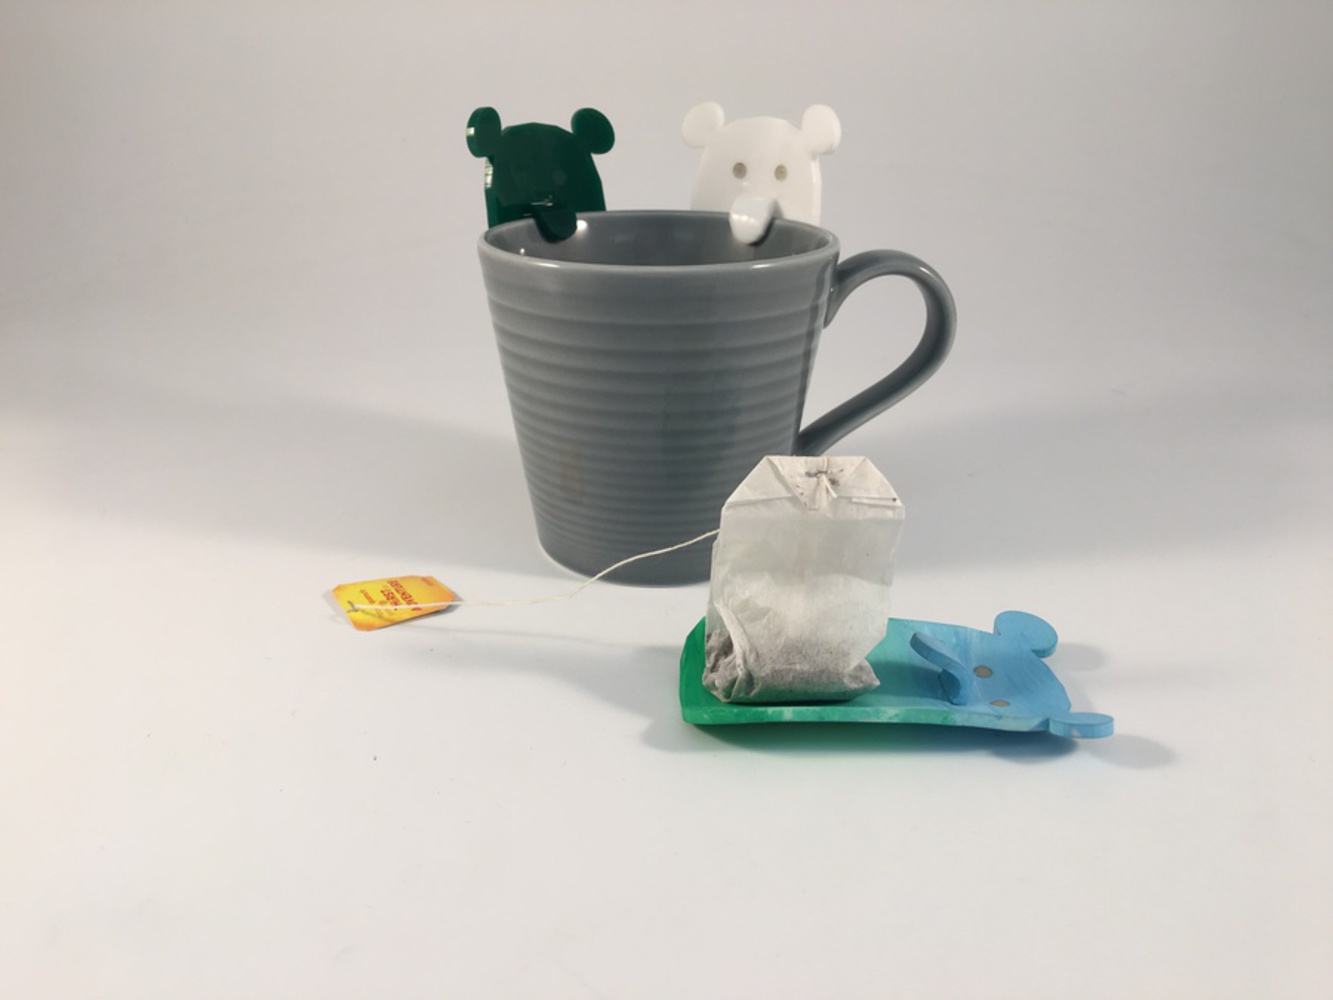
The problem that I saw that I had the most trouble with was the constant worry that I would drop my tea bag into the cup. I would carefully place the tea bag handle as far over the lip as possible. This was the main problem that I wanted to focus on so I ideated around this concept. 
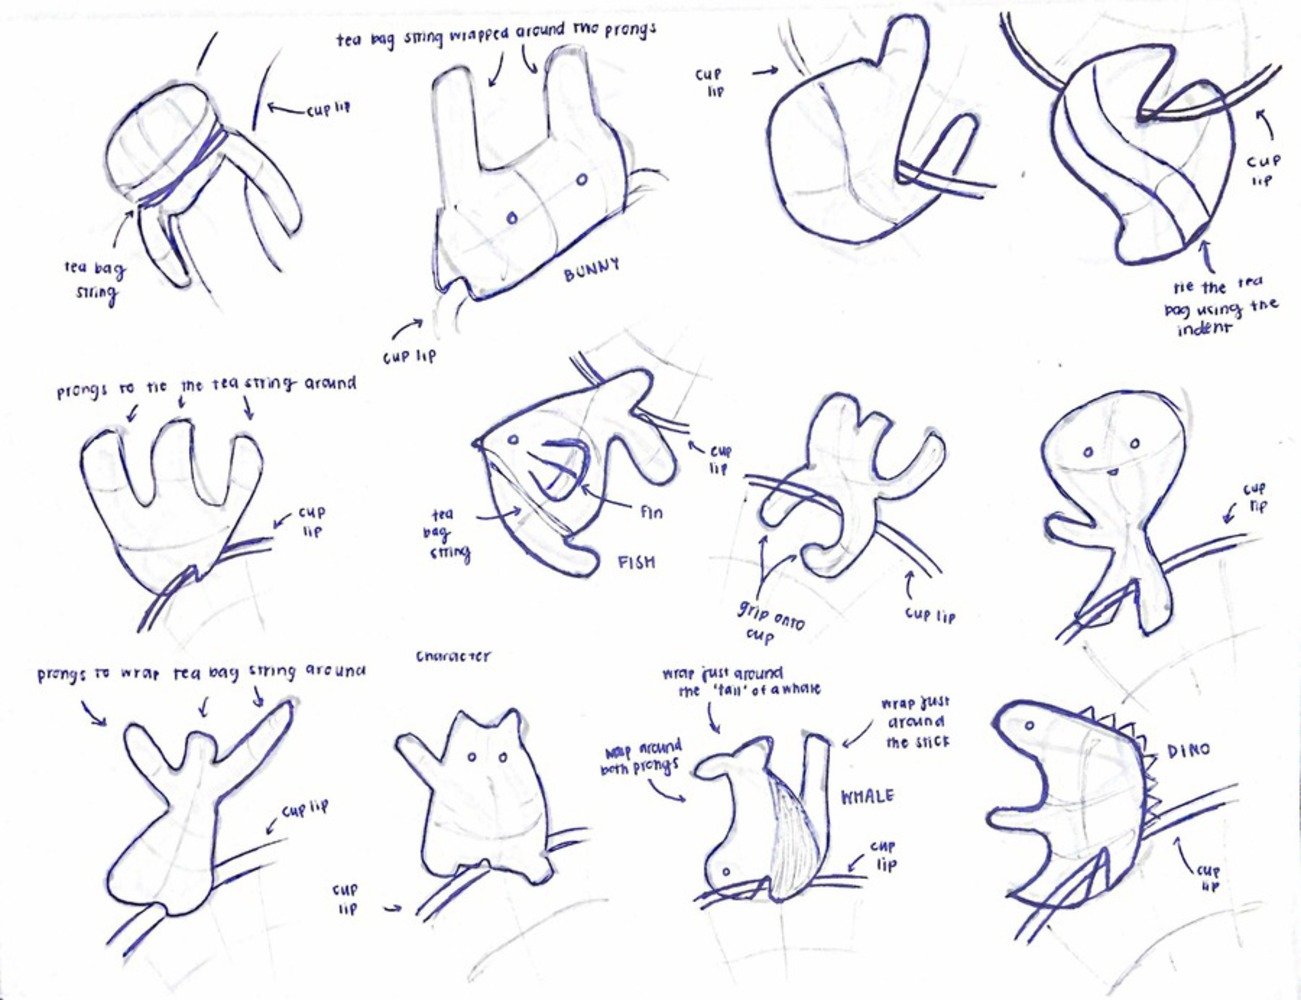

Develop Phase

I then began to start my process of ideating by starting with a few sketches of tea bag holders. I started with a light grey Copic marker. Since I was having trouble generating ideas, I created random lines and strokes to help spark my creativity. Then I went over the outline of the shape with a darker grey Copic marker. This helped me see shapes and further define the object. I then took a Bic ballpoint pen and added fine details to the sketches. 

Initital sketch tea bag holders.thumb
Show Advanced Options

Then, I started to define the idea further as I realized I wanted to focus on creating a cute animal tea bag holder. I realized that this was the interaction that I wanted to have. Then, I started to realize that I would be able to combine the idea of a tea bag holder with the idea of a tea bag coaster. By laying the animal on their side, I would be able to create a small dish for the tea bag to rest in after it was used. This would allow for tea bag reuse for a whole new cup of tea, or even allowing users to make the tea strong as they drank it. 

Final idea sketch.thumb
Show Advanced Options

Deliver Phase 

I then bought the acrylic and started working on the prototype. I first started designing the tea bag holder in Solidworks. However, I made a rough sketch so the bear did not turn out as cute (see rightmost form below).  I redid the shape and tested the ear size that would look the best aesthetically as well as work the best functionally so the string could wrap around the ears (see middle form below). 

I also created a mood board to help me understand the overall feeling that I was trying to evoke. I thought that there should be a level of sophistication in this design as it should not look like something a child would use. The overall feel for the object was a sense of sophistication mixed with fun. 

Cardboard prototype.jpg.thumb
Show Advanced Options
Moodboard.thumb
Show Advanced Options

I then started testing with the acrylic once I was happy with the overall shape. I created prototypes to help me test and learn which methods are best. 

Learned

  • Overheating the acrylic causes bubbles to form, leaving that texture within the form 
  • Using a nonsmooth surface to curve the acrylic leaves extra dents and bumps 
  • After heating and bend the acrylic, the tab would not fit in the slot because the form changed
  • Acrylic glue leaves a mark after it dries so I used Gorilla Glue instead 
  • Bending using a spoon produced inconsistent results and caused strange curves in the sides of the form (see rightmost image below)
  • The best way to create the form I wanted was to bend it by hand into just a simple half-moon shape that was consistent throughout the entire form. 

Prototyping process.thumb
Show Advanced Options
Prototype context shots.thumb
Show Advanced Options
Final prototype.jpg.thumb
Show Advanced Options

Then I created the final design using white and green acrylic. The Gorilla Glue worked great to bond the tab to the main form. I prototyped and tested the various interactions. I had fun making tea and testing out the interactions and refining them. Through testing, I realized that the bear was not long enough and actually extended the length. I also reduced the tab length to create a smaller and more elegant design. 


Focus on Craft

I created numerous prototypes in order to refine my level of craft. After experimenting with the different glue and keeping the paper on the acrylic, I was able to get a clean finish. I made sure to not put excess glue and only put it on the surfaces that were in contact to hide the fact that I used glue. I prevented the bubbling by timing how long I would heat up each part: 30 seconds for the body and 20 for the tab. I also added additional features such as the eyes and tail in order to make the animal feel more friendly. 

The interaction between the cup, the tea bag, and the holder was essential to the design. I played with the ratios of the body and the tabs in order to perfect the interaction. I needed to make sure there was enough space on the body for the tea bag. If the tab was too short, it was not able to hold onto the cup and if the tab is too long, it interferes with the space needed for the tea bag when it rests on the table. 

Show Advanced Options

Bonus -- Painted Acrylic 

I actually painted the ombre one using acrylic paint blending the green, blue and white acrylic paints. In order to paint this design, I used various techniques to do this. I first laser cut the eyes and painted them grey using the acrylic paint and wiping off the excess with a paper towel. Then, I put blue tape on top of the grey eyes and laser cut the eyes and removed the area around the eyes. This allowed me to cover just the eyes with blue tape. After, I laser engraved everything except for the eyes of the bear. This gave the acrylic texture which allowed me to then paint the rest of the bear. I used a combination of green, white and blue paint to create the ombre effect. I then repeated the process on the other side of the bear this time covering the tail.   

Drop files here or click to select

You can upload files of up to 20MB using this form.