Back to Parent

Outcome


Preface

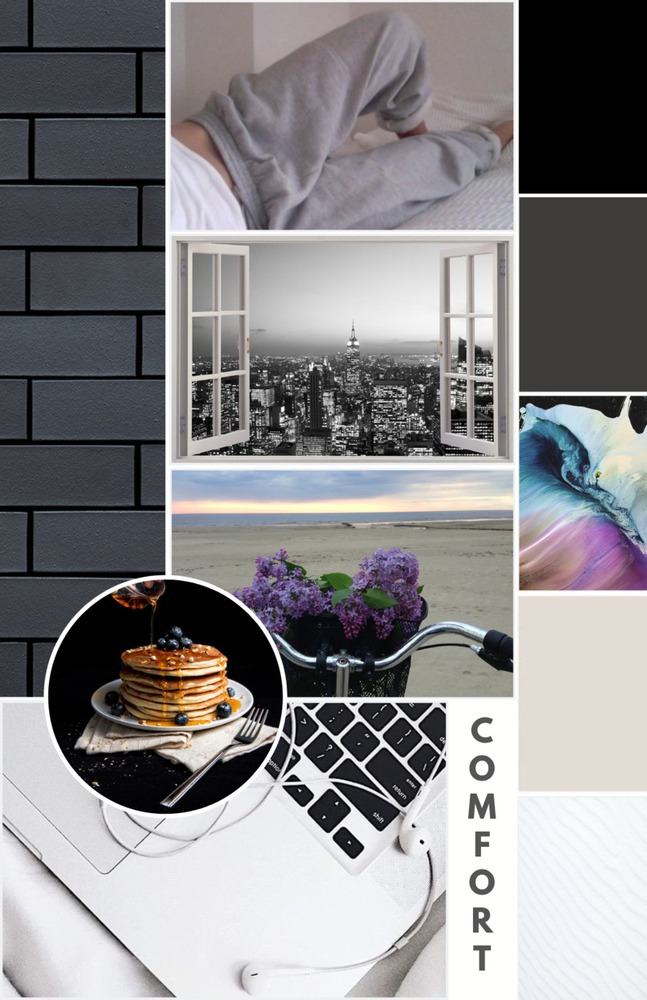
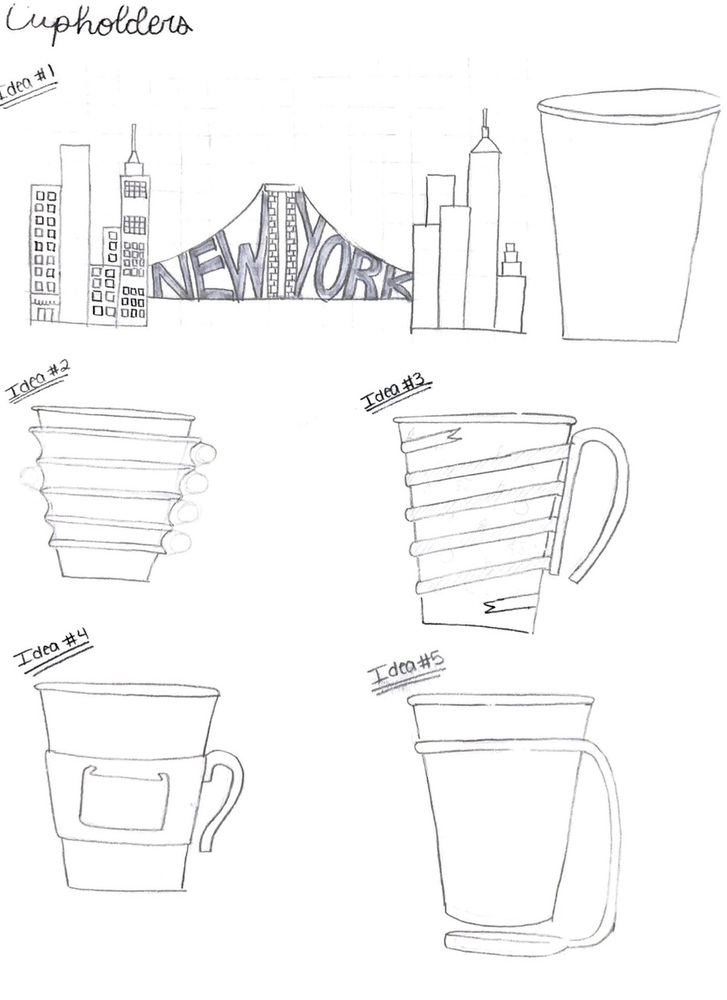
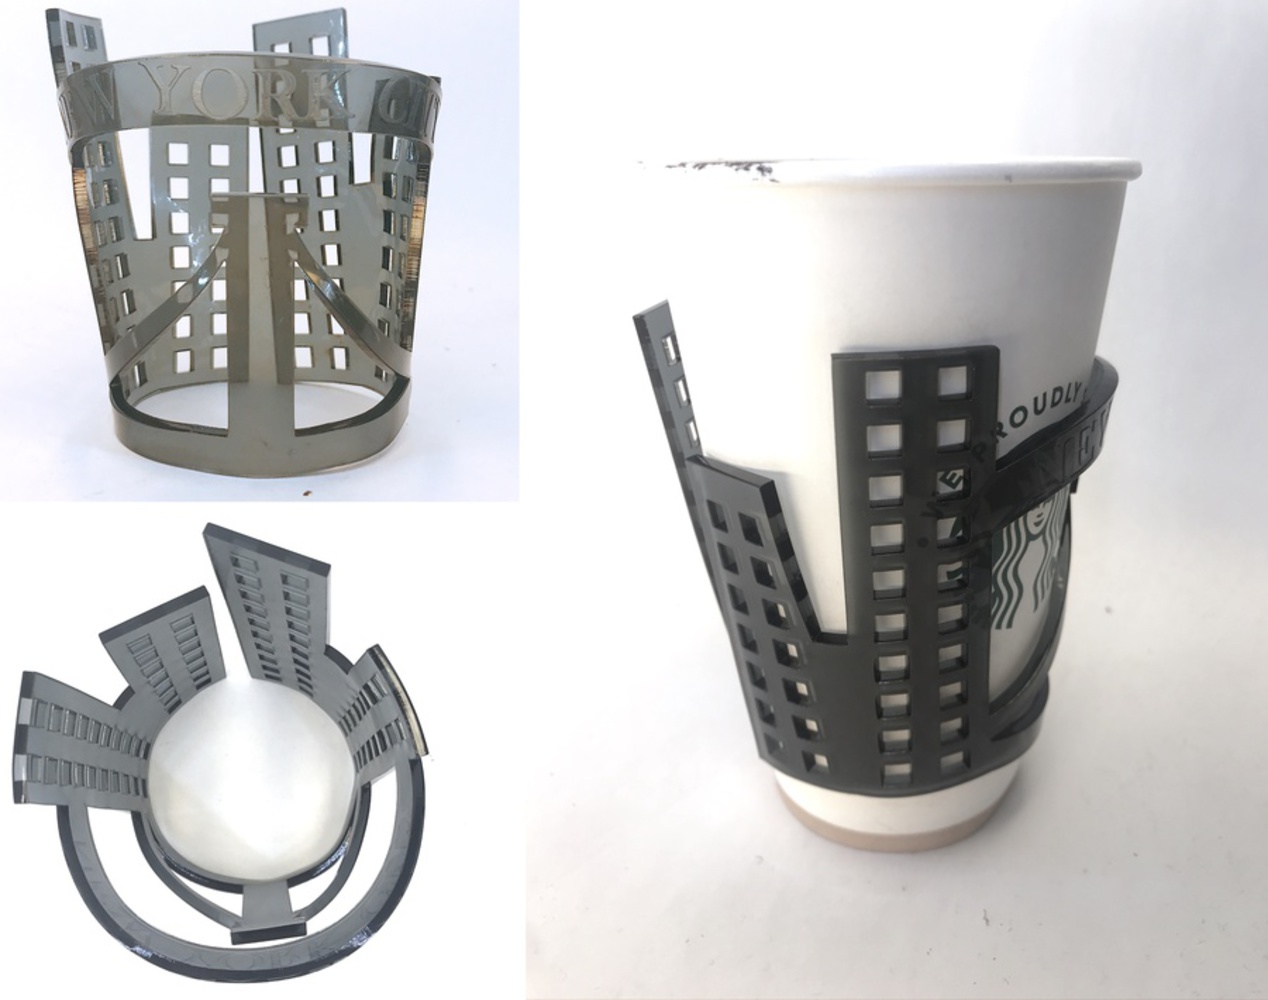
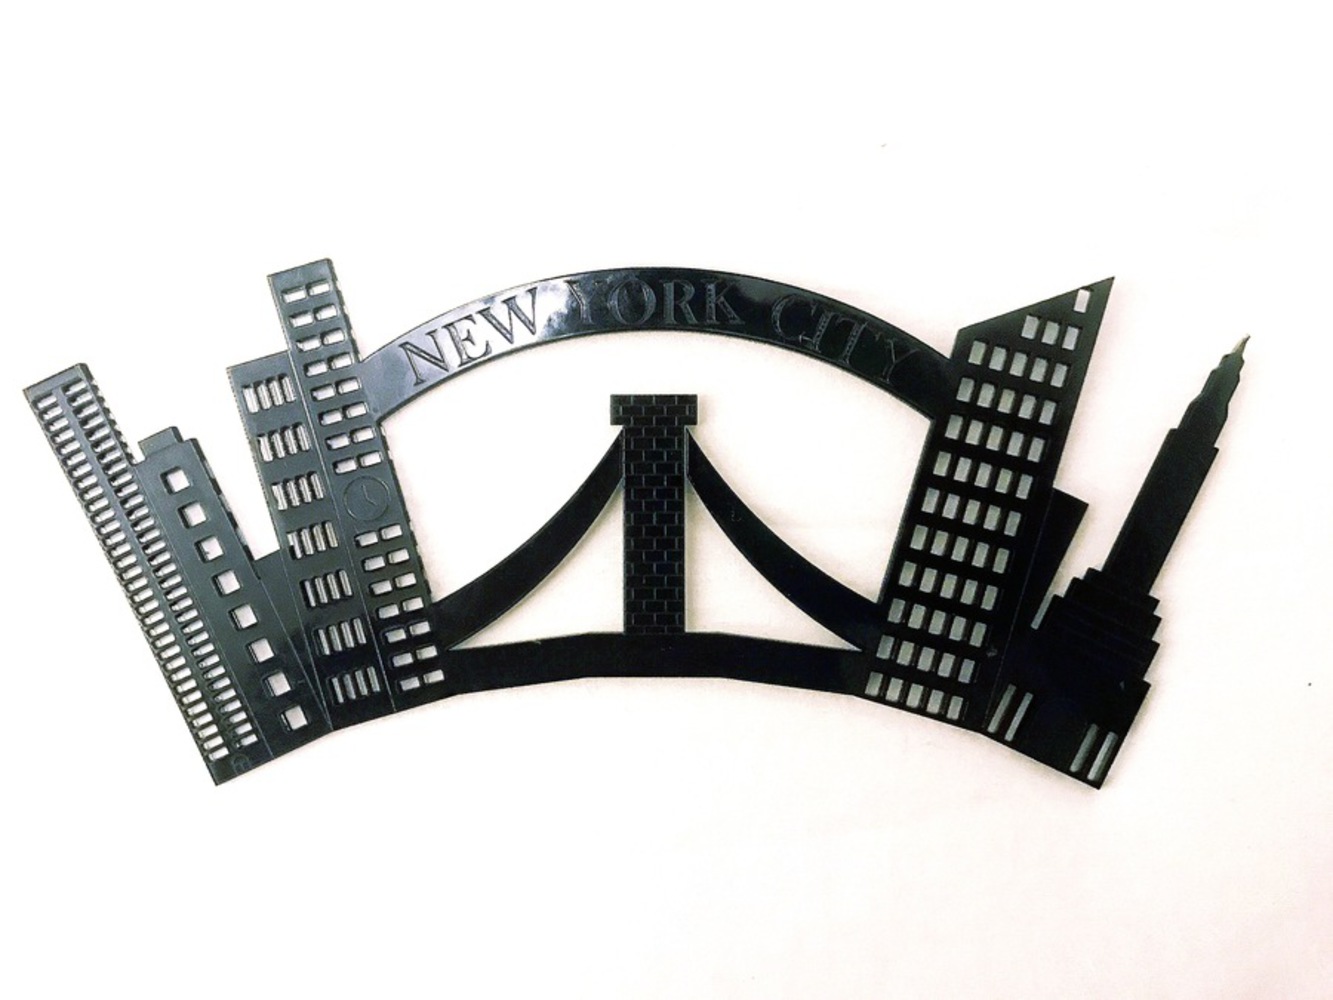
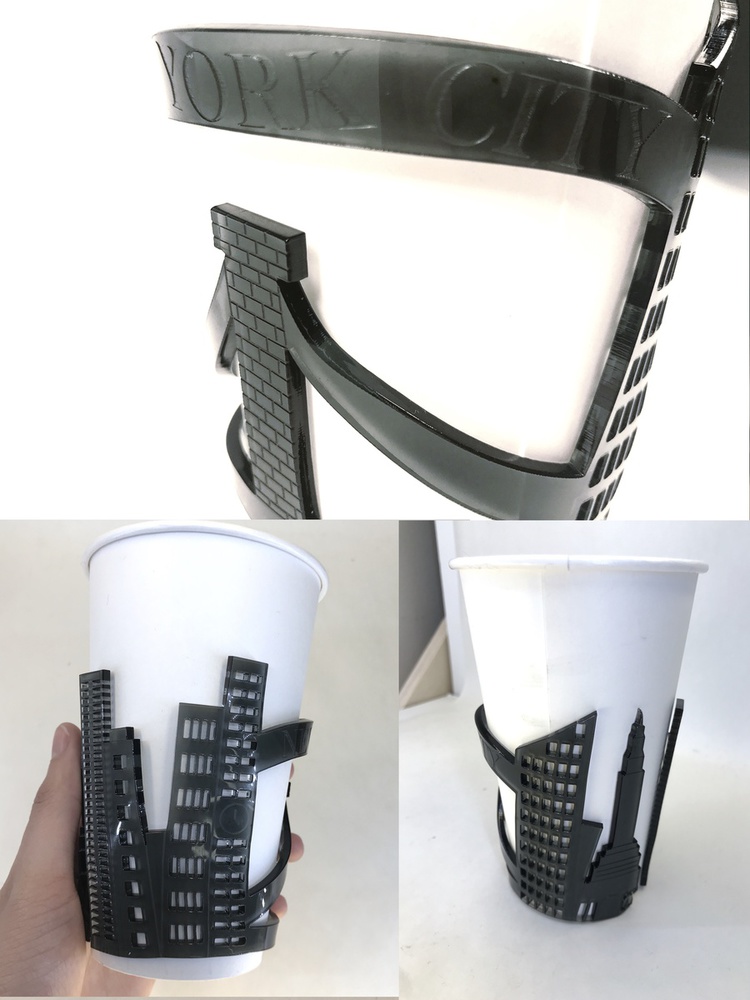
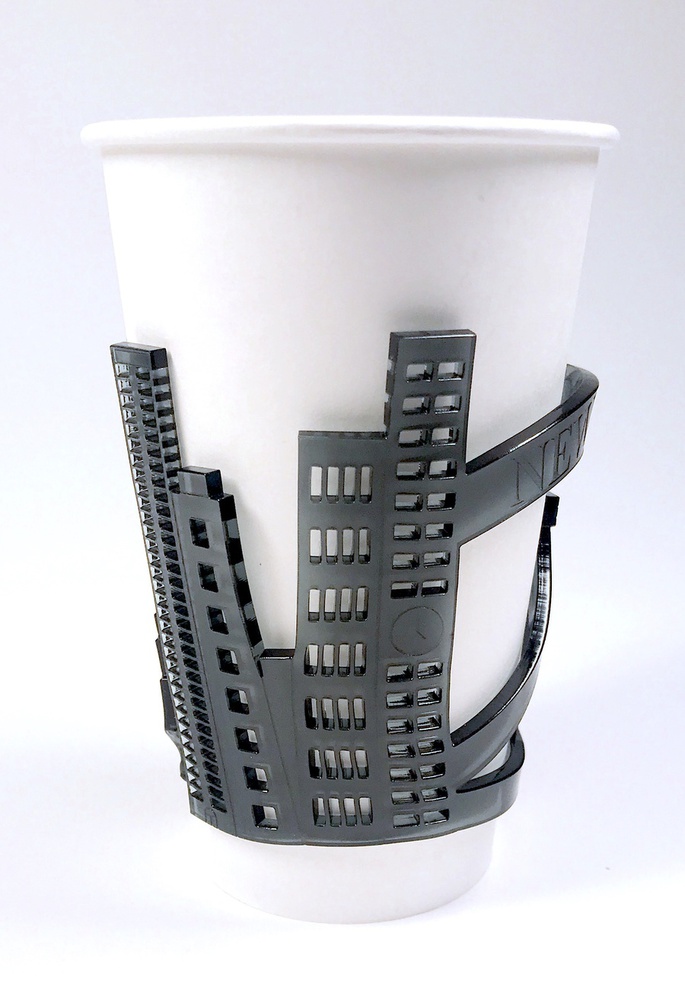
Although most adults start their day off with a hot cup of coffee, I've never gotten hooked on caffeine. I decided to pivot away from a functional cupholder idea to a more decorative design that holds meaning to me. After being away from New York for the last three years I wanted to create something that could be a little taste of home away from home. In order to generate some ideas for the portions of my home experience that I wanted to incorporate, I designed a mood board detailing what makes me feel cozy and at home.

Cup mood board.thumb
Show Advanced Options

Idea Generation

Three features from my mood board that I wanted to emphasize in my design:

  1. NYC skyline
  2. Sleek black brick paneling
  3. COMFORT

In my thought process, nothing would make a better statement of New York than the skyline with a view of the Brooklyn Bridge. I wanted to keep the tones simple. I would only used black or white acrylic because I didn't want the color to take away from the raster detailing of the skyline. Brick patterning would become essential in the depicting the bridge. Lastly, I wanted the sleeve to have a good grip on all cups. I wanted there to be some flex in the acrylic, so that it could fit comfortably on an assortment of cups. Below are my initial sketches after receiving the cupholder prompt. The skyline sleeve is drawn under Idea #1.

Cup sketches.thumb
Show Advanced Options

Nearly all of my ideas would involve heat formation, an unfamiliar process for me. I was set on fabricating the skyline sleeve because of its personal meaning, however, I wanted to explore if there were other methods to create the piece.

Drafting Fabrication Methods

I thought of two methods to assemble the sleeve. 

Method 1 involved cutting the buildings individually and assembling the pieces together in an octagon formation using glue. The length of the octagon sides would be dependent on the diameter of the cup base. Then, I could determine the length using simple algebra. I decided against this method because the buildings would lie slanted as a result of trying to form a point of contact between buildings for the glue. This would bring about unstable connections between the buildings, as well. Additionally, using glue introduces a number of issues with ensuring that the adhesive is not visible to the eye to achieve elegance

Method 2 involved cutting the buildings on to one sheet and heat forming around a mold. Since the diameter is not the same along the height of the cup, I utilized the octagon concept from Method 1 to make manipulating the acrylic easier and less distorted.

Cup fabrication.thumb
Show Advanced Options

Prototyping Phase

When designing the CAD model of the design, I started off with simple rectangular shape for the buildings. The purpose of my initial cardboard prototype was to see the layout on the cup. Was the design too long? Too short? Would the lettering inside the bridge be noticeable?

Cup outline.jpg.thumb
Show Advanced Options
Cup cardboard.jpg.thumb
Show Advanced Options

The cardboard was difficult to completely bend around the circumference of the base, but the prototype was good enough for me to make adjustments on my dimensions in SolidWorks. I realized that the central area of the design was pretty barren besides the bridge, so I decided to create a banner with New York City engraved on it. In the second CAD prototype I added windows as well to test how they would deform with the heat gun.

Cupwindows.jpg.thumb
Show Advanced Options

To accurately mold the acrylic to the cup, I started by clamping the cup to the table. Now that the cup was fixed, I heated up the center of the design first to form around the circumference with my hands. Once that cooled, I rotated the acrylic to mold the buildings located to the left of the bridge, leaving the edge untouched still. I repeated the same process with the buildings on the right side of the bridge. Lastly, I molded both ends simultaneously to the cup to ensure a snug fit.

Heat gun.jpg.thumb
Show Advanced Options
Cup windows.jpg.thumb
Show Advanced Options

Final Deliverable

Now that I had some experience using the heat gun, I made the final design with brick paneling and buildings that replicated the NYC skyline. The sleeve was snug and did flex so that it could slide on to various cup diameters. Some of the buildings had deformed from the heat gun, however, the result is still clean.

Img 5475.jpg.thumb
Show Advanced Options

Here are some up close shots of the detailing.

Cup details.jpg.thumb
Show Advanced Options
Cup.jpg.thumb
Show Advanced Options
Drop files here or click to select

You can upload files of up to 20MB using this form.