I wanted my project for the cup to have a
functional use. I appreciate things that can make life easier. I drew a few
sketches of ideas I had. Some included a stirrer and a handle of a “brass
knuckle” where your fingers go through. Eventually I decided on an idea for a
“pop- socket”. This pop socket is popular on phones to make it easier to grip,
so I went with that Idea.
Outcome
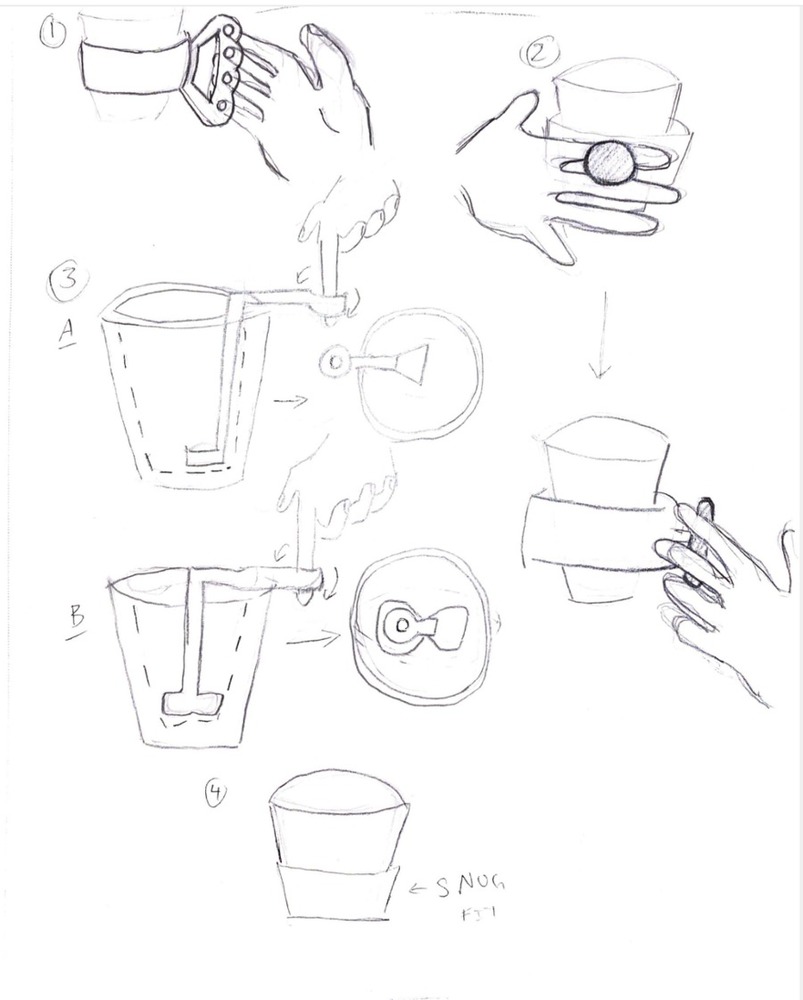
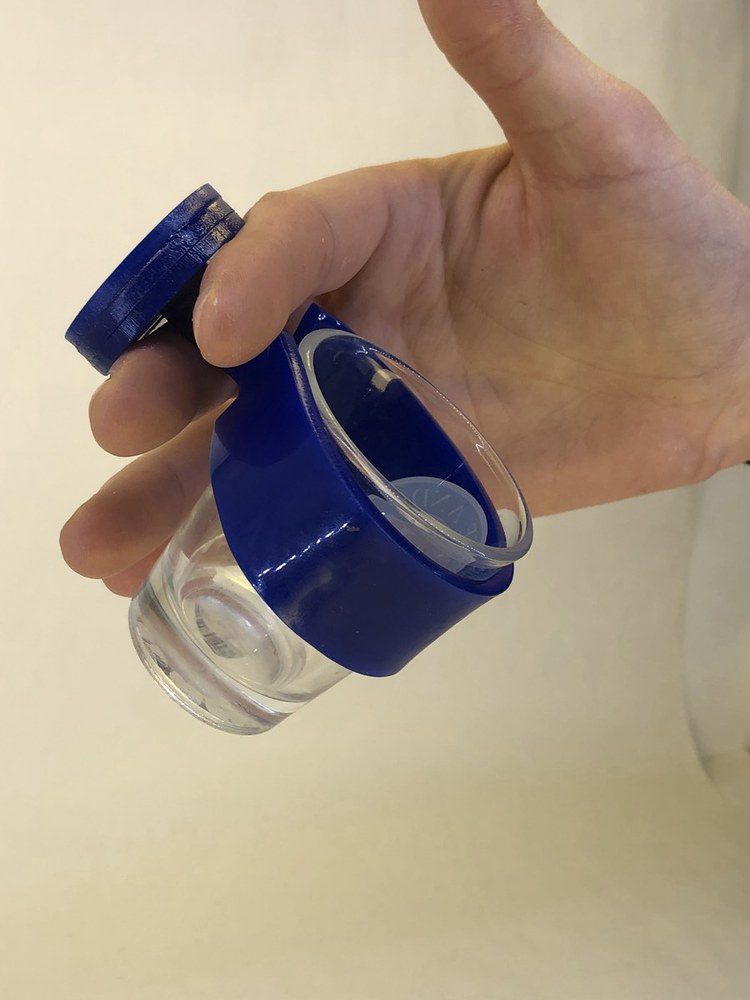
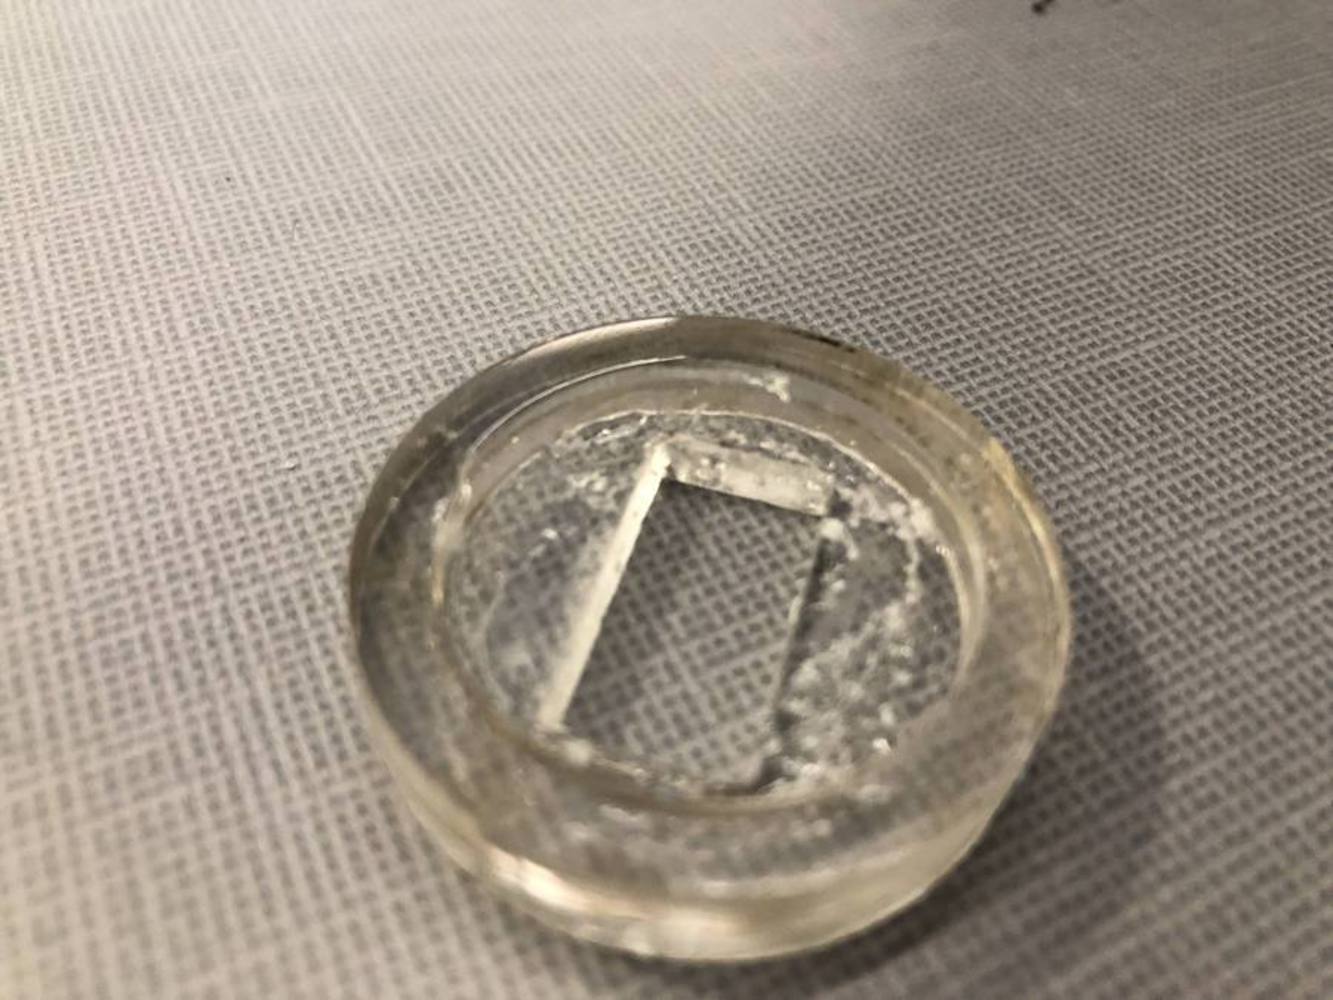
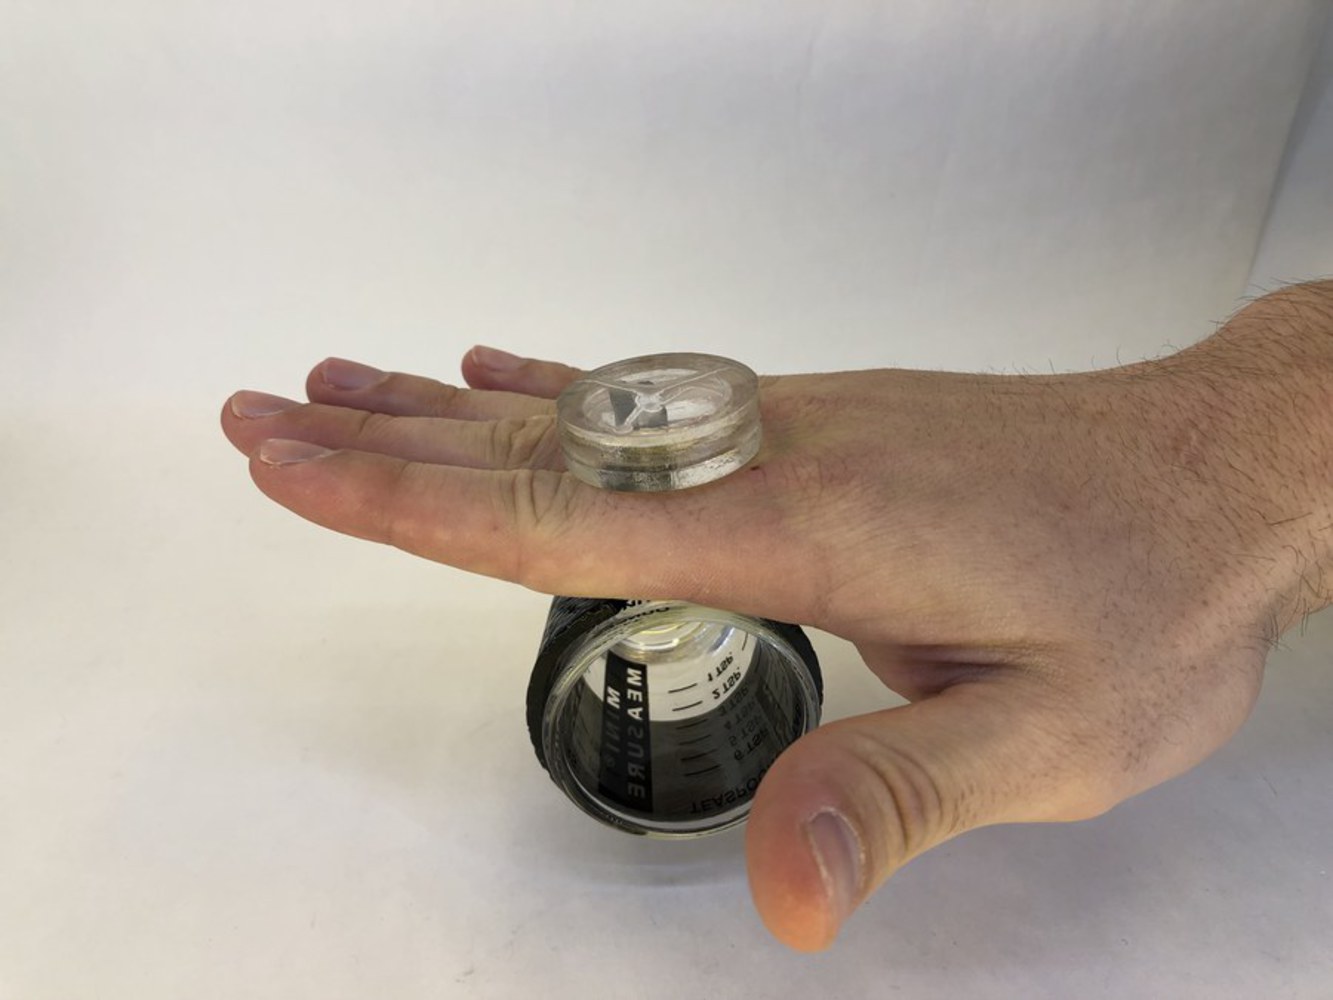
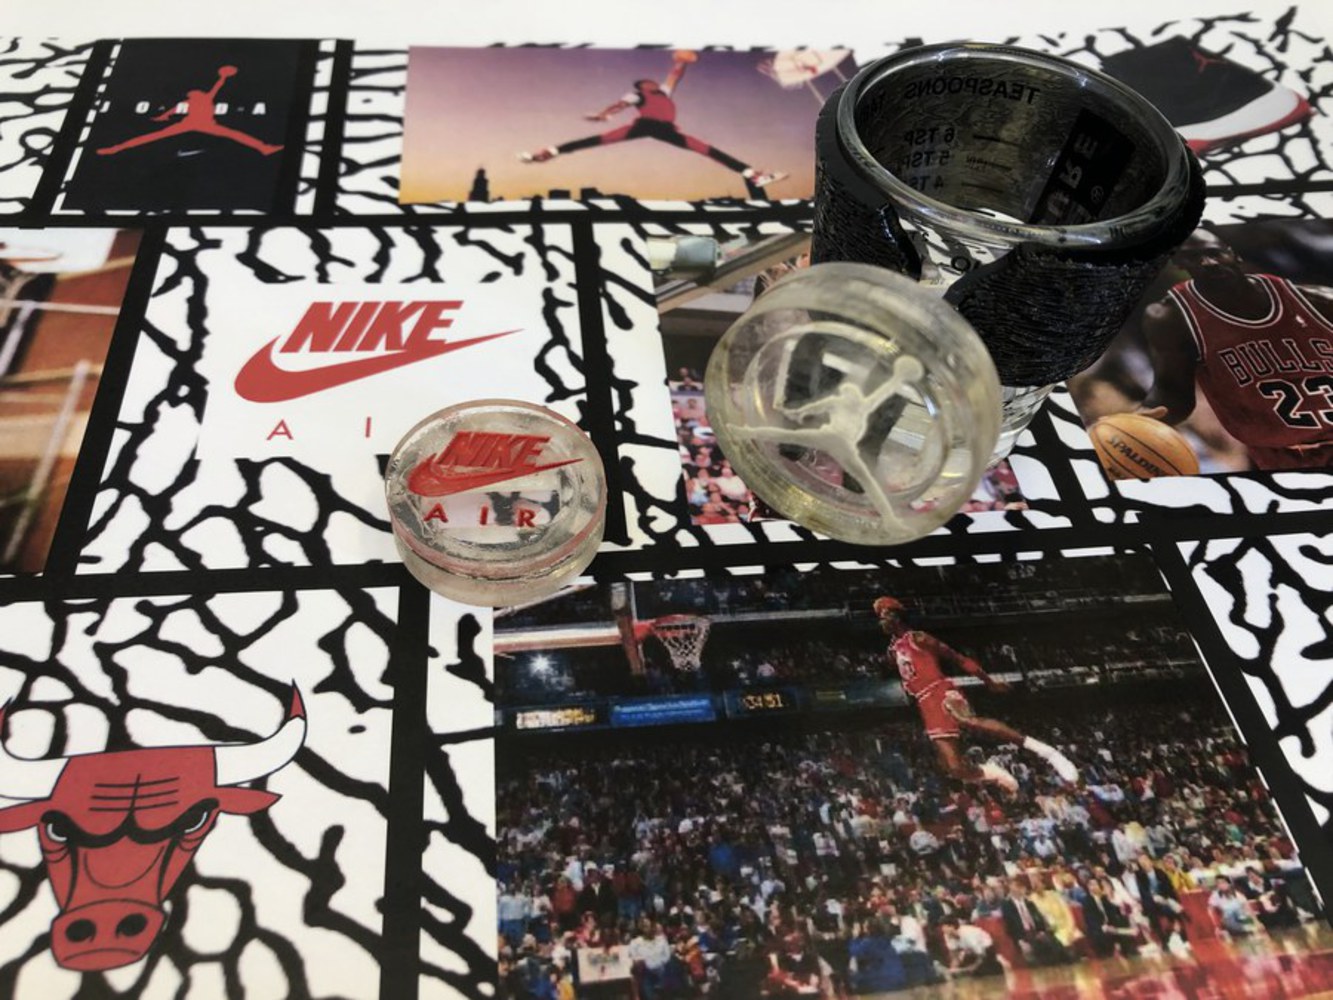
The design ideas I had would be the pop-socket itself and then piece with an extrusion that would wrap around your cup. The pop socket would have a slot and a channel that would allow the extrusion piece to turn and lock the pop socket into place. Then it would perform similar to the phone version where it would be held between two fingers. The popsocket would be made of three pieces of circular acrylic epoxied together. The first piece had a rectangular slot for the extrusion to go into, the second piece of a ring to create a channel for the extrusion to rotate, and a third sold piece to act as a cap. Again thinking of functionality, I thought this would be best applied to a shot glass. With large fingers, I often find taking a shot of alcohol troublesome. Sometimes my fingers get in my face and holding it (sometimes intoxicated) is a hassle sometime. So, I made the length of a wrap around piece the circumference of a standard shot glass. Of course I could have altered it with the circumference of other cups/ bottles. But for this project, I used a shot glass.
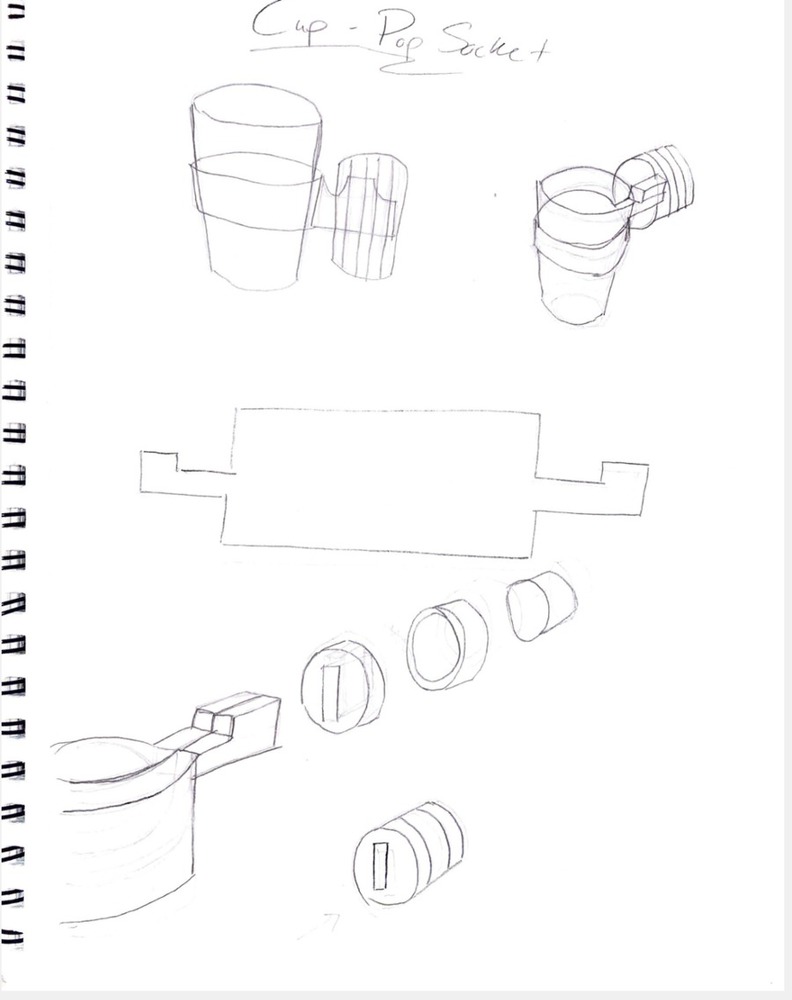
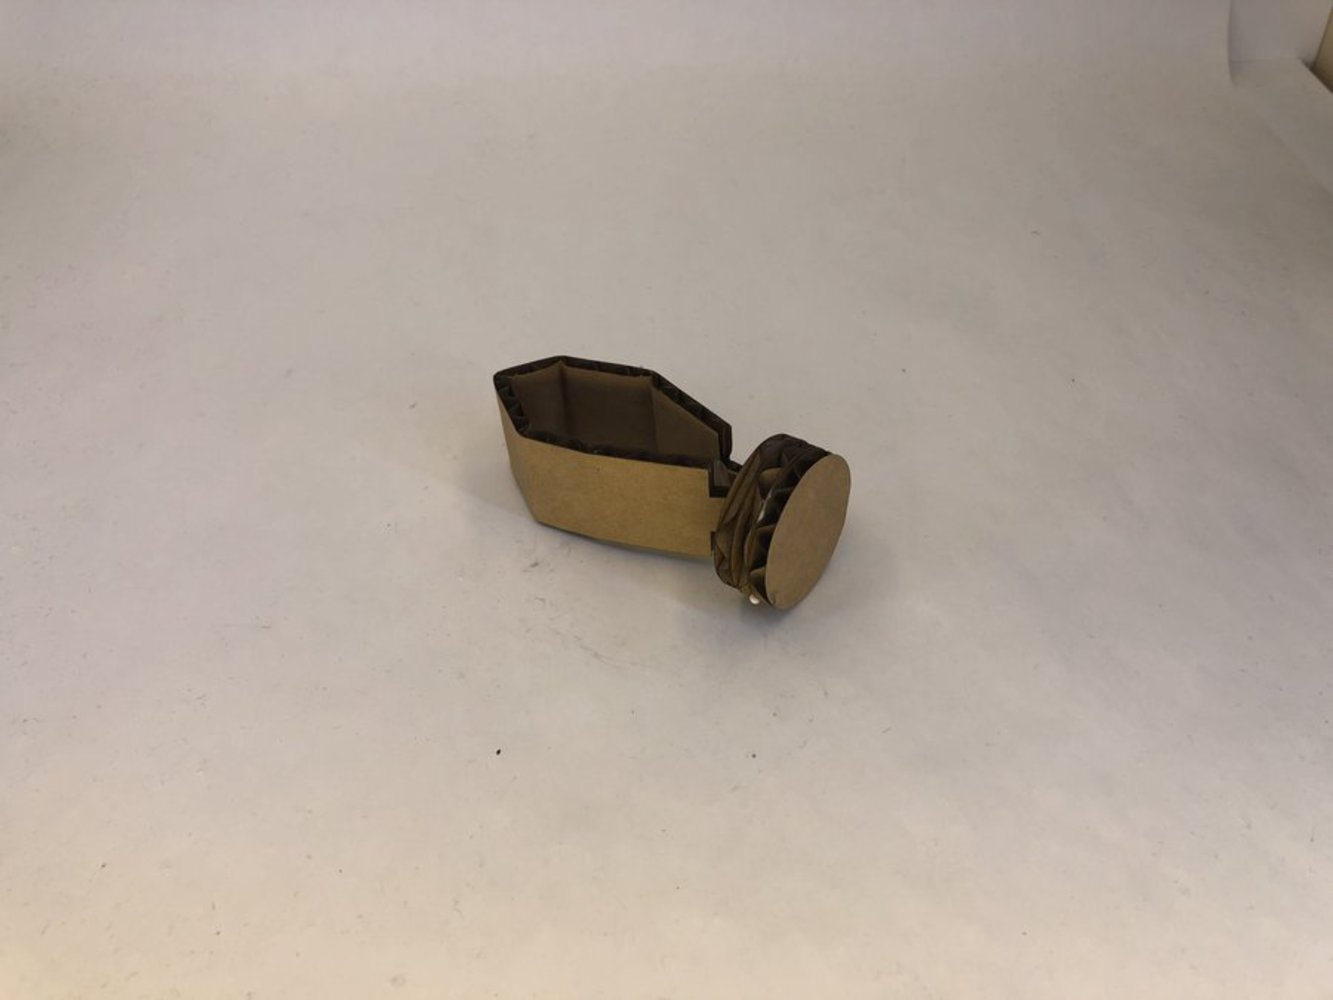
First I used Solidworks to CAD my sketches and made sure dimensions and assemblies fit. I arbitrarily picked sizes that seemed appropriate. Then I made cardboard prototype. The cardboard prototype was a bit difficult to bend around the cup, so I made the length of the wrap around piece longer. It was a good preview.
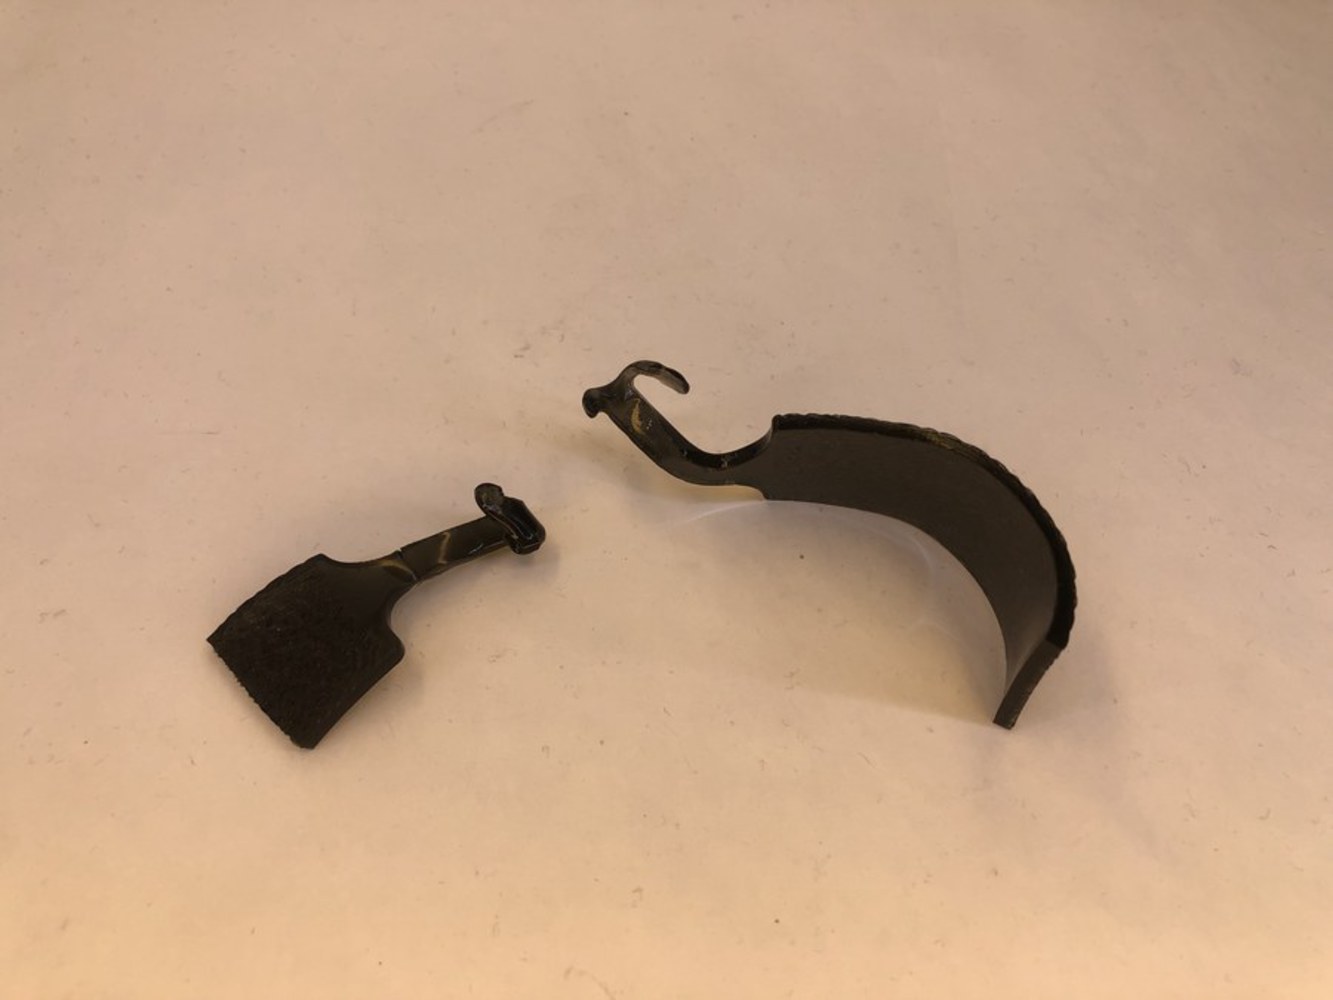
Then I moved onto acrylic. Again, The wrap around piece was a bit short, so I lengthened it again. I figured if I had extra material, the popper would stick out a bit more. This one worked as well. During the process I learned a few things. The epoxy that stuck the popper together with seeped into the channel, making the twist not very smooth. I made sure to epoxy more cleanly and sand down my extruded piece to give it more space to turn smoothly. I also felt sharpness from the wrap around piece in its corners, so I fillet those to make it smoother. With these iterations I moved to my final model
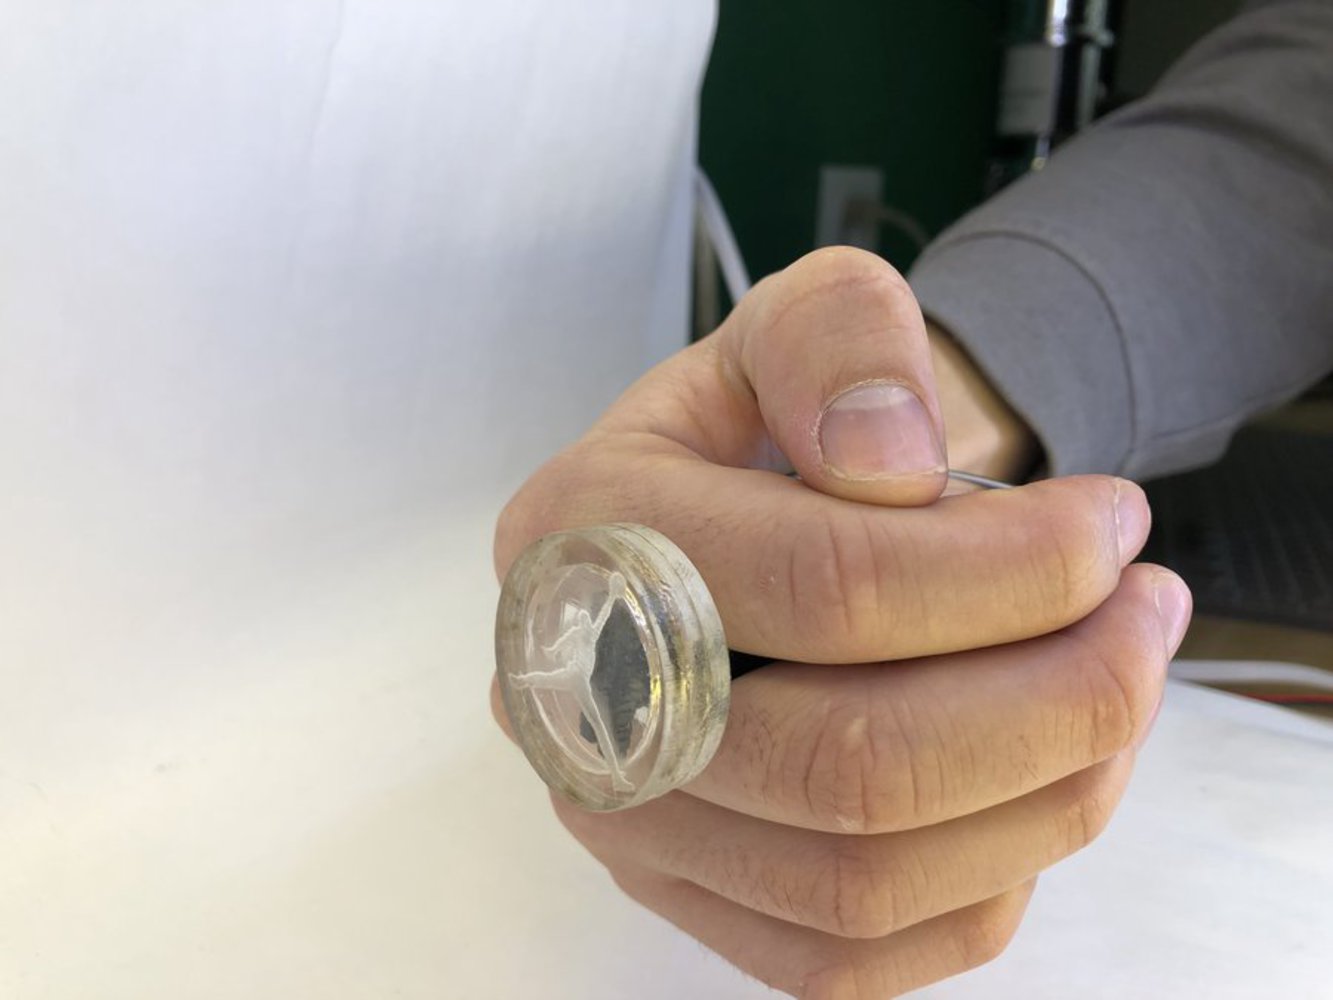
In my last model, I used my final materials to fit my theme of “Air Jordan”. I used black acrylic and engraved elephant print onto the wrap around piece. I also engraved Jordan and Nike logos to be used on the popper itself to add more creative flair. Two quick issues of fitting the popper onto the sleeve were that excess epoxy filled the channel where the popper would go on. Additionally, hot molding the sleeve extrusion was difficult because the arms melted together and I had to get the notches to line up perfectly or else they would not fit in the channel. I made sure to file/ wipe the excess epoxy on the popper and mold very carefully the arms of the sleeve.
You can upload files of up to 20MB using this form.