Back to Parent

Outcome


Introduction

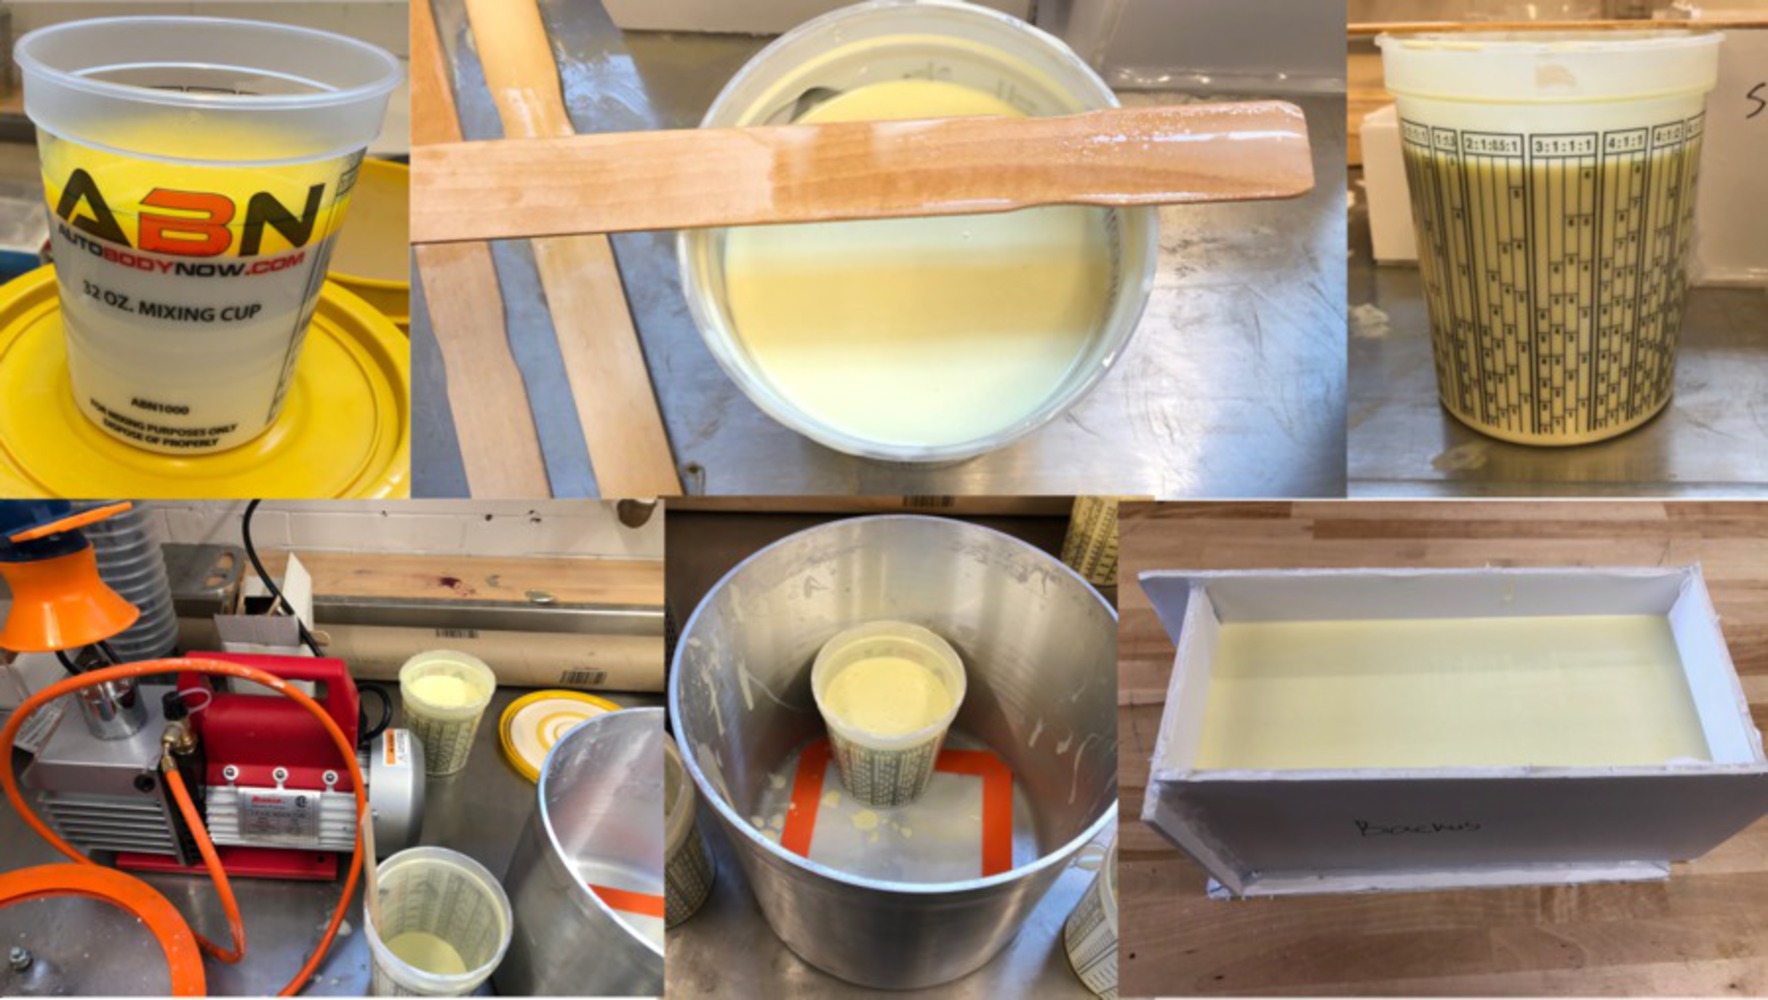
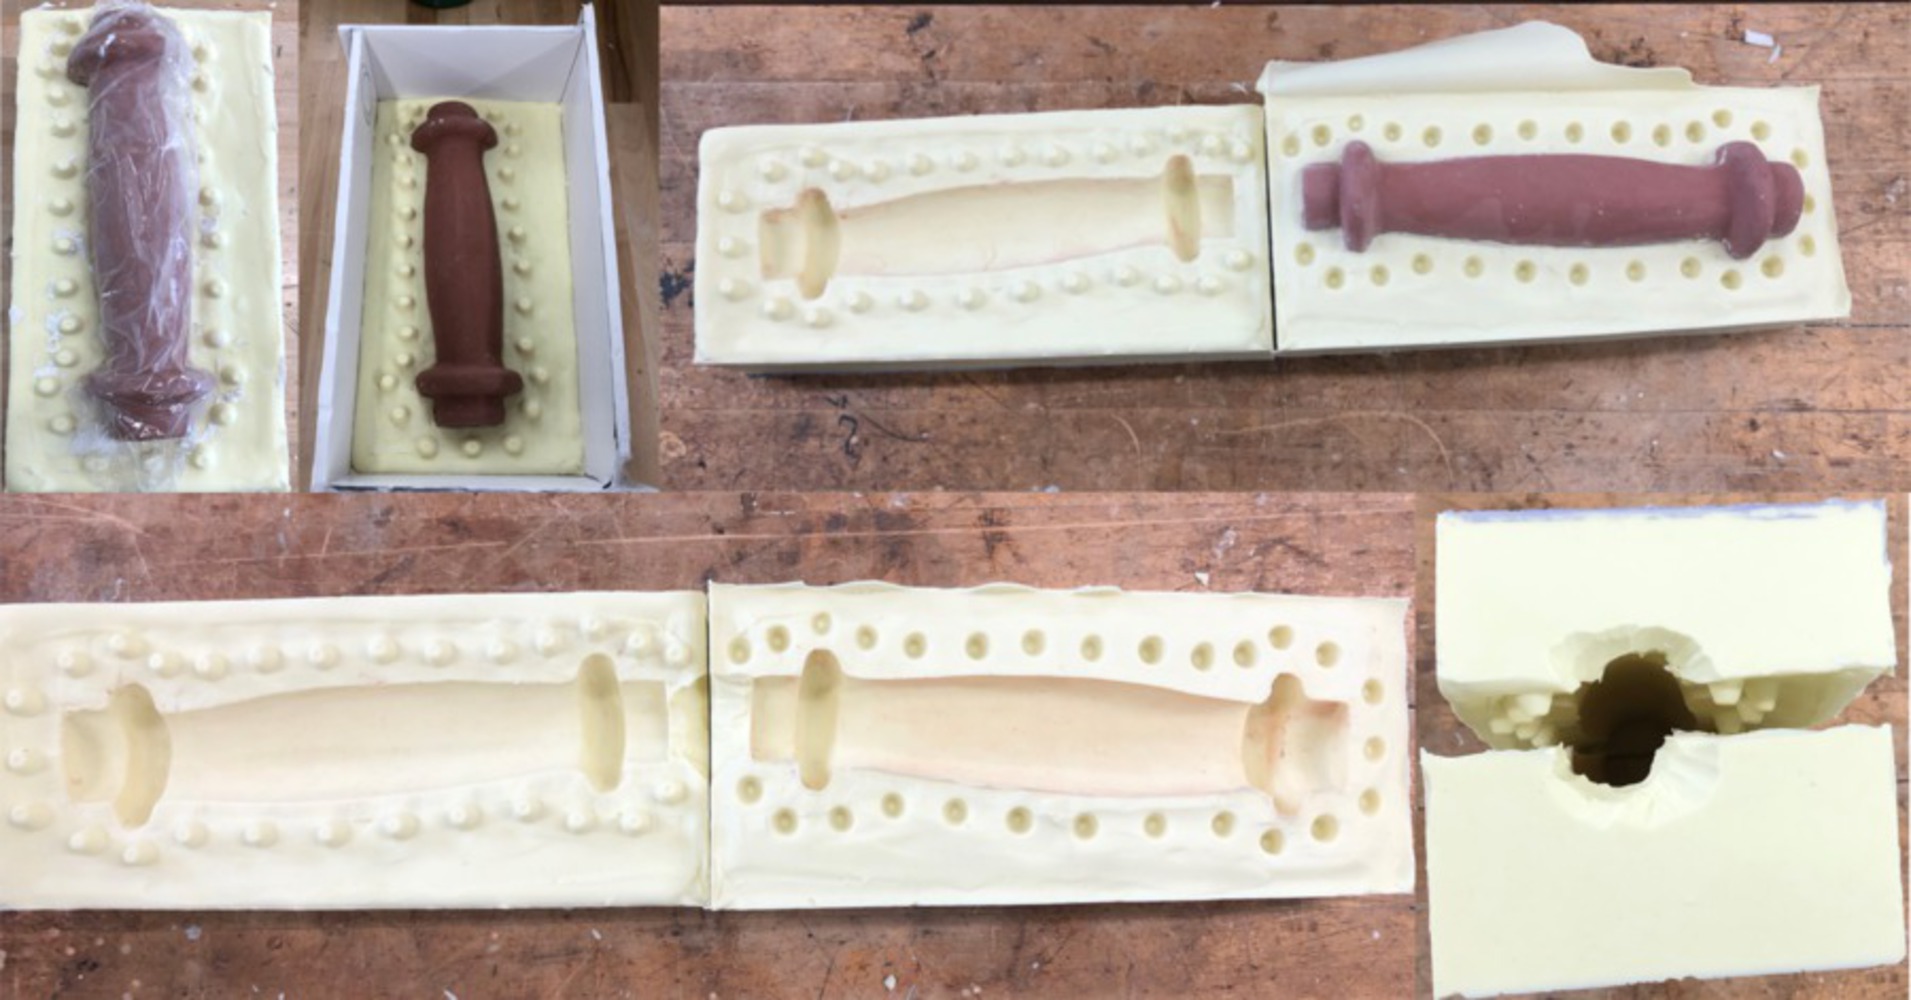
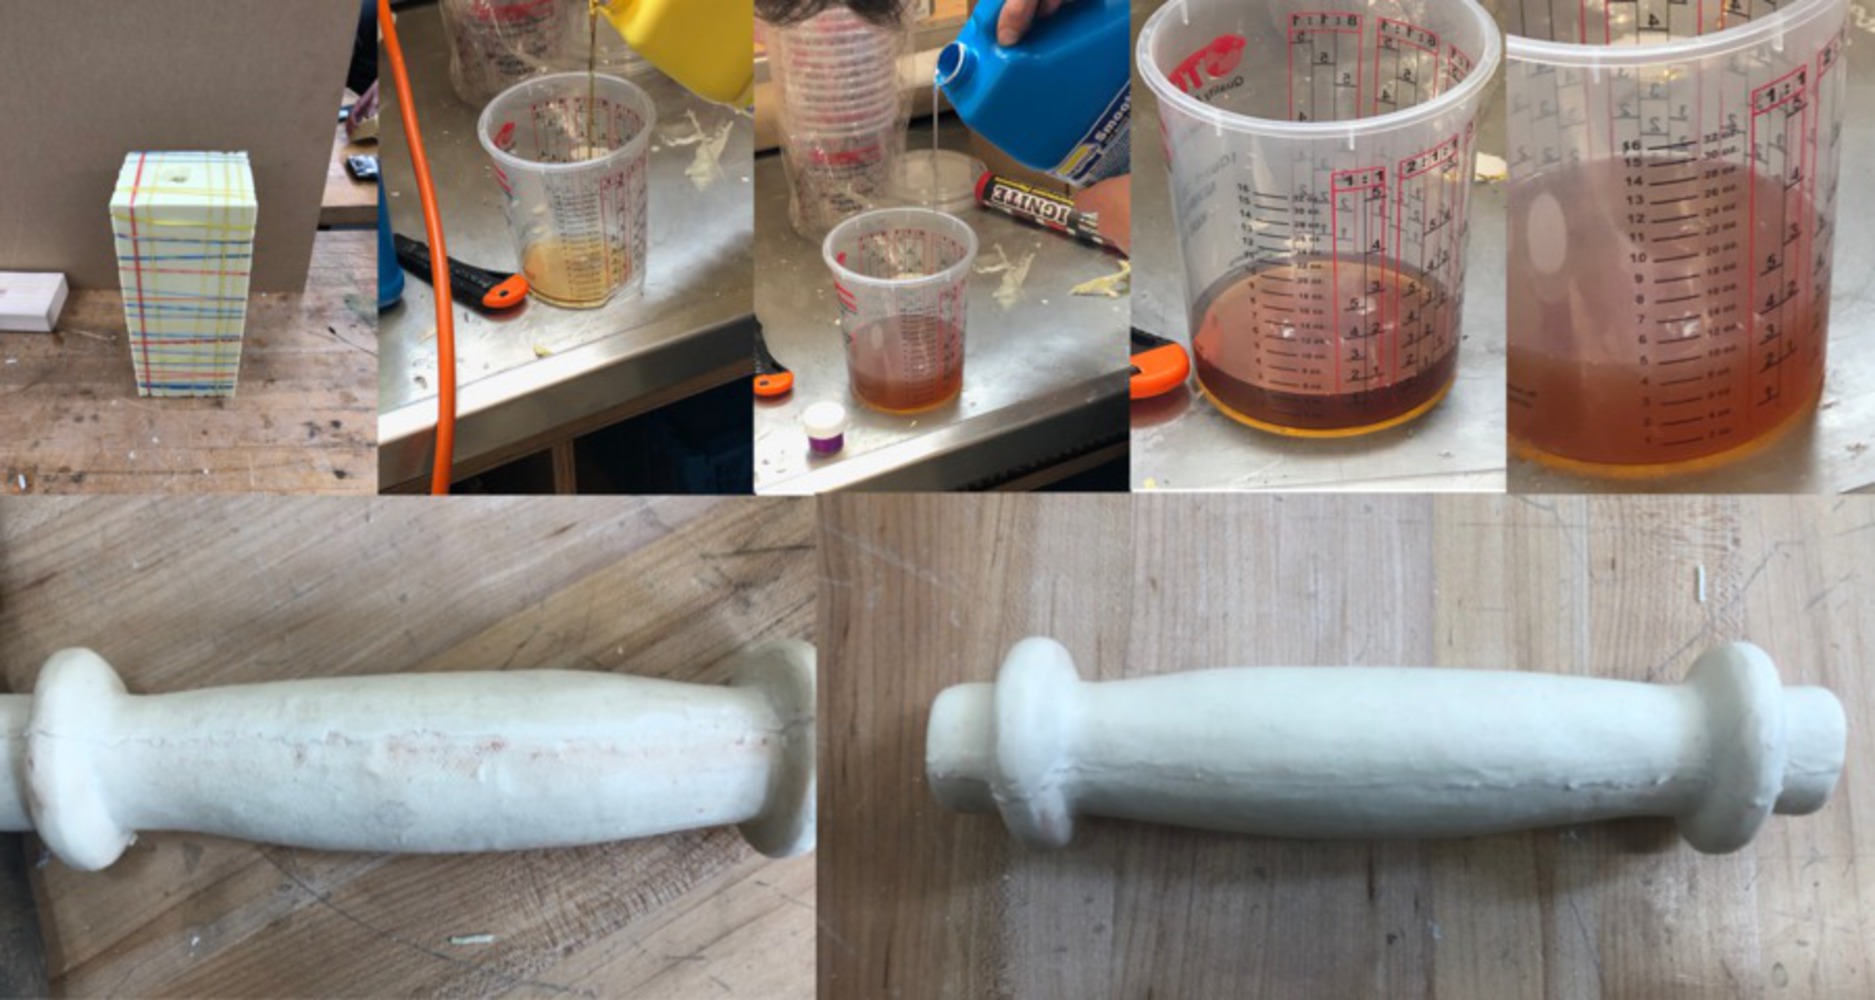
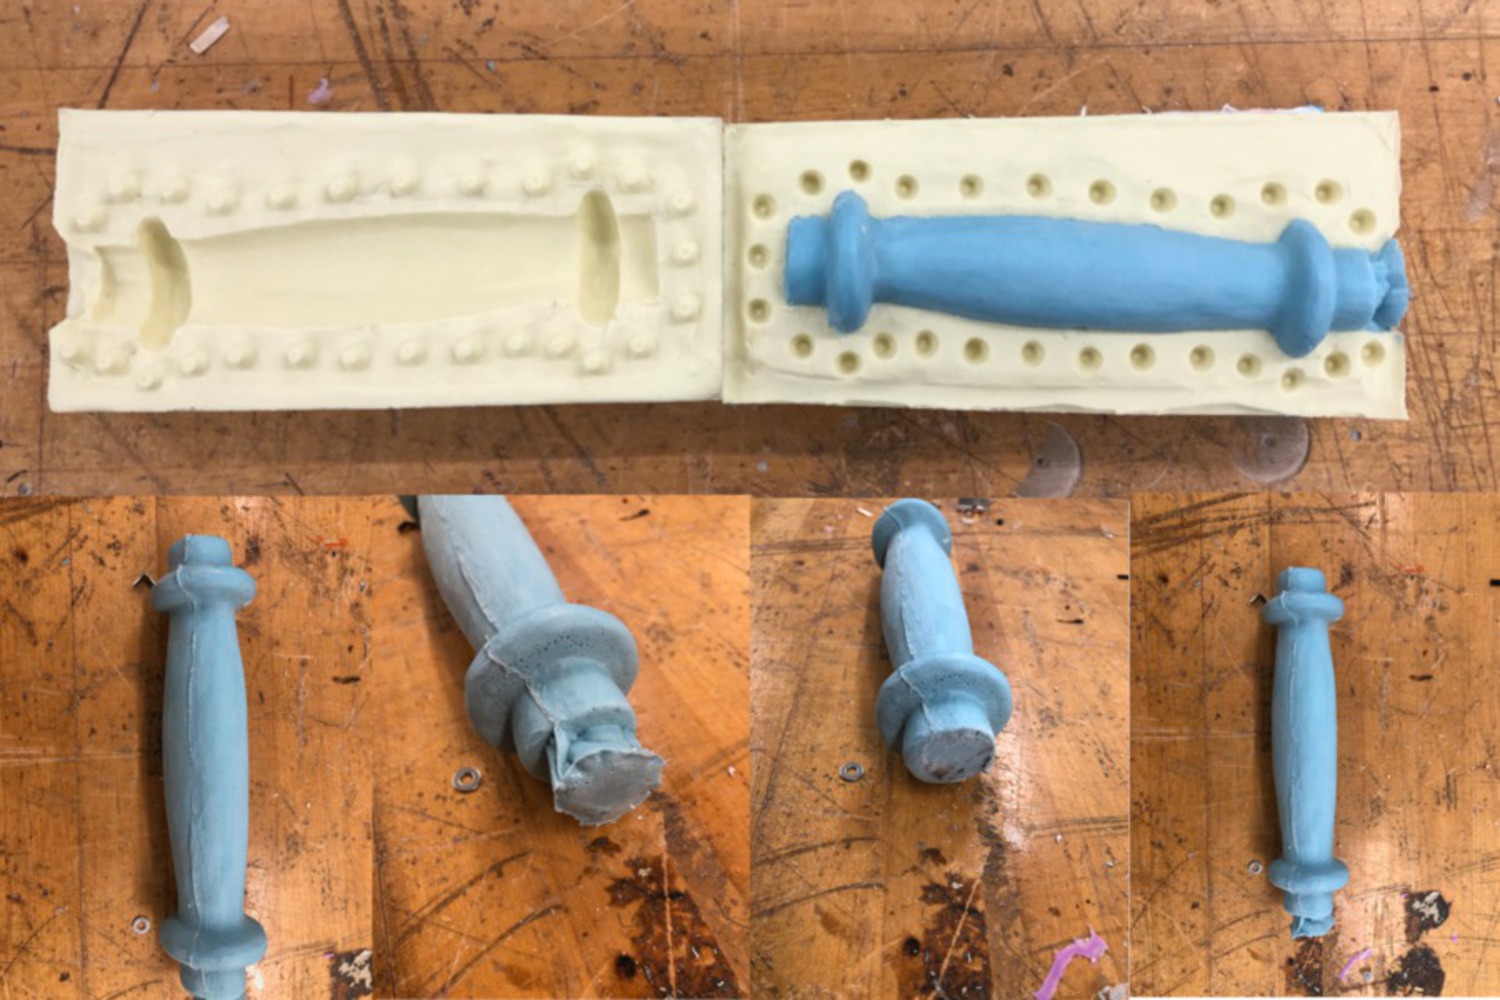
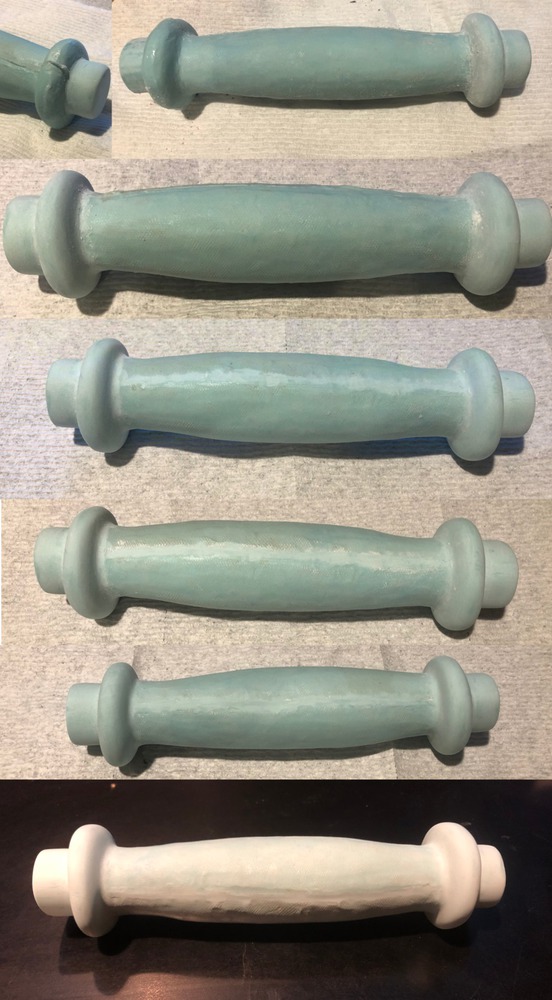
With my redesigned barbell handle fully designed and sculpted, I could begin to produce a more hands on friendly model. This is to be done by creating a two part silicon negative mold which could then be used to cast a two part epoxy resin, thus creating a solid plastic positive. Three casted parts will be created with an attempt to successively produce a better part with each iteration. The best of the three will be sanded down at the seams and further refined until a final model is produced.

Starting

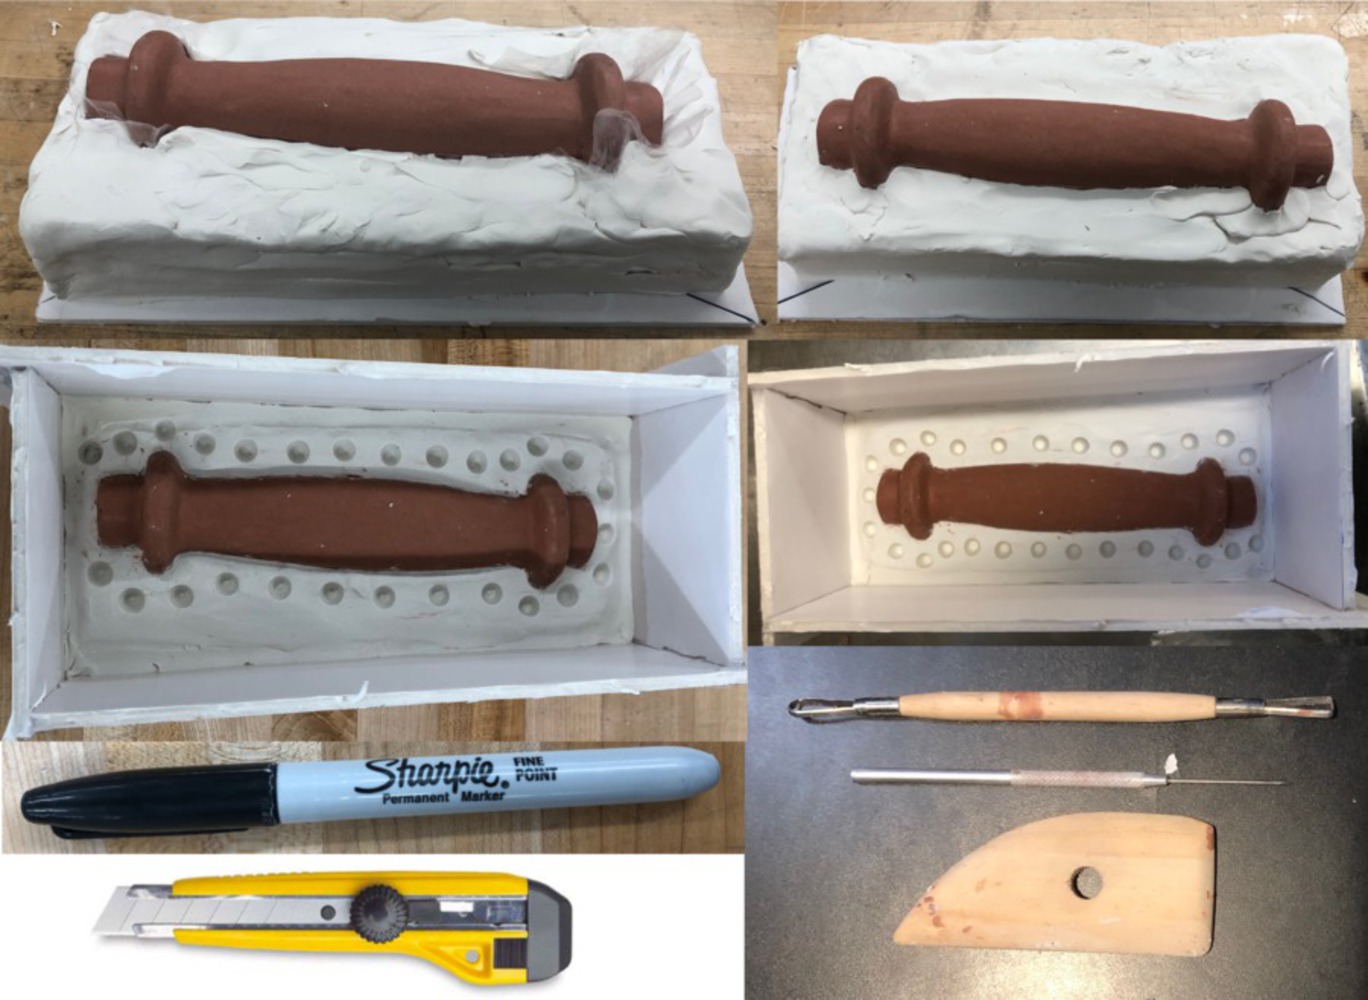
Beginning with the clay model from project 3, I made sure the model was at a level of refinement needed for the casting process. I then calculated the size of the bounding box needed such that there is ample wall thickness around each part of the clay positive. I then cut five of the six sides of the foam core box needed to create the first half mold. The next step is laying clay to block the bottom half of the clay model.

Laying Clay

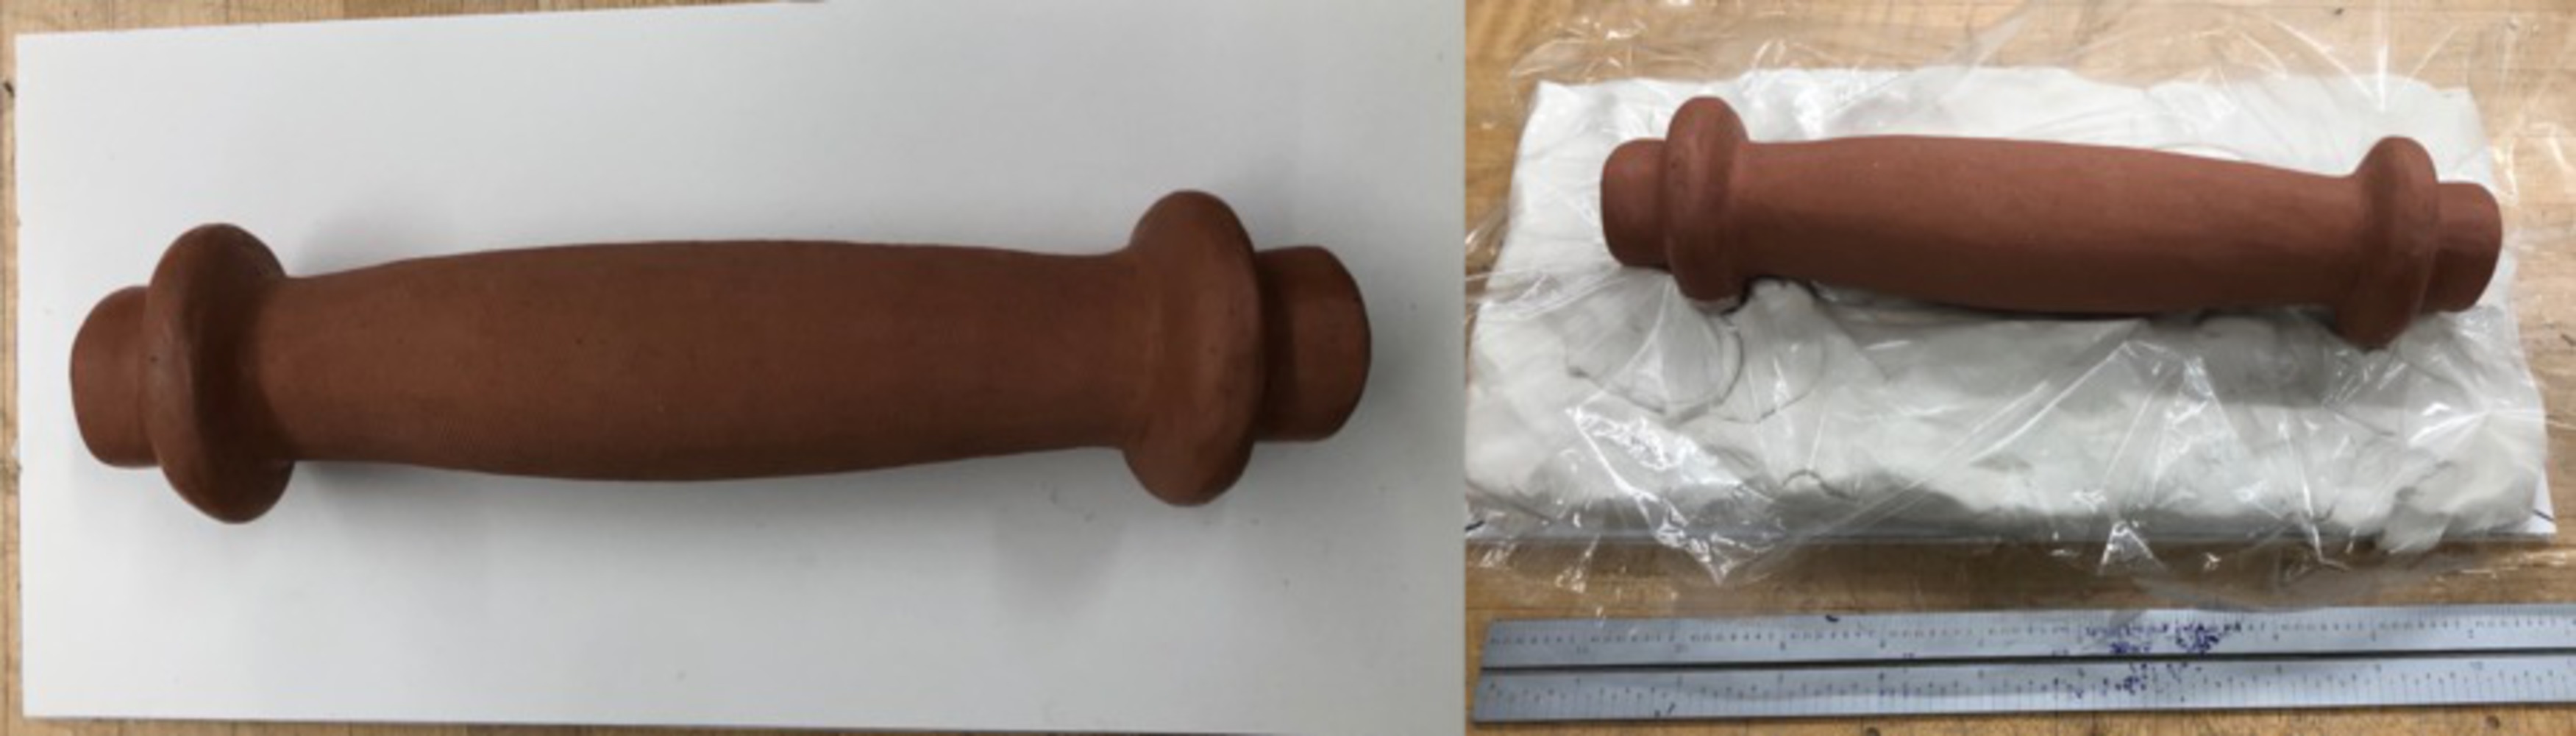
I began by putting clay down in the center of the foam core rectangle that is to be the bottom of the molding box. I then placed the clay positive on top to check its height in the box. This repeated until the clay positive was at the correct height above the bottom. Once at the correct height, a piece of saran wrap was laid down on top of the soft clay and the clay positive was laid down on top of the plastic wrap. The wrap is used to prevent the clay positive from sticking to the softer molding clay (See below). 

1.thumb
Show Advanced Options

I continued to build up clay around the hard clay positive until it was halfway up the model (This will later become the parting line). I then trimmed the saran wrap at the midway point and refined the parting line to be as perpendicular to the positive surface as possible. After trimming and flattening the top, I added alignment dimples all around the part. I then trimmed the edges and glued the foam core sides onto the the box. I then added a bit of clay around the inside edge of the box to prevent silicon from seeping around the sides. A Picture showing the box and tools I used can be seen below.

2.thumb
Show Advanced Options

Pouring the First Half

A two part silicon was used for the silicon portion of the mold. Two cups were needed to measure out the quantity of liquid needed. for each cup, 775 grams of part A were mixed, then 75 grams of part B for a total of 850 grams. Each cup was mixed up thoroughly by hand then put in a vacuum chamber to degas the mixture. During the degassing, the inside of the box was sprayed with a mold release. Once each was degassed, the mixture was slowly poured into the mold box. The box was checked for leaks and left to cure for 6 hours.  

3.thumb
Show Advanced Options

Pouring the Second Half

After the first silicon pour cured, I removed the foam core from the silicon mold and flipped it over. I then removed all of the white clay  and saran wrap from the hard clay positive. I then tried to clean excess silicon and leftover white clay as best I could. Then I cut out 5 sides of a box from foam core and made a box around first silicon half and glued it together, making sure that the sides were as tight around the bottom half as possible (to prevent leaking of silicon to the sides). The inside of the box was thens sprayed with mold release. I then followed the same steps mentioned above to mix and pour the liquid silicon.

Post Cure

 Once the second pour cured, the foam core was removed and the two halves were pulled apart. The Clay positive  was pulled out and the two mold halves were cleaned up. A pour spout was then cut in the two halves and the mold was ready for the two part plastic resin to be poured.

4.thumb
Show Advanced Options

Initial Plastic Resin Pour

To begin the resin pour, I took the two parts of the mold and pressed them together then wrapped them in rubber bands to apply pressure onto them. The two part resin could be mixed 1:1 by volume or 90:100 by mass. for the first pour I opted to use the volume mix. I estimated I would need about 10 fl oz to fill the mold so I poured 5 oz of part A then 5 oz of part B into a mixing cup and mixed thoroughly. Then white dye was added in and again mixed thoroughly. The mixture was then poured into the mold in 5 parts. In between each part, the mold was tilted slightly and rotated to try and get the resin in all the overhang areas. Once poured, the 10 oz filled perfectly to the top of the mold. The mold was then placed in a pressure chamber and left to cure.

First Part

After the resin cured, the mold was taken out of the pressure chamber and rubber bands removed. The part was then pulled from the mold and the spout cut off. This part came out fairly good. There was however, a small amount of bubbling on the top of one of the overhangs. Other than that, the parting line was visible, but the rest of the part was very defined. The smooth parts was very smooth and the knurling was defined as well.

5.thumb
Show Advanced Options

Second Pour

The second resin pour and part was performed exactly like the first with only two exceptions. The first was the addition of some foam core rectangles added to each side of the mold to try and even out the pressure applied to each side of the mold. The second change was the choosing of a blue dye rather than the white.  During this pour I tried to section the resin a bit more and rotate and agitate the mold more to try and get less bubbling.

Second Part

The second part came out better than the first. There was still a bit of bubbling in the same area, but it was better than before. The knurling seemed to be a bit more defined. In addition, I liked the blue coloring much better than the white, it seemed to make the part look cleaner. This part came out very good and so I planned to use this part to finish up for my final product.

6.thumb
Show Advanced Options

Third Pour

The third pour was done exactly the same as the second, the only difference is that I did not put the mold in the pressure chamber just to see the quality difference. 

Third Part

Just as expected, the third part came out worse than the second part. There was more bubbling in the area that was previously experiencing bubbling and the parting lines contained more plastic and was more defined. In addition, the definition of the part wasn't as good either.

7.thumb
Show Advanced Options

Final Product

For the final model, I opted to use my second part because it came out the best. I began by sanding the non knurled surfaces with 220 grit sandpaper to smoothen them out and get rid of imperfections and the seams. I then got rid of the seams on the knurled surface as best I could with a small X-acto knife first. I then went over it with the 220 grit sandpaper. After the first pass, I went over all the sanded surfaces with 400 grit sandpaper, then 800, and then a quick pass with 1000 grit. After the sanding finishing work, I wiped it all down with a small amount of acetone to further smoothen the smooth surfaces. I also quickly wiped the knurled surface to smoothen the ridges out slightly and clean them off. The result looked very nice of the sanded portions but accentuated the rough uneveness of the non-sanded surfaces. 

8.thumb
Show Advanced Options

Final Thoughts

Having done this over, having a harder clay to work with in order to be able to sand it smooth would have been beneficial for the final plastic part. In addition, I realized that the clay positive was a bit tilted in making the first half of the mold which made a slightly tilted parting line. I could have put the positive flat on the bottom piece of the foam core and built up around that rather than raising it. In addition, having markers to make sure a consistent height of clay would've been beneficial as well. Some more work making the edges of the white clay that touch the hard positive may have resulted in a smaller parting line as well.

Drop files here or click to select

You can upload files of up to 20MB using this form.