Back to Parent

Outcome


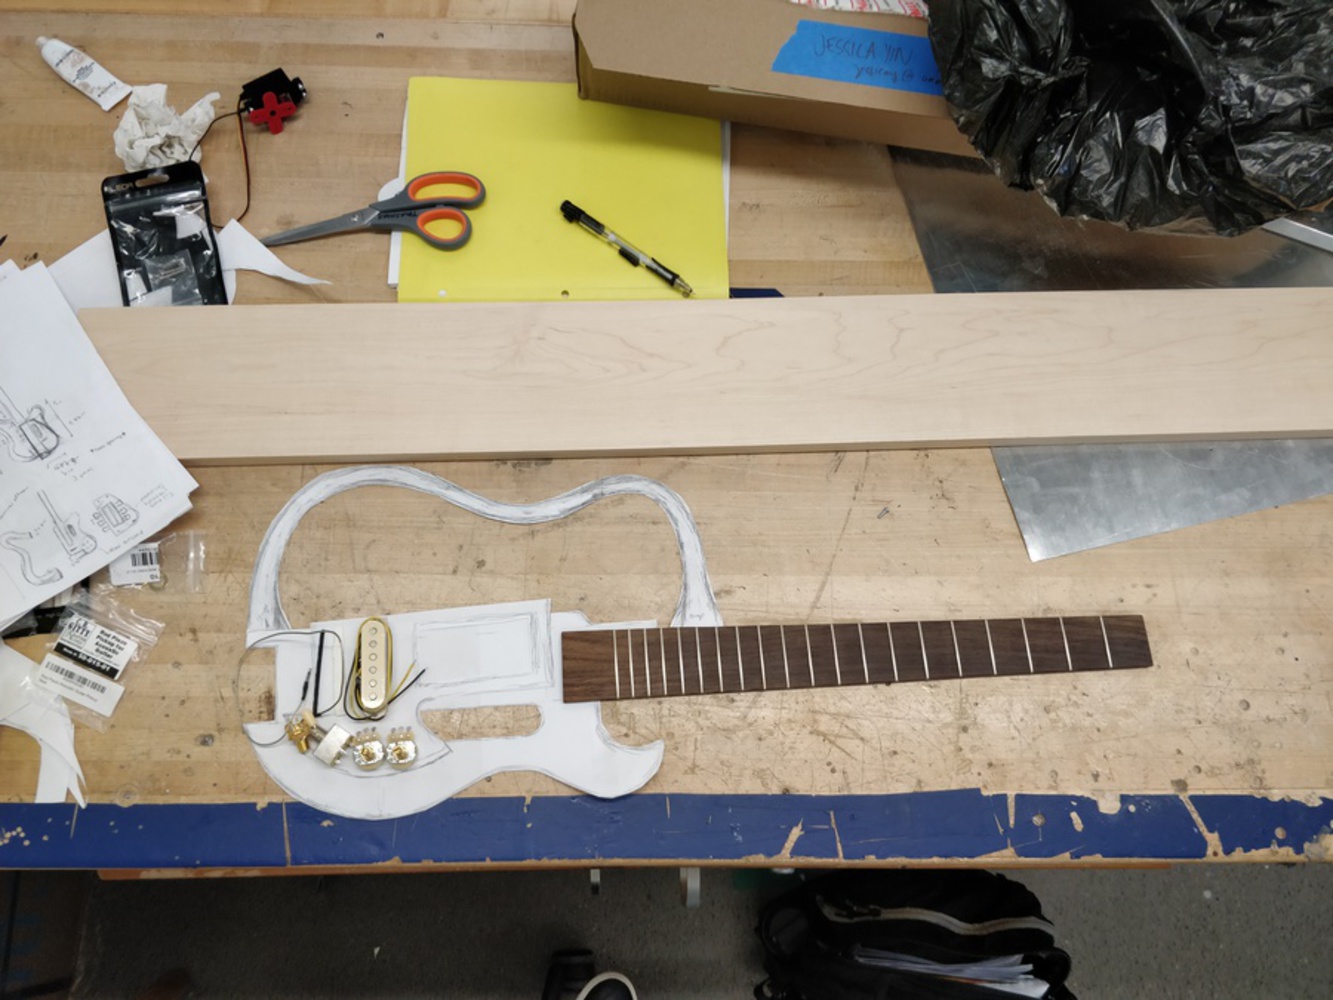
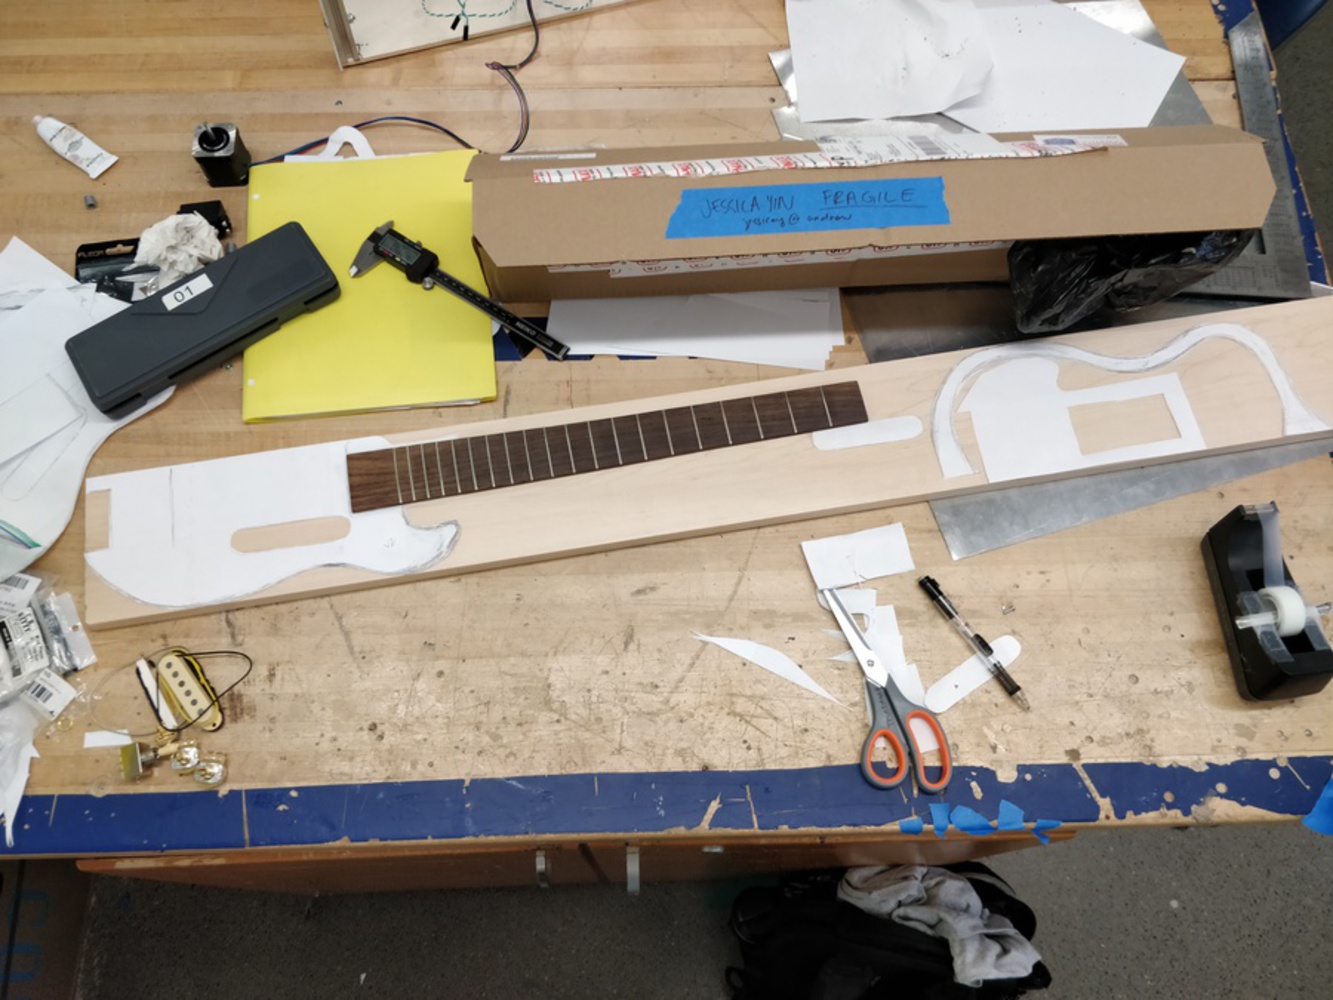
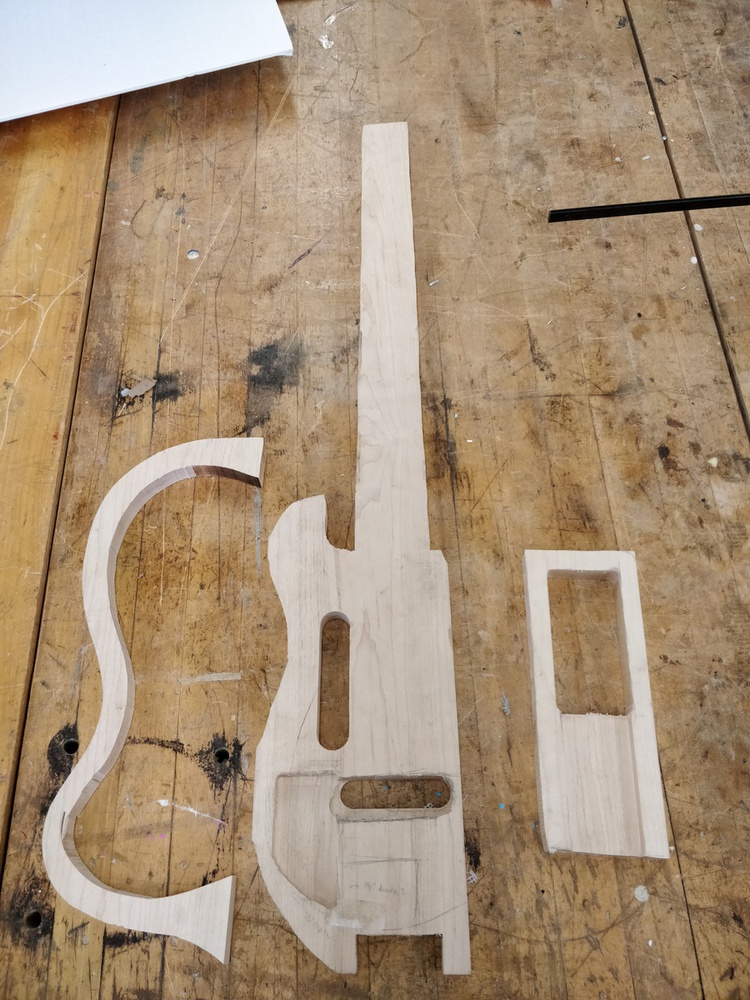
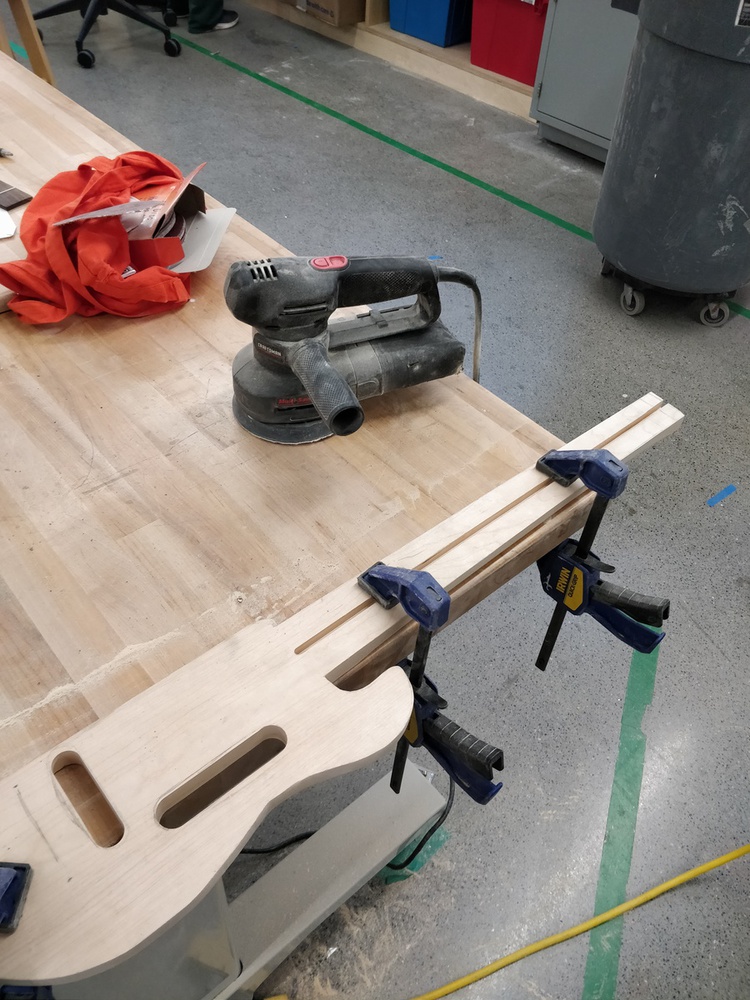
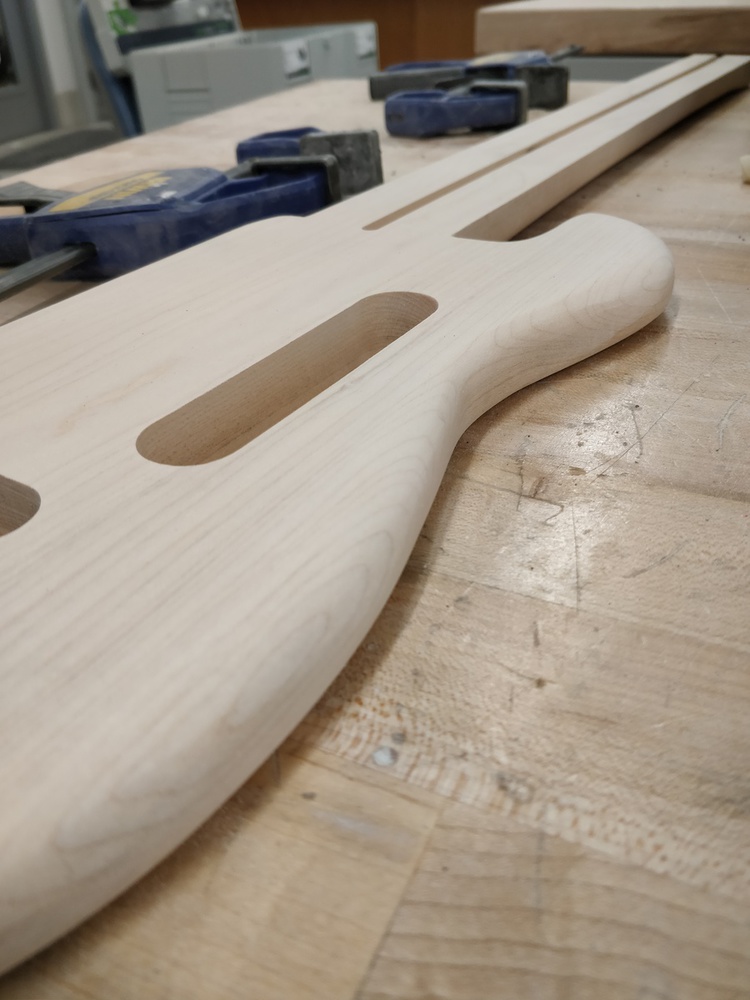
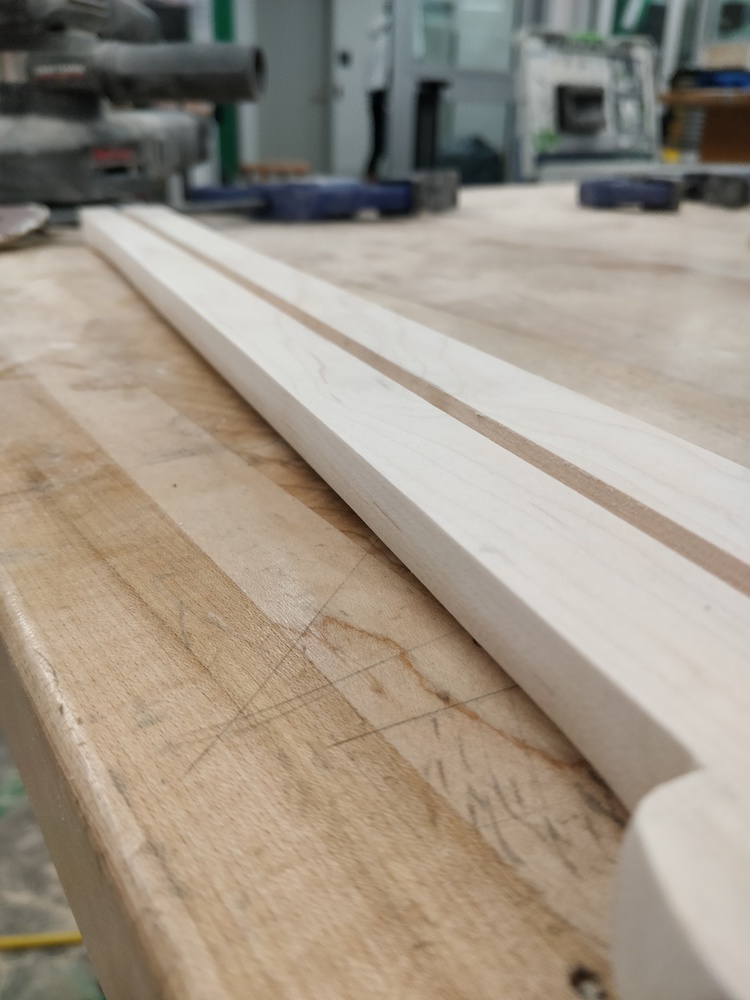
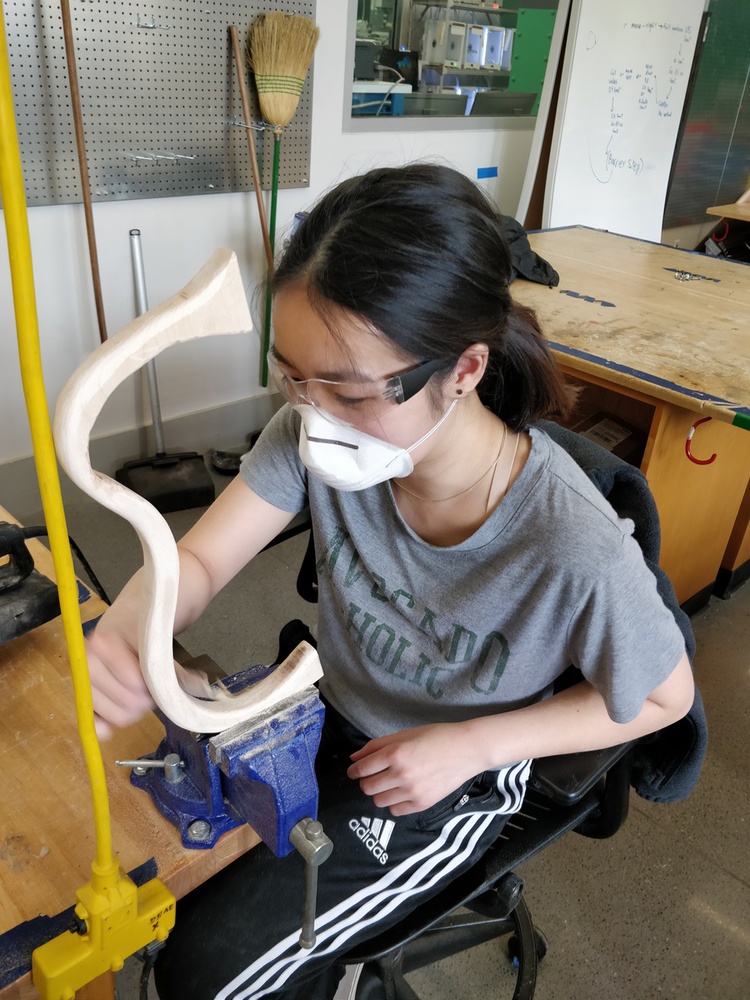
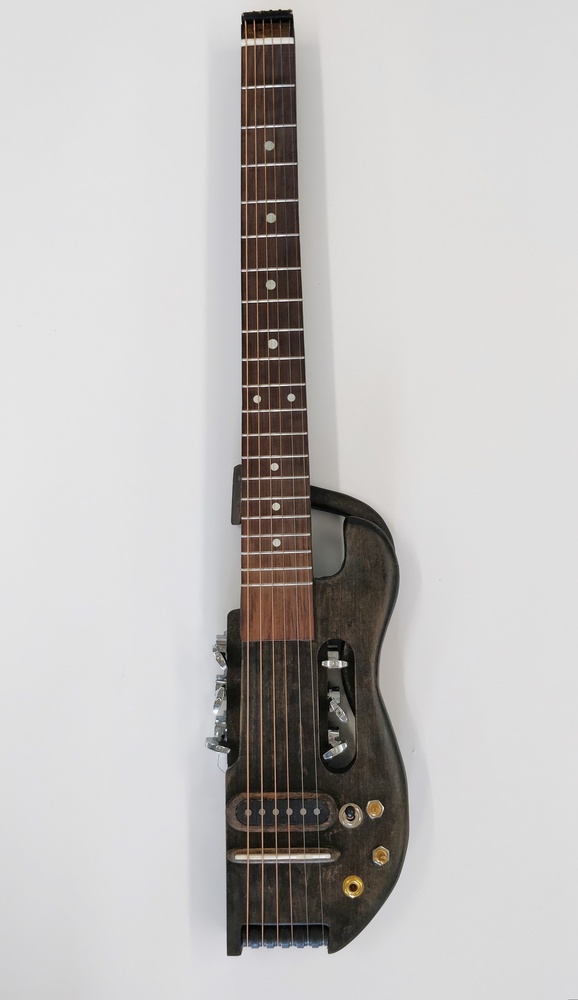
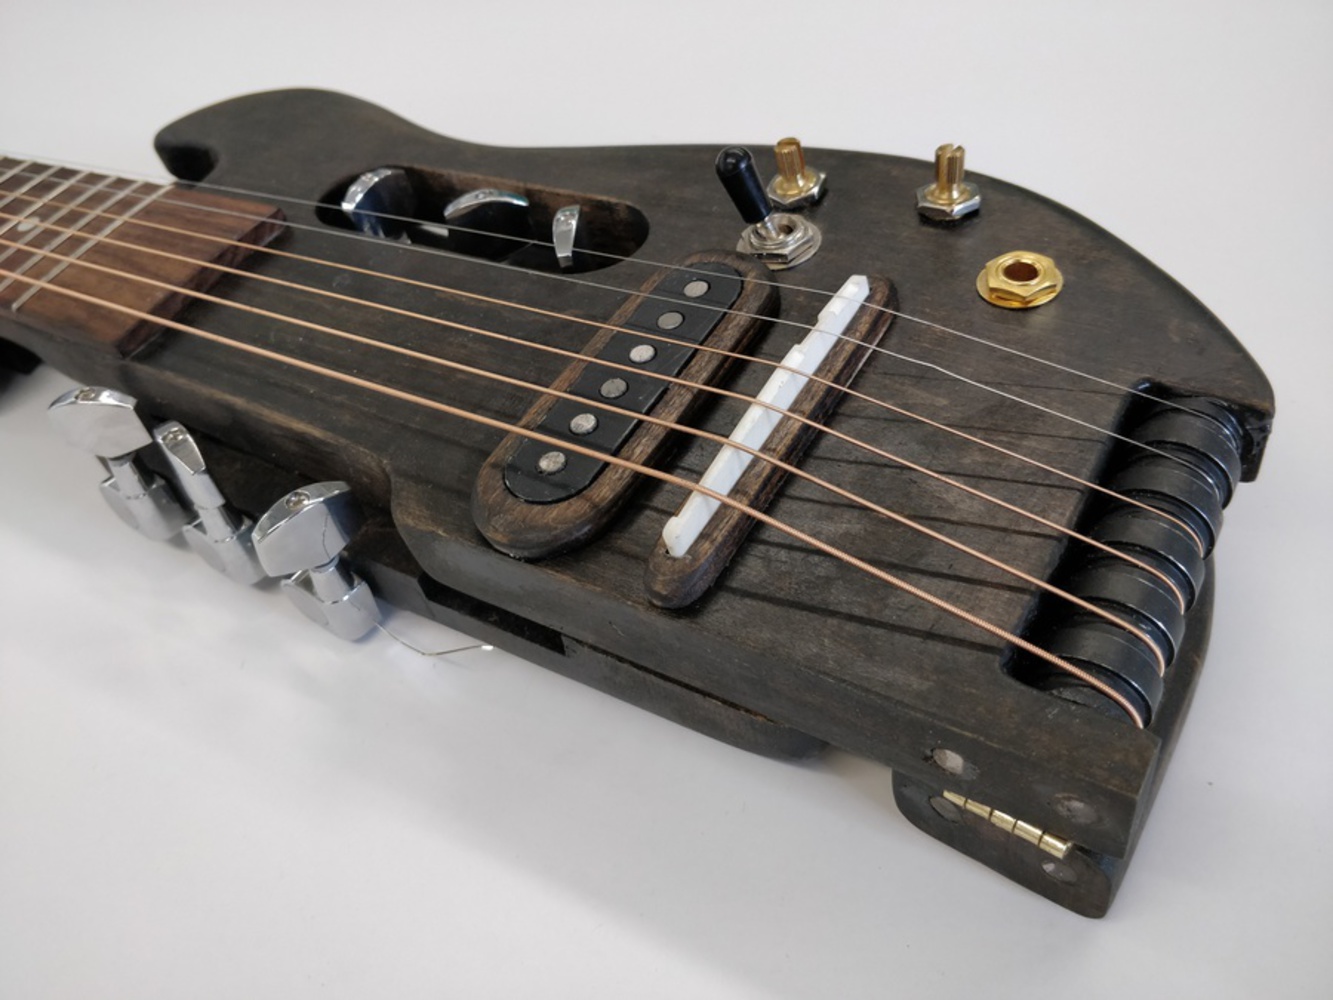
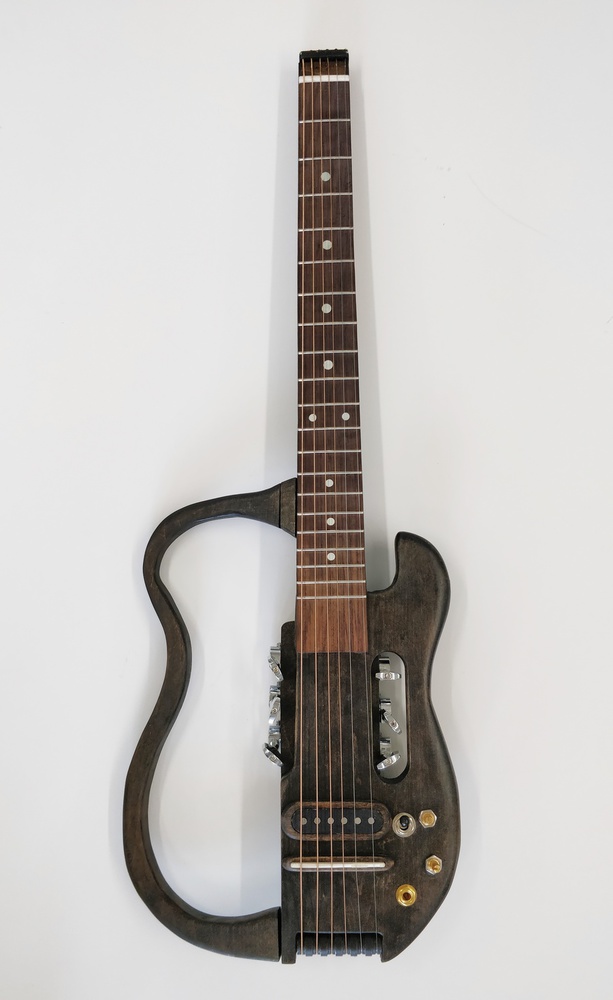
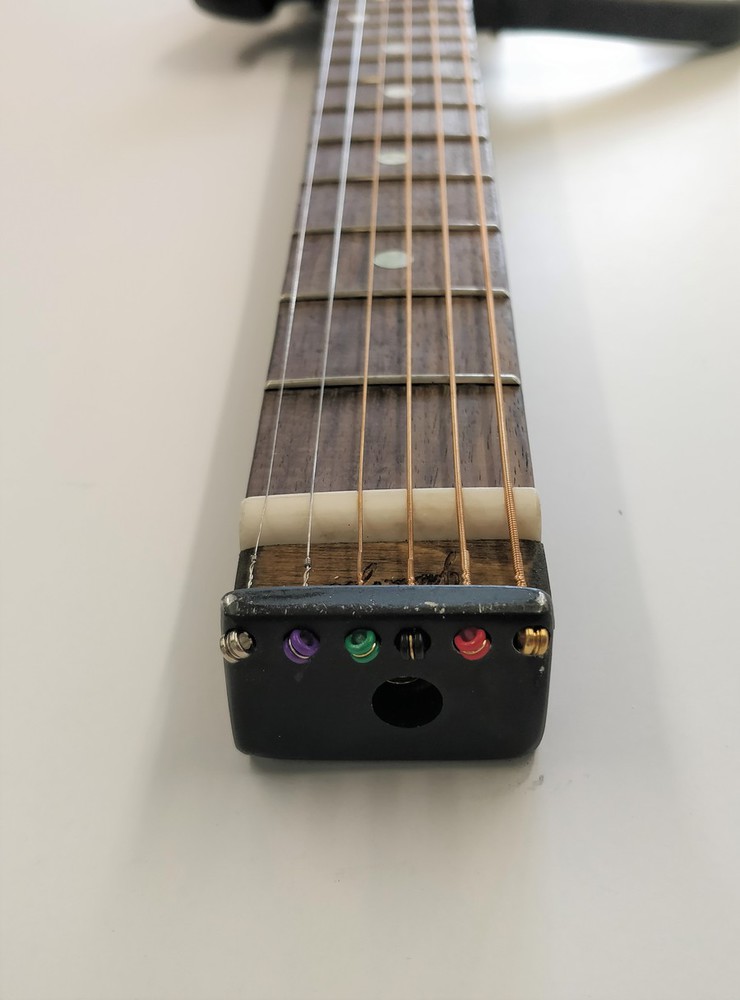
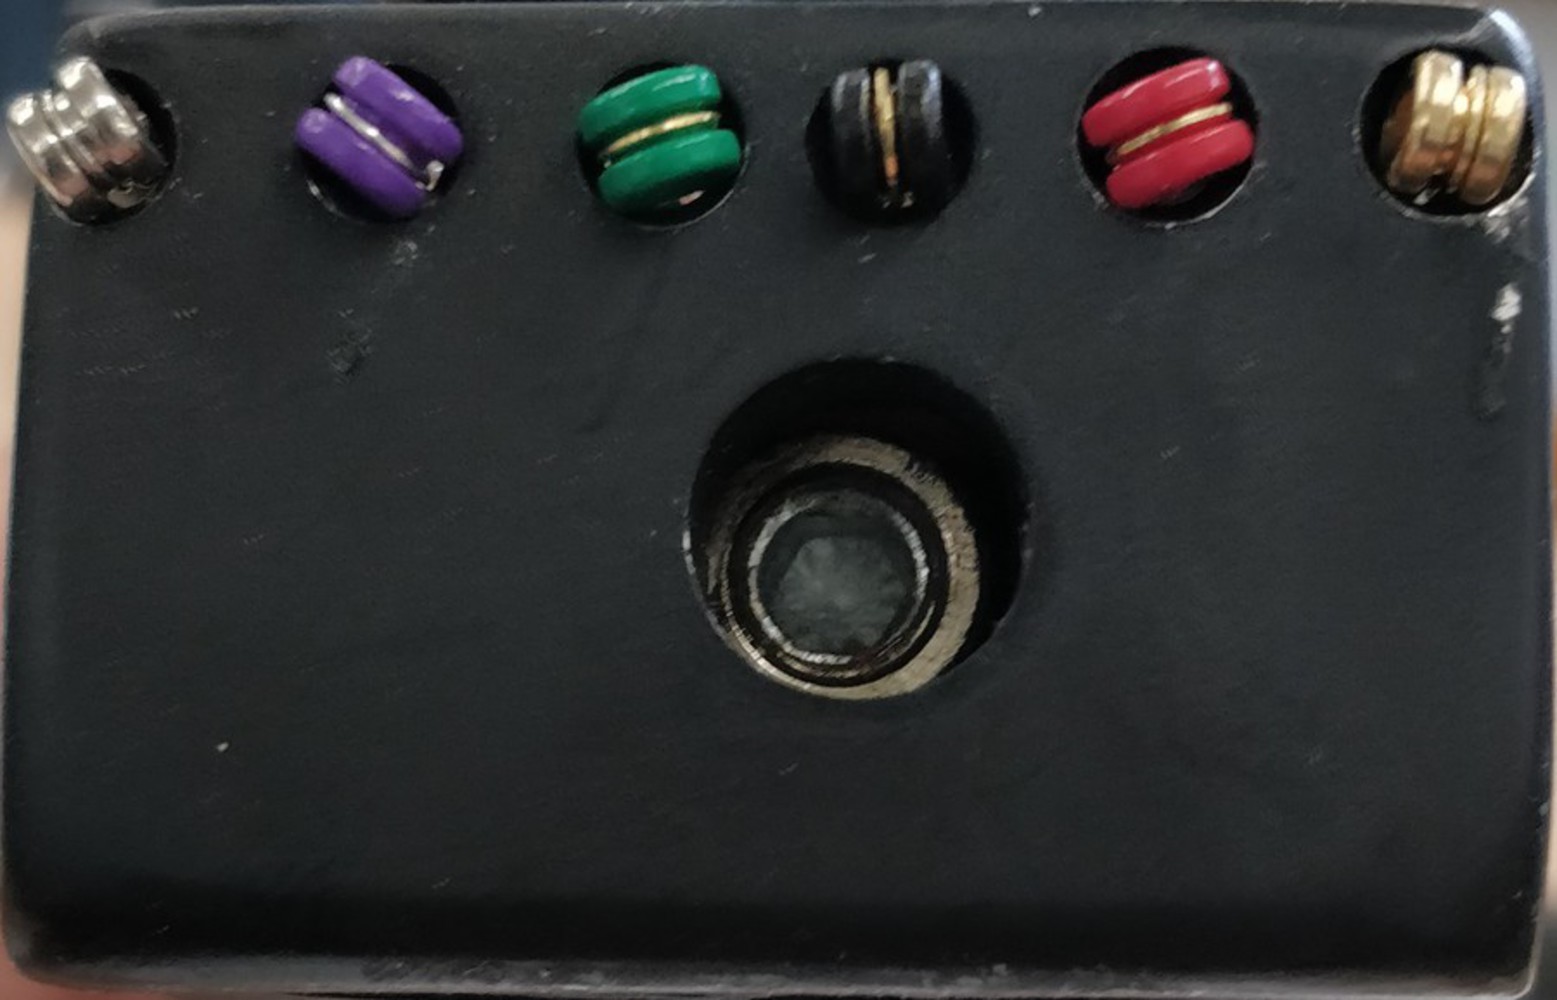
For my final project, I decided to build a folding electric guitar. I have a guitar at home (in California) and I've always wanted to be able to learn and practice more, but it wouldn't be cost-effective to ship it or fly it back and forth. So, I decided to build a travel friendly and compact guitar that would allow for it to be a carry-on. 

This product would be targeted towards people who play or want to learn to play guitar and are looking for a more portable instrument to practice on or take when travelling. It would also be well-suited for road trips or dorm rooms or any scenario where space is at a premium. Elements of the targeted demographic are shown in the first moodboard.

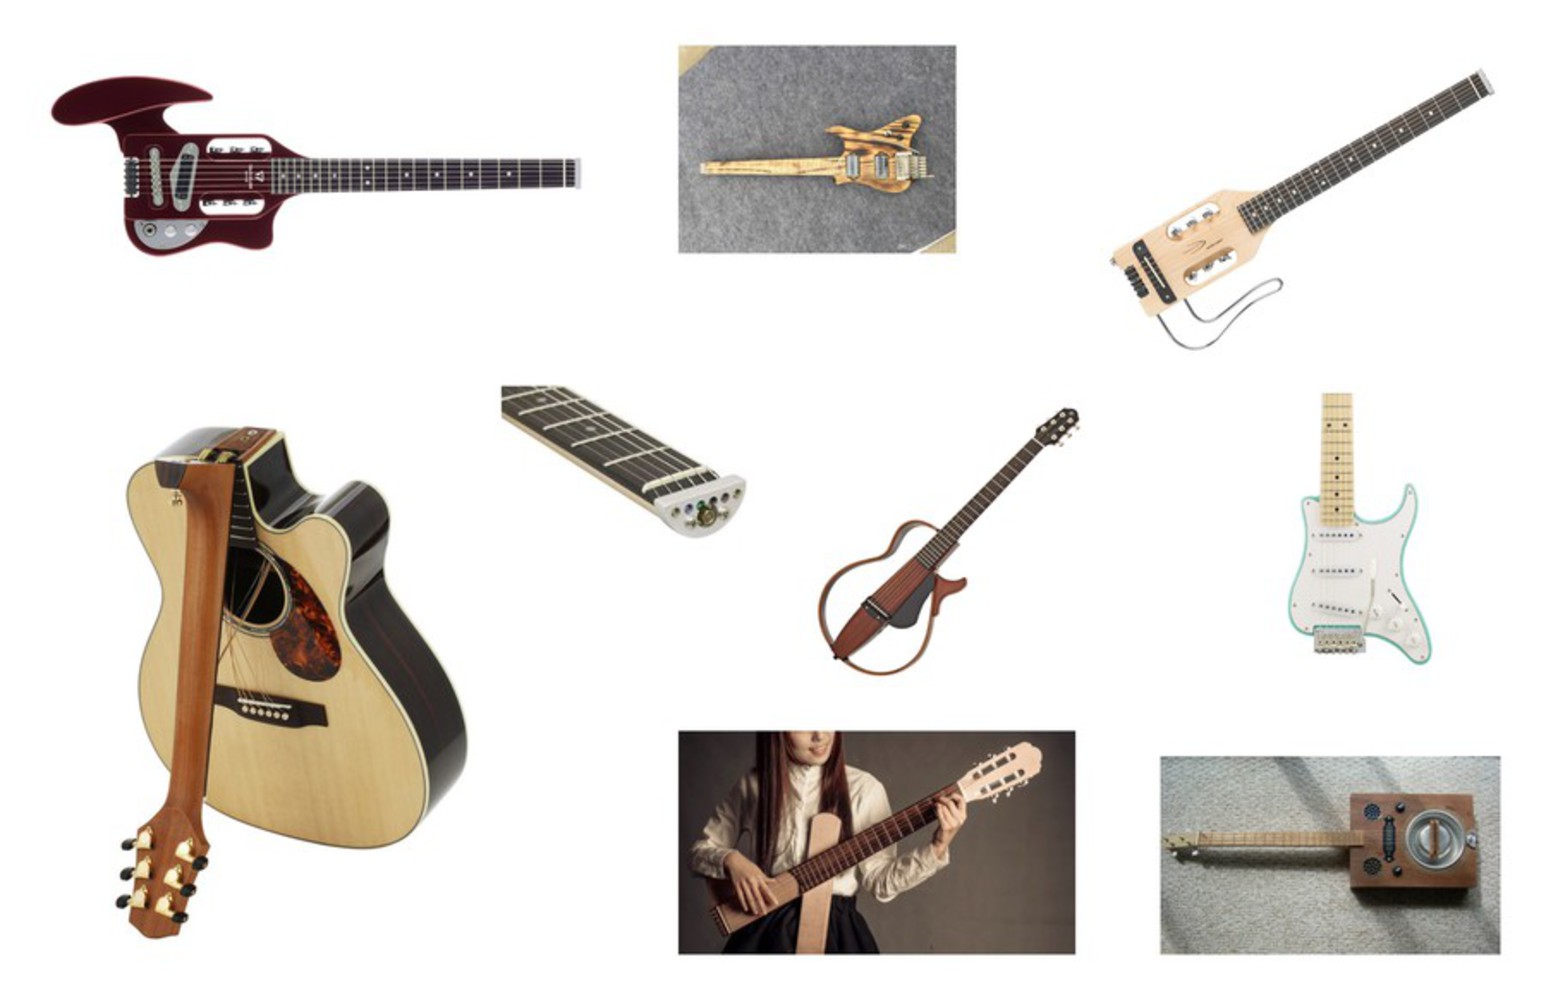
There are several travel-oriented or compact guitars on the market already, shown in the second moodboard. I looked to these for inspiration, especially the Traveler Ultra Light Acoustic Electric guitar with the design that places the headstock and tuning pegs in the guitar's body. I was also very inspired by the Yamaha Silent Guitar, with its minimalist body. 

Moodboard1.thumb
Show Advanced Options
Moodboard2.thumb
Show Advanced Options

The first thing that I started to work on was the fretboard, which I bought from an online guitar store that already had the fretwire slots in them. It came as a large rectangular piece, so I cut it down to size to match the saddle and nut of the guitar. Then, I cut the fretwire to approximately the right size and hammered and glued it into the fretboard. 

Finally, the most time-consuming step of this process was sanding and filing down the fretwire, which I did by hand with varying grits of sandpaper (starting with 80 and working up to 400) and a hand file. It's really important to file down the frets so that the player doesn't cut their fingers when playing- you can see the difference that filing and sanding makes in the close-up photos (upper photo is unfiled, bottom photo is filed and sanded). 

Img 20190425 093641 cropped.thumb
Show Advanced Options
Img 20190425 114347.thumb
Show Advanced Options
Img 20190425 141257 cropped.thumb
Show Advanced Options
Img 20190425 141926.thumb
Show Advanced Options
Img 20190425 190255.thumb
Show Advanced Options

The next step was to move on to making the guitar body, which was also by far the most challenging. Since I was working with a fairly narrow piece of wood (5.75"), it was difficult to fit all the electronics in a cavity that was also compatible with the folding piece (so that it would lay mostly flat). I sketched out the design on paper and tested out different designs for spacing for the electronics. I finally settled on this design, which I then used to trace onto the wood and roughly cut out. 

Then, I sanded down the appropriate edges using a combination of an orbital/palm sander, a dremel, hand files, and varying grits of sandpaper (ranging from 60 to 1500). This above and beyond the most time consuming process, especially since I had to sand all the particularly curvy parts by hand since the palm sander, dremel, and hand files were not agile enough to go over the curves. It was definitely worth it though, and the guitar wood blanks looked pretty nice after sanding. 

Img 20190426 150702.thumb
Show Advanced Options
Img 20190426 160626.thumb
Show Advanced Options
Img 20190427 175815.thumb
Show Advanced Options
Img 20190429 193502.thumb
Show Advanced Options
Img 20190429 205348.thumb
Show Advanced Options
Img 20190429 205423.thumb
Show Advanced Options
Img 20190430 132008.thumb
Show Advanced Options

Next, I had to machine two specific custom parts from aluminum. The first round cylindrical object has grooves for each of the six strings that allow them to wrap around the bottom of the guitar to the back with the correct spacing. The second part is basically a metal plate with holes in it to hold the strings at the top of the guitar along with a hole that allows for access to the truss rod. I spray painted both parts black in order to fit the color scheme of the guitar.

Img 20190429 154554.thumb
Show Advanced Options
Img 20190429 180715.thumb
Show Advanced Options
Img 20190430 153711.thumb
Show Advanced Options
String edited.thumb
Show Advanced Options

Then, I soldered all the electronic parts together: the single coil pickup, two volume potentiometers, the rod piezo pickup, the three way switch, and the 1/4" jack. Luckily the circuit is pretty simple and there are many online guides out there.

I also used steel-reinforced epoxy to glue in the truss rod to the neck. The truss rod will allow for some minor adjustments to the curvature of the neck, in the case that it becomes slightly warped due to humidity or age. 

After adding the truss rod and gluing on the fretboard, I stained all the wood pieces using a mix of Dark Walnut and Ebony wood stains. I also added a glossy polyurethene coating for protection.

Img 20190501 050617.thumb
Show Advanced Options
Img 20190501 070335.thumb
Show Advanced Options
Img 20190501 102957.thumb
Show Advanced Options

I glued in small magnets in the hinges of the design to help hold the top hinged part in place. 

Img 20190502 193202.thumb
Show Advanced Options

Final glory shots of the finished product, as well as a short video demo of the hinged design:

Img 20190503 124612  01  01  01.thumb
Show Advanced Options
Img 20190503 124628.thumb
Show Advanced Options
Img 20190503 124933  01.thumb
Show Advanced Options
Img 20190503 125042 cropped.thumb
Show Advanced Options
Img 20190503 125106 cropped.thumb
Show Advanced Options
Img 20190503 125022 cropped.thumb
Show Advanced Options
Drop files here or click to select

You can upload files of up to 20MB using this form.