High Five
Made by Ashutosh Sharma, Varun Gadh and Chris Perry
Made by Ashutosh Sharma, Varun Gadh and Chris Perry
Using IoT enabled "Hands" to help geographically separated friends stay connected through shared high fives.
Created: March 6th, 2018
For people separated geographically, it can be hard to maintain the fun and liveliness of a friendship. We propose "High Five" to help solve this problem, which uses two connected (3D-printed plastic) hands that easily extend from your actual hands to communicate. Specifically, when one friend high-fives his hand, the other hand rotates toward the other friend's hand and slaps it.
-2 servo motors
-2 IR sensors(QRD1114 Optical Detector)
-2 Plastic 3D Printed Hands
-2 2"x4" and 2 1"x0.5" Acrylic sheets for mounting on hand (using Laser cutter)
-4 pieces of 4' Velcro
-2 portable batteries with USB port
-1 Diamond Grit File
-2 Breadboards small enough to be mounted onto acrylic
-4 pieces 2' Aluminum Wire
- 2 3' wooden pegs
- Electric Drill
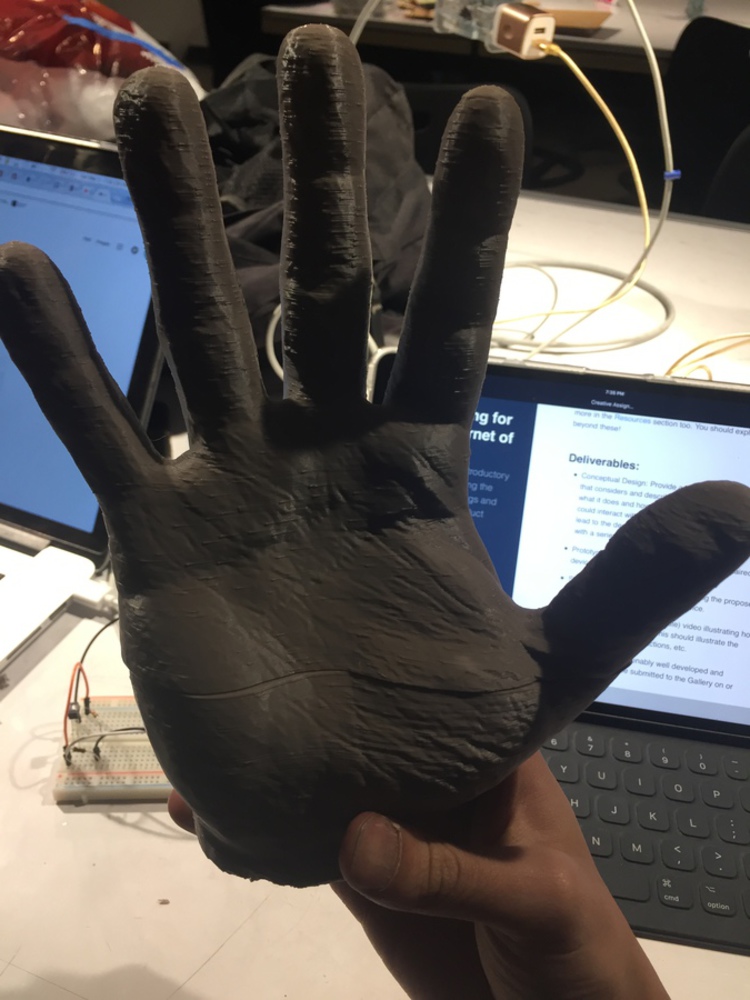
For this project, we decided to have the 3D-Printed Hands attach directly to the left hand of each user. This method allows for easy access and the possibility for the secondary (activated) hand to always make contact with the user's hand.
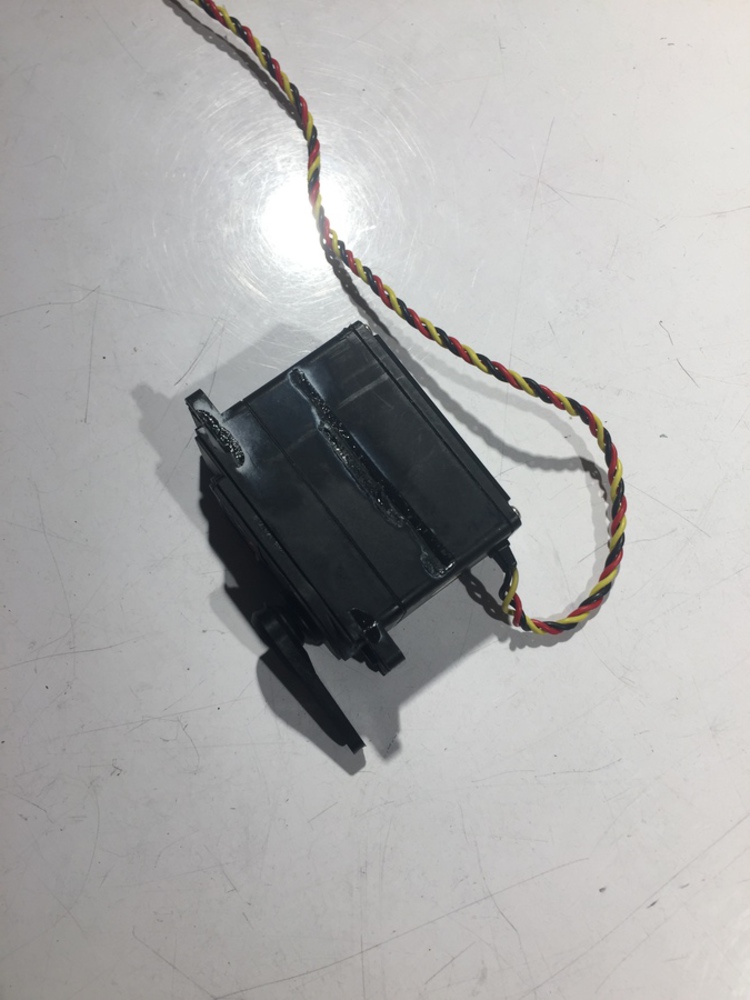
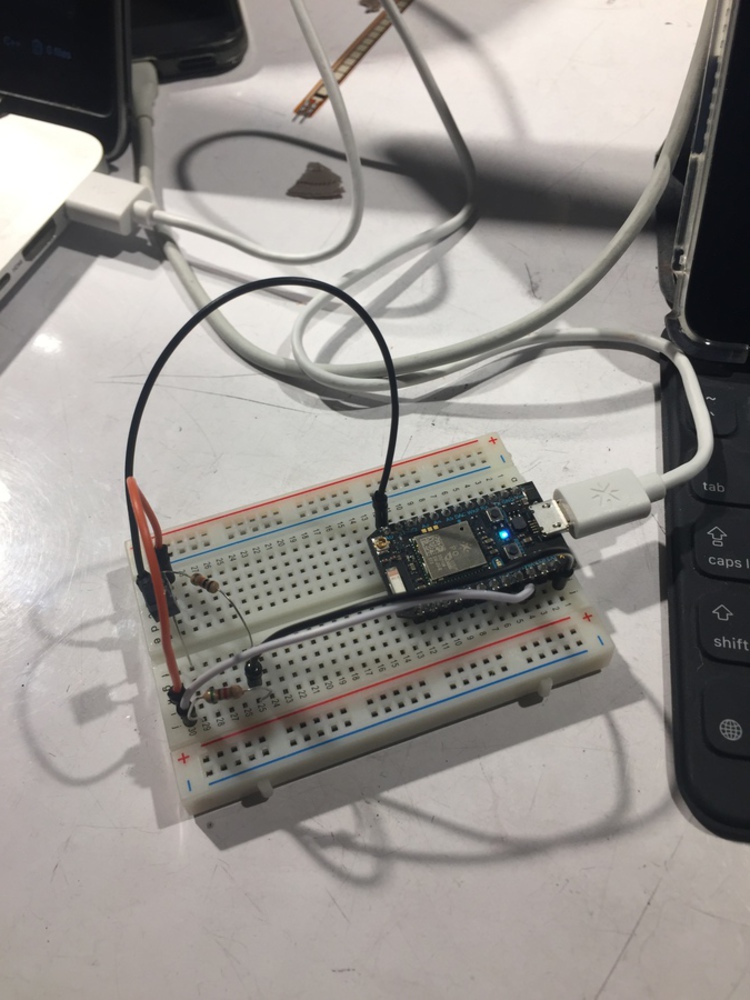
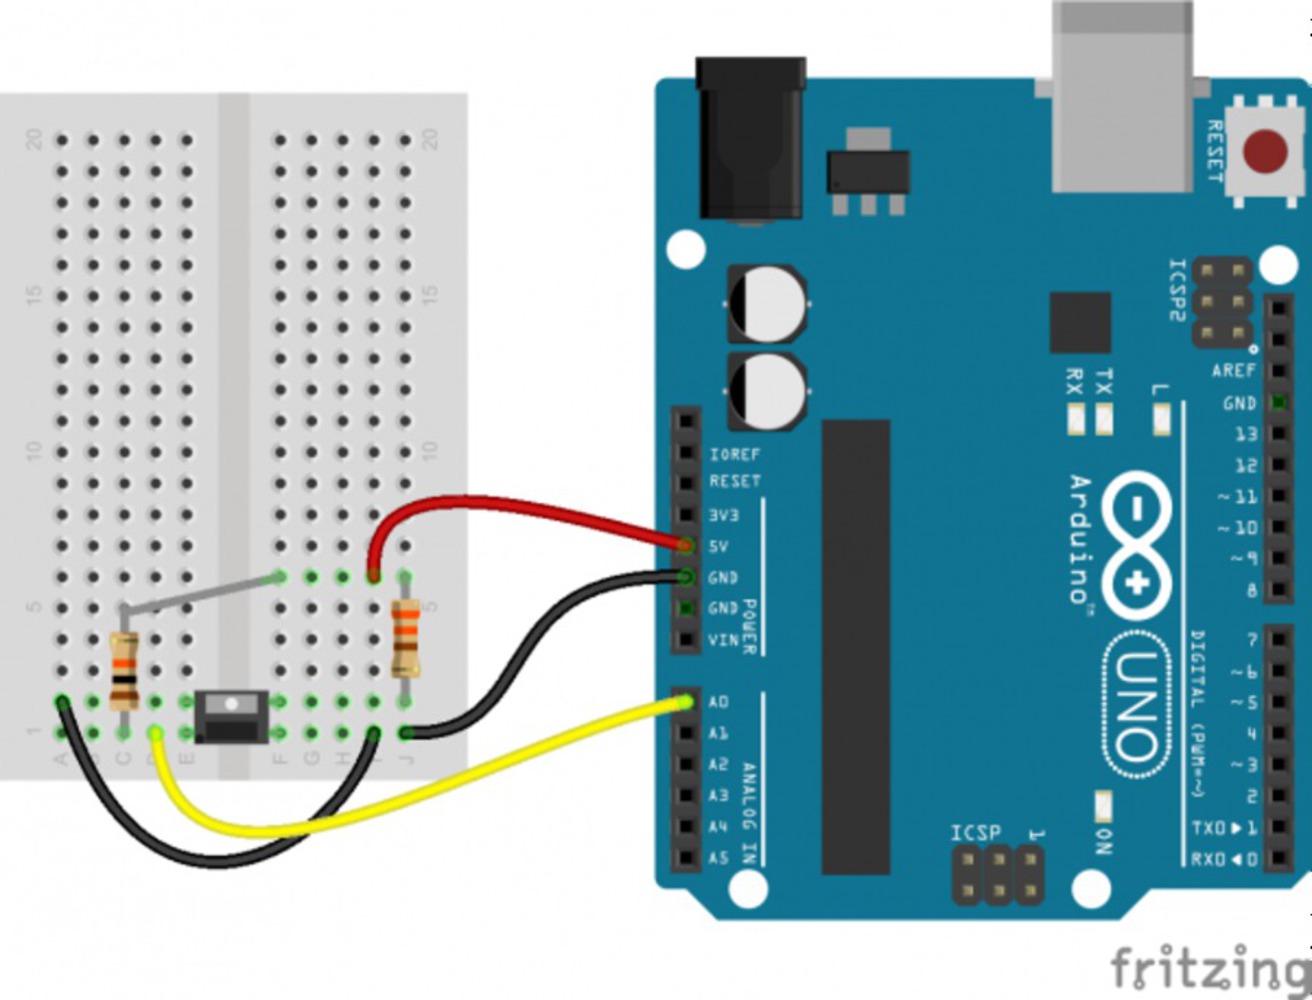
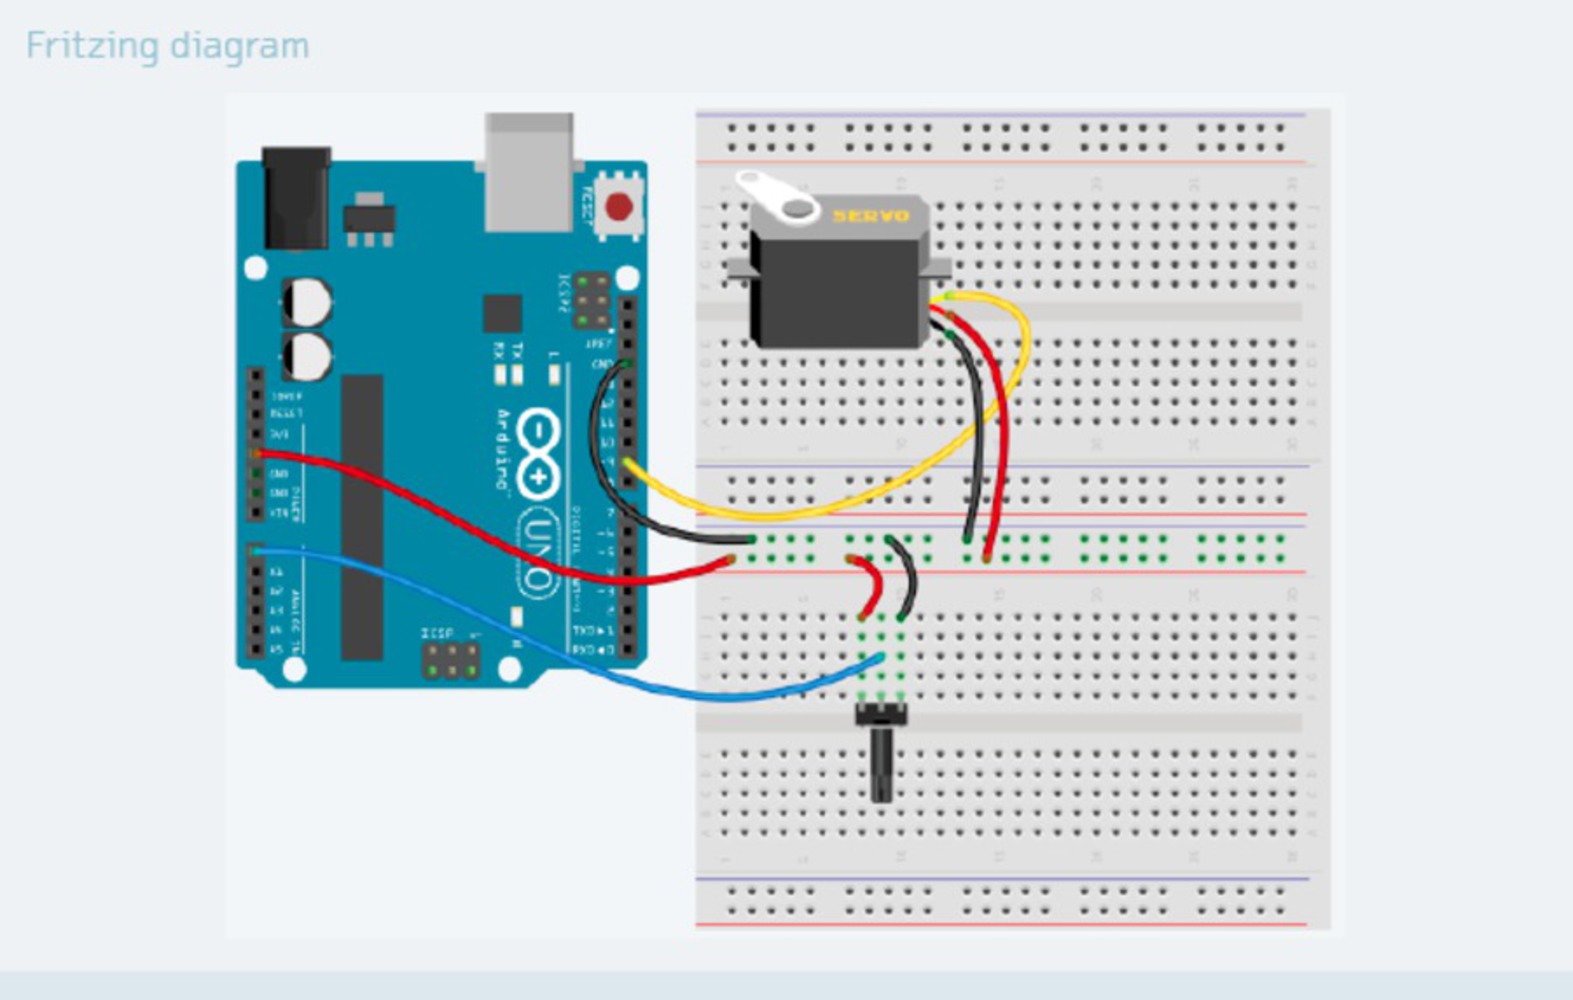
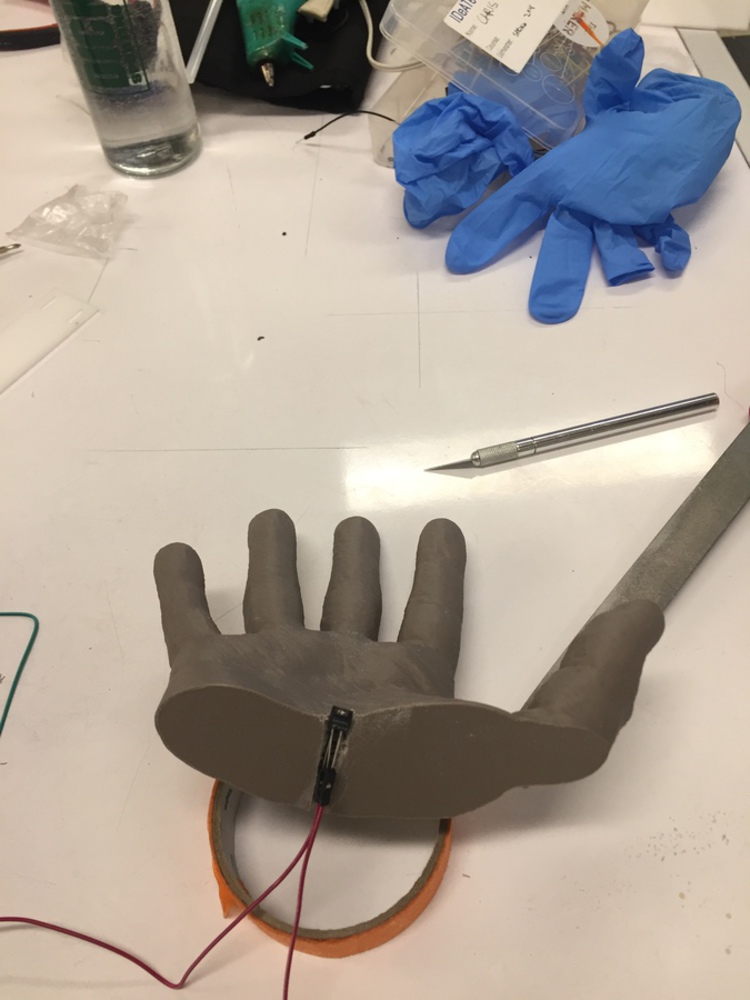
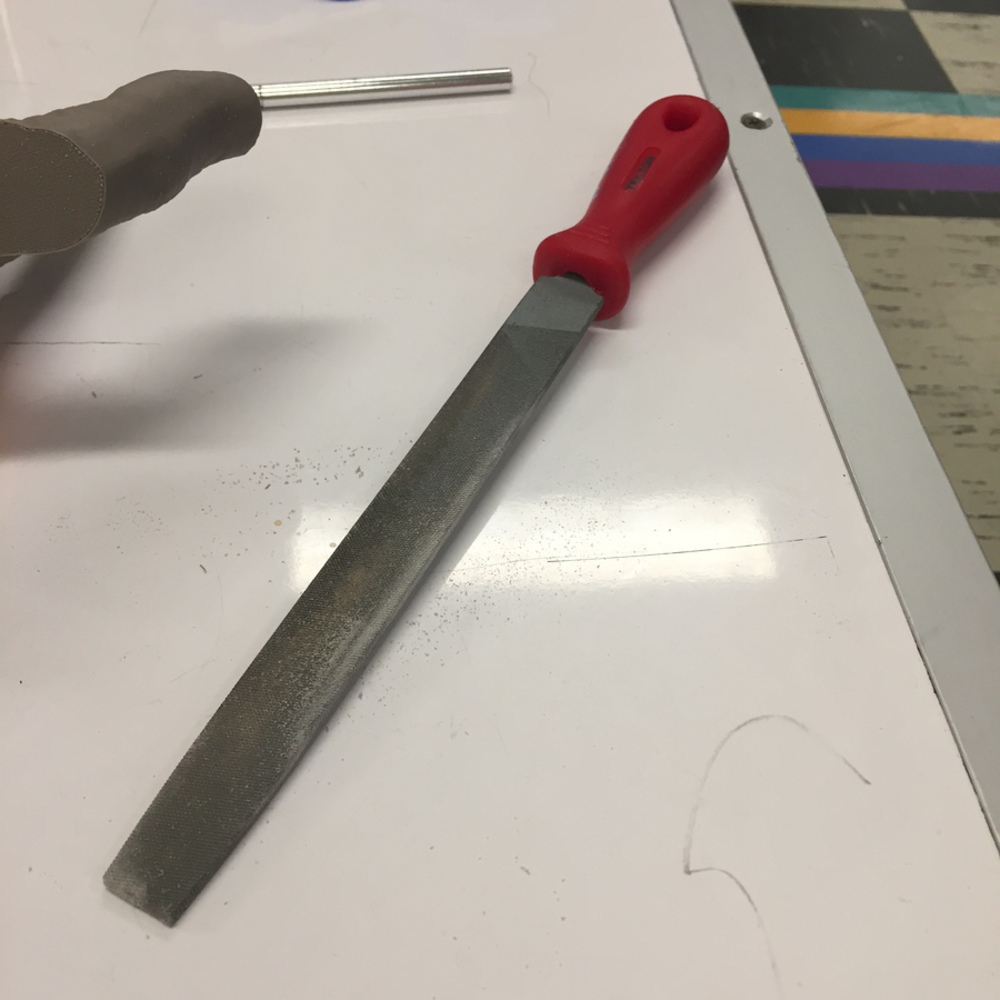
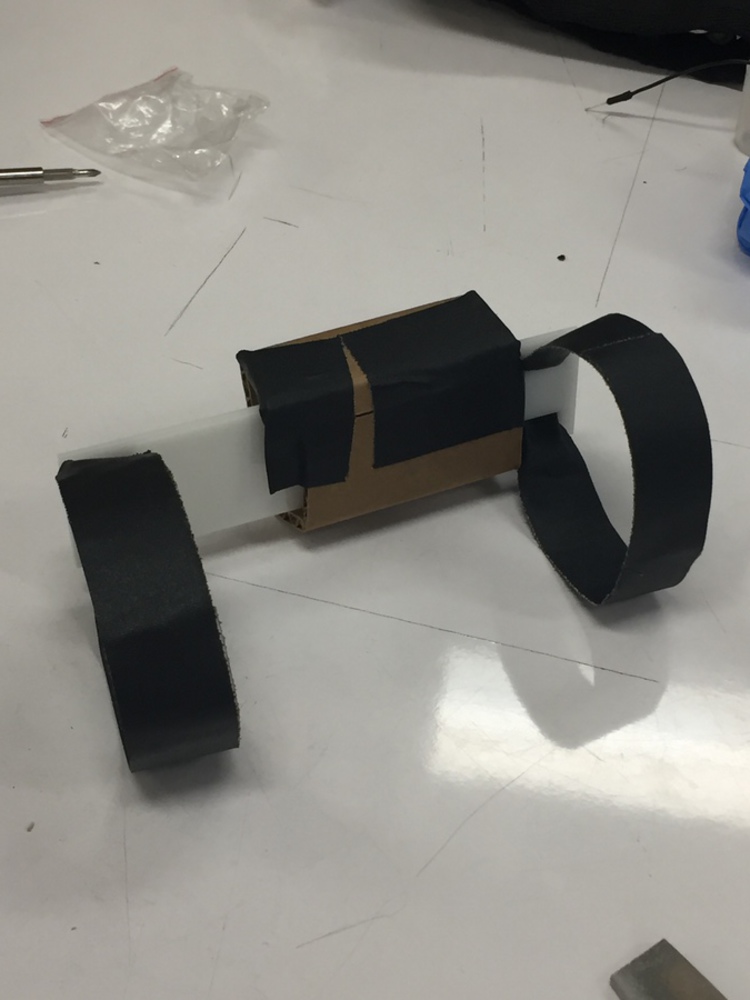
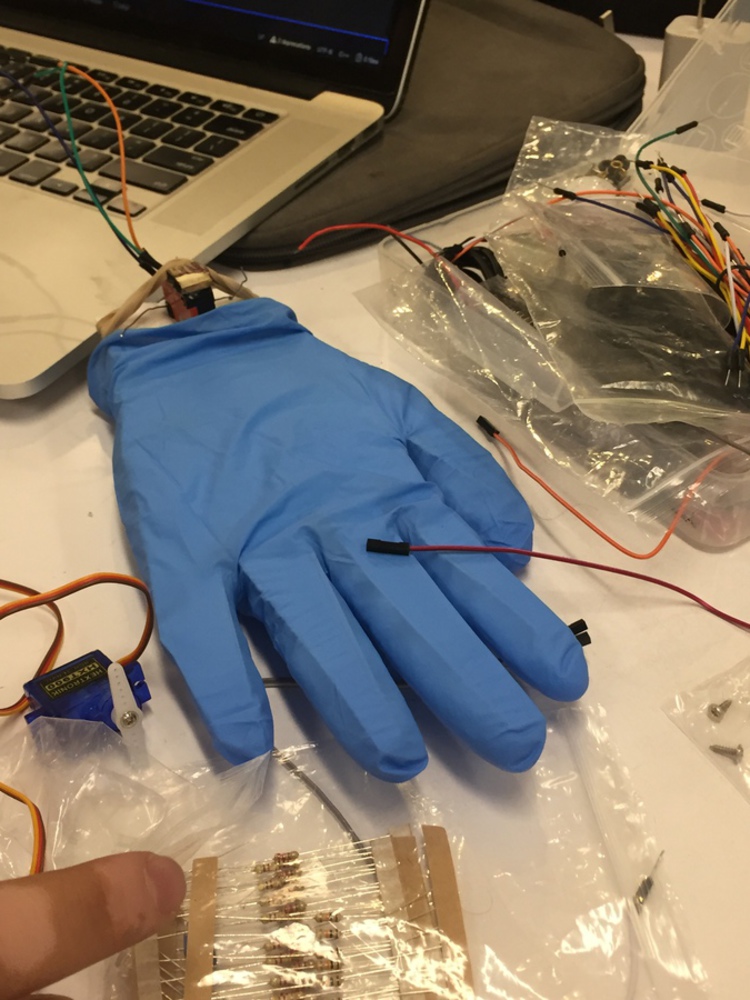
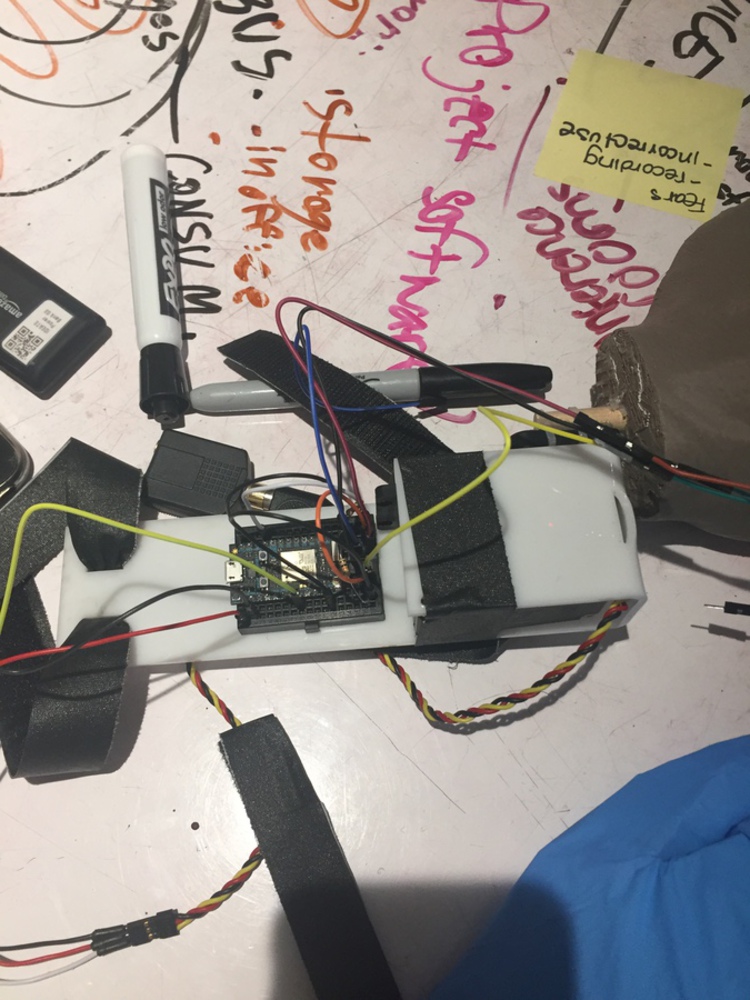
Only one hand could be 3D-printed (B) due to printing constraints, so we used a glove filled with cotton and plywood to construct the other. However, both 3D printed hands can be easily made using an STL file found online (see Works Cited). Both of these were connected to an IR proximity sensor (C) mounted in the middle of the hand after a ~0.5 inch indent (D) was made with a diamond file (E). The Arduino setup for the IR sensor and an idea of the jumper connection length needed is shown in pictures below. Afterwards, a mount of the acrylic with the velcro were made and attached to the user's left arm (F). Meanwhile, the hand was attached to the pivot arm of the servo (A) by drilling a wooden peg in and tying aluminum wire around it (G). This step makes it possible for the hand to turn (from 30 to 65 degrees) when prompted. Additionally, a smaller breadboard was connected to the components to allow for storage.(H) These two components now fit quite easily into each other, as seen in the video.
The code contains functions "sendSlap" and "receiveSlap" to communicate and subscribe to an event, and is included below. Additionally, sufficient delay in data input was used to ensure that the IR sensor would not activate when approaching the hand, effectively preventing a high-five loop. In the video, you can see that there is a slightly annoying delay between input and output due to this countermeasure.
int toSlap = 30;
int fromSlap = 60;
int slapRest = 600;
const int QRD1114_PIN = A0; // Sensor output voltage


int servoPin = A4;
Servo baloon;
int servoPos = 0;
//int servoPos = mouthClosed;

const int switchPin = D0;              // switch is connected to pin 2
int val;                        // variable for reading the pin status
int buttonState;
int counter = 0;
bool currentlySlapping;

float lastproximityV;


void setup()
{

  //Particle.function("servo", servoControl);

  //Particle.variable("servoPos" , &servoPos , INT );

  Serial.begin(9600);
  Particle.subscribe("diot/2018/highfive/", receivedSlap);
  pinMode(QRD1114_PIN, INPUT);
  //Particle.subscribe(  "diot/2018/paired/" , handleSharedEvent);
  //Serial.begin(9600);

  // attaches the servo on the A7 pin to the servo object
  baloon.attach( servoPin );

  //Register our Particle to control the servo
   //Particle.function("servo", servoControl);

  //Particle.variable("servoPos" , &servoPos , INT );
  //Register our Particle to control the servo
  Particle.function("servo", highFive);

  //buttonpinMode(switchPin, INPUT);    // Set the switch pin as input

  Serial.begin(9600);           // Set up serial communication at 9600bps
  buttonState = digitalRead(switchPin);   // read the initial state
}

void loop()
{
  // Read in the ADC and convert it to a voltage:
  int proximityADC = analogRead(QRD1114_PIN);
  float proximityV = (float)proximityADC * 5.0 / 1023.0;
  //Serial.println(proximityV);
  delay(100);


  counter = counter+1;

  //switch section
  //val = digitalRead(switchPin);      // read input value and store it in val
  delay(500);
  if (counter==14)
  {
    highFive(" ");
  }

  if (proximityV<19 && lastproximityV<19 && currentlySlapping==false) {          // the button state has changed!
    if (val == LOW) {                // check if the button is pressed
      Serial.println("slappin");
      sendSlap();
    } else {                         // the button is -not- pressed...

    }
  }


  buttonState = val;                 // save the new state in our variable

}
// This value will store the last time we published an event
long lastPublishedAt = 0;
// this is the time delay before we should publish a new event
// from this device
int publishAfter = 10000;

void sendSlap()
{
  //publish event to other hand
  if(lastPublishedAt + publishAfter < millis()){
  String eventName = "diot/2018/highfive/" + System.deviceID();
  Particle.publish(eventName, System.deviceID());
  lastPublishedAt = millis();
  Serial.println("slap being sent");
}
}
  void receivedSlap(const char *event, const char *data)
  {
      currentlySlapping=true;
      // Now we're getting ALL events published using "db2018/paired/"
      // This includes events from this device.
      // So we need to ignore any events that we sent.

      // Let's check the event name
      String eventName = String( event ); // convert to a string object
      // This gives us access to a bunch of built in methods
      // Like indexOf()
      // Locates a character or String within another String.
      // By default, searches from the beginning of the String,
      // but can also start from a given index,
      // allowing for the locating of all instances of the character or String.
      // It Returns: The index of val within the String, or -1 if not found.

      // We can use this to check if our event name contains the
      // id of this device

      String deviceID = System.deviceID();

      if( eventName.indexOf( deviceID ) != -1 ){
        // if we get anything other than -1
        // the event came from this device.
        // so stop doing stuff
        return; }  //return call kicks us out of this function
    highFive("hey");
    delay(1000);
    currentlySlapping=false;
  }

/*
int servoControl(String command)
{
    // Convert
   int newPos = command.toInt();
   // Make sure it is in the right range
   // And set the position
   servoPos = constrain( newPos, 0 , 180);

   // Set the servo
   myServo.write( servoPos );

   // done
   return 1;
}*/


int highFive(String command)
{

   // Convert


  // Set the servo
  baloon.write(toSlap);
  delay(slapRest);
  baloon.write(fromSlap);
  /*
//Serial.println("wazzup" );
  //Serial.print(newPos);
  Serial.print("    ");
*/
  //BLINK IT
  //blinkLED(100, 100, 120);

  //blinkLED(230, 230);


   return 1;
}For IR Sensor: https://learn.sparkfun.com/tutorials/qrd1114-optical-detector-hookup-guide
For Device connectivity: Jakob Marsico in-class demonstration
For 3d Printed Hand: https://all3dp.com/1/free-stl-files-3d-printer-models-3d-print-files-stl-download/
A hands-on introductory course exploring the Internet of Things and connected product experiences.
Using IoT enabled "Hands" to help geographically separated friends stay connected through shared high fives.