jychang1 Project 1
Made by Justin Chang
Made by Justin Chang
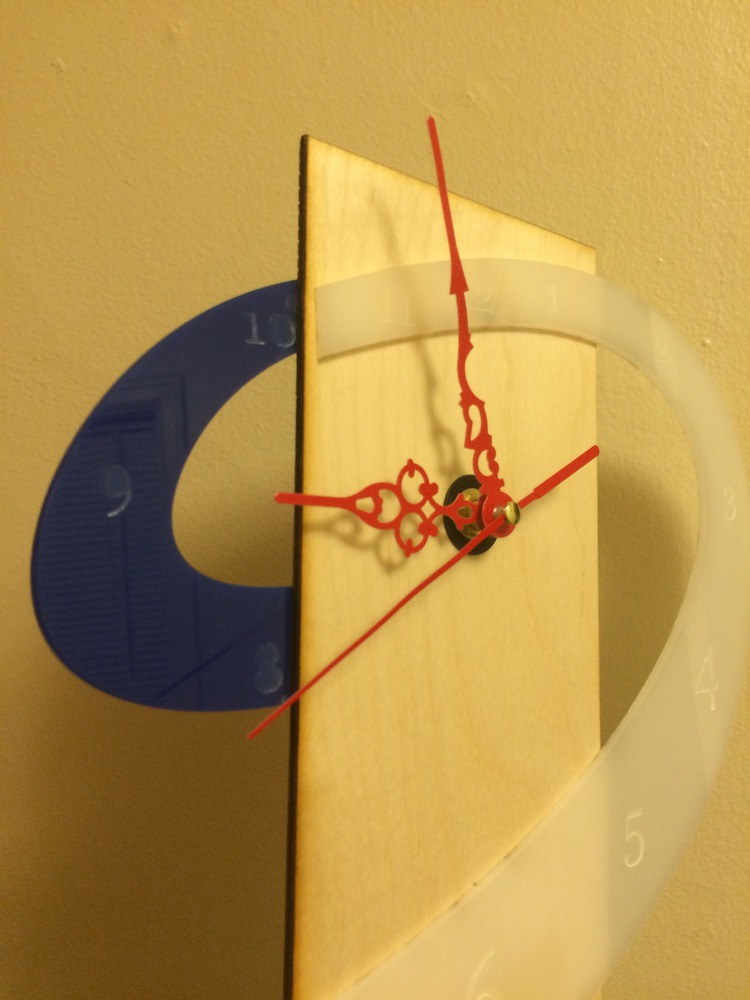
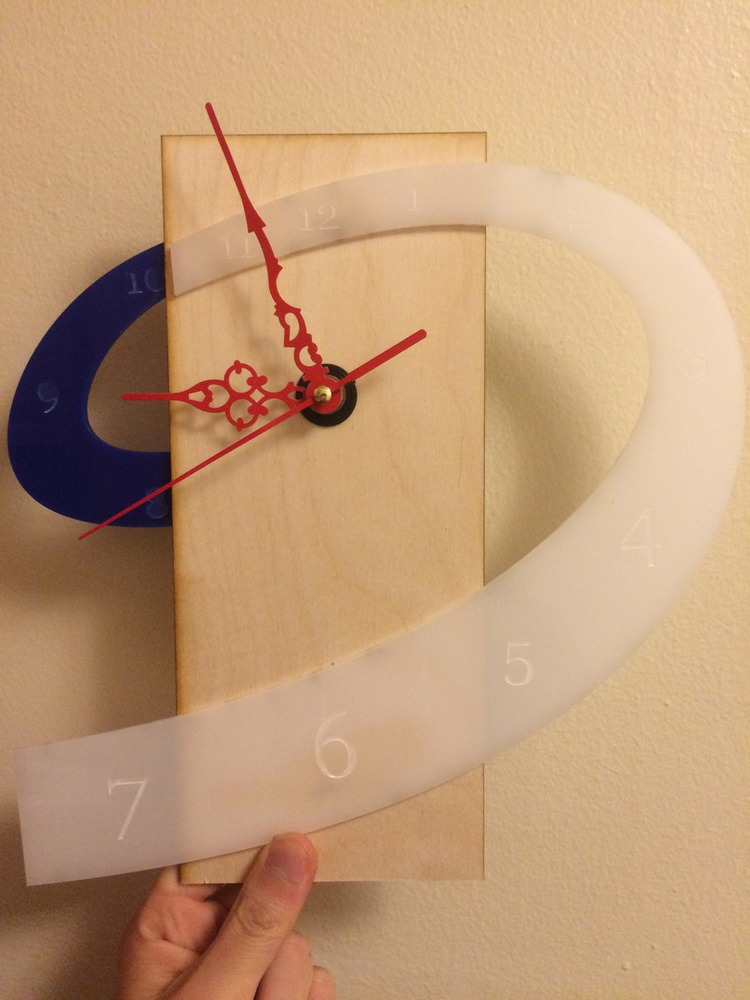
Created a spiral shaped clock.
Created: October 25th, 2017
The goal behind this project was to create a clock that would also function as a wall ornament for my completely empty room's walls. Creating and mounting an aesthetically pleasing clock in my room will both liven the room up and provide needed functionality.
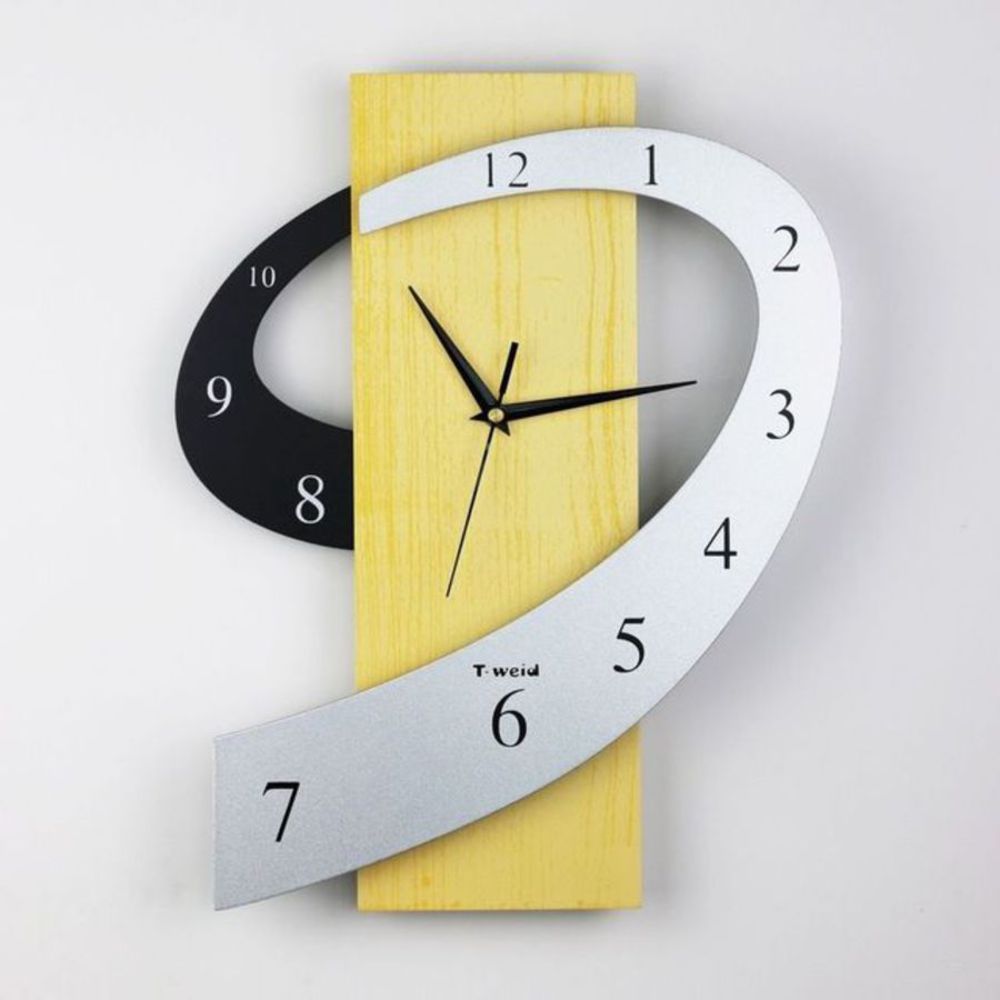
The main idea that I initially had for this clock was that I wanted the shape to be distinct. I am not at all proficient in arts or crafts so I felt that the best way to make the clock look both distinct and pleasant was to have an original shape. For my design, I decided to create a spiral shape with the clock and base my model off of a project that I found online. An image of the reference clock that I used is displayed below.
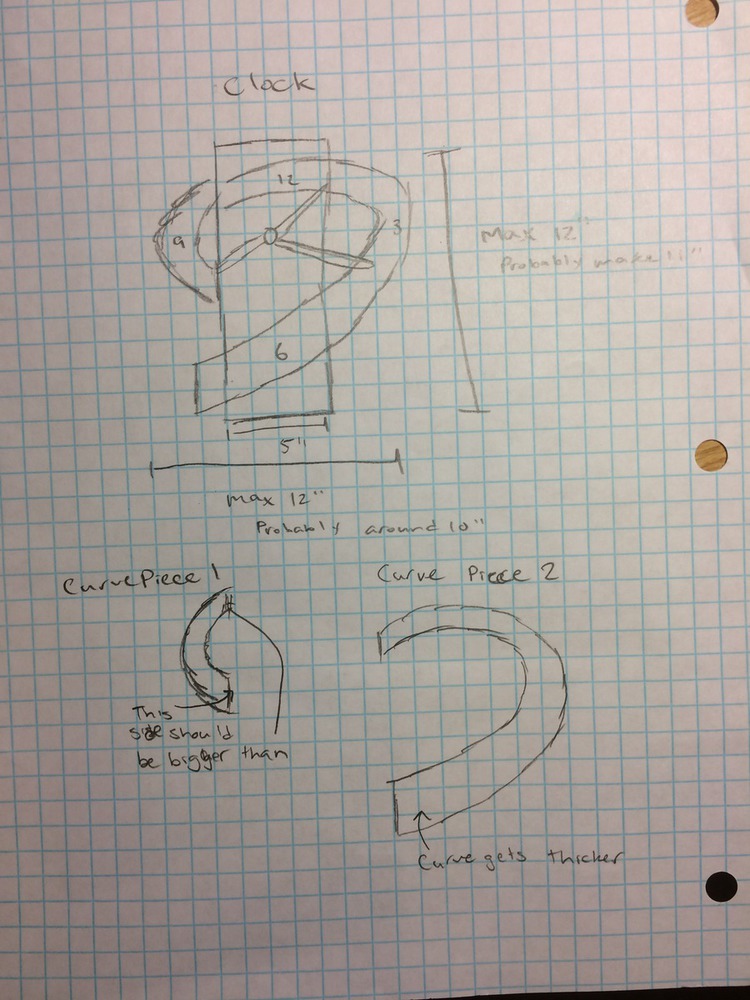
The first step for this project was to sketch out the dimensions of the clock and the general shape. This was mostly helpful for envisioning what my final clock would look like and was referenced during the modelling of the clock. The dimensions of the clock were made so that I would only need pieces from 12 by 12 inch sheets of acrylic and wood, reducing costs.
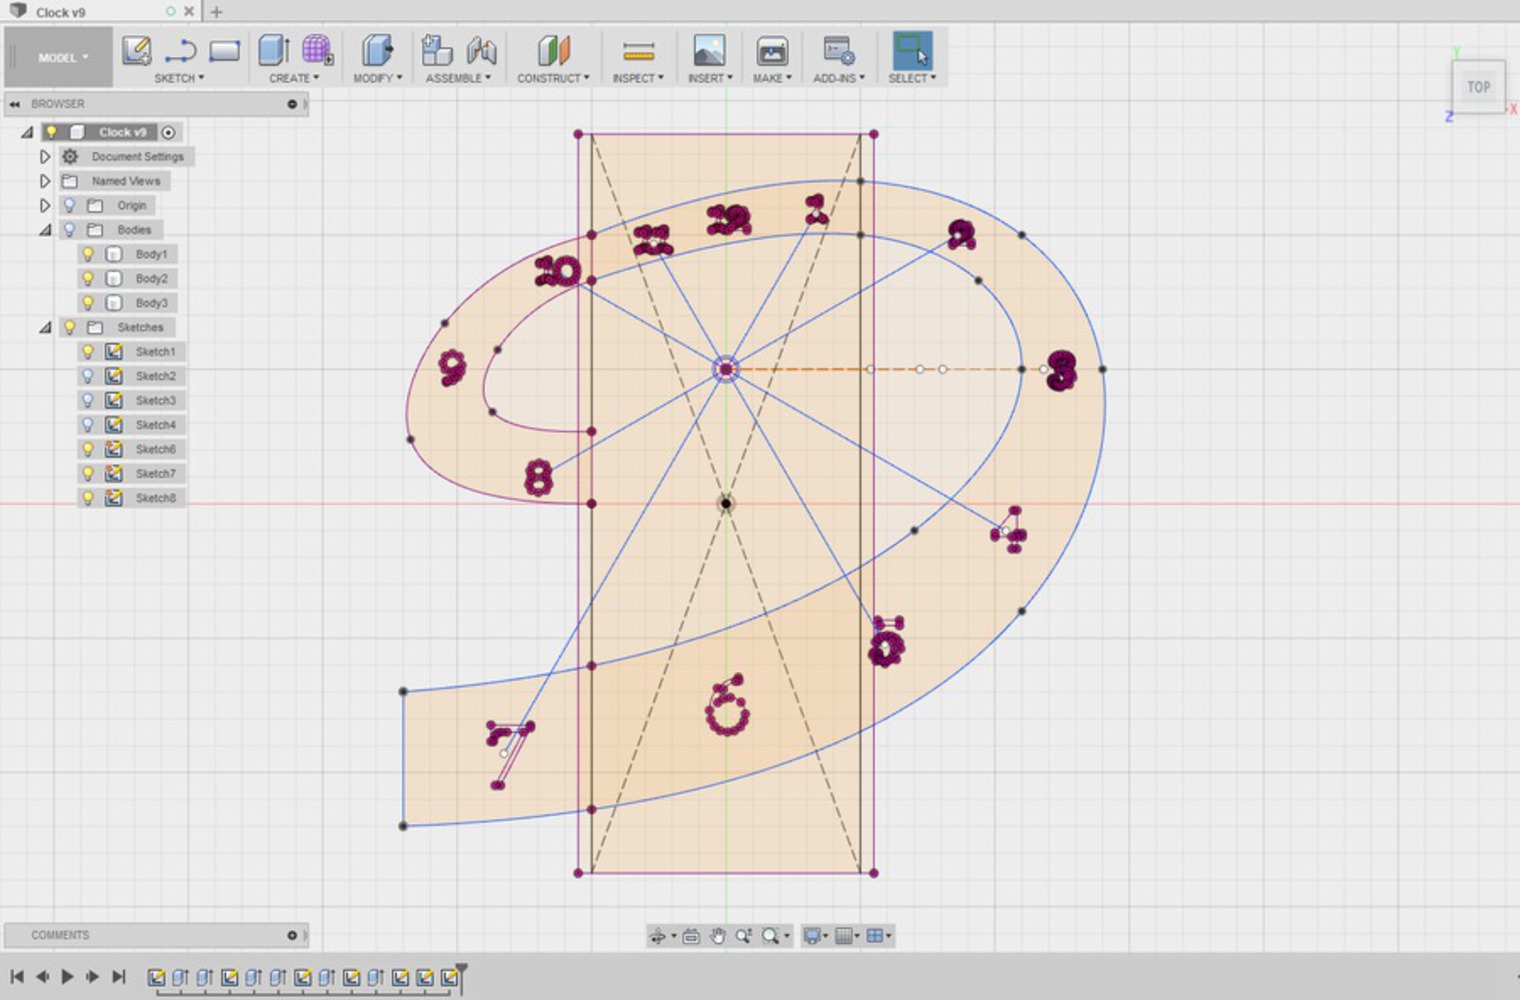
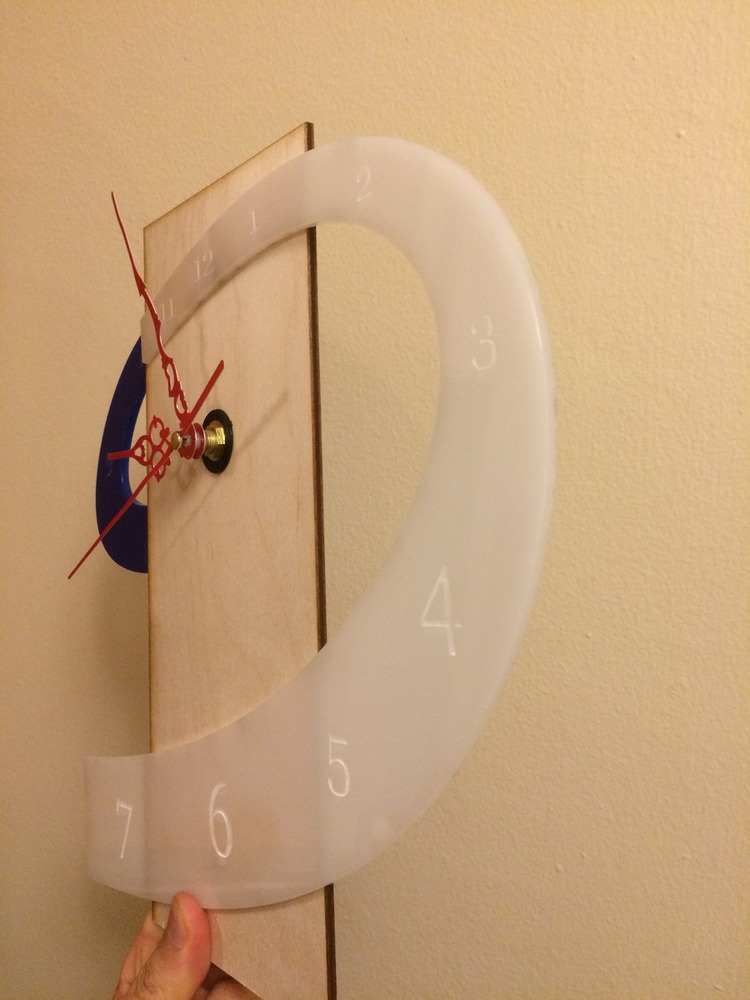
Next, I used Fusion360 to generate the model for the clock. First, I created the middle plank that the two curves of the clocked would be attached to. Then, I tried playing with the arc tool to make the curves that I wanted. However, I found that the arcs could not be customized in the ways that I intended so I instead used the spline tool to manually draw the curves. After creating the points, I tinkered with them until I found the shape that I wanted. The last thing to do in the sketch was to draw lines for every 30 degrees from the center spindle hole in the middle plank. This sketch was created so that I would place the numbers of the clock in the correct positions. Once the sketch was complete, the curves and middle piece were extruded. After the numbers were cut into the curve bodies, projections were created that would be saved as the final DXF files which were used to finally cut the pieces. The DXF files were imported into Lasercut and cut individually. The overall time that it took to cut all three pieces was about 15 minutes. After the cuts were complete, I used alcohol wipes to clean the acrylic and superglue to glue the pieces together. To complete the clock, I installed the clock kit.
One problem that I ran into while importing the DXF files into the Lasercut program was that some of the numbers (4 and 6) did not look very complete in the Lasercut preview. To resolve this, I had to delete them and add text from within the Lasercut program. One problem with this is that the 4 and 6 may not be lined up as well since I did them by eye whereas all the other numbers were carefully placed according to the angled lines.
Software: Autodesk Fusion360, Inkscape, LaserCut
Tools: Rabbit Laser
Material: Blue acrylic, white acrylic, birch plywood, clock kit
Finishing: Alcohol wipe, superglue, assembling
The final product is an aesthetically pleasant and functional clock that will help make my room walls less of a barren landscape.
Reflect on the process of making this project. What did you learn? What would you do differently?
The main things that I learned from this project were using the tools in Fusion360 and learning how to deal with problems when importing DXF files into Lasercut. It was very important to carefully check the Lasercut preview because if I had not, some of my numbers would have ended up looking strange. One thing that I would do differently would be to fill in the engraved numbers with some sort of paint because the numbers are difficult to see in certain lighting. The reason I was not able to do this was because some of the engraved numbers were very small and I felt that it would be too difficult to fill them in cleanly. Overall, I am pretty happy at how the final clock turned out since I was mainly focused on the shape and I enjoy how the shape looks.
Digital Tooling (DigiTool) provides a platform for any CMU student to learn Digital Fabrication processes; all of which are very hands-on. Like these processes, this class is also very hands-on. I...more
Created a spiral shaped clock.