Double-Faced Tablet Weaving

Made by kshih

A skill investigation of a tabletweaving technique that allows arbitrary two-color patterns to be woven into bands.

Created: February 19th, 2019

0

Introduction to (Double-Faced) Tabletweaving 

I have some experience with tabletweaving, which is a warp-faced weaving technique that allows the weaver to create long, narrow bands of fabric. I wanted to explore double-faced tabletweaving, since you can theoretically create any (most) two-color patterns in the band.

In tabletweaving, cards with punched holes are used to structure the loom.  The cards are arranged in a deck, and the warp is threaded through the holes in each card. A combination of the way the cards are threaded (which colors are placed in which cards/holes) and the way the cards are turned creates regular patterns. As the cards are turned, different warp threads are brought to the top of the fabric, and passing the weft between them locks the warp into place.

Double-faced tabletweaving uses just two colors, but through a series of twice forward/twice backward turns, any pattern of those two colors can be created.

0

Materials

- Cards. You can buy a set of premade cards, or use a deck of thick playing cards to make your own.

- Warp and weft string. I used #8 perle cotton; 8/4 cotton warp is also a good choice. You'll need quite a bit even for a short band, since each card requires four warp threads, and you need to leave plenty of room at the end of the warp to turn your cards.

- Something to beat with. You can use the edge of a shuttle, a seam creaser, or (as I did) an ordinary comb.

- Things to attach the warp to. I used two large carabiners to tie the thread to, plus velcro straps to attach the carabiners to a) my bedframe and b) myself.

- Semi-optional: thick cord or scrap fabric, and a flat, rigid object. These let you start your band off evenly and neatly.

- Optional: a shuttle for your weft. You can also just make a butterfly of thread, or if it's small enough use it as it came.

0

Process

The process of double-faced tablet weaving is detailed at the following sources:

http://www.stringpage.com/tw/basictw.html

https://www.cs.vassar.edu/~capriest/dfdt.html

Additional tricks are found here:

https://silkandquill.com/2019/01/16/starting-and-finishing-tablet-woven-bands-and-some-other-hacks/

To briefly summarize:

1) Using a ~2x1 grid, design a pattern comprised of two colors. Because each cell represents two turns of the cards, they must be wider than they are tall (generally between two and three times, depending on how tightly the fabric is woven).

0
Scotty Dog design
Pattern.thumb
0

2) Thread the cards. Except for the border cards, which should be all one color, the cards should be threaded with two holes of one color and two of the other. Arrange them so they are all turned the same direction. Tie them off on either end; now you have your warp.

3) Attach one end of the warp to a sturdy object, like a bedframe; attach the other end to yourself. Now you have your loom.

0
Threaded cards
Process1.thumb
0

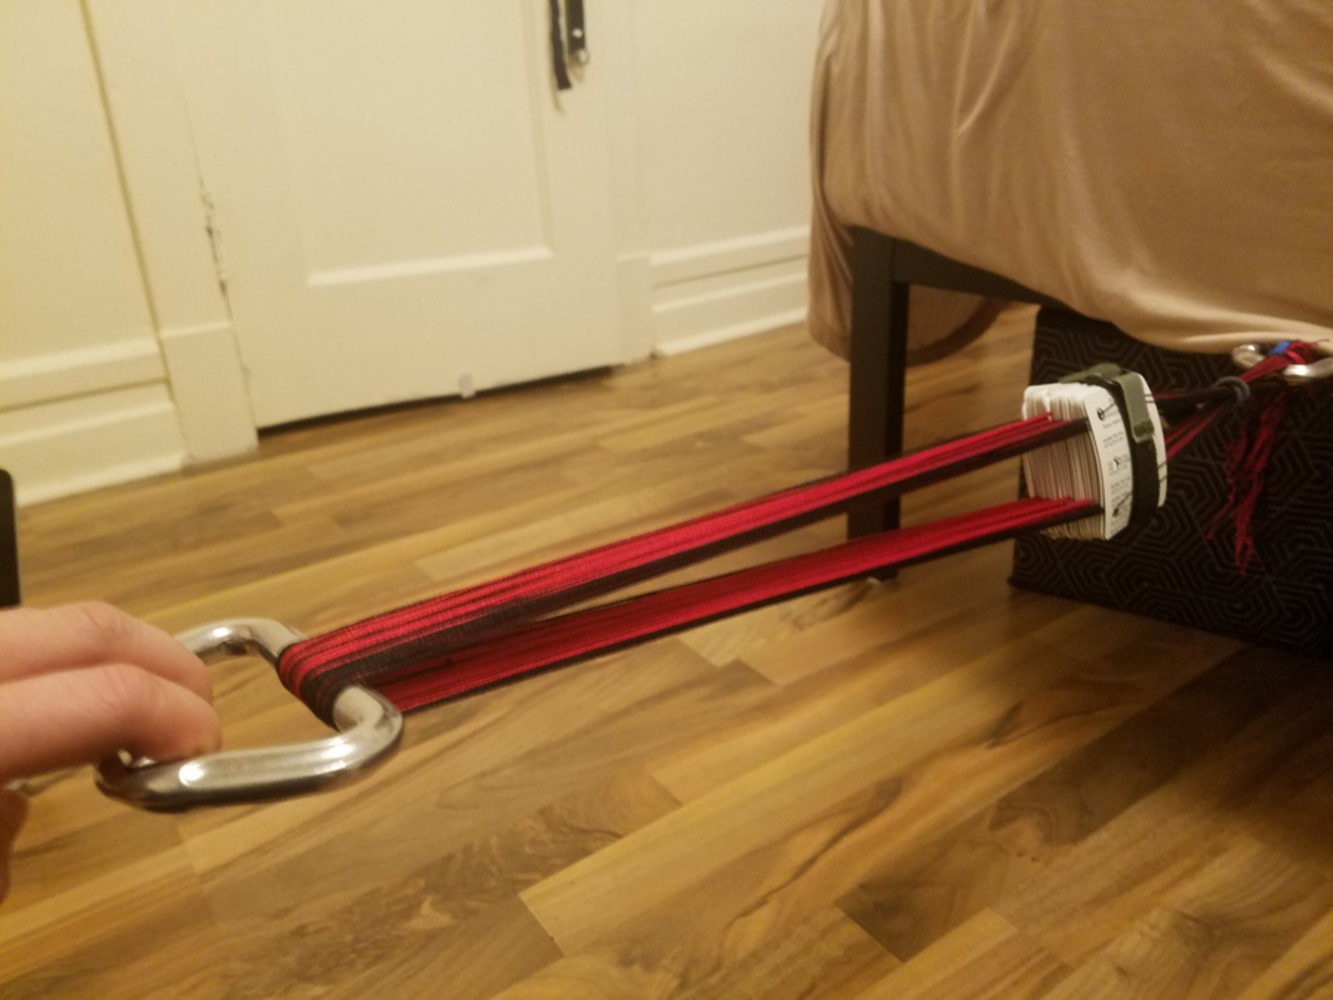
4) The cards form a gap, through which you will pass your weft. Use a thick cord or piece of fabric to begin your weaving; this will be removed later on. Pass it through, turn the cards forward, and pass back the other way. Repeat a few times until the warp threads have straightened out. Add a flat, rigid object, like a dowel, and turn the cards again.

5) Begin weaving. Leave the tail end of your weft long; pass the weft through, turn the cards forward, and beat. Pass the weft through the other way, and pass the tail of the weft across it (so that both pass through the gap in opposite directions). Turn forward and beat.

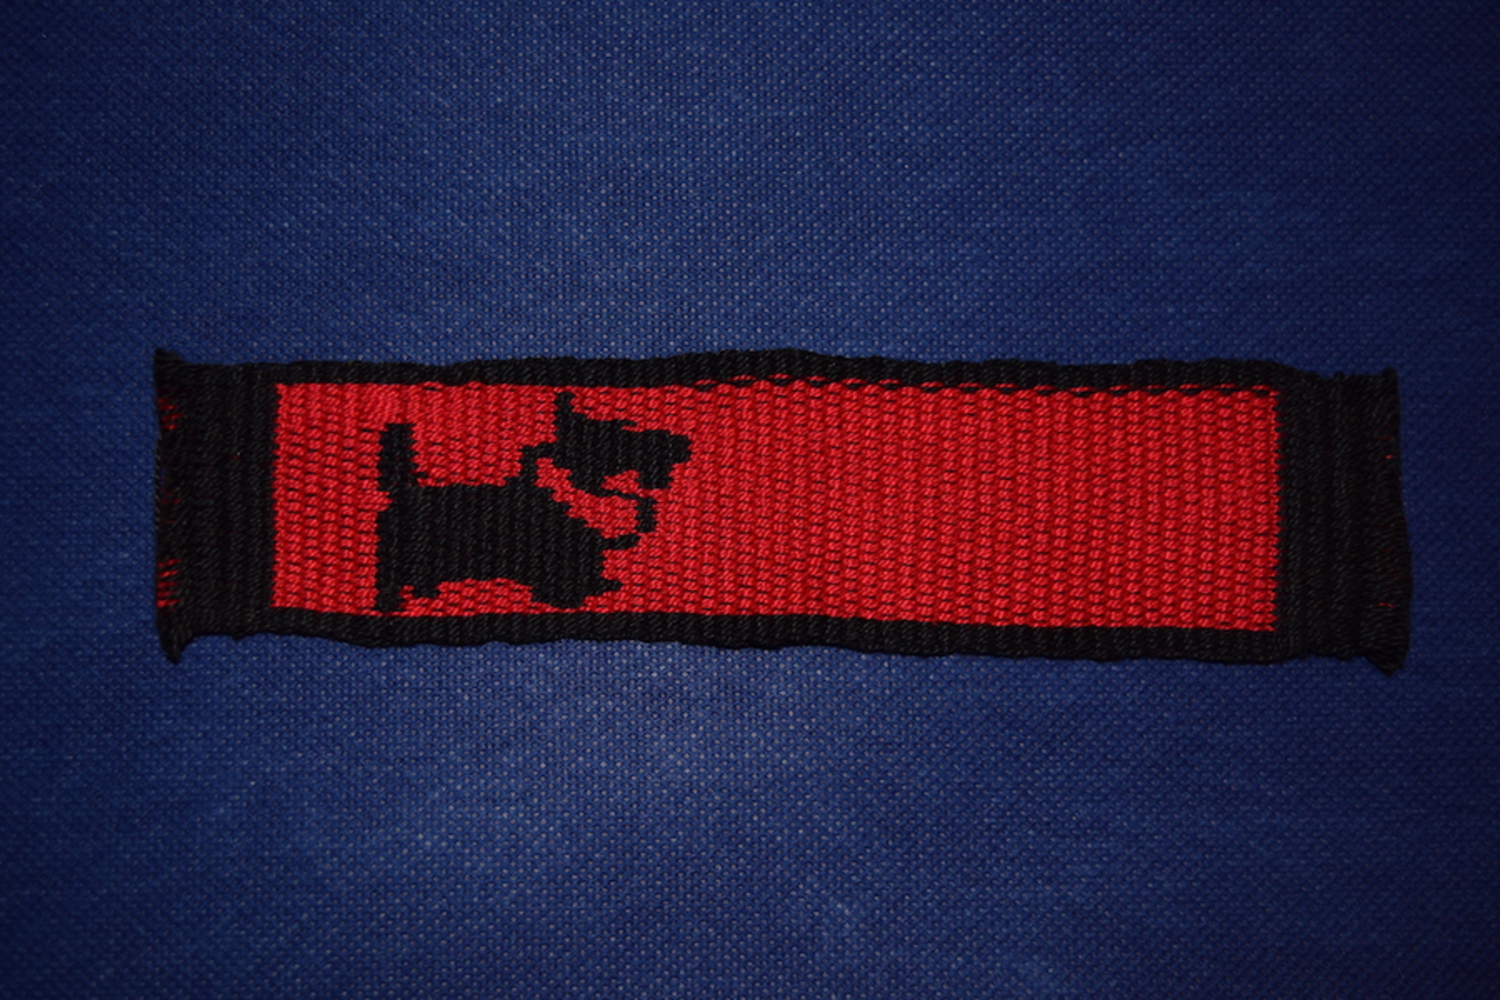
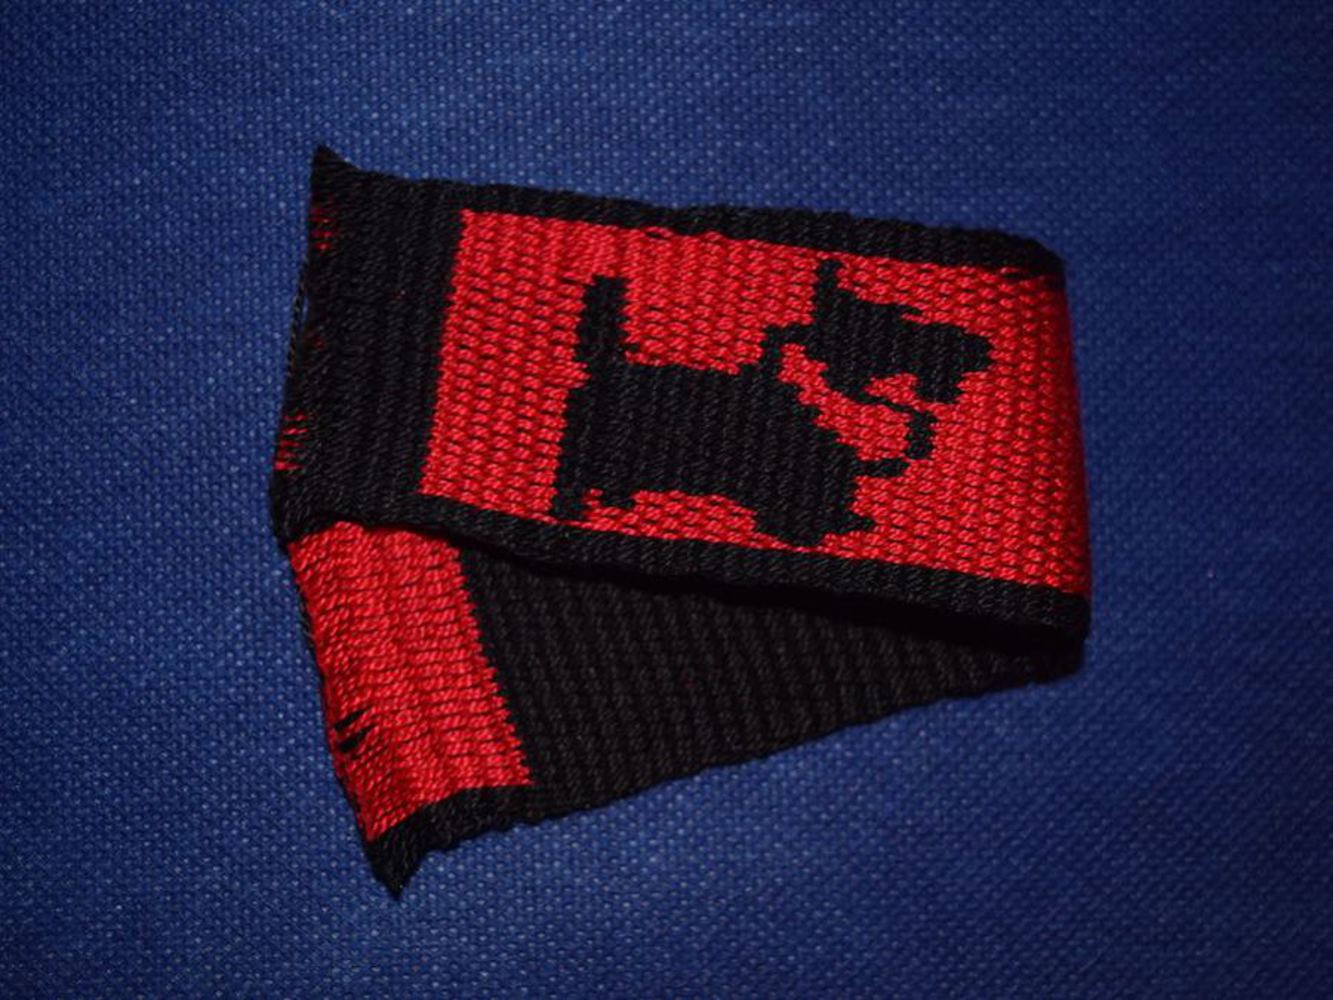
6) In order to get a single solid color in double-faced weaving, you need to turn the cards forward twice, then back twice. Since you've turned forward twice, now turn back, pass weft (and tail, if it still exists) through, and beat. Repeat. Once the tail is gone, simply continue with one piece of weft thread (this just weaves the end into the band, locking it in place).

7) Weave, alternating two forward turns and two back turns, until you're ready to begin your pattern. Finish with either two back or two forward turns.

8) Count out the cards into two decks: the cards that will remain your background color, and the cards that will be your pattern color for the first row. Pass weft through. Turn the background cards as you would normally, and turn the pattern cards the other direction. Beat. Pass weft through; turn again; beat.

9) You've woven the first row of your pattern. Continue in the same vein, always turning the background deck in the same ff/bb pattern and turning the pattern deck opposite.

0
Partway through weaving; note the two separate decks
Process2.thumb
0

10) When you're almost finished, with a few rows left to weave, take some scrap thread of the same type as your weft. Fold it in two, and pass it through with the loop in the same direction that your weft is going. Repeat several times.

11) Make sure your weft emerges in the same direction as the last loop you added (this requires an extra pass). Cut the weft. Take the tail, pass it through the loop, and pull the loop back through the warp. This starts to weave the end of the weft back into the band, just like you did to start. Repeat until you've run out of loops or you've run out of tail.

12) Cut the ends of the warp to remove the band.

13) Optional: wet-finish your band. Put it in hot water, add a little laundry detergent, and agitate lightly by hand. The threads will swell and lock together, creating a more even looking weave.

0

Product

The final piece has two sides, which are mirror images in opposing colors. Below are pictures of my final product.

If you look closely, you'll note that I made a mistake near the dog's tail; one row of red threads is twice as long as the rest. That's a place where I either messed up the card-turning (flipped direction too soon) or didn't pass the weft through at the right time. Also note that the band gets appreciably thicker the further it gets from the beginning; the warp wasn't kept at a constant tension the entire time, and so the weft ended up with different tightness as I progressed.

Overall, I'm happy with the project! I'll try to iron out these issues the next time I try something, and see if I can speed up the warping process for next time (it took longer to thread the cards than to weave the pattern!)

0
Back of woven band before wet finishing
Process4.thumb
0
Front of woven band after wet finishing
Finishedfull.jpg.thumb
0
Final product!
Finished.thumb
0

Sample Book

0
Handstitch sampler: running, back, overcast, and blanket stitch
Sampler3.jpg.thumb
0
Machine stitch sampler: tension, stitch, two pieces
Sampler2.jpg.thumb
0
Machine stitch sampler: square/circle spirals
Sampler1.jpg.thumb
0
Dart samples
Sampler5.jpg.thumb
0
Handstitch and 3D sewing samples: whip and slipstitch, stuffed heart, pouch
Sampler4.jpg.thumb
0
Felt samples: ball, 3D form
Sampler6.jpg.thumb
0
Felt sample: sheet
Sampler7.jpg.thumb
0
Soft circuit sample
Sampler8.jpg.thumb
x
Share this Project


About

A skill investigation of a tabletweaving technique that allows arbitrary two-color patterns to be woven into bands.