FiiO E10 (Headphone Amplifier) Case
Made by Seth Geiser · UNLISTED (SHOWN IN POOLS)
Made by Seth Geiser · UNLISTED (SHOWN IN POOLS)
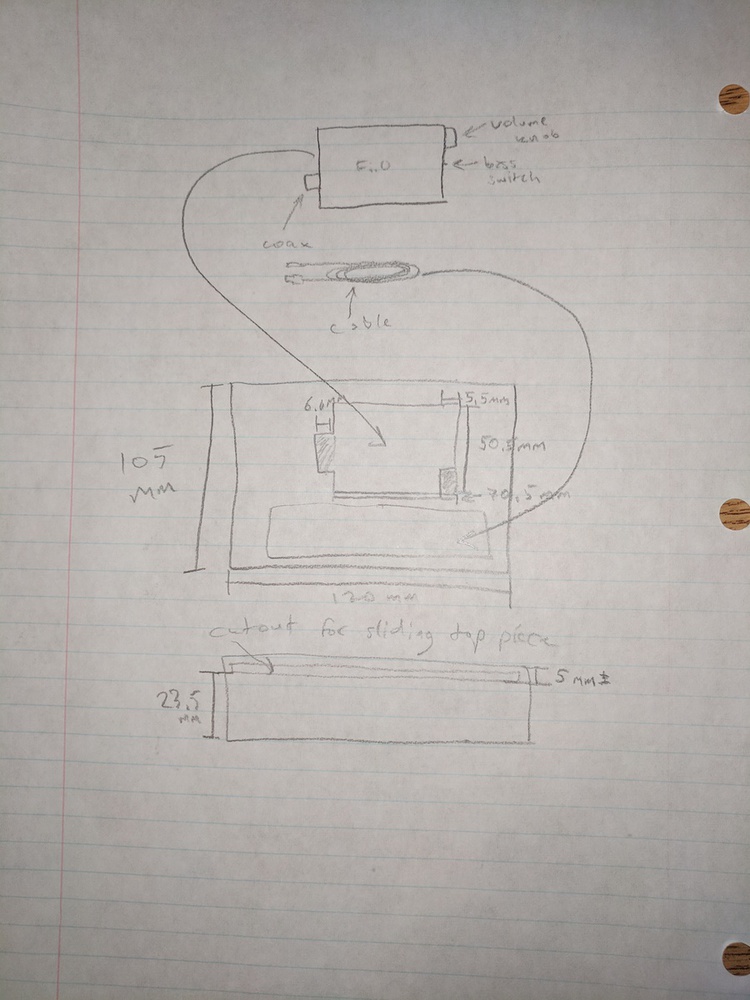
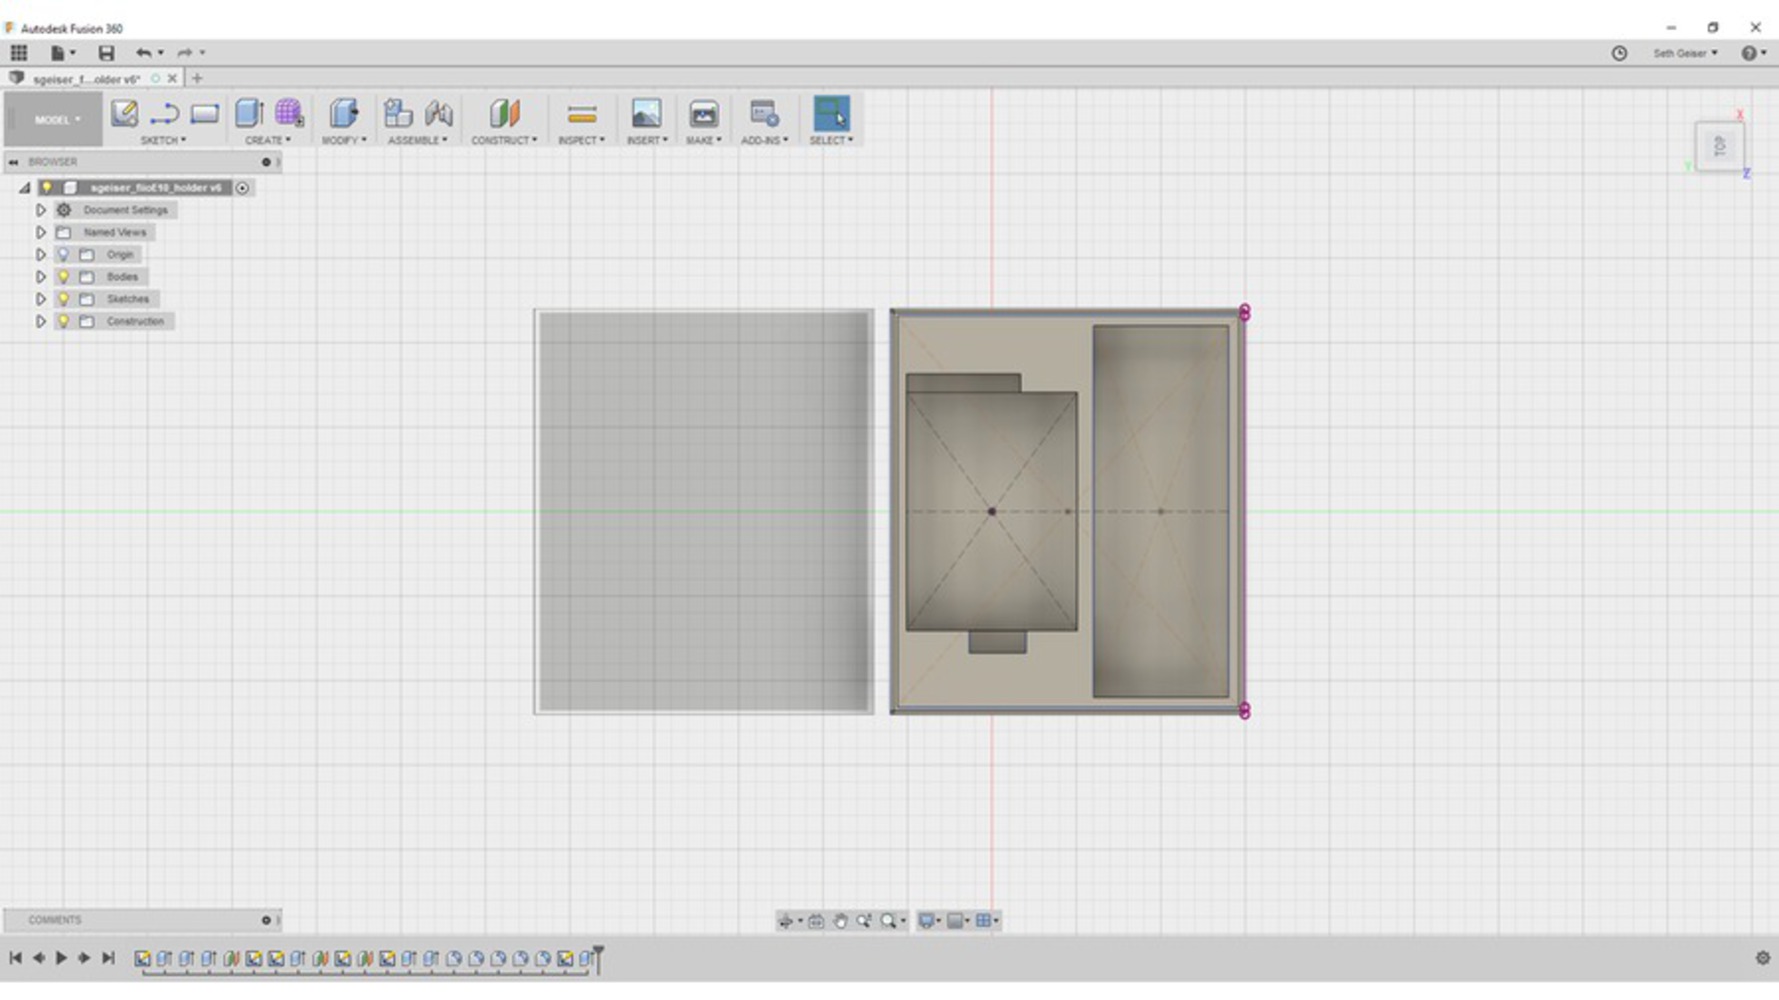
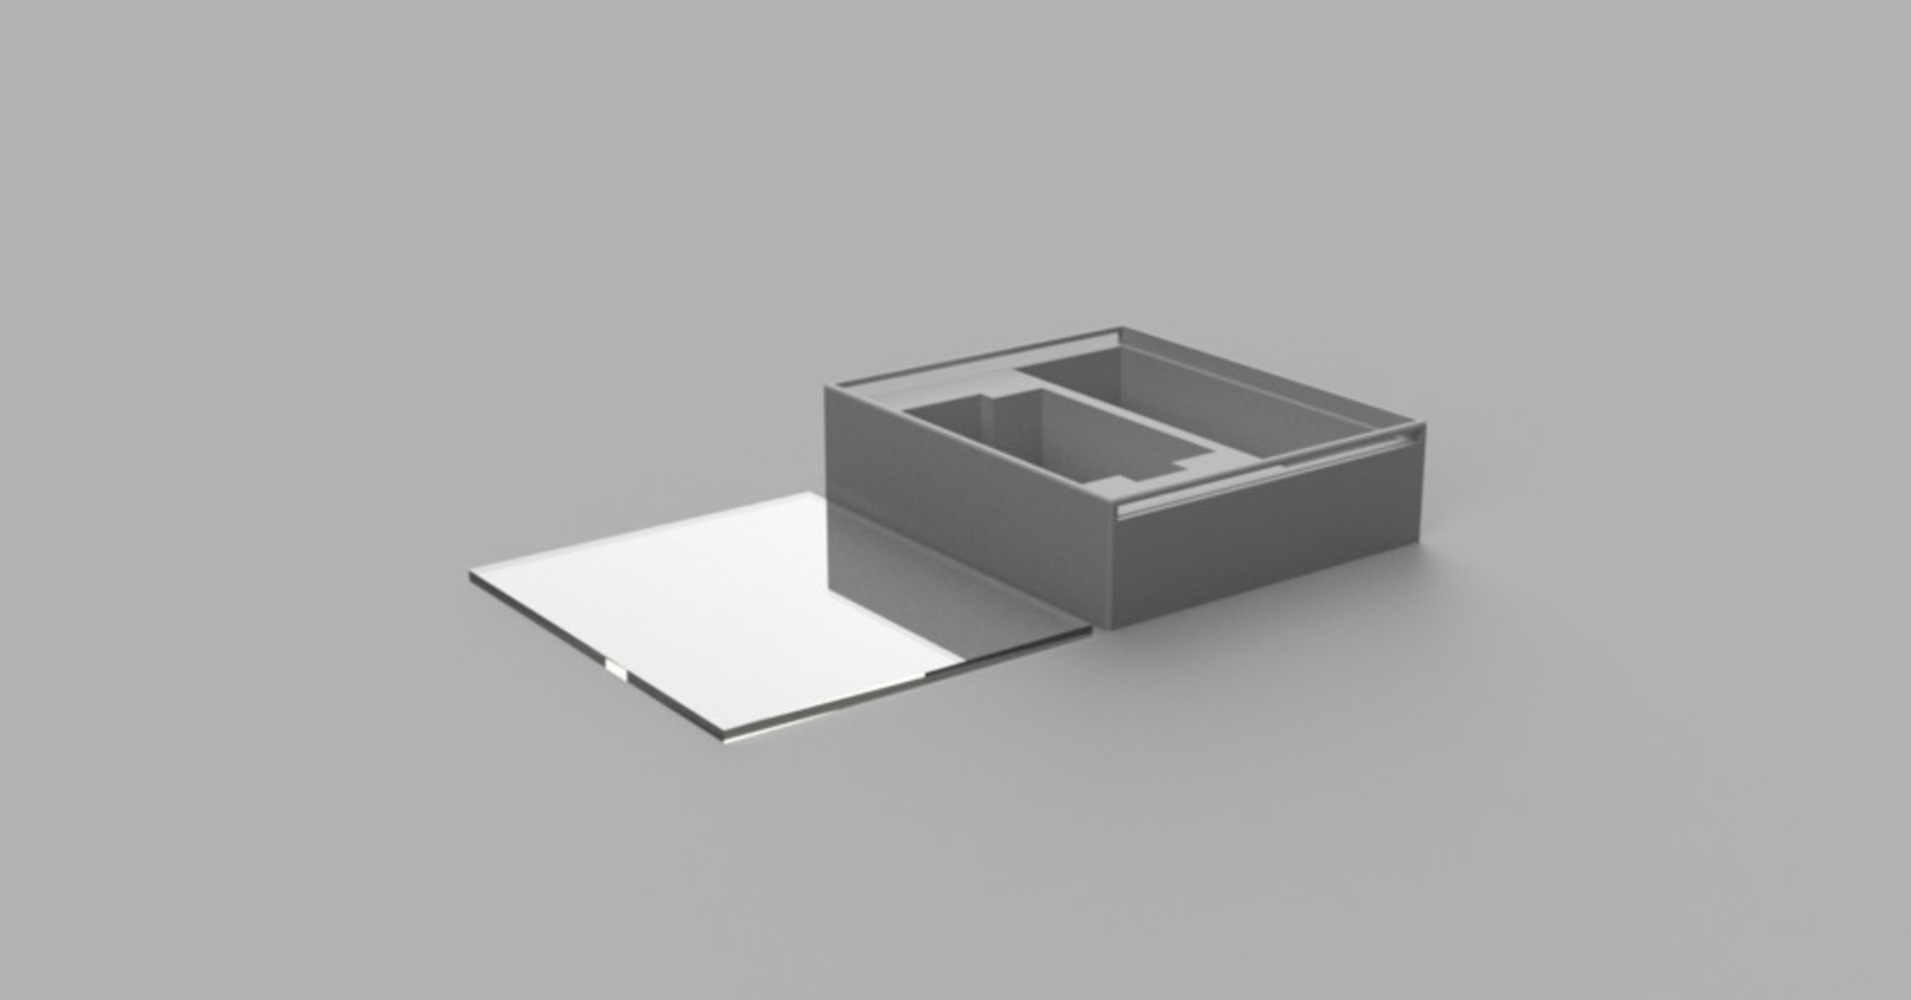
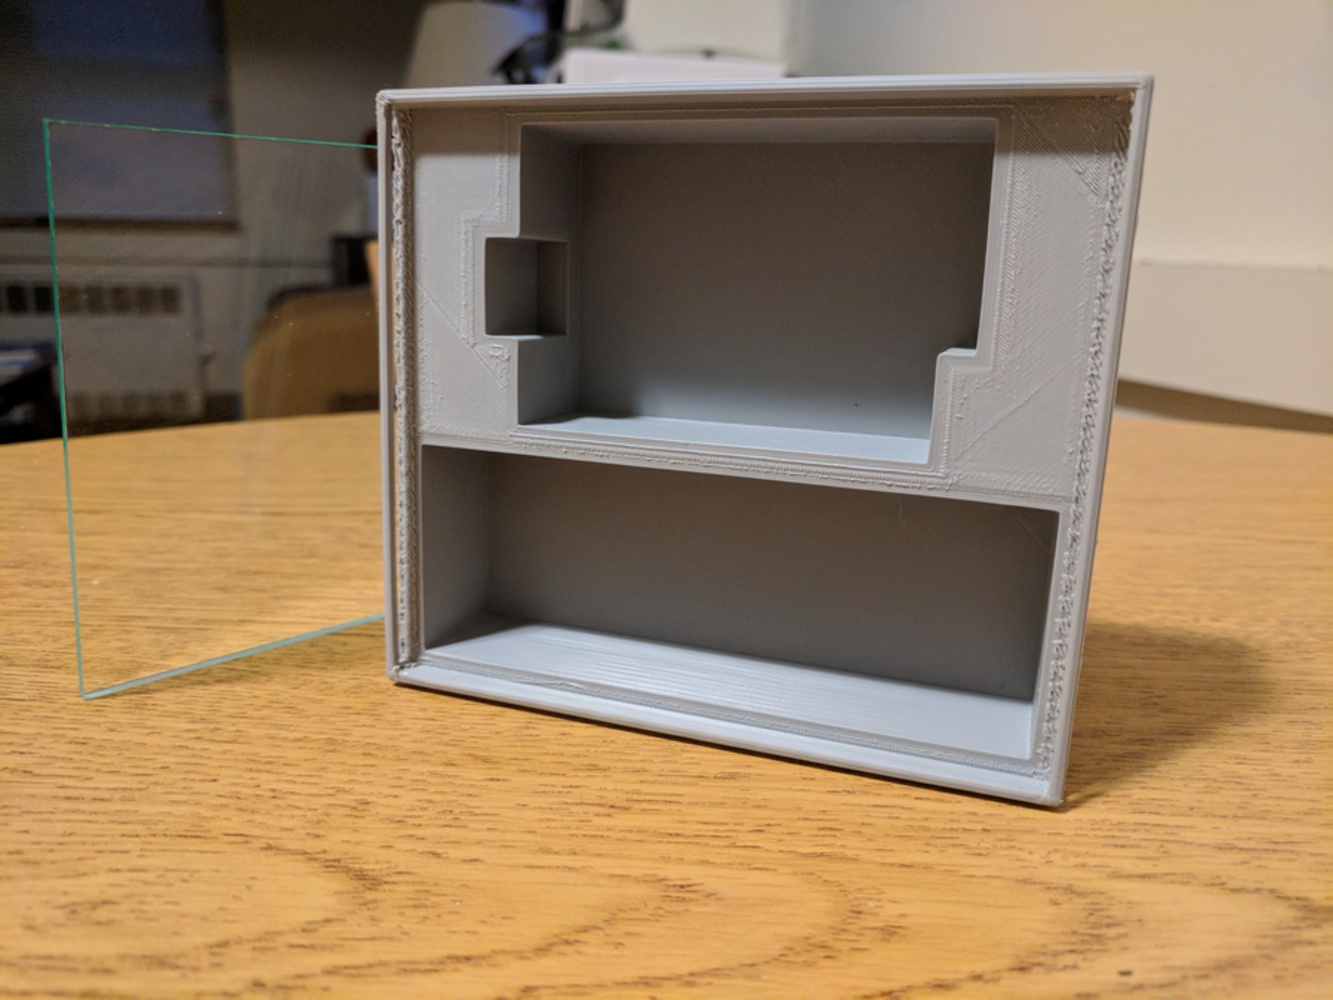
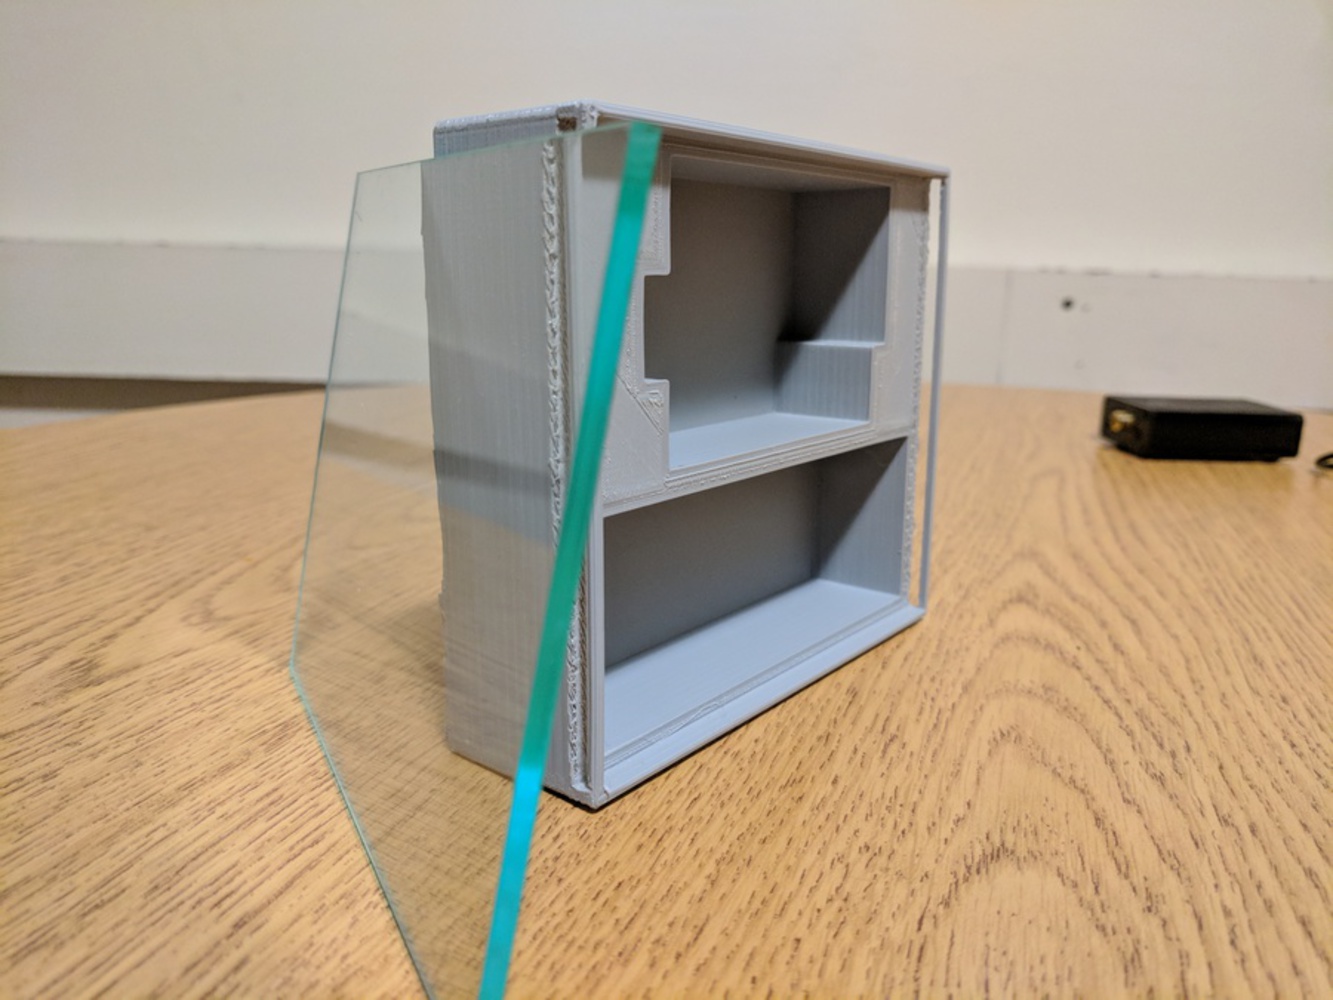
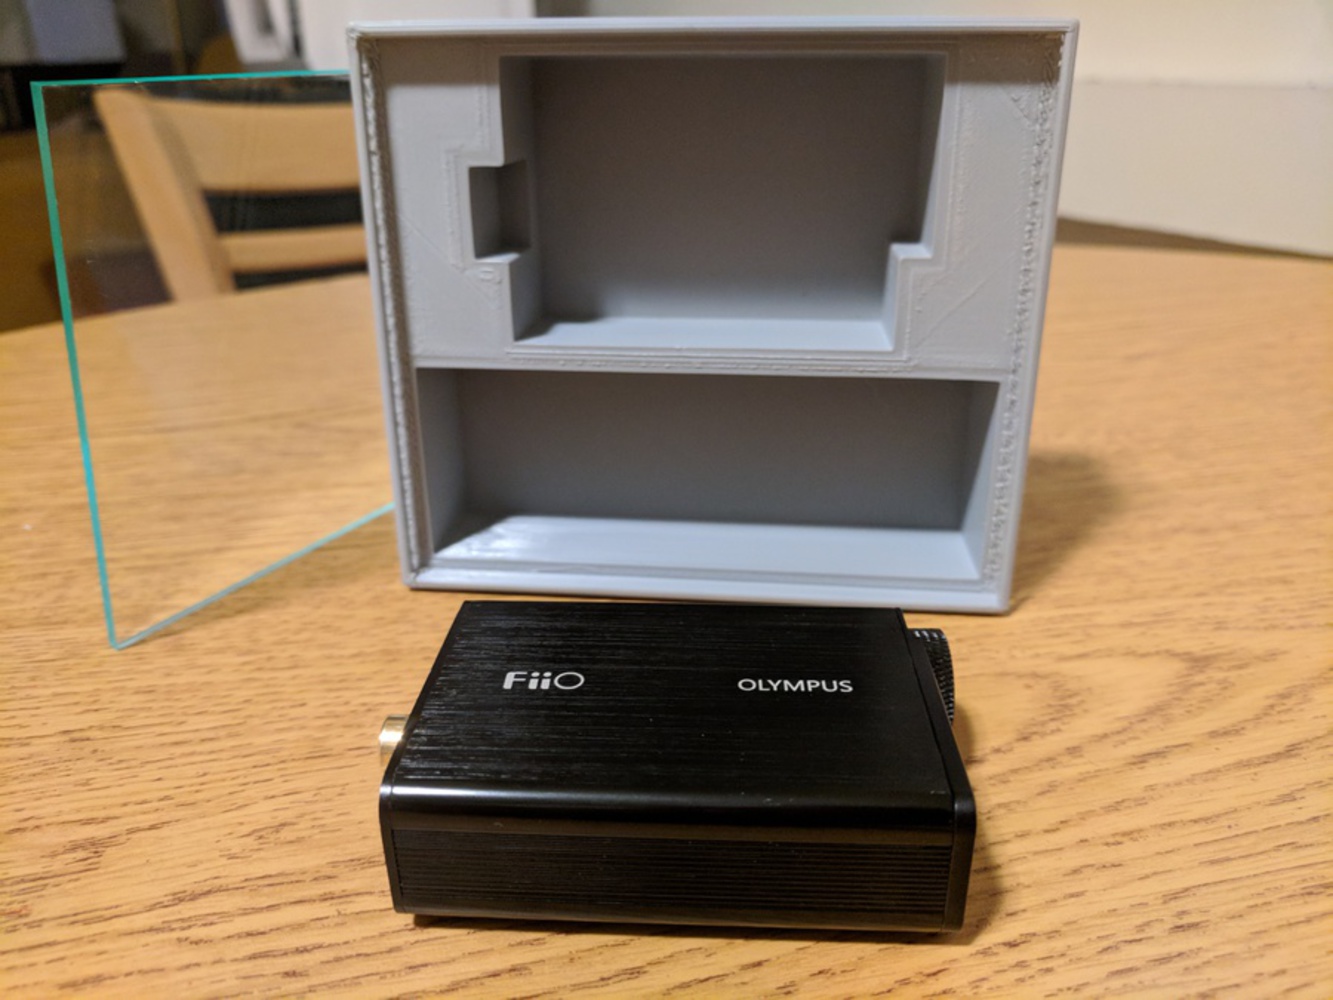
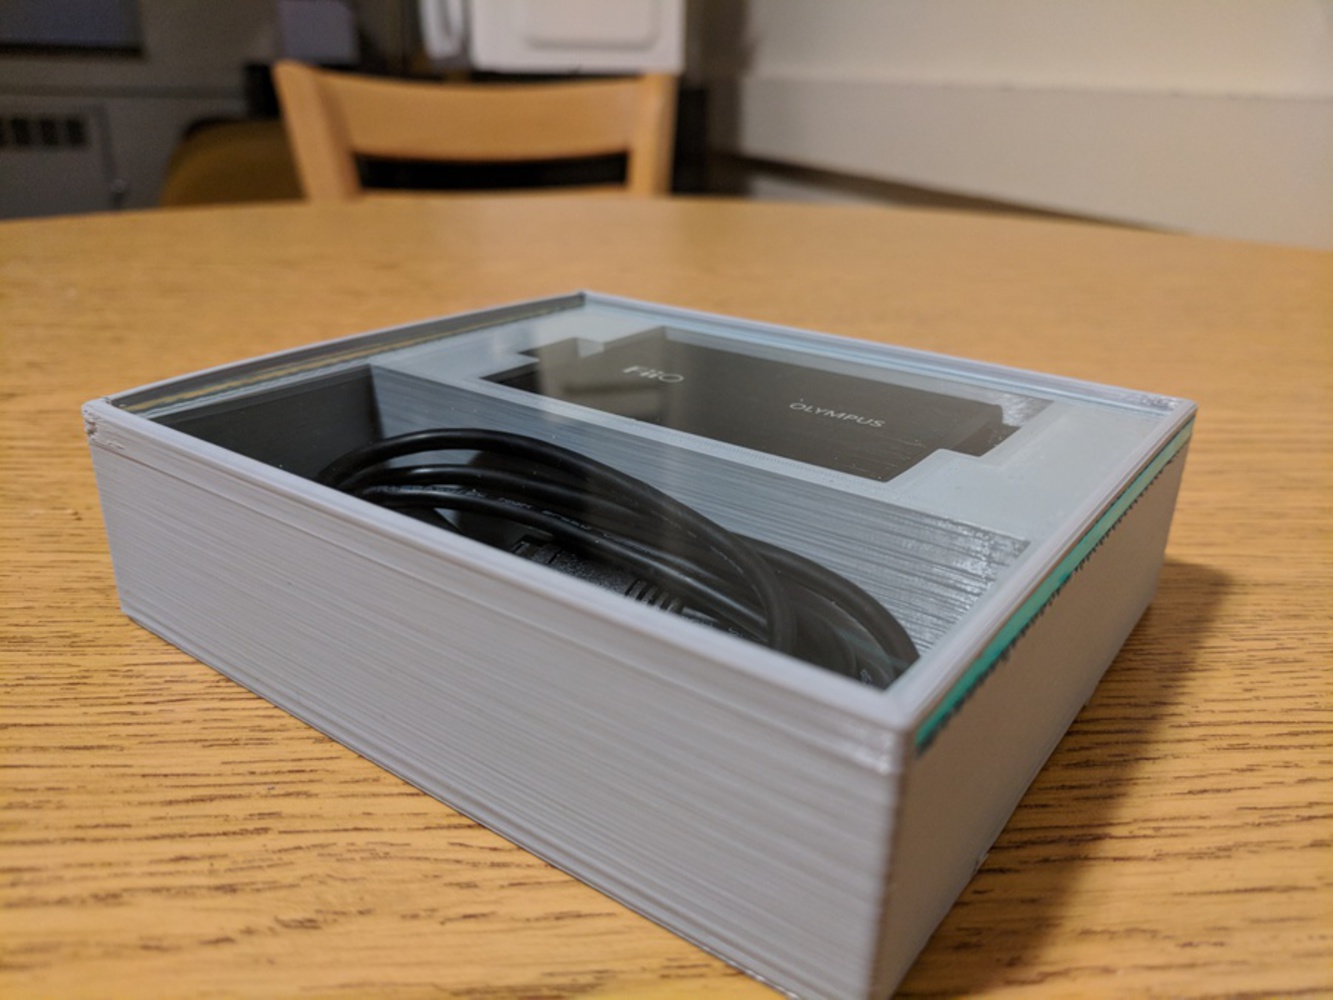
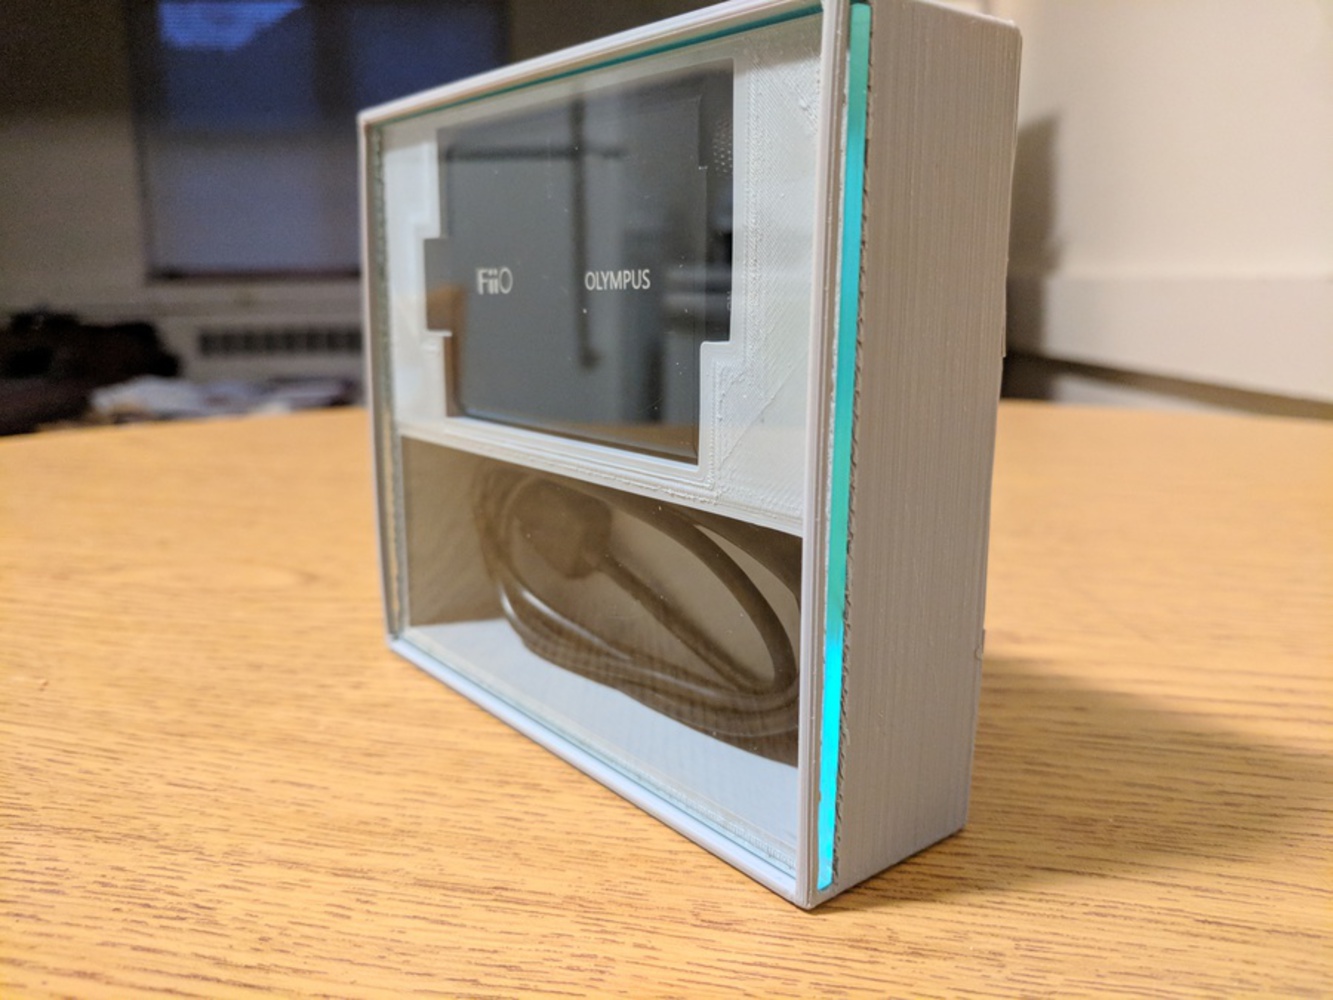
The goal is to create a more substantial and permanent holder for my headphone amplifier, as the original packaging was never meant to be used as such after opening.
Created: December 8th, 2017
This project is only listed in this pool. Be considerate and think twice before sharing.
Digital Tooling (DigiTool) provides a platform for any CMU student to learn Digital Fabrication processes; all of which are very hands-on. Like these processes, this class is also very hands-on. I...more
The goal is to create a more substantial and permanent holder for my headphone amplifier, as the original packaging was never meant to be used as such after opening.