Holder Project (smaley)

Made by smaley · UNLISTED (SHOWN IN POOLS)

Printer a useful holder for my high school robotics team that represents its sense of style and relevant contents.

Created: October 24th, 2017

0

Intention

The prompt for this project is to create a holder. I wanted to print something that I could use for other specific purposes rather than just as a convenient thing in my apartment. I figured an ideal audience for such a 3D printed part would be one of the high school robotics teams that I coach, which does gifts for its departing seniors every spring. I've decided to make a "goodie bag" holder that holds safety glasses, a team shirt and maybe some other trinkets. Some prominent part of it should be easily customizable to display the student's name and maybe their superlatives as decided at the end of this year (e.g. Most Likely to Become a Mad Scientist).

0

Context

The team (which is different from the team logo in Project 1, though they happen to have the same school colors) is not very into branding. It's an all-boys school, and while they have school colors, they prefer every stark and professional decor for them. I've decided to keep this design simple and a touch "mechanical" with a basic filleted container that has a slot to slide in a laser-cut cover. This handle will also meet the easily-customizable requirement (though there are other ways to do so) and provides a large, prominent surface for laser engraving student names and superlatives.

0
My high school robotics team's not-exactly-exciting team shirt
20171205 011043.thumb
0

Process + Procedure

Design:

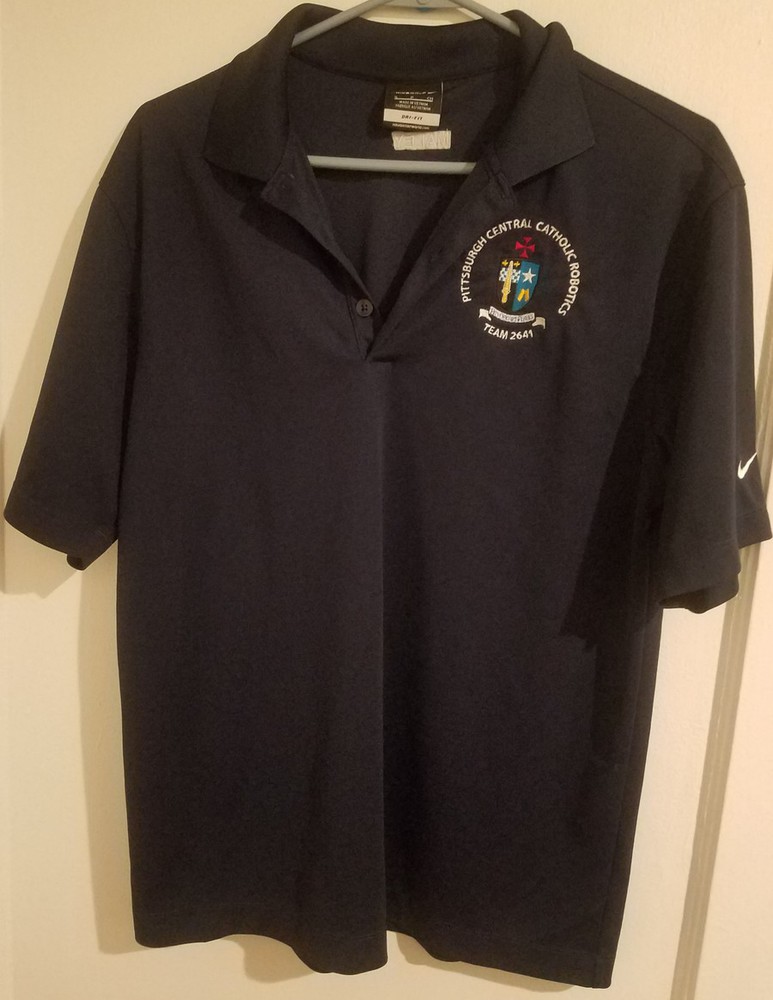
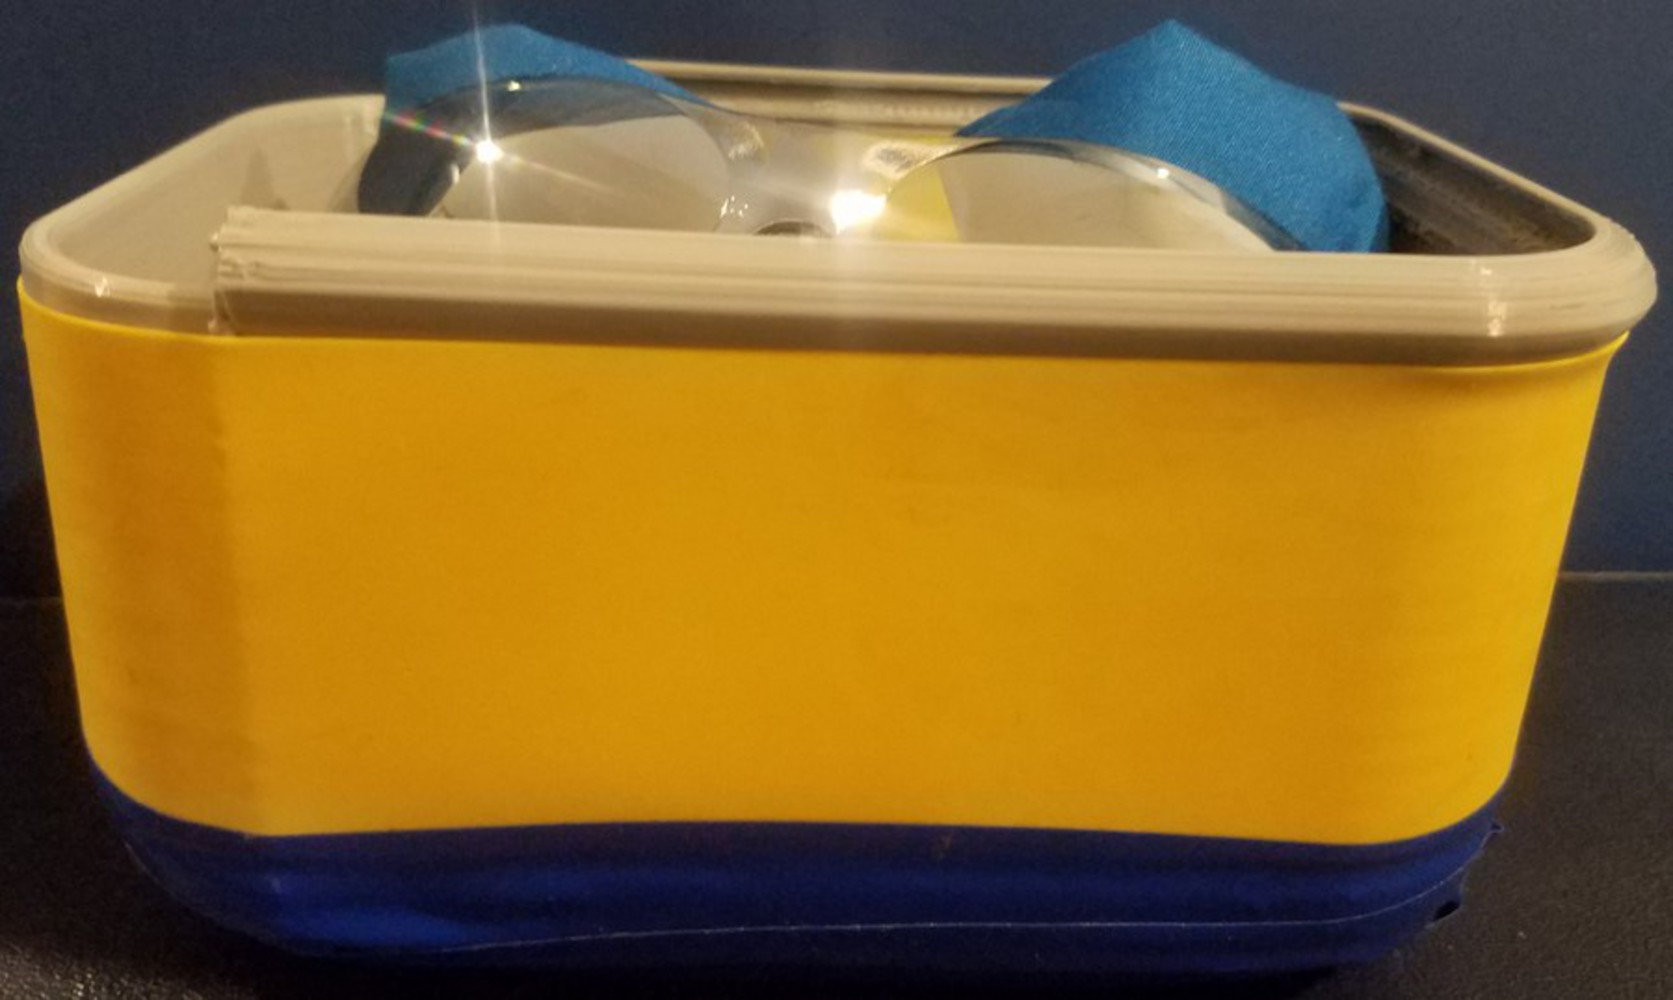
1. Package together a sample senior gift of the senior shirt, safety glasses, and a wristband.

2. Measure the gift dimensions and add estimate container size since these are soft goods.

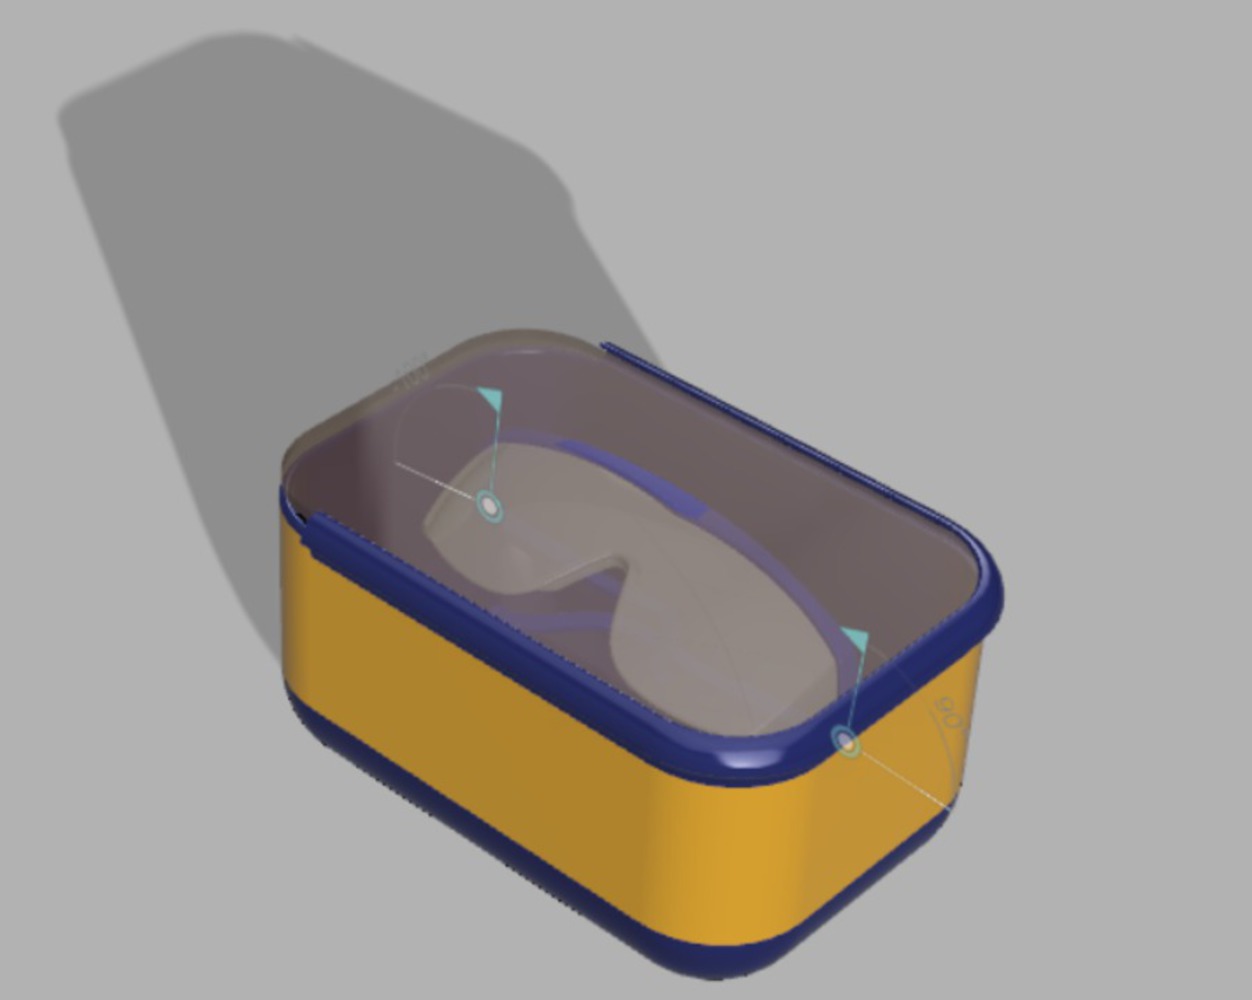
3. Sketch container base in Fusion and extrude.

4. Add initial modifications (fillets).

5. Shell the container base.

6. Sketch the profile of the mechanical slide notch. Ensure it has tolerances (0.4mm) for 3D printing interfaces.

7. Sketch the path for the notch (open on one side). Create a sweep.

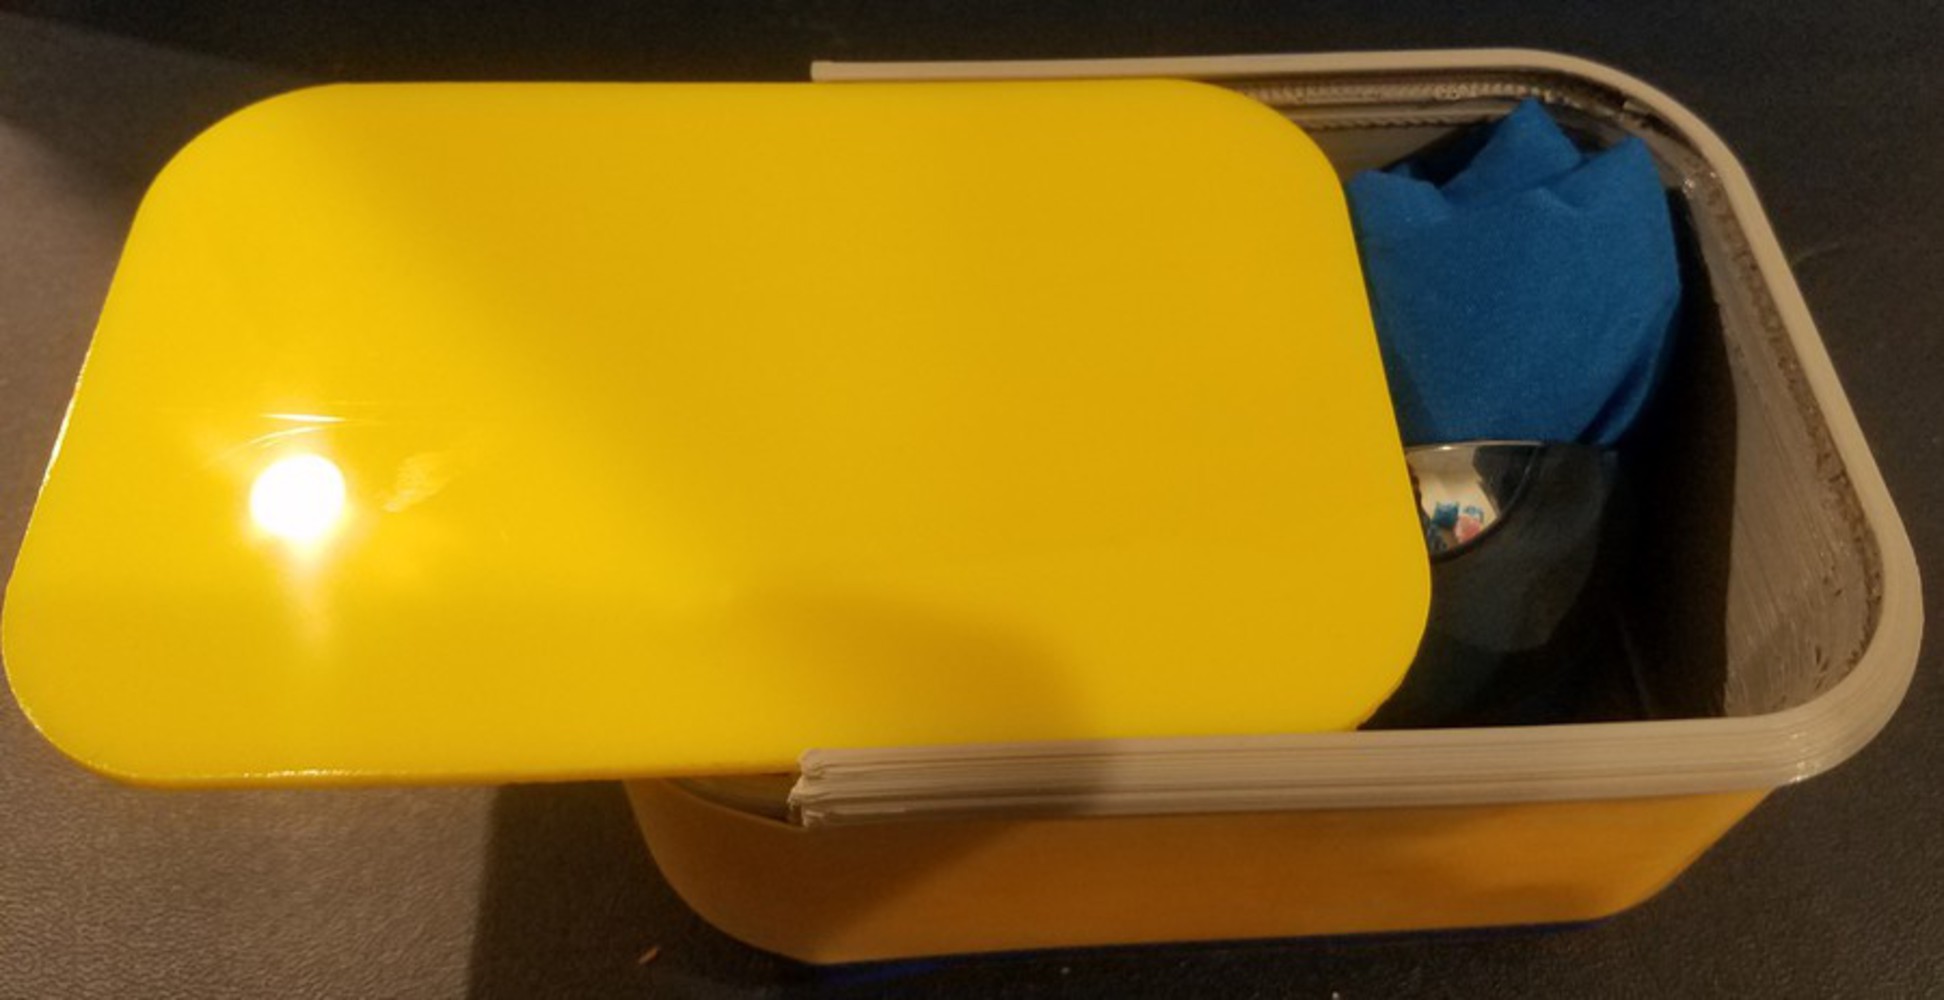
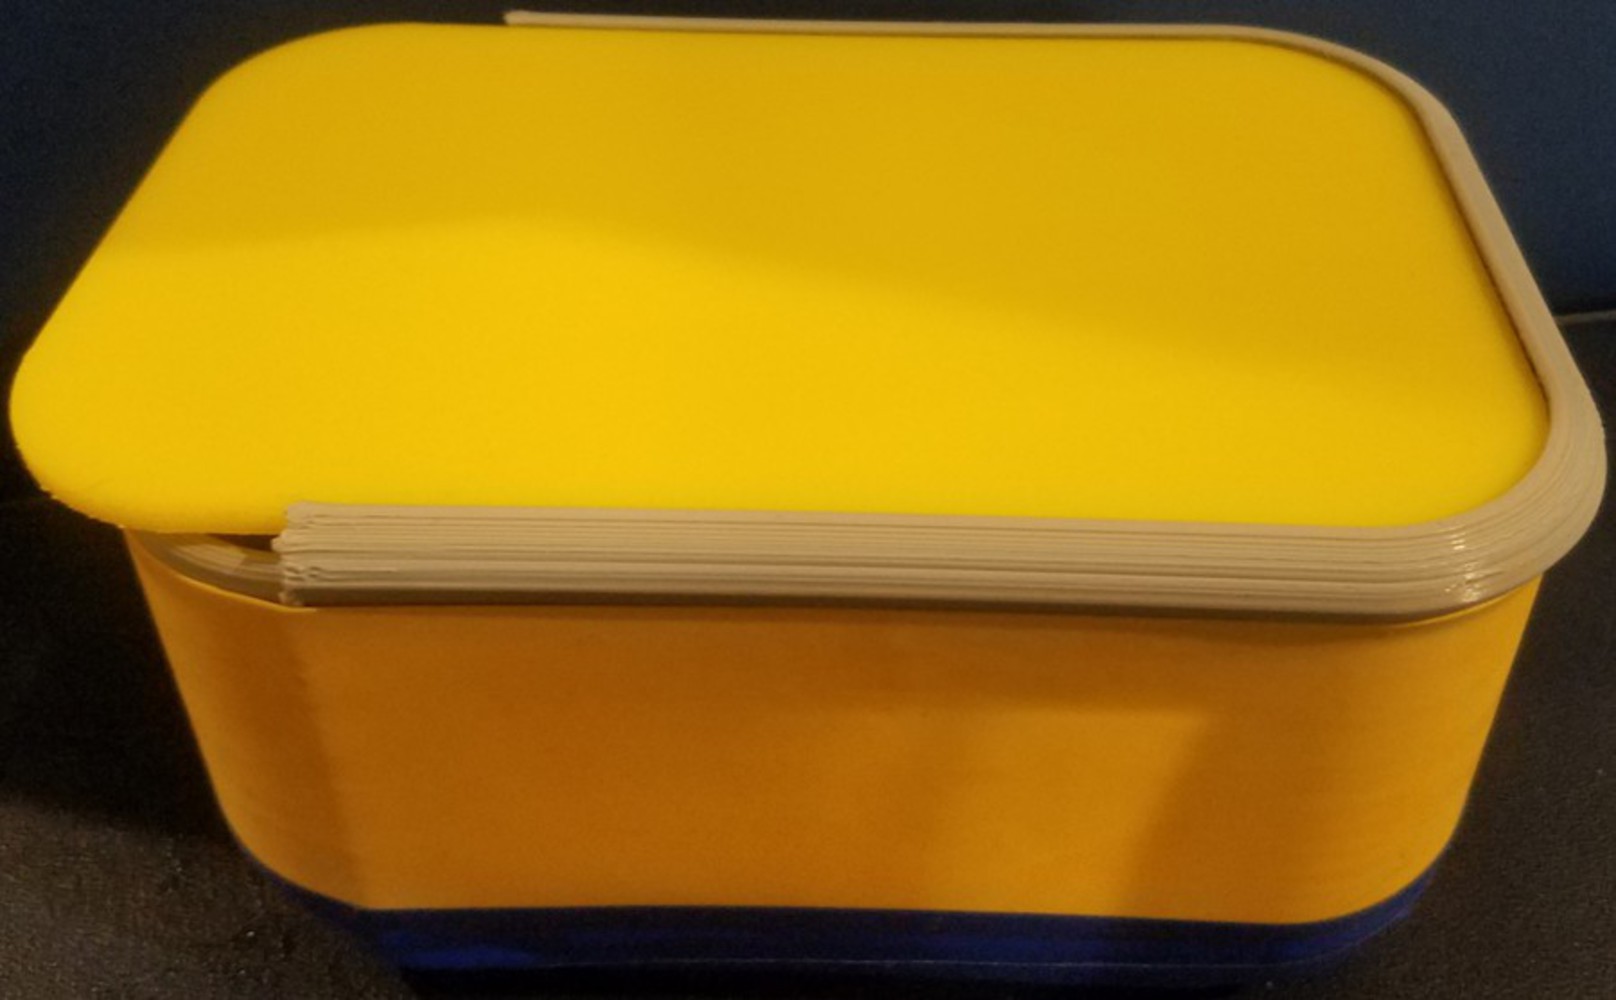
8. Create the cover component using the container base geometry.

9.  Find an import GrabCAD safety glasses as a different file.

10. Convert bodies to components and create revolve mates for the glasses side pieces. Rotate them to the folded position.

11. Copy (click-and-drag) the safety glasses file into the holder file. Orient the glasses in the box.

12. Set appearances to match school colors.

Fabrication - 3D Printing:

13. Export the STL and load it on NVBot Cloud.

14. Confirm transformations and supports.
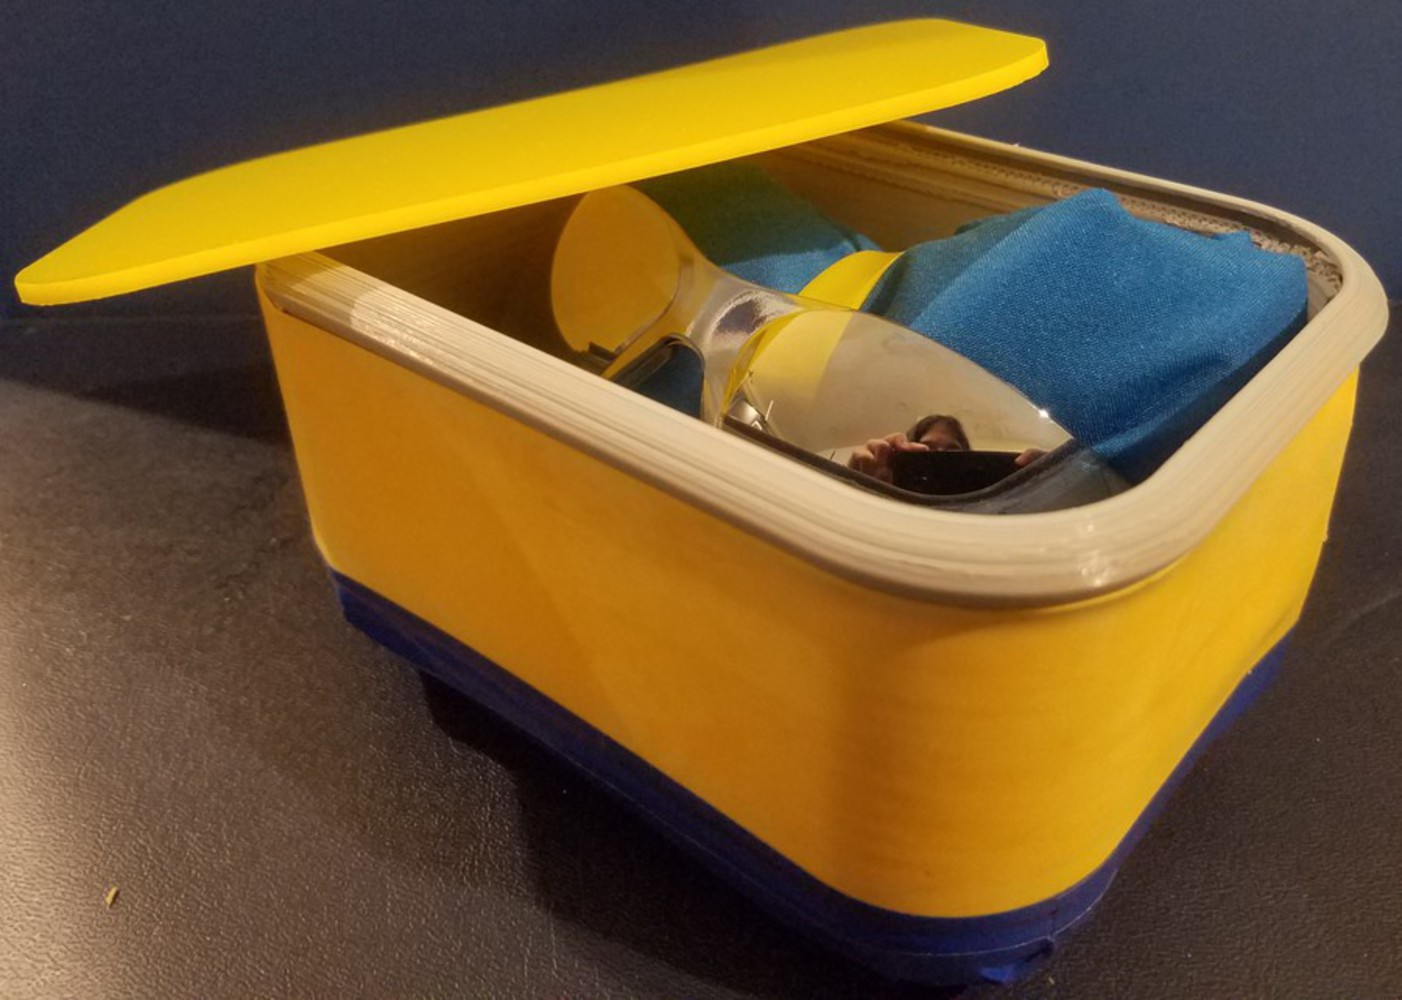
15. Submit print.

16. Clean up the completed print using dental picks.

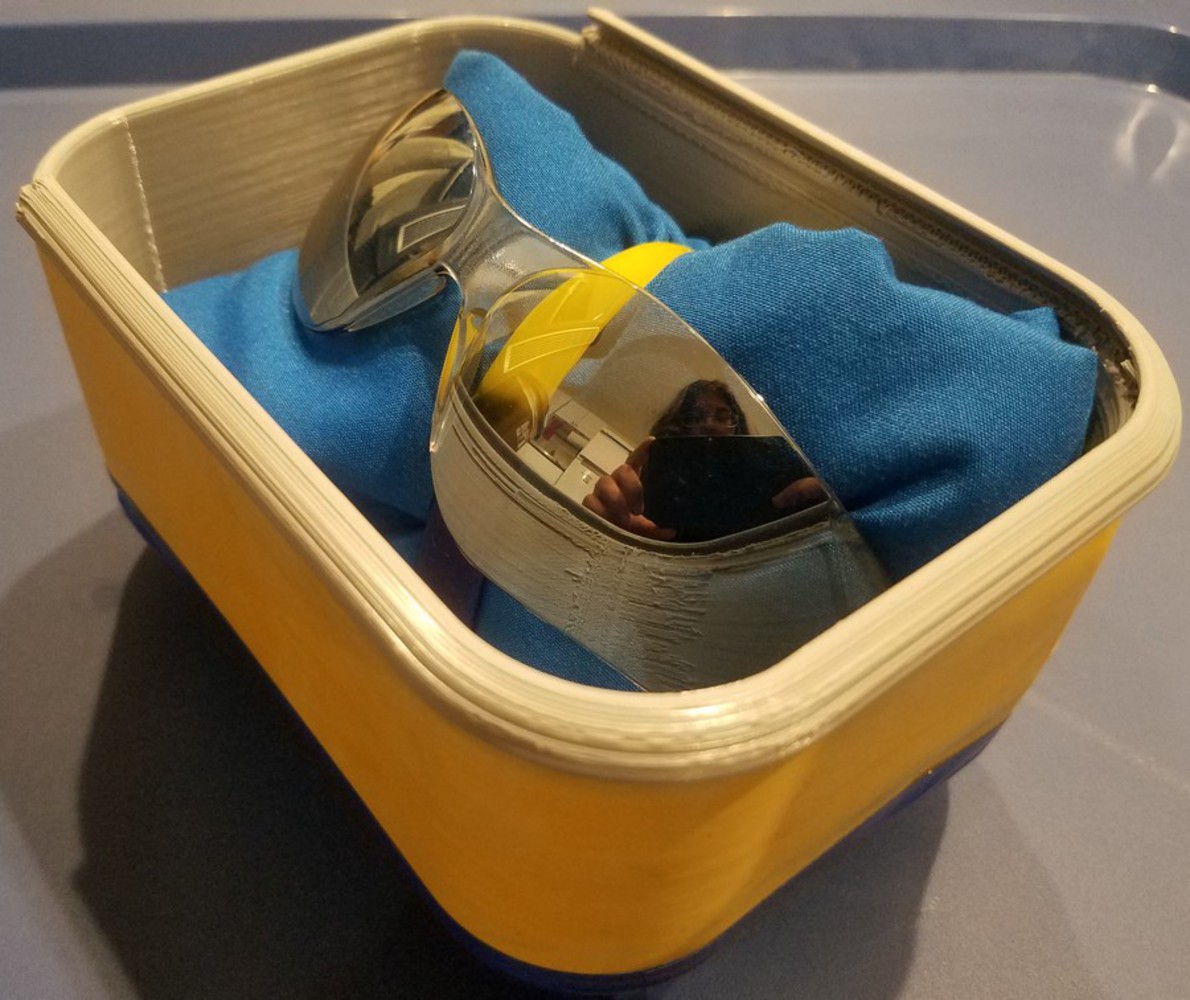
17. Add soft goods covers to the outside of the box and put the senior gift in.

Fabrication - Laser Cutting:

18. Verify measurements and change cover based on as-built of the container bottom(wasn't necessary).

19. Export DXF and load into DraftSight. Clean up and convert to old version.

20. Import into LaserCut. Position, unite lines, and set speed and power.

21. Cut 3mm acrylic.

22. Clean edges and insert cover into slide notch.


This worked pretty much as expected, though the safety glasses GrabCAD isn't of the actual glasses I used, so the CAD does differ in that regard. The final colors are also slightly different.

0

Product

Software: Fusion360, DraftSight, LaserCut

Tools: NVBot 3D Printer, Laser Cutter, dental picks

Materials: NVBot filament, yellow acrylic, cloth, safety glasses, color tape.

Finishing: cleaning print, cleaning acrylic, covering, assembling

0

Reflection

I was pleasantly surprised that the cover fit so well in the notch the first time. I'd expected to do some sanding of the cover or even selection of a different thickness (worst case reprinting the box), but it worked very smoothly. On the downside, this print was incredibly difficult to clean up in terms of support material. Between the round exterior and the concave interior and the thin overhung notch, it was a surprising portion of project time. I know some 3D printers do water-soluble supports for removal. This is a great idea.

I screwed up the first version of this file in Fusion somehow (I think I saved it in the wrong spot) and had to re-CAD it. I'm learning a lot about Fusion workflow and how to streamline it and pick up on projects more easily. I also learned how to put one file into another, which was a good lesson to figure out. Overall if I were to do the design again, I'd make the case more interesting, high school boys' sense of style be darned. The Sculpt environment we learned recently could be really cool for this.

0

Thanks

Thanks to Farzad Valamagham for saving me a lot of time and making my renders cooler with a GrabCAD model of safety glasses.

x
Share this Project

This project is only listed in this pool. Be considerate and think twice before sharing.


Courses

62-478 digiTOOL

· 65 members

Digital Tooling (DigiTool) provides a platform for any CMU student to learn Digital Fabrication processes; all of which are very hands-on. Like these processes, this class is also very hands-on. I...more


Skills
Tools
About

Printer a useful holder for my high school robotics team that represents its sense of style and relevant contents.