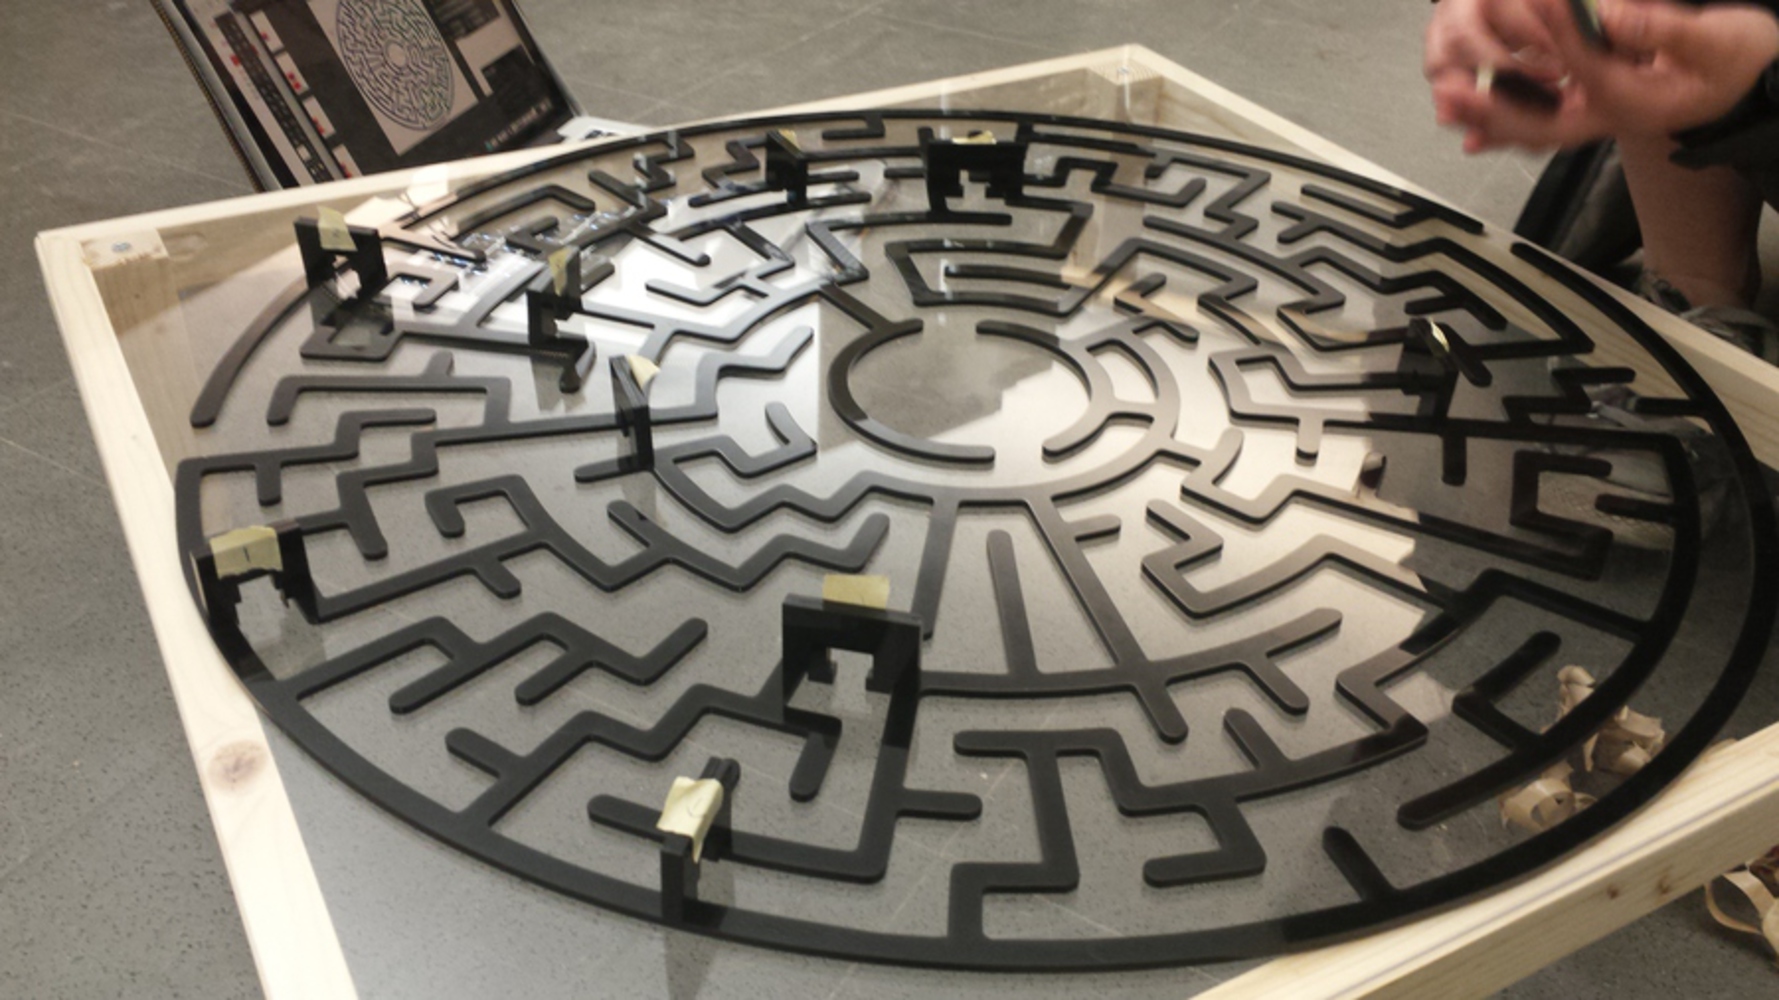
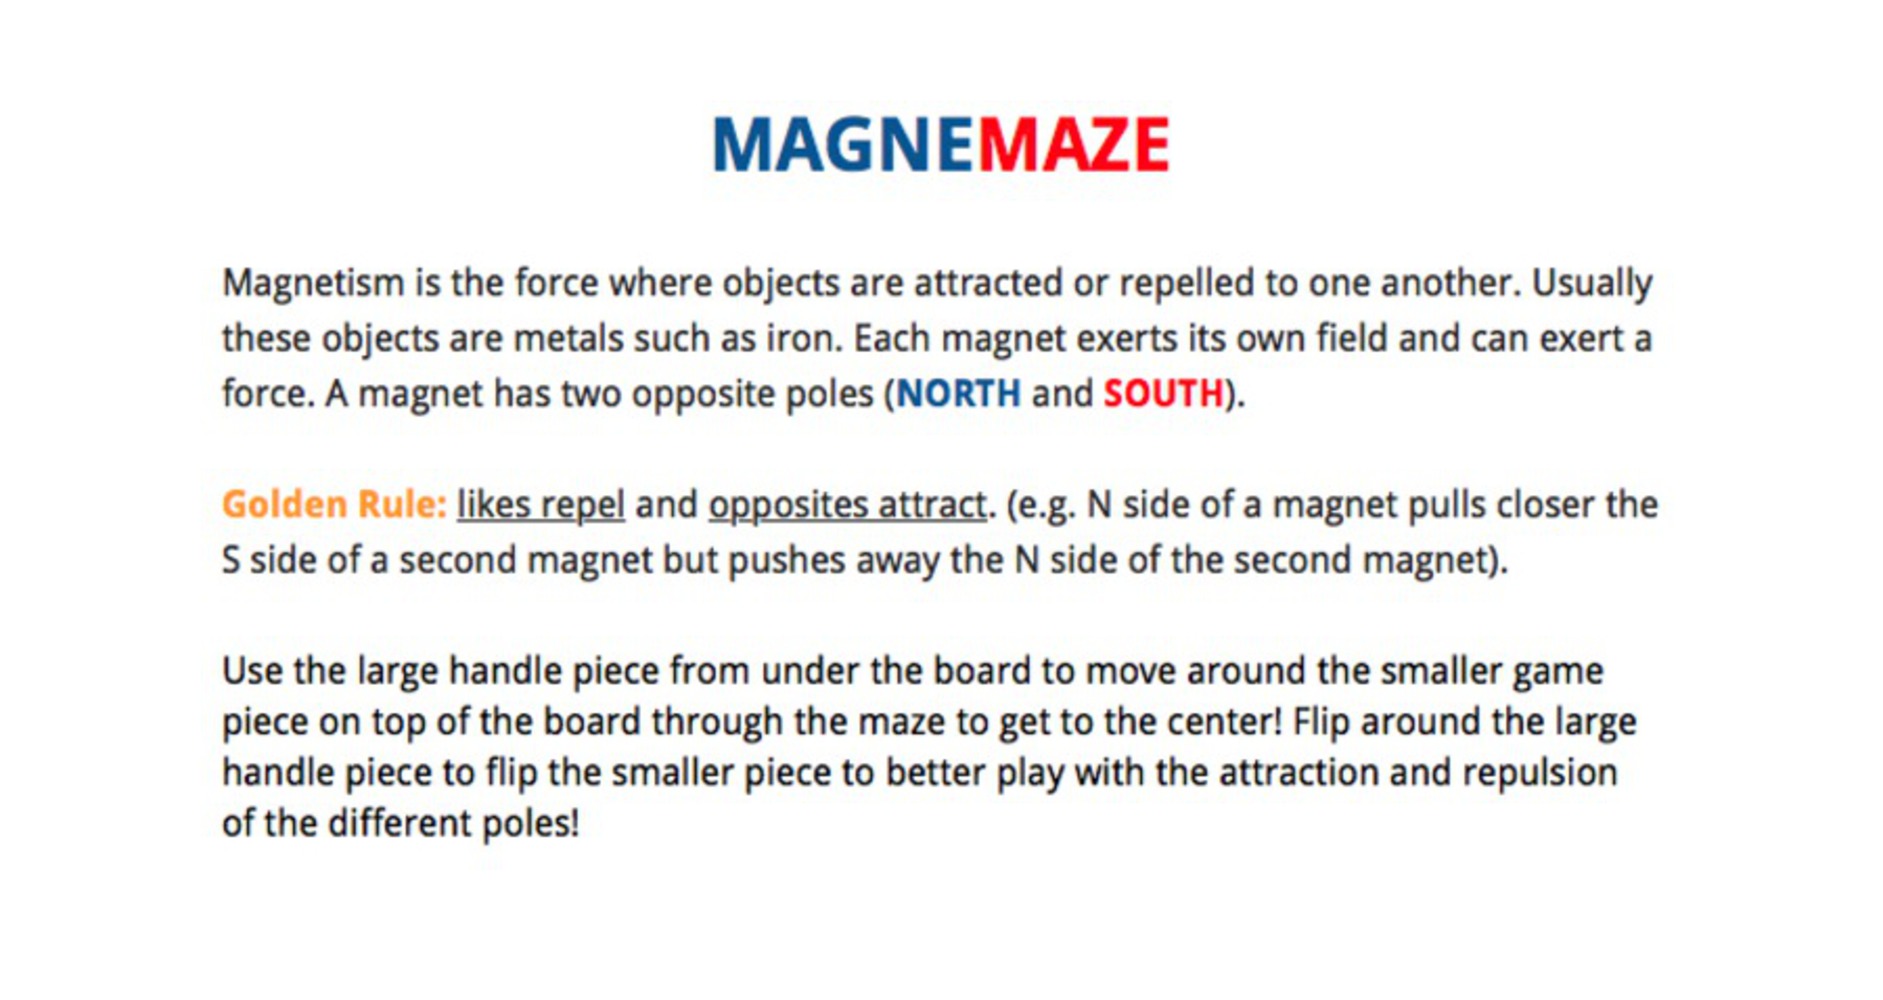
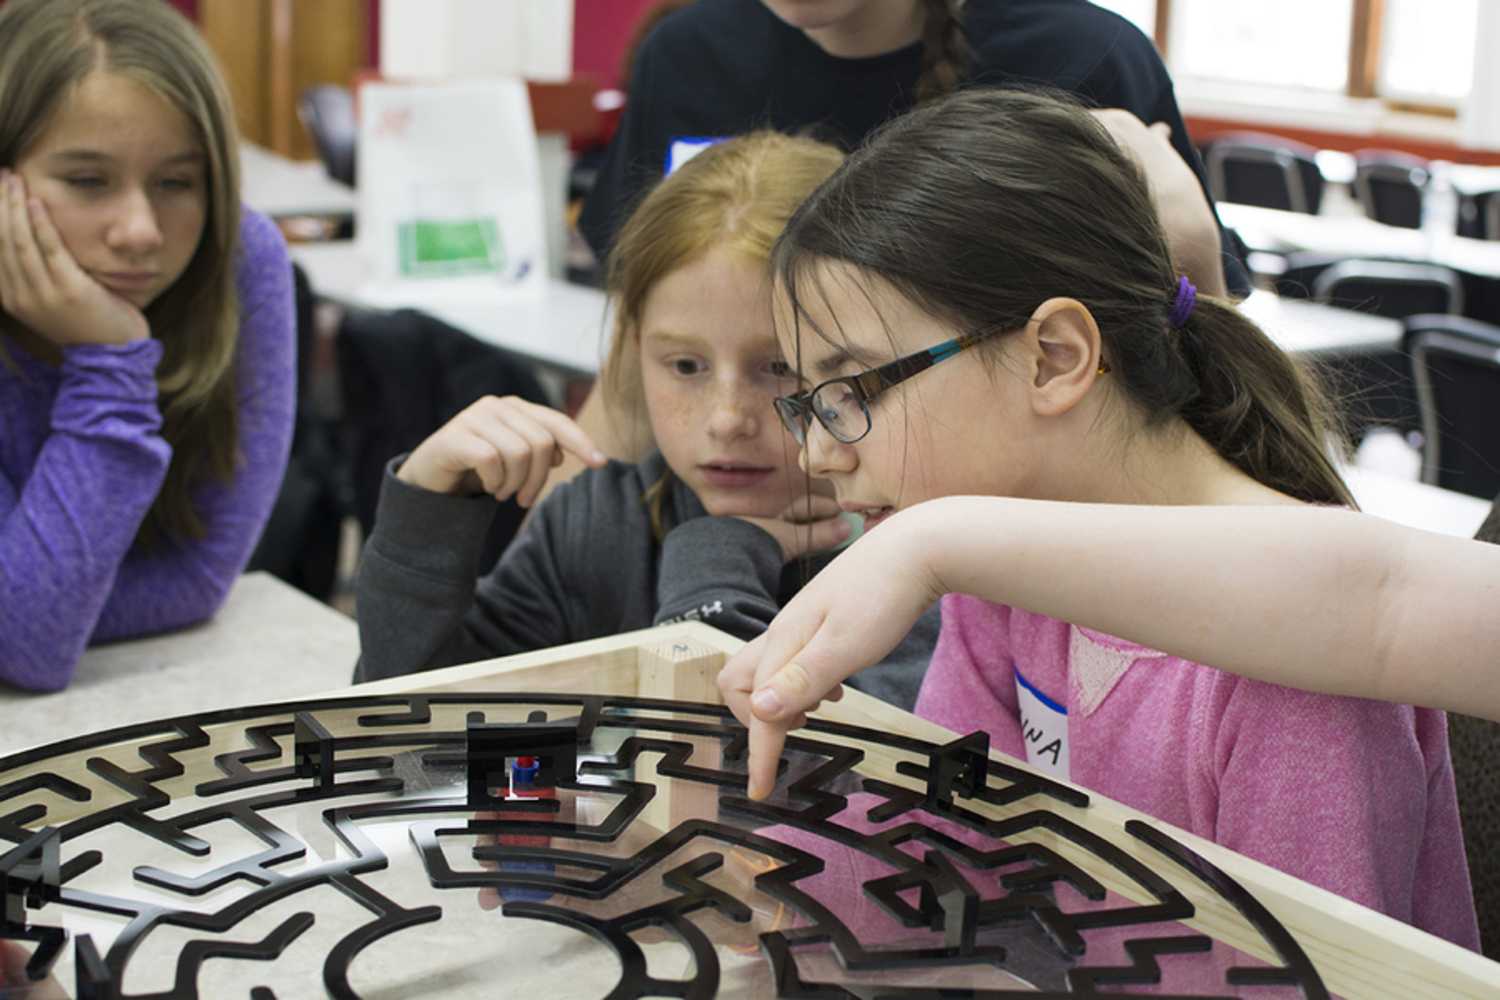
Concept
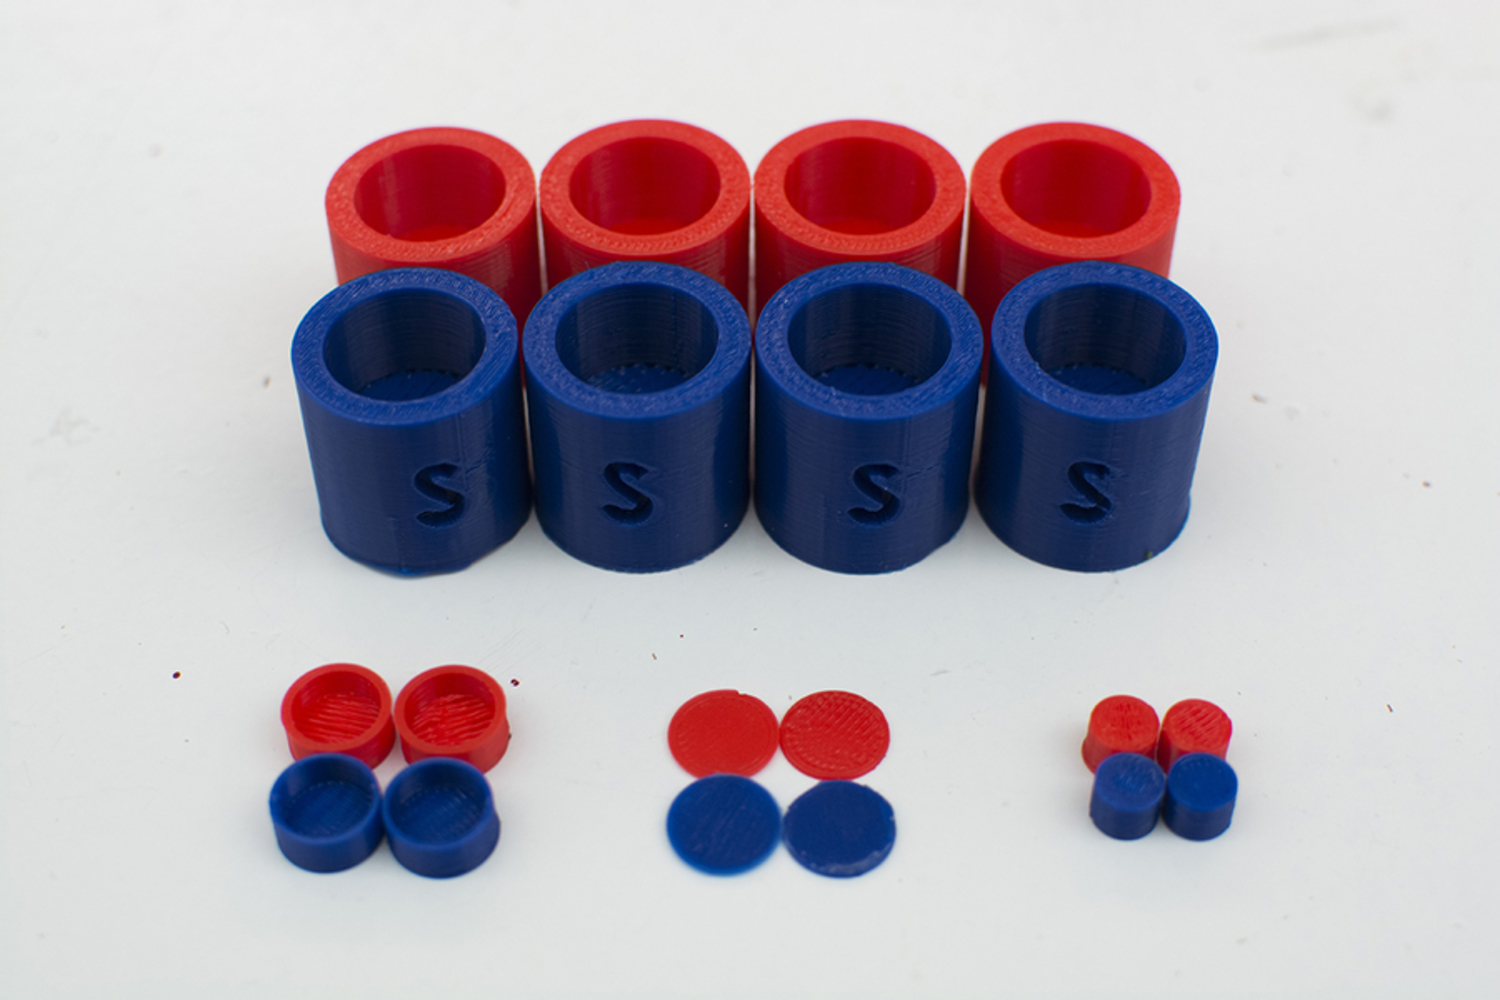
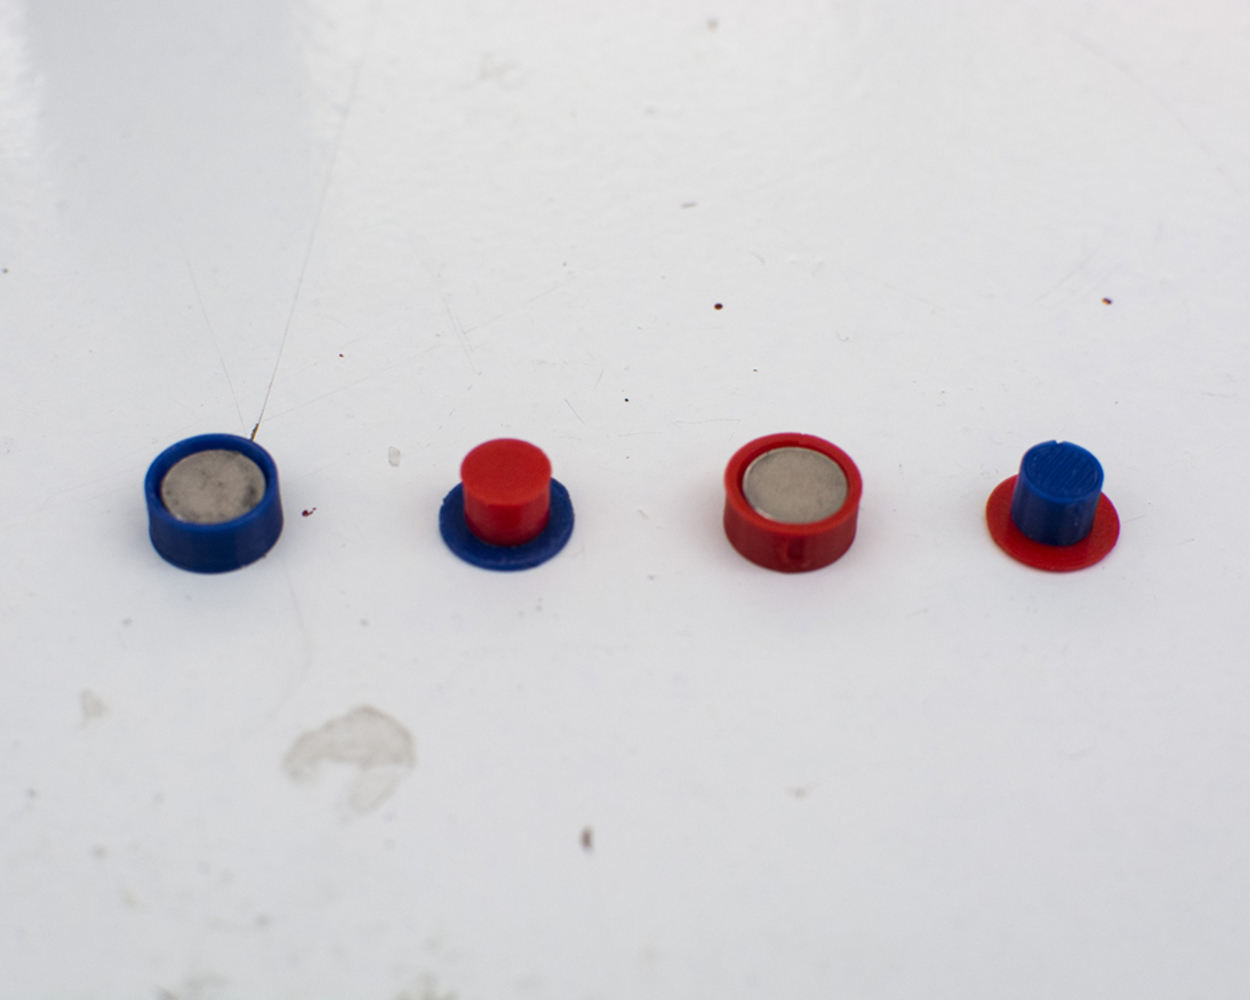
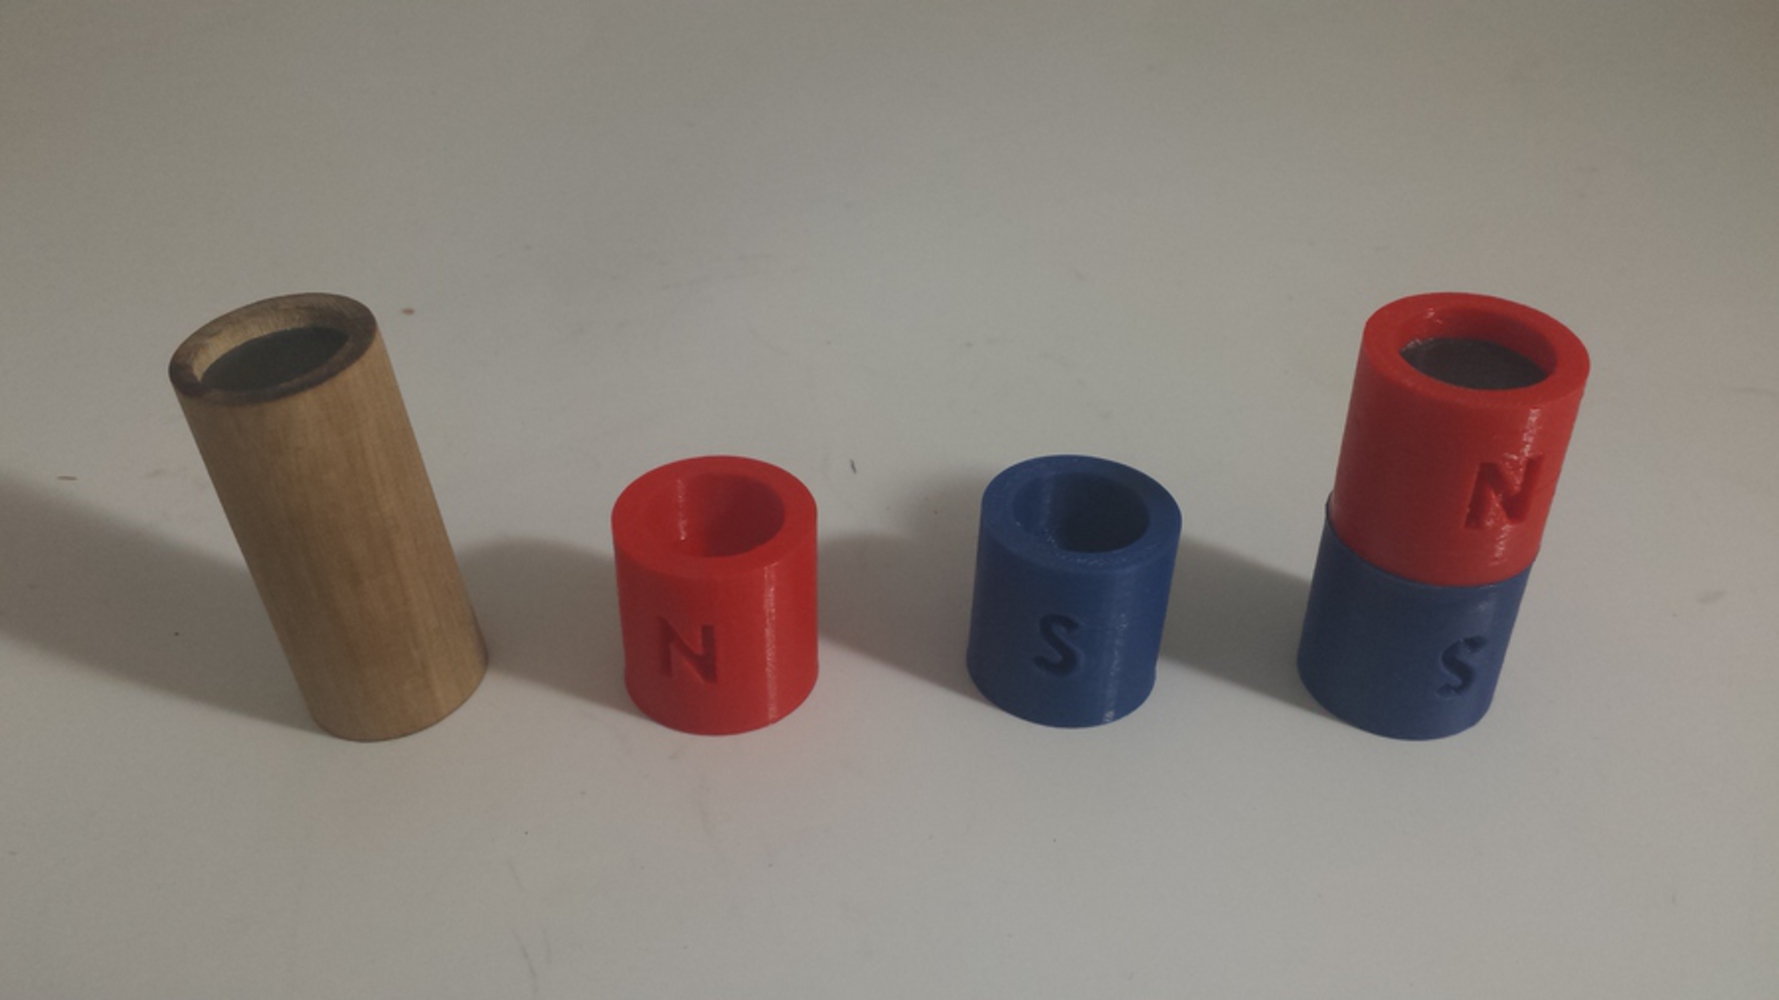
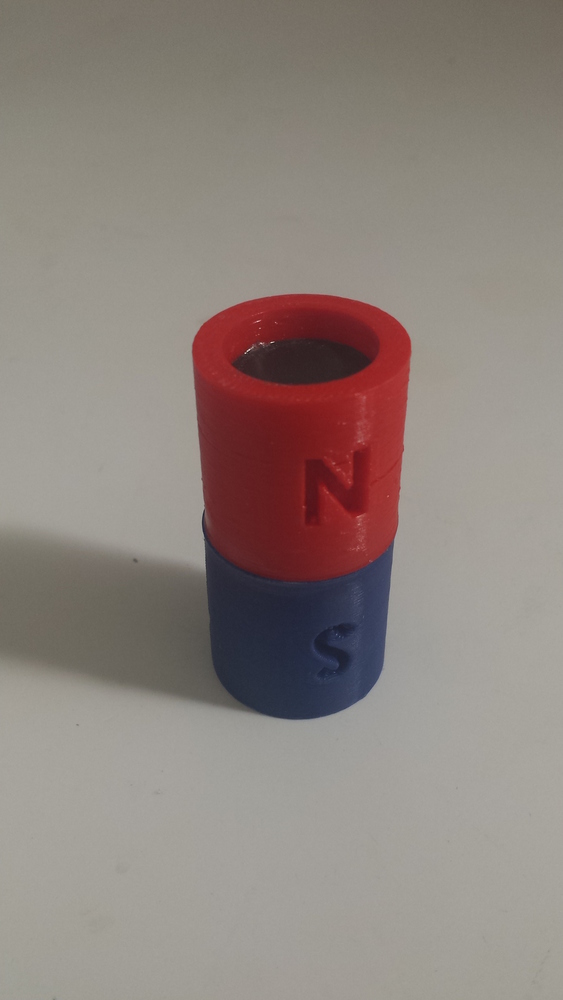
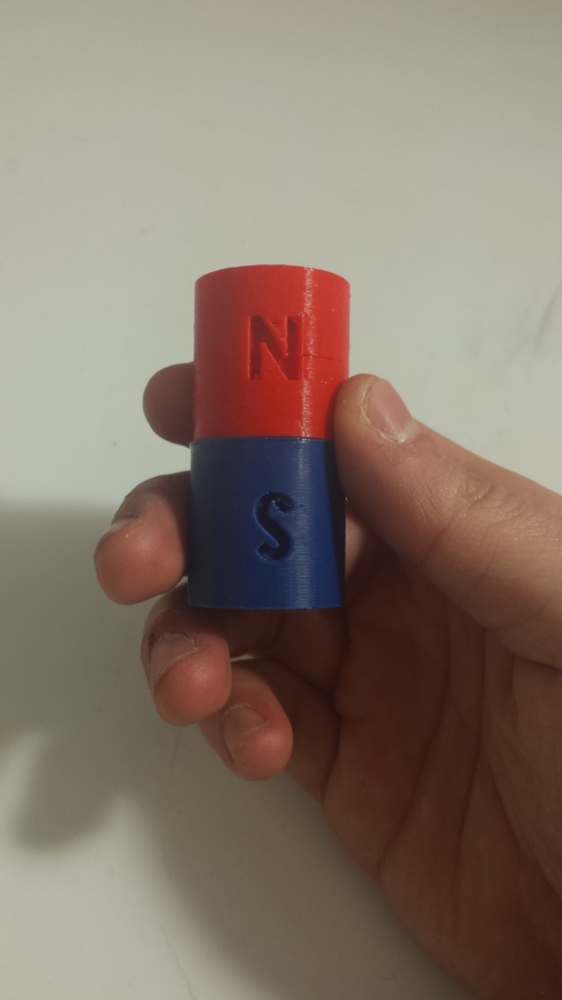
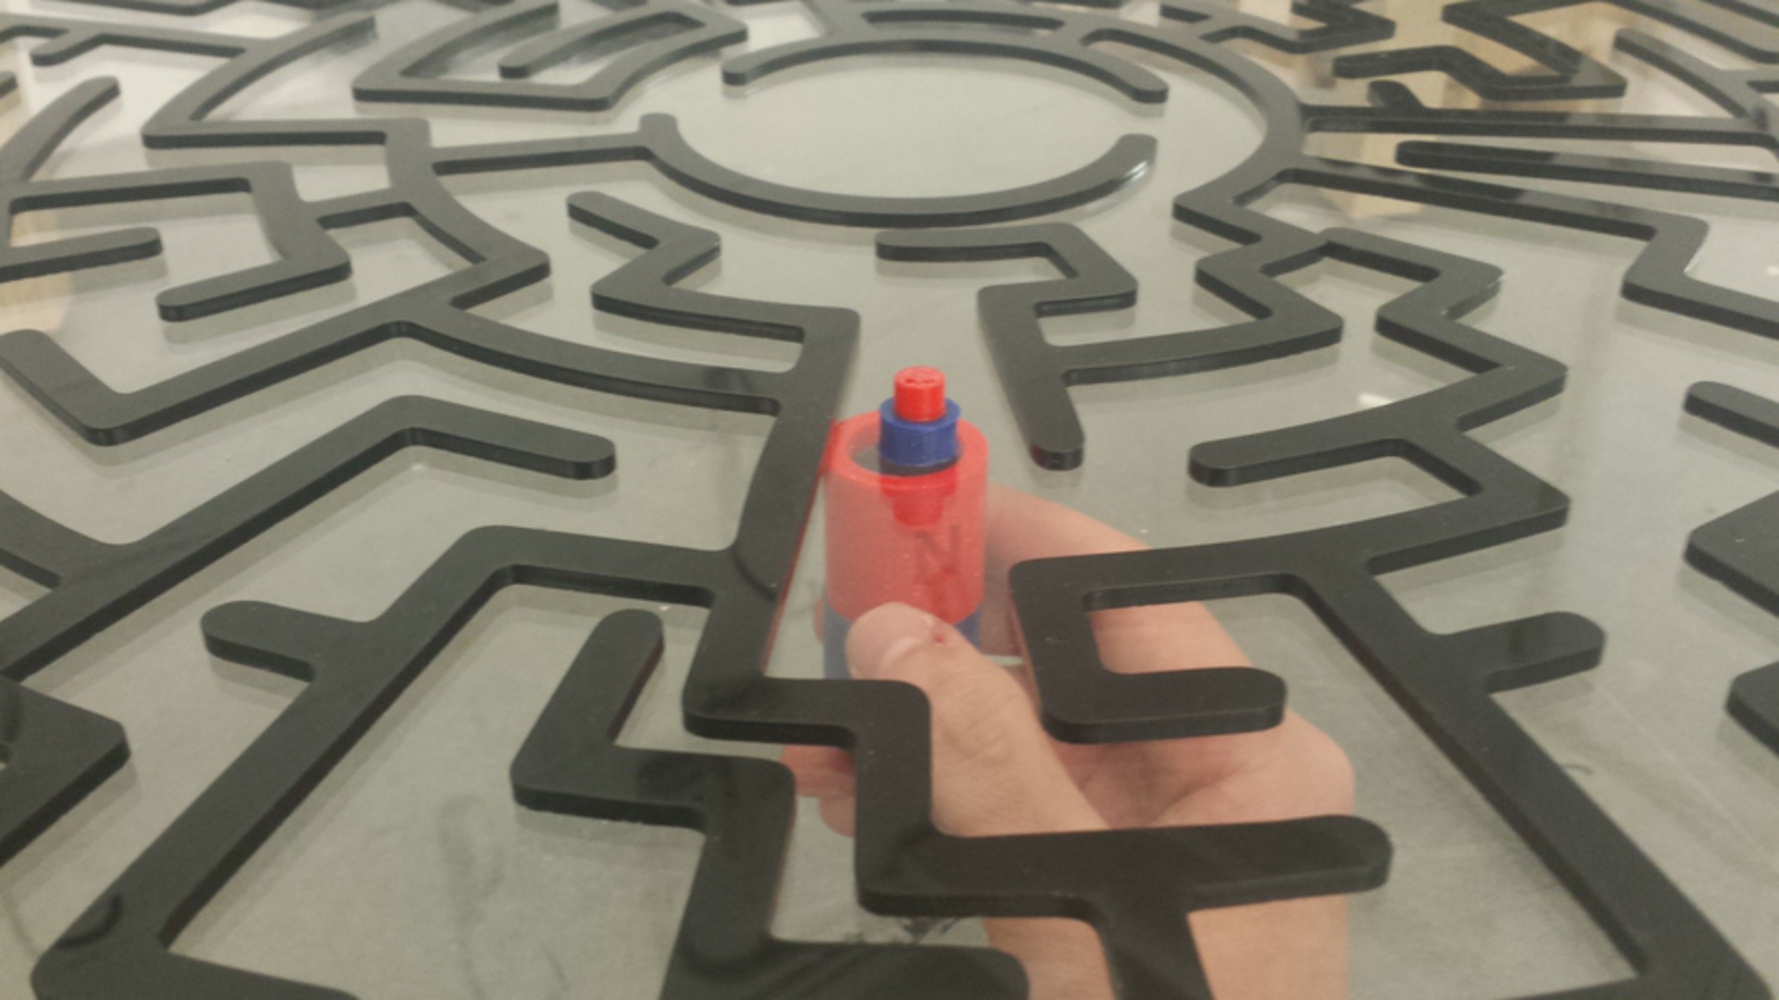
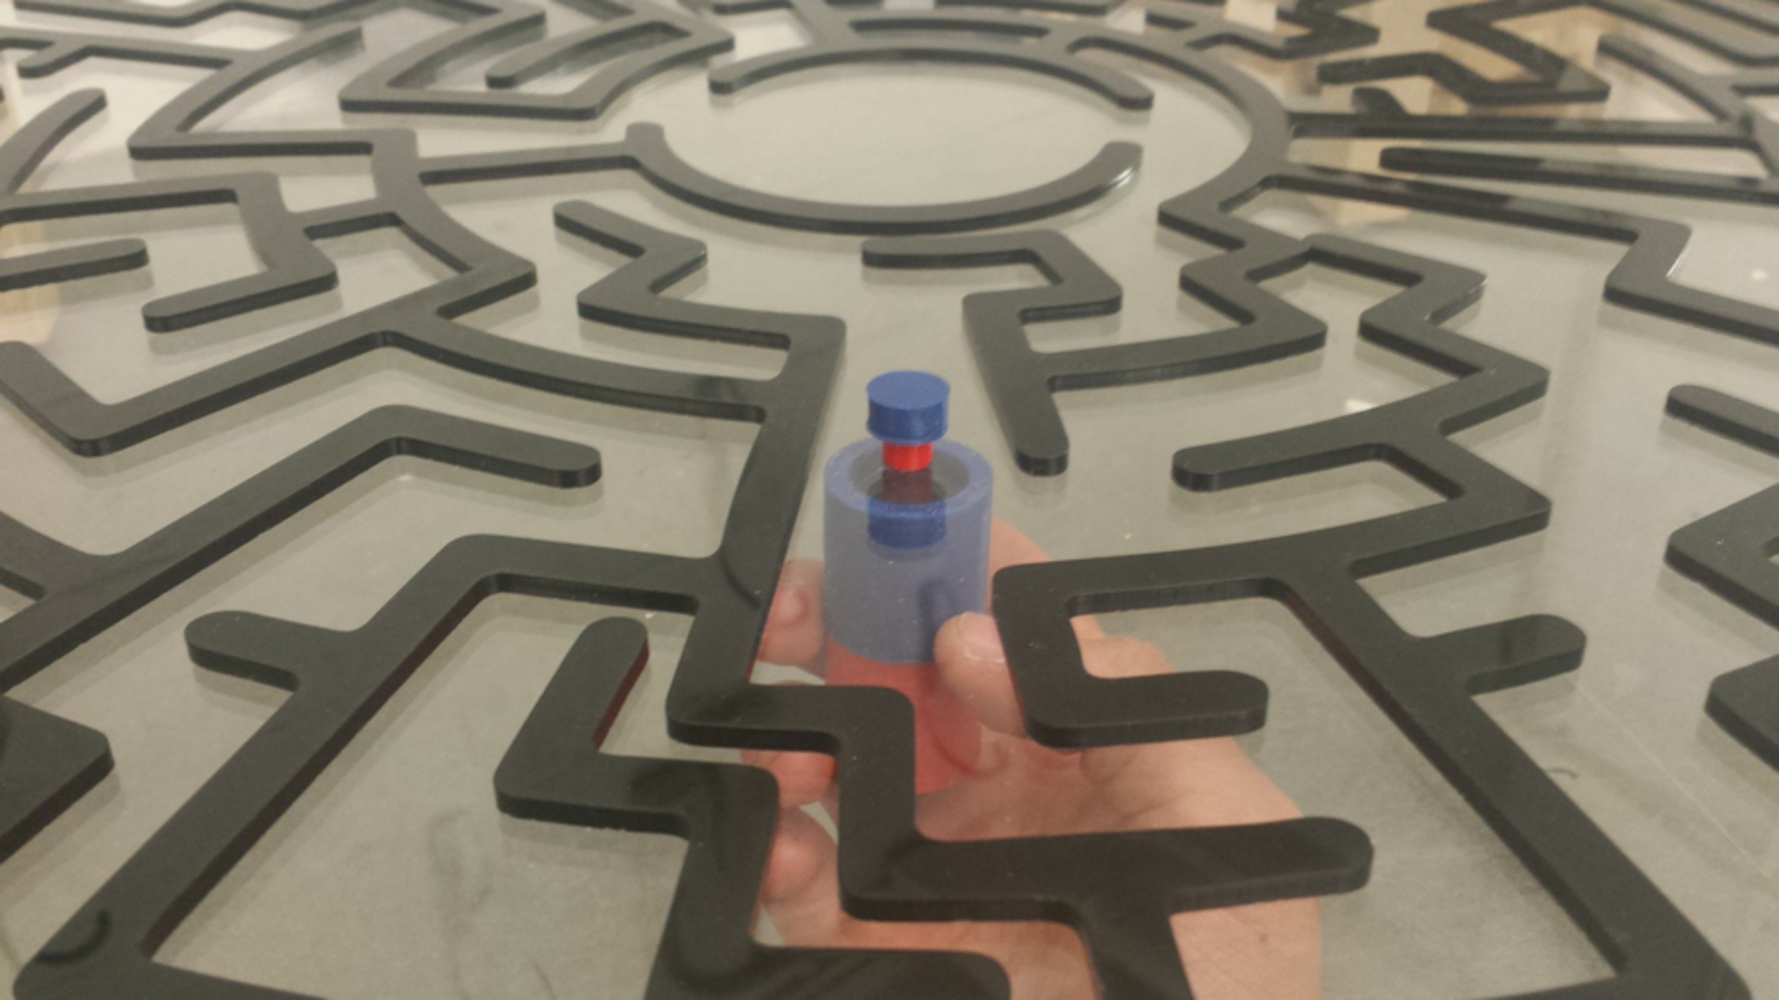
From part 2, we realized that simply using the controller to navigate the top player piece was too easy as it was only demonstrating magnets that attract. To further teach that magnets can not only attract but also repel, we thought about how to integrate repelling. This drove our design for the controller and player pieces to be flippable. We added color to create a visual cue when the pieces flipped so that North (red) attracts to South (blue), North (red) repels North (red), and South (blue) repels South (blue). Lastly, we implemented gates to prompt children to have to flip in order to reach the center goal.
Interaction
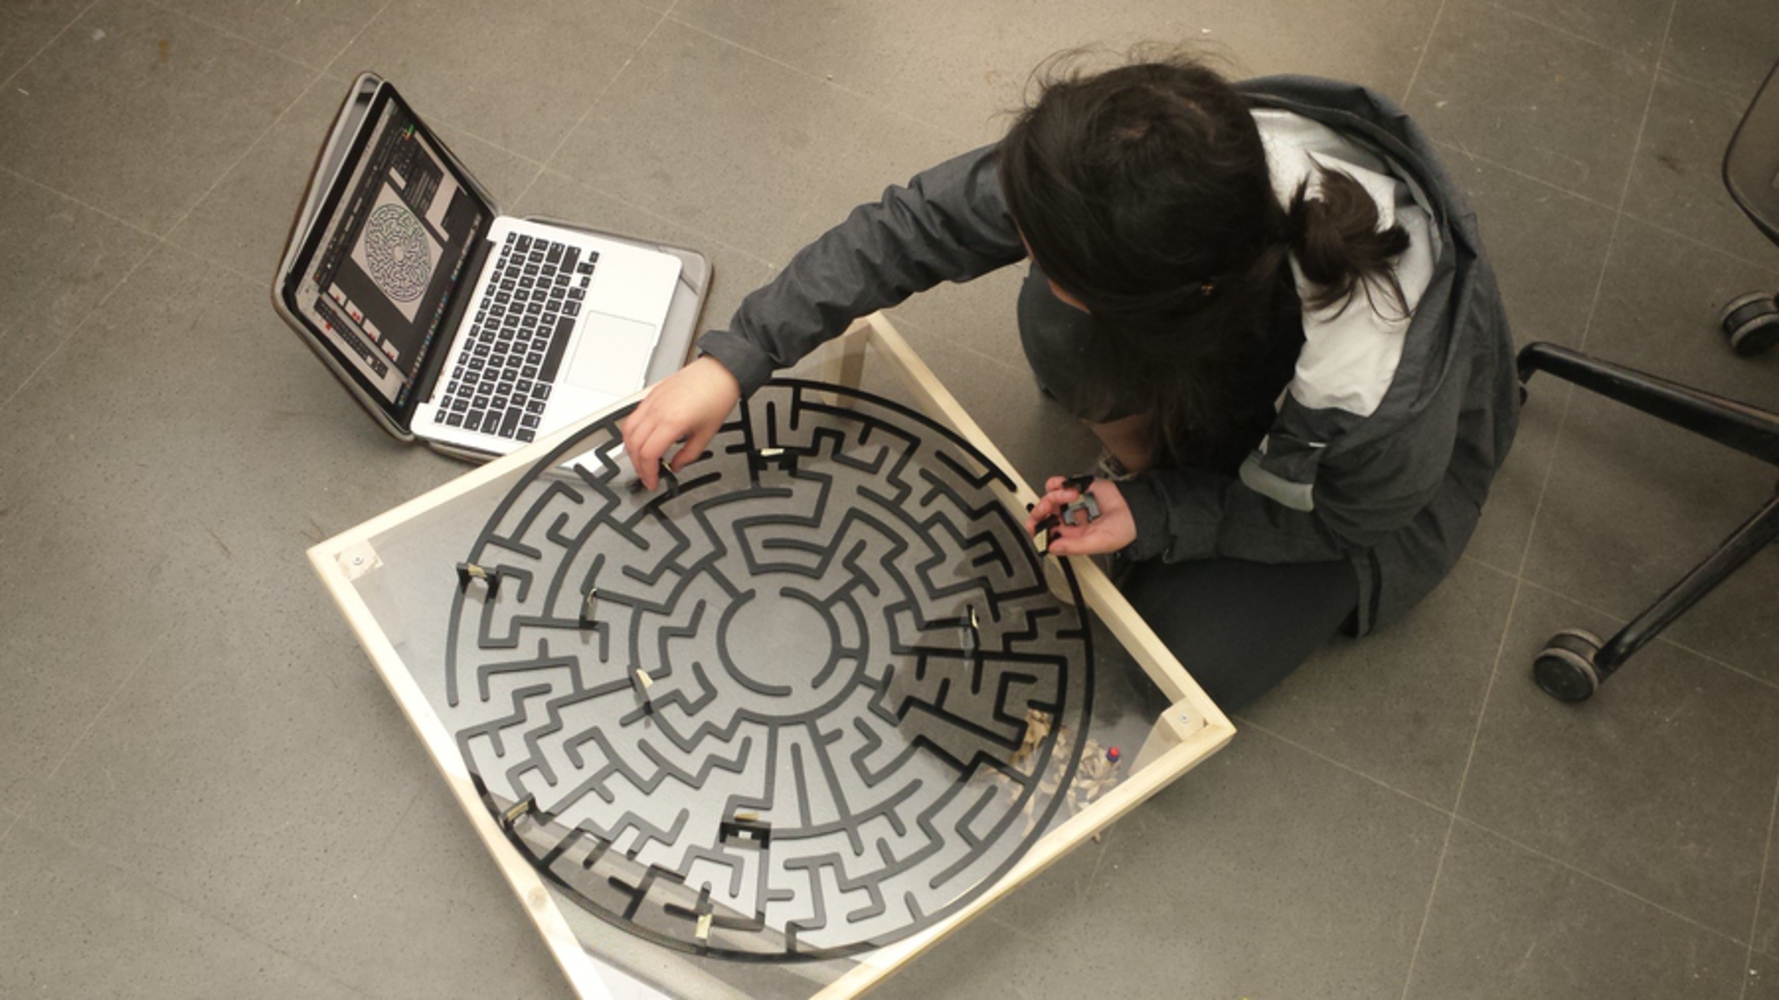
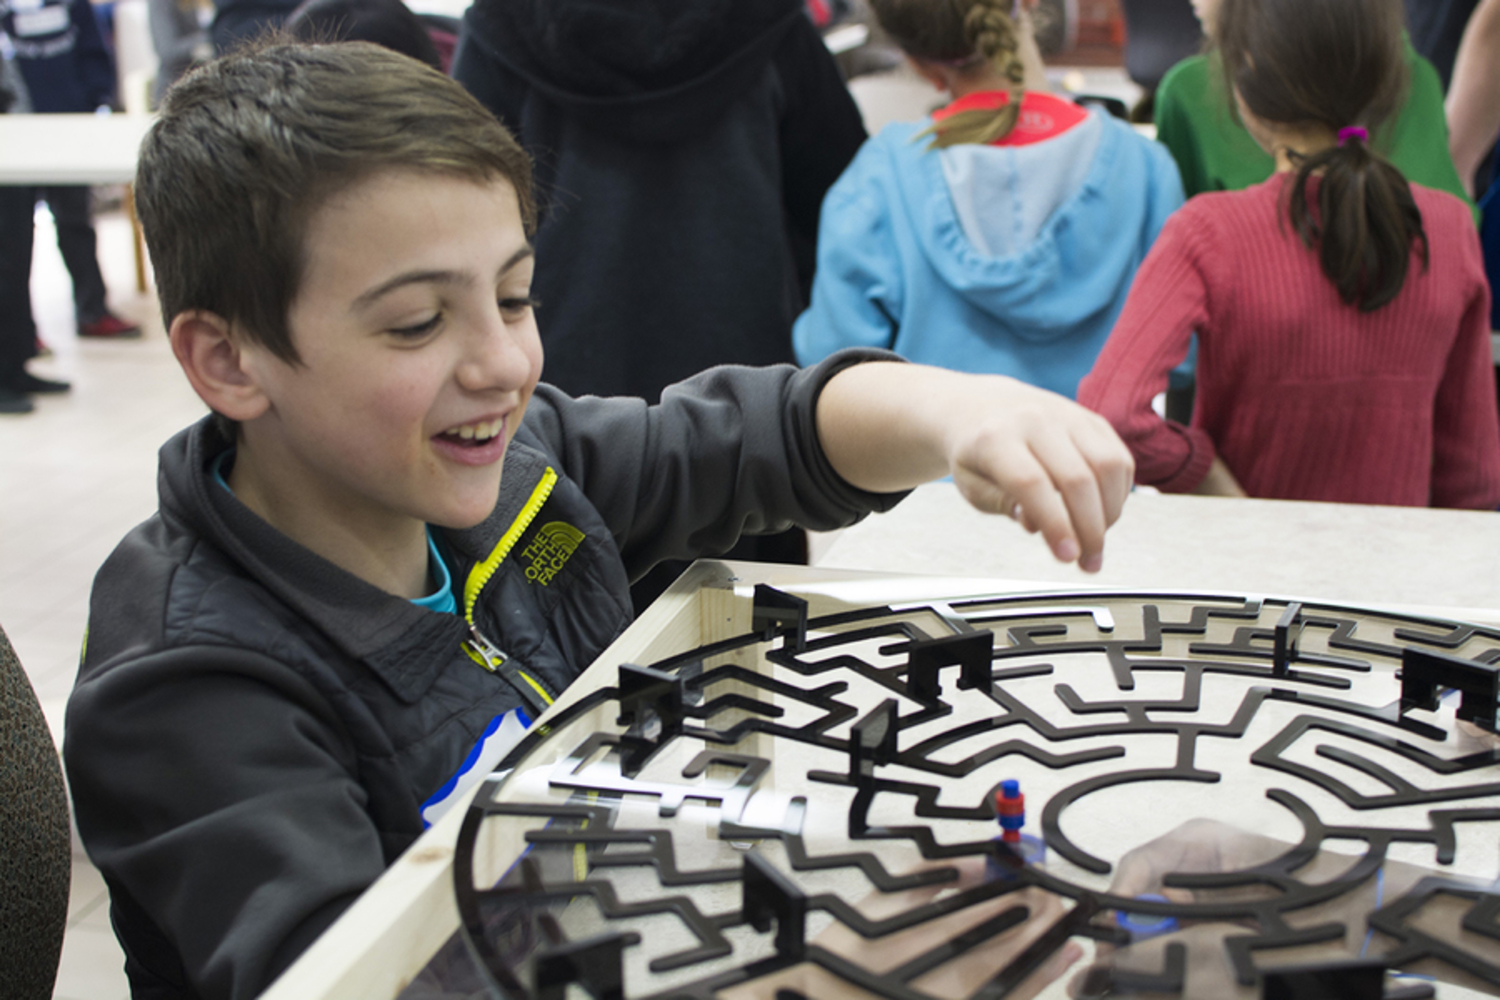
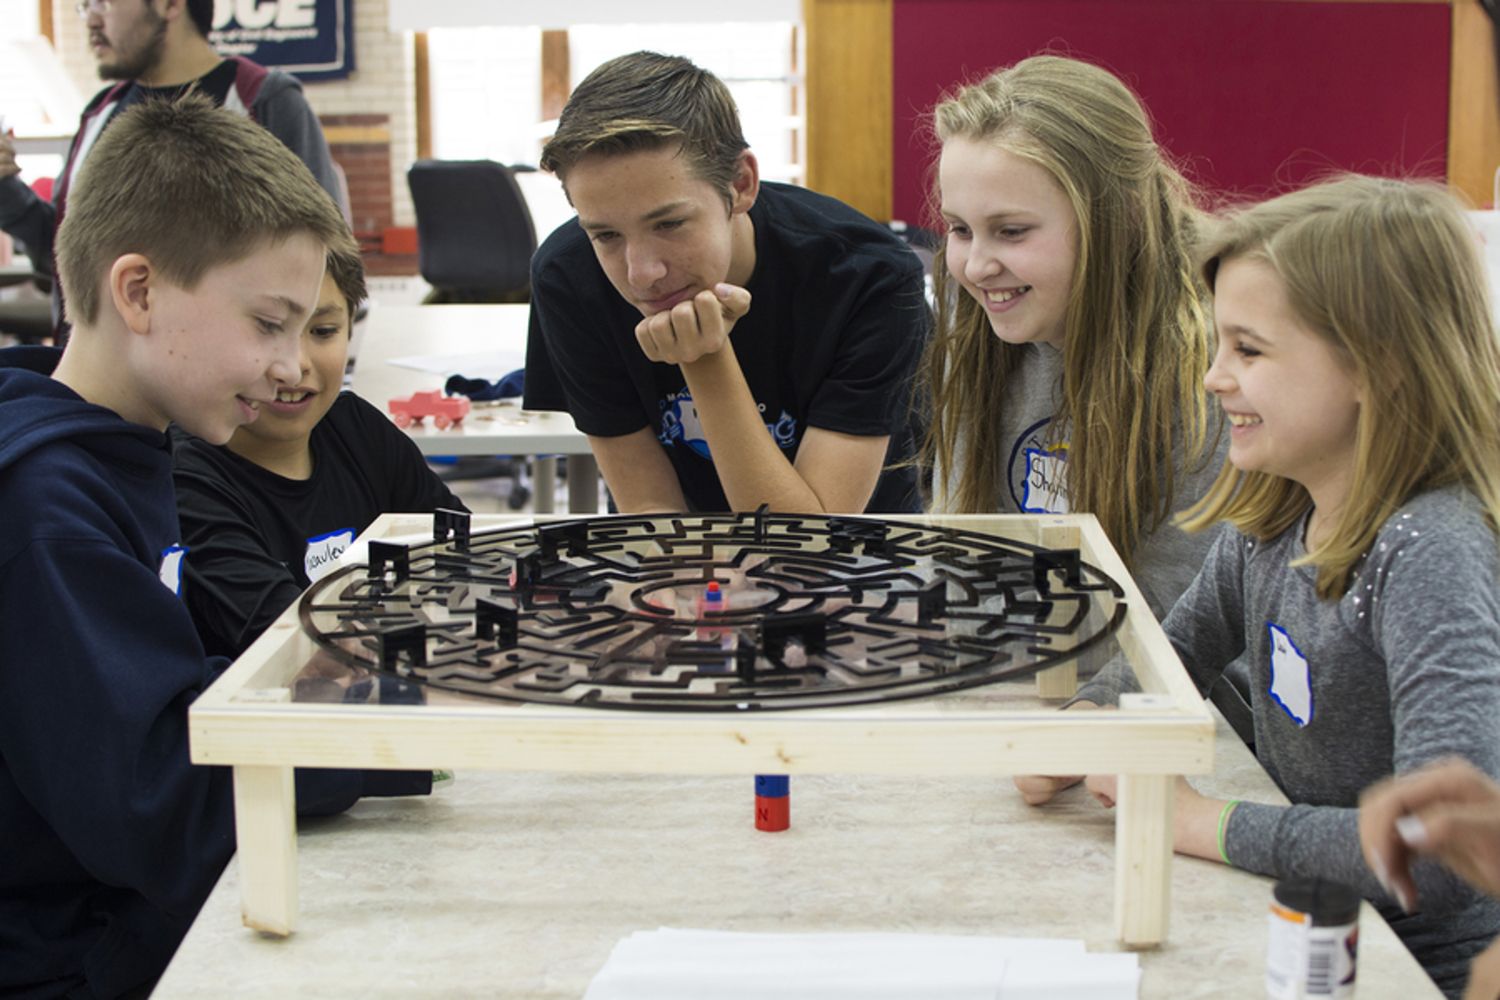
Children must flip the bottom controller piece to either attract or repel the top player piece in order to get through obstacles and reach the center goal. Whoever reaches the center goal wins.
Meeting Requirements
Successfully knowing when to flip the piece to get through the gates shows a child's understanding of magnetism where likes repel (North (red) to North (red), South (blue) to South (blue)) and opposites attract (North (red) to South (blue)).
Supplies
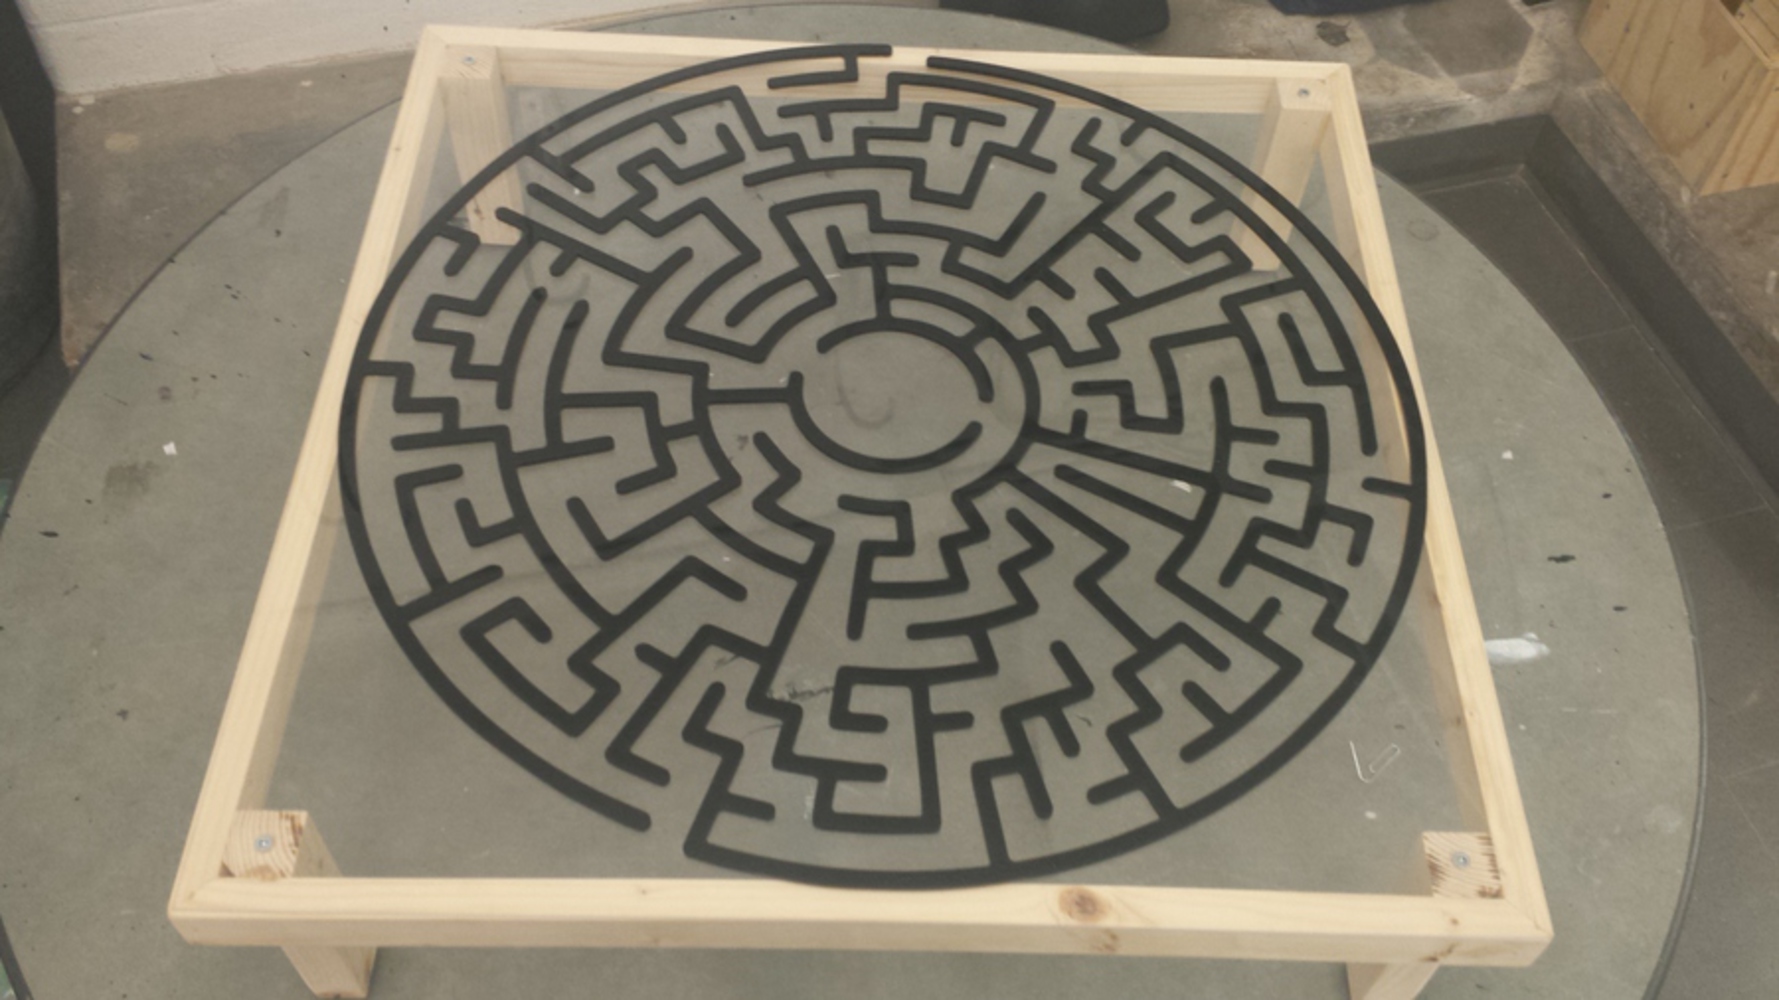
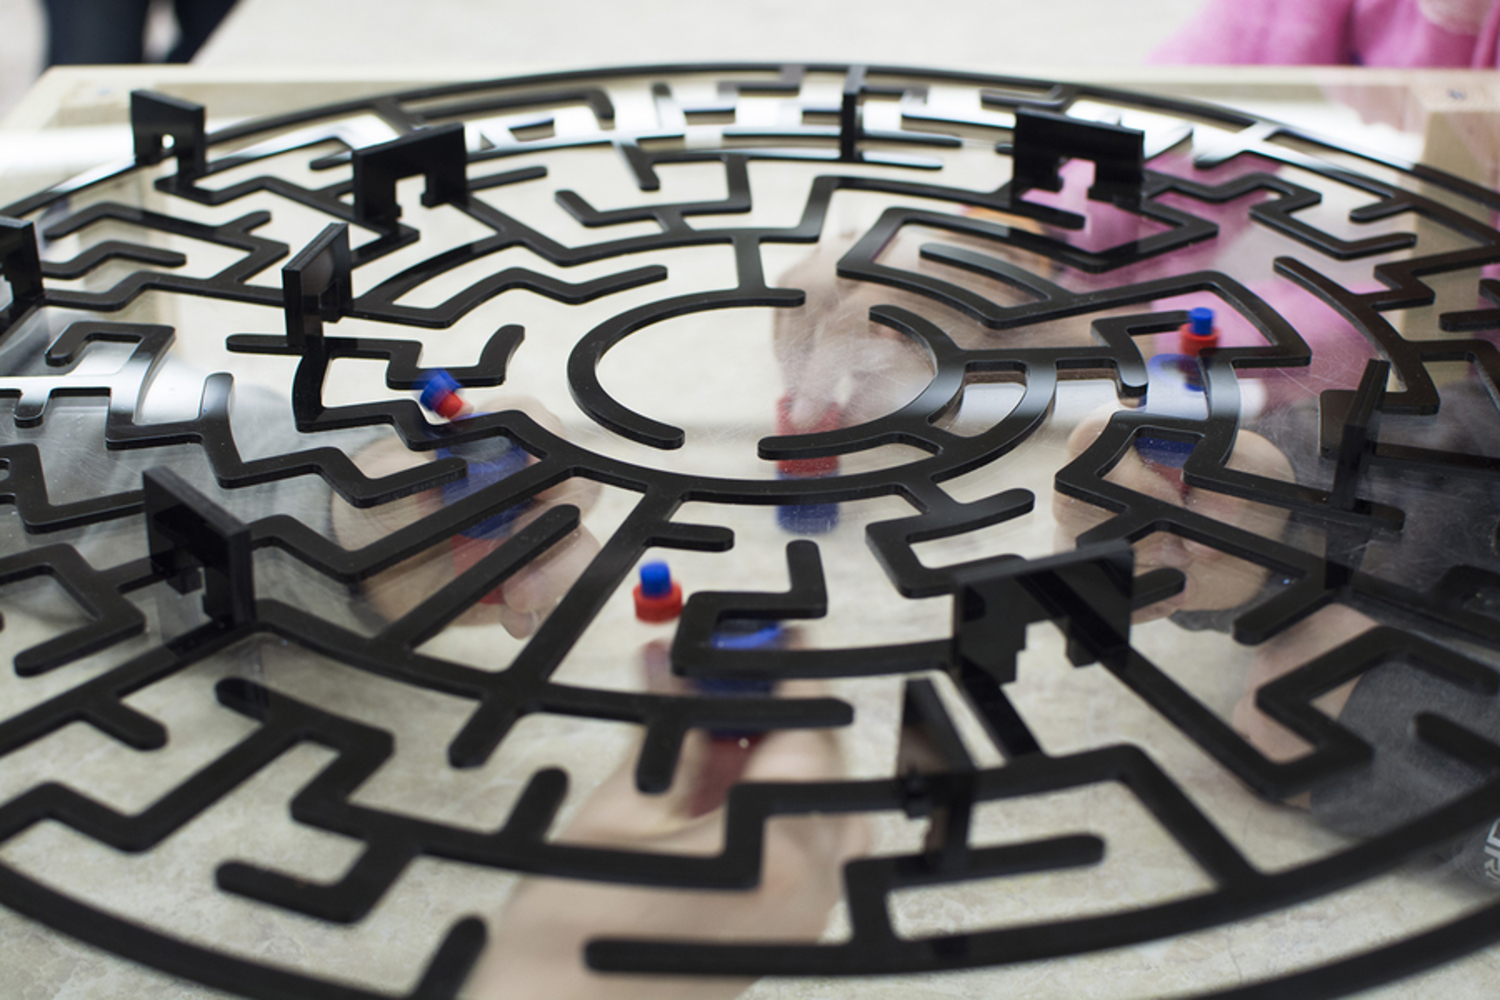
Maze
- Black acrylic (24" x 24" 1/8" thick)
Table
- Clear acrylic (24" x 24" 1/8" thick)
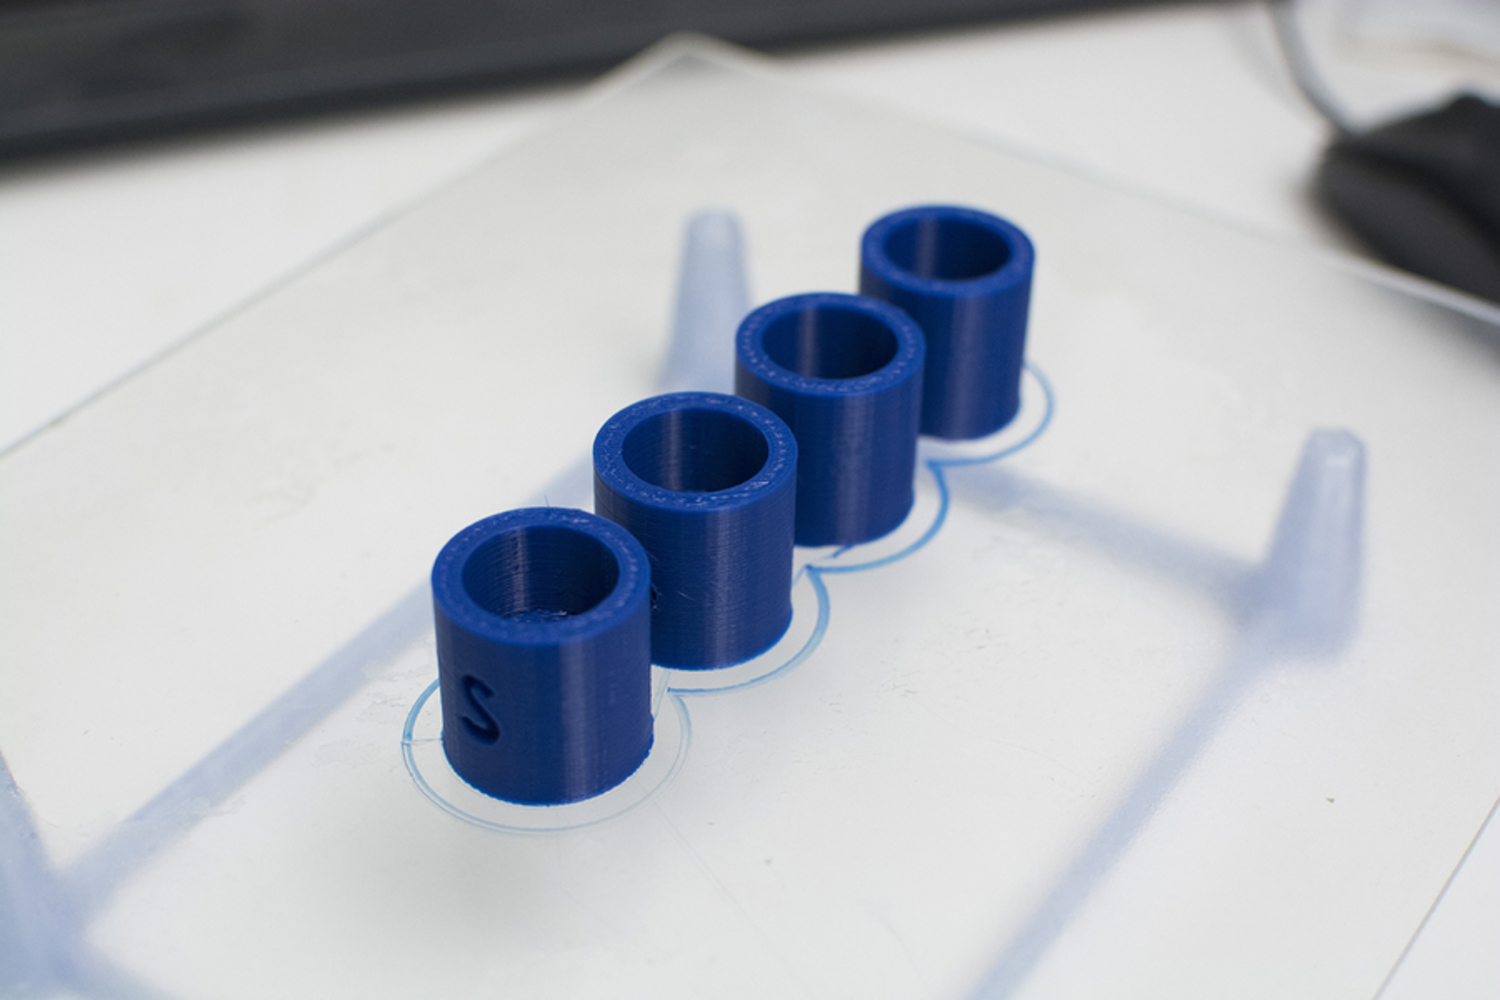
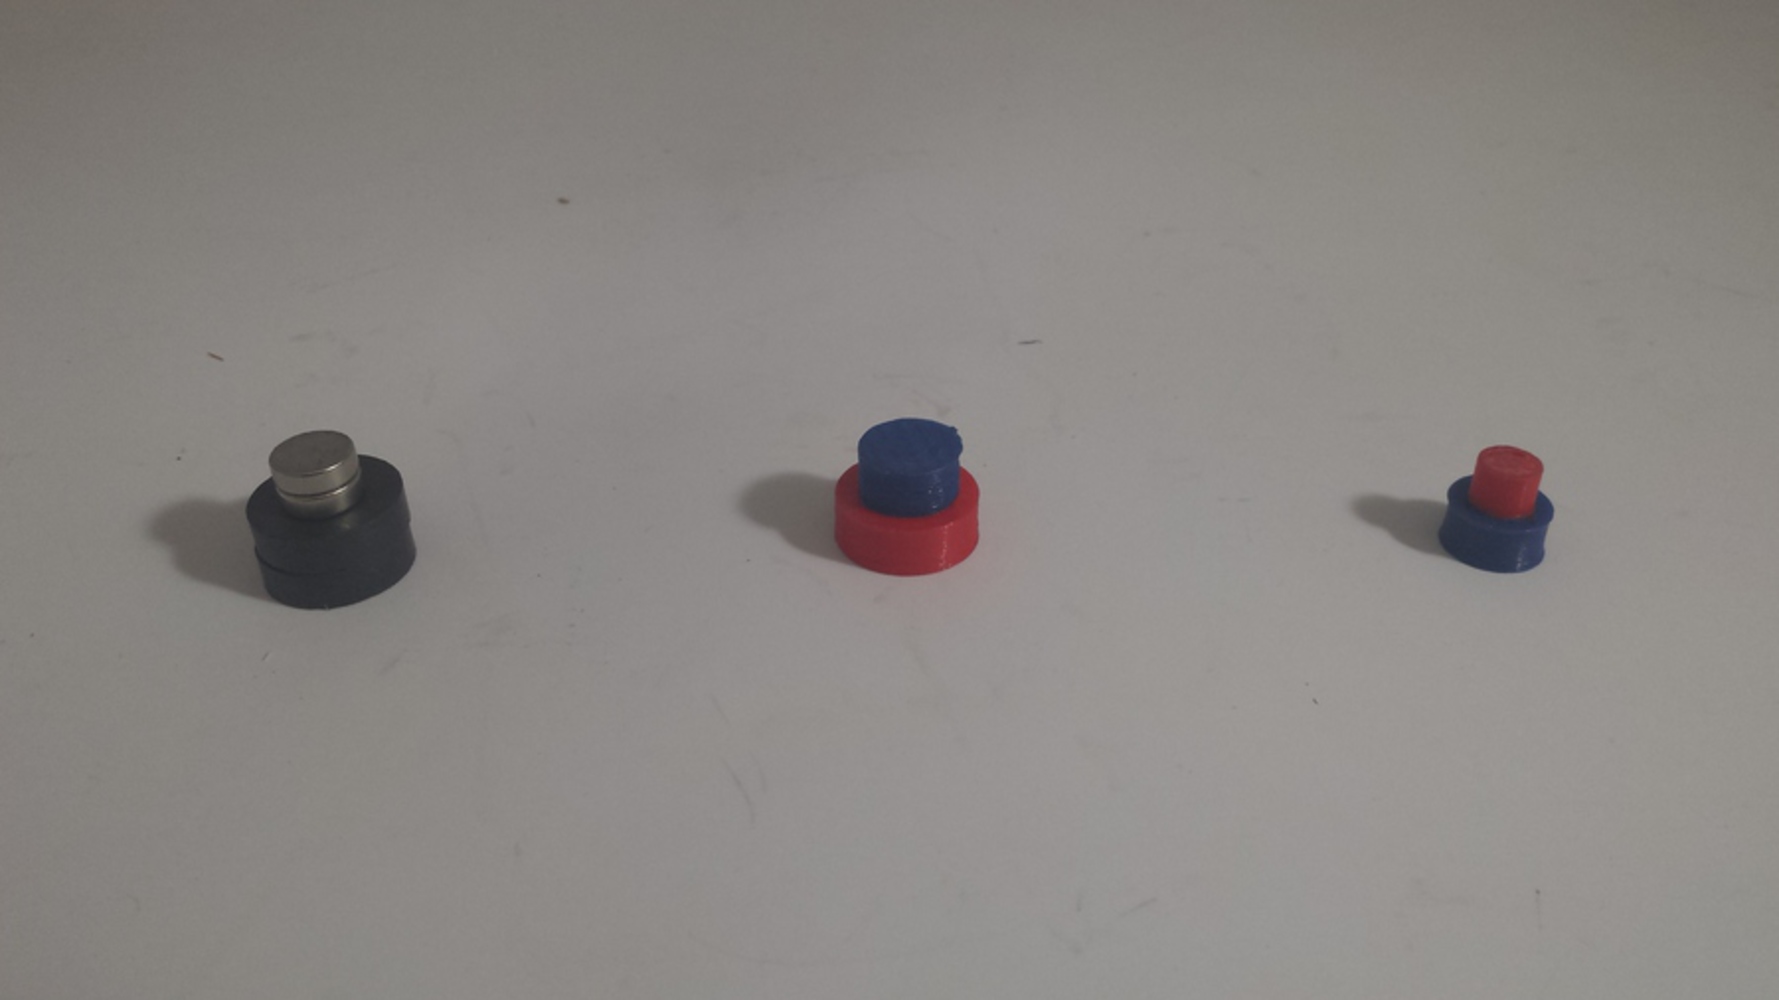
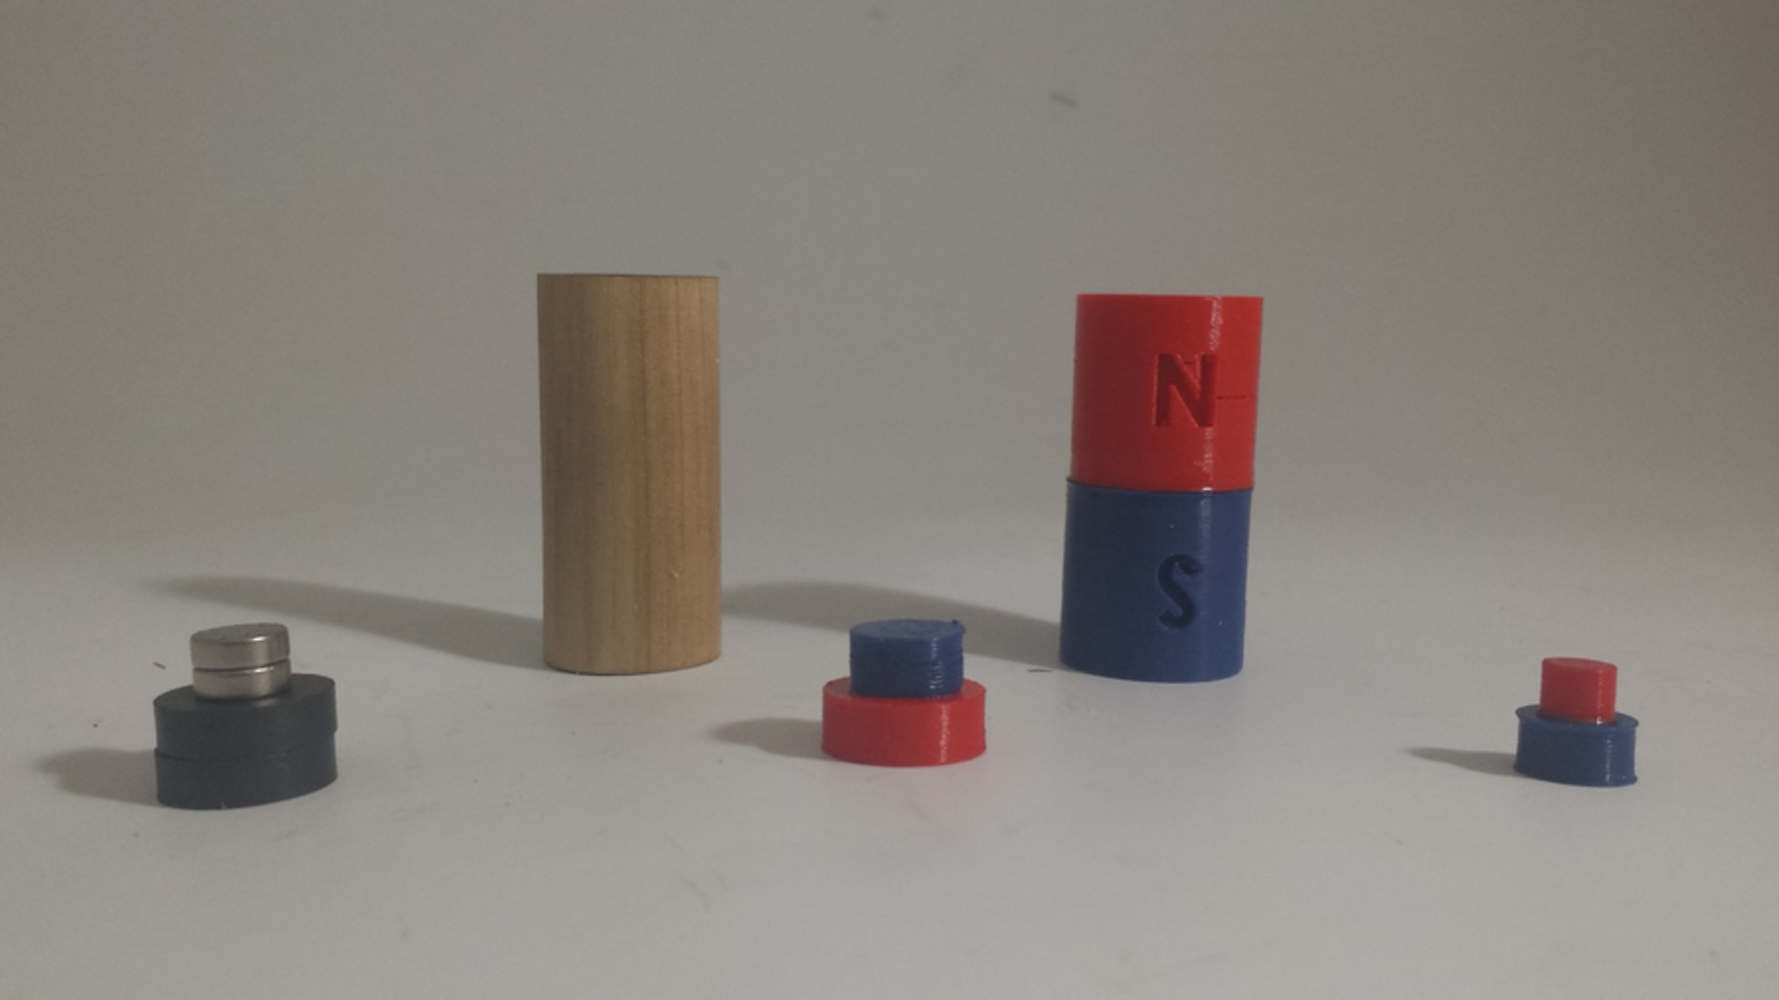
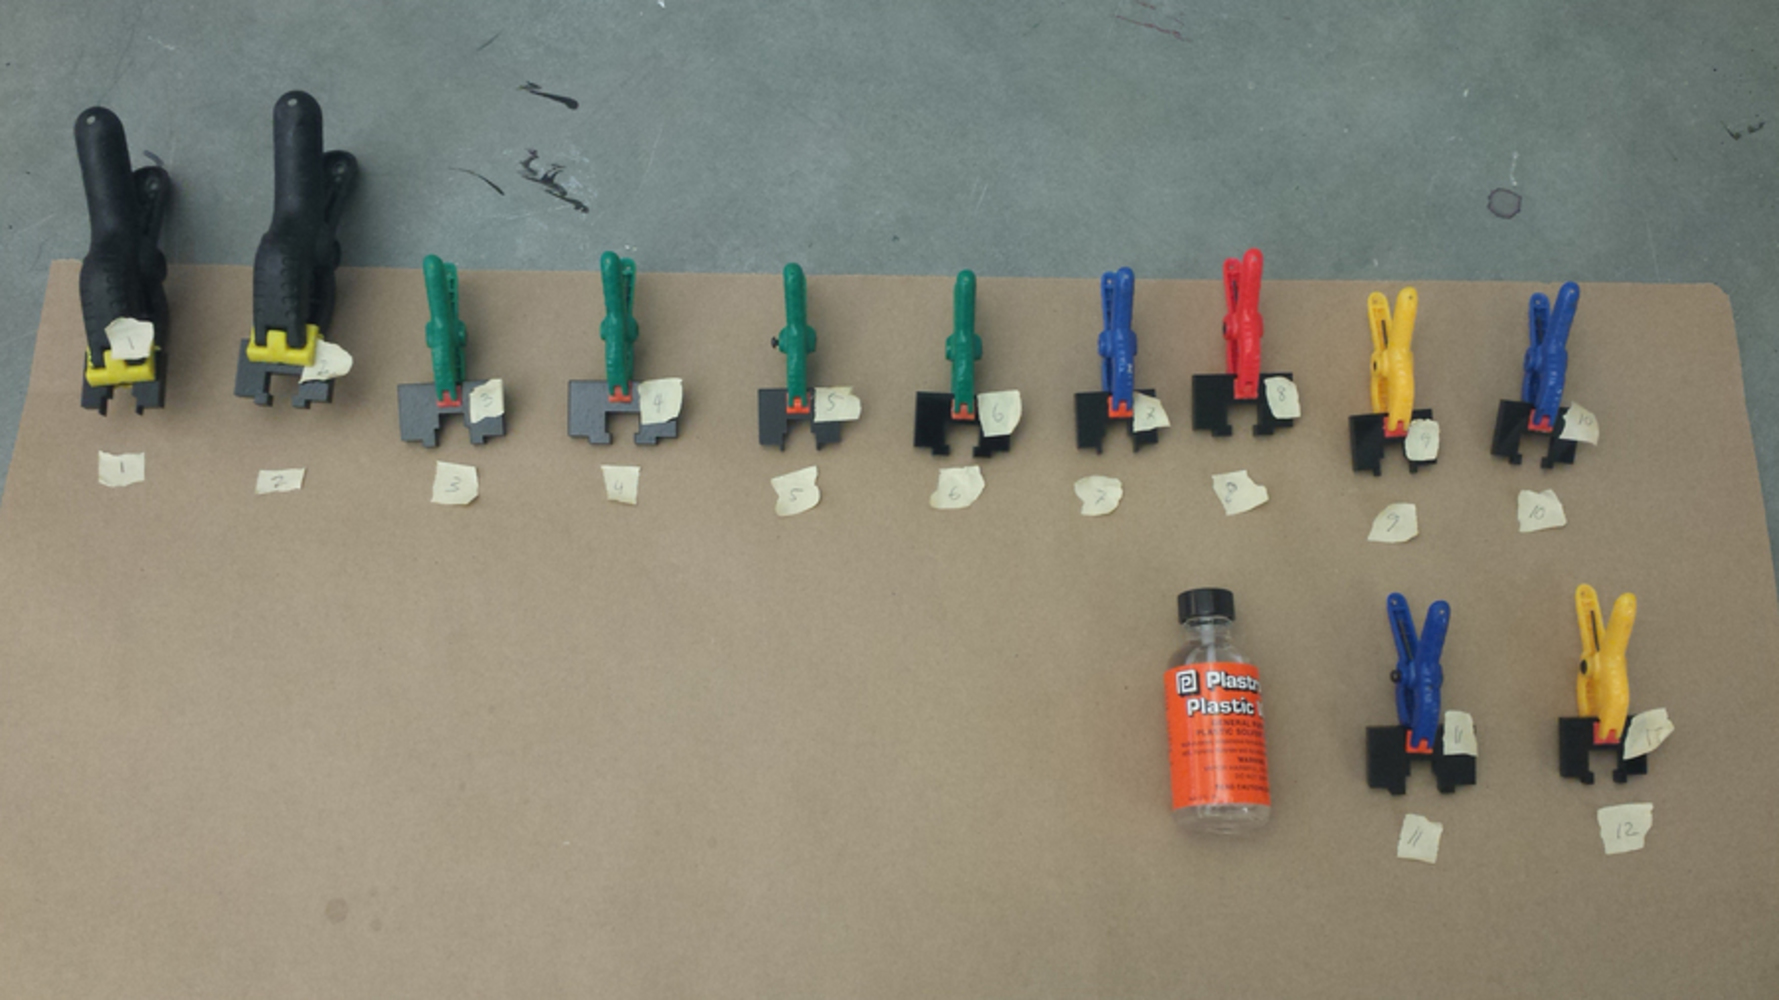
Magnet Pieces
- Ceramic Magnets (3/4" Diameter)
- Neodymium Magnets (3/8" Diameter)
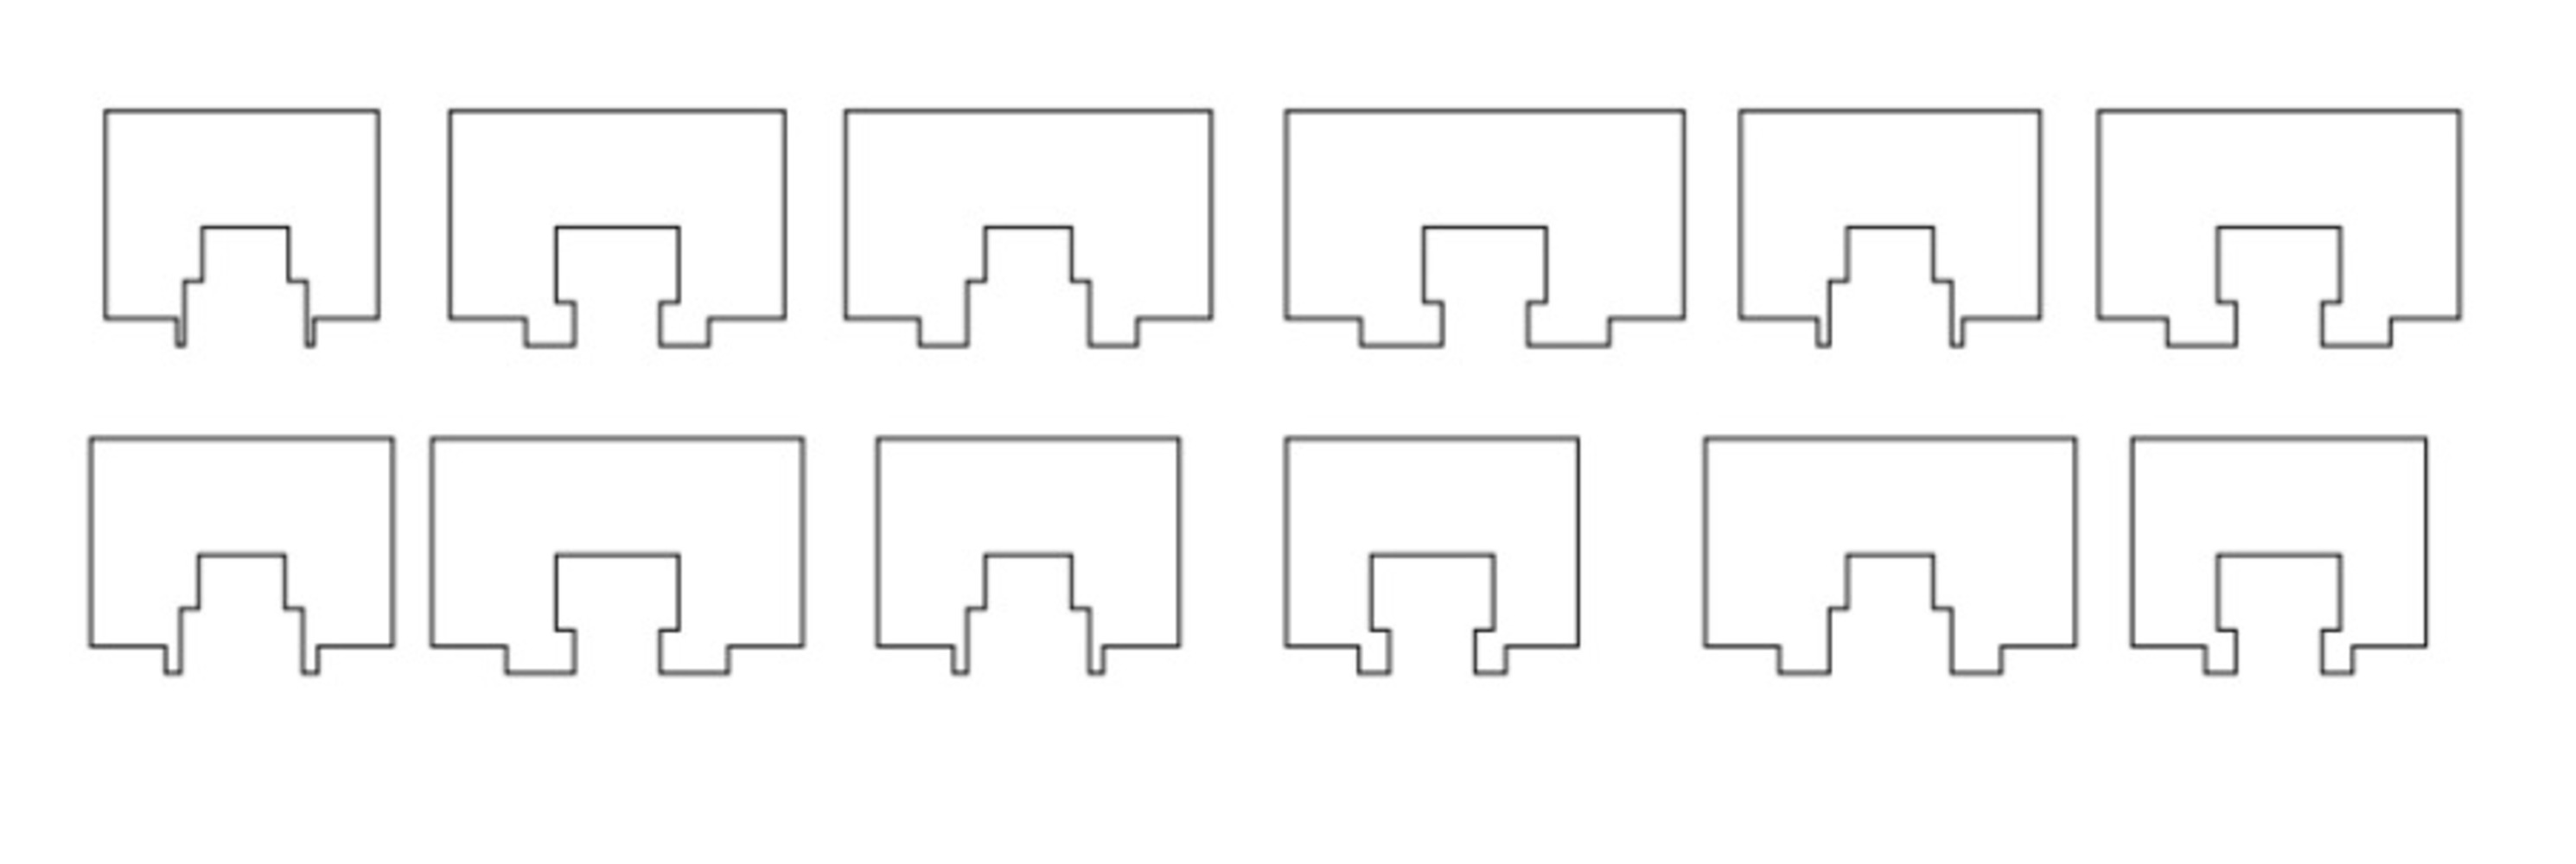
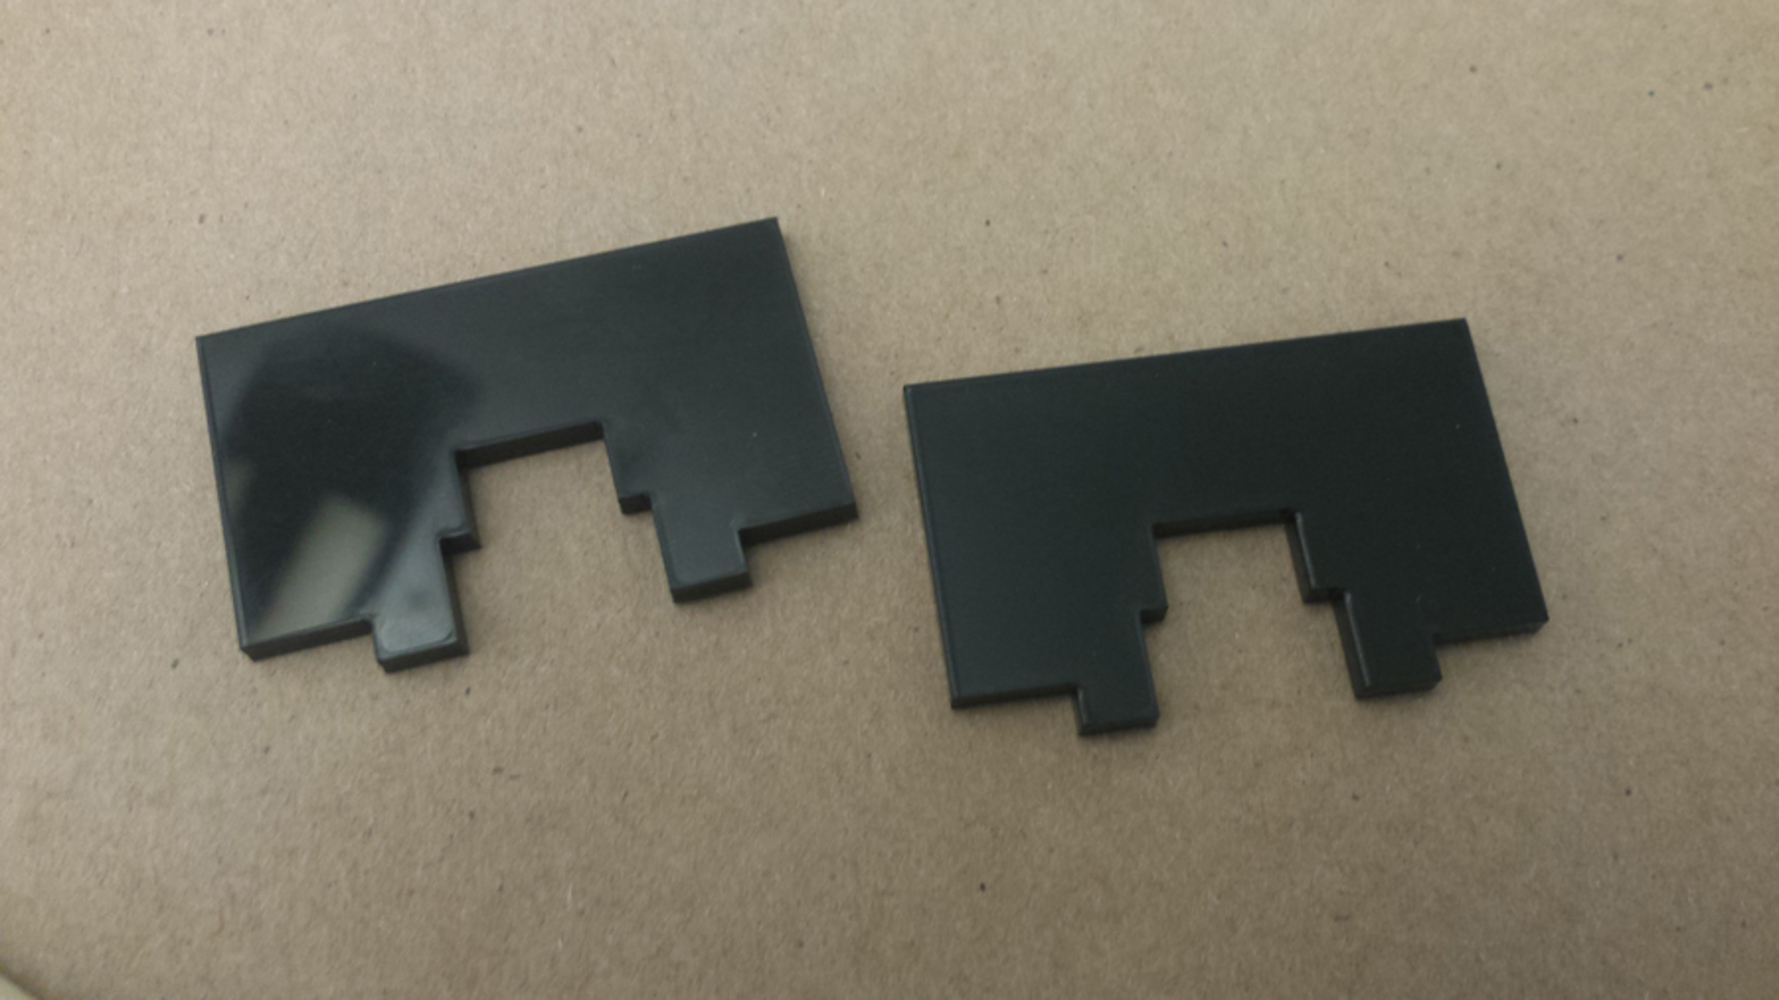
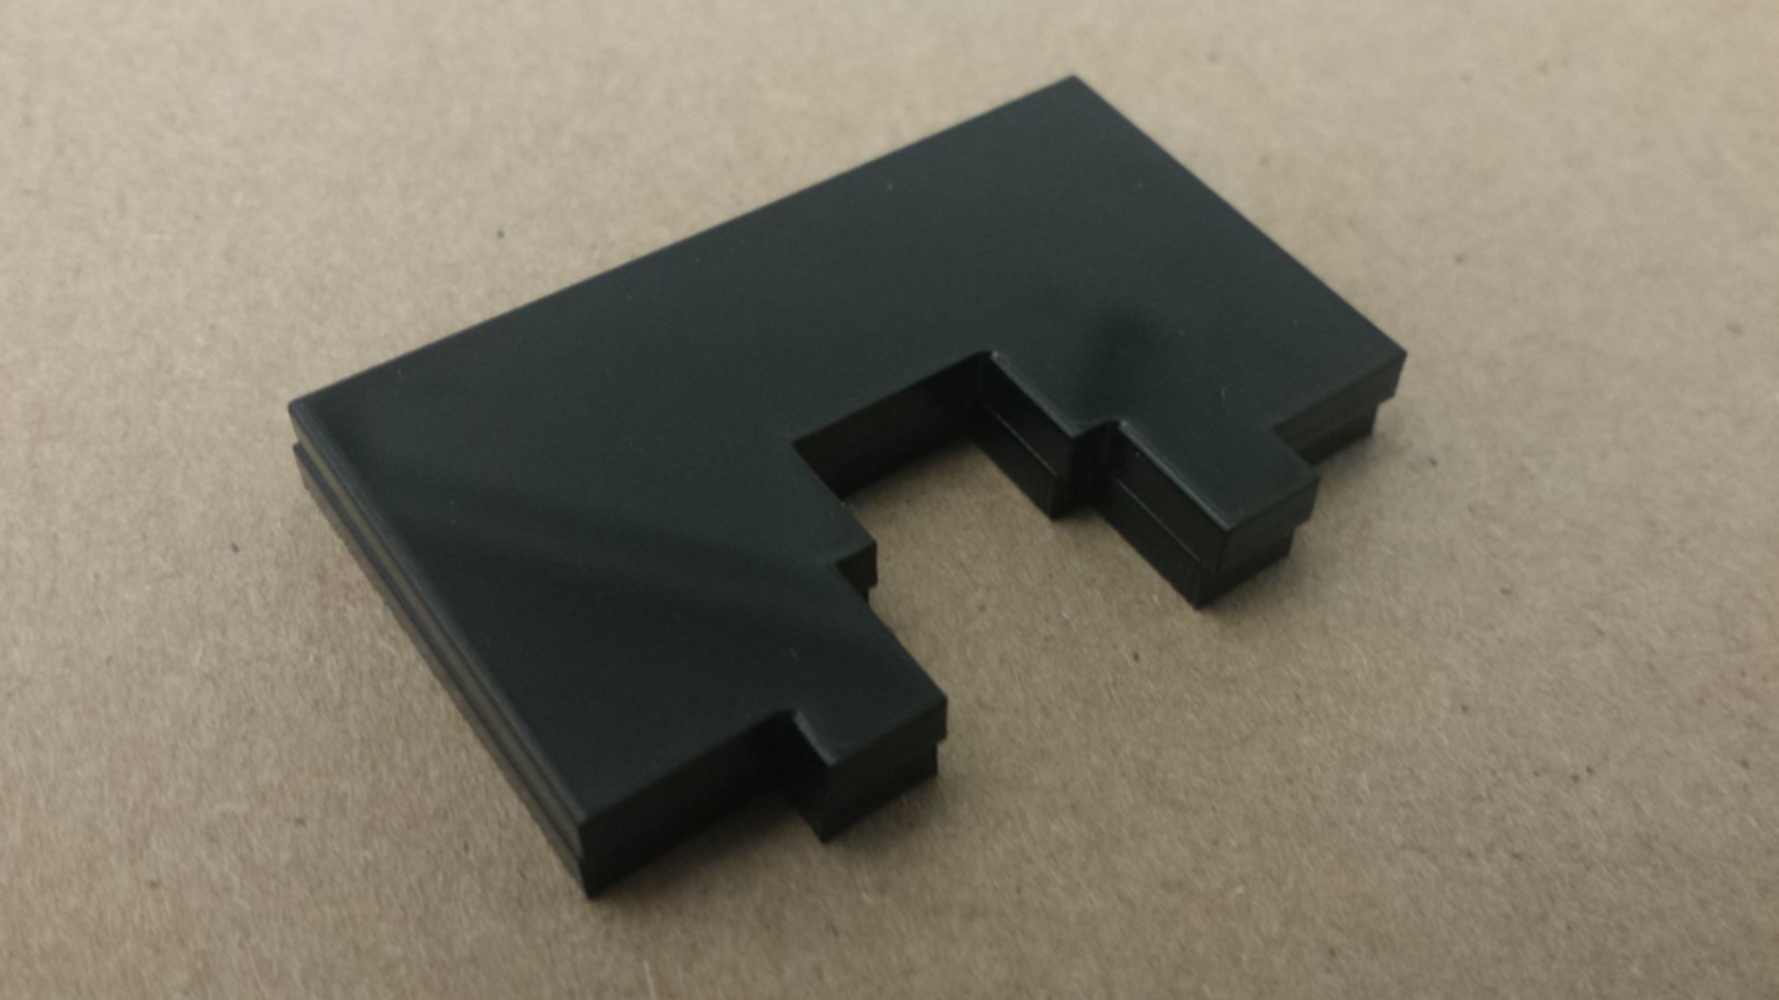
Gates
Manufacturing
Maze
We used the same manufacturing technique as part 2, which was laser cutting, except we used black acrylic instead of MDF.
Table
For part 3, we used the table from part 2; table manufacturing can be seen in the following link: http://ideate.xsead.cmu.edu/gallery/projects/toy-design-2
Magnet Pieces
We 3D printed magnet casings, red for North, and blue for South, for the bottom controller piece and the top player piece. We used SolidWorks to create the STL files.
Gates
We laser cut the gates and used illustrator to create the vector/dxf files.