Progress Bar

Made by Qin Bian, Nickie Cheung and ydavanzo

For this project, we created physical display devices that allow people working remotely to share their progress.

Created: March 5th, 2018

0
0

Opportunity Space

For people who collaborate remotely, they need to update their progress constantly with each other. Even though there are multiple online team collaboration tools (e.g., Kanban board, Trello) that help teams stay informed of each other's work progress, they also deprive people of opportunities to interact and develop good relationships with each other. How might we create devices that help remote teammates communicate their work progress in an enjoyable way?

Proposed Solution

We created paired devices, Progress Bar, that allow a person to communicate his progress on a remote physical display. When users make progress on their work, they will slide an indicator on their side. The move of indicator triggers the LED strip on the other device to change, reflecting the updated work progress. Similarly, if their teammates have moved the progress indicator, they will see a change of LED strip on their side.

0

Materials

  • 2 Particle Photons
  • Jumper wires
  • Woodboard
  • LEDs
  • Conductive tape
0

Design Process

Brainstorm

To get started, we first brainstormed the possible devices that can facilitate remote communication. The ideas we came up with included:

- Touch screens that allow people share and edit concurrently

- Have visual displays that help co-workers or collaborators update their work progress with each other

- Devices that lower people's barriers to apologize in person

After discussing, we decided to pursue the second idea because it moves away from the traditional domain of long-distance relationship and can be applicable to a larger population.

Initial Design

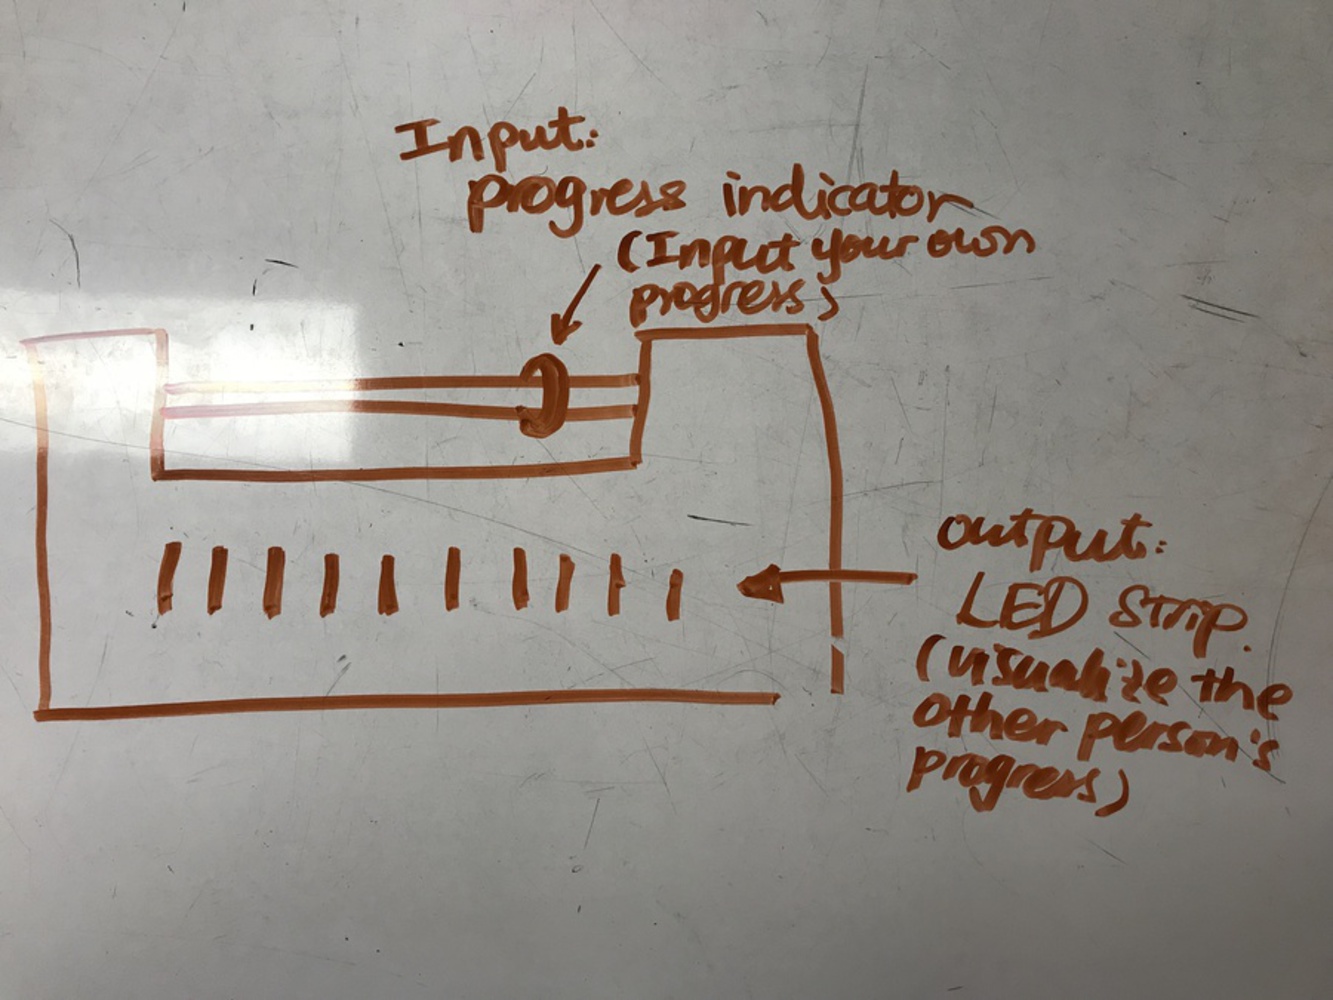
In our initial design, we imagined that the device will consist two rings. Users will move the input ring on a bar to show their work progress. The output ring will be moved automatically when their collaborator moves his or her input ring remotely. To achieve this, we would need one stepper motor on each side to drag the ring to the proper place.

This idea turned out to be infeasible because the photon couldn't really run a motor. It didn't have the necessary power or setup for a motor shield. Even if we made our back current regulator, the photon's 3V would not be enough to spin a motor. We also thought about replacing the stepper motor with servo motor. However, the problem with that was that servo would not give us enough spin.


Design Implementation

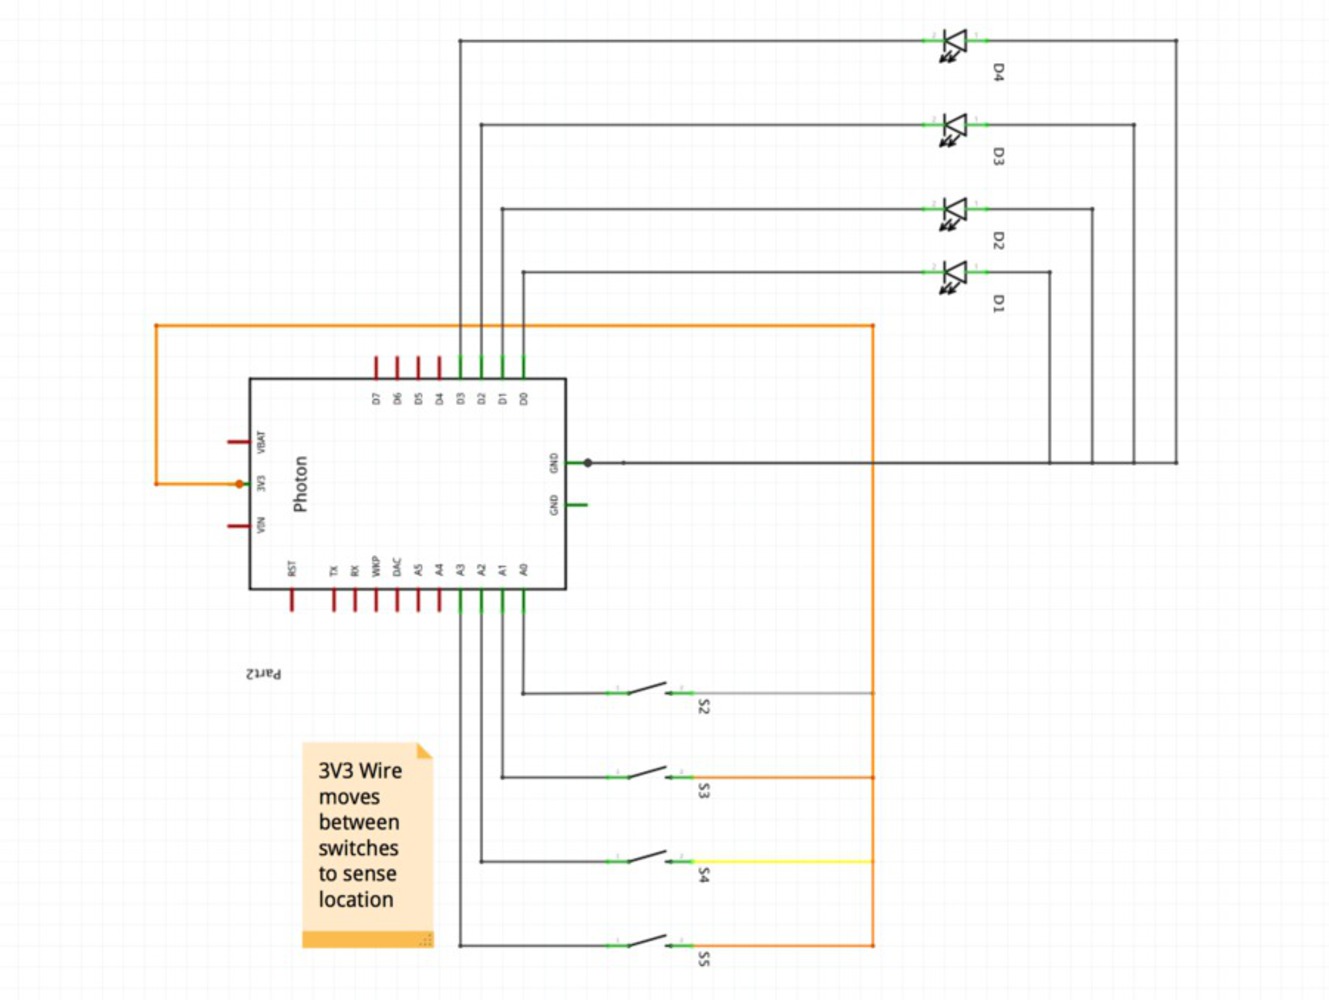
To implement our design, we cut and heated the acrylic tube to make sure the indicator and the attached wire can be moved freely. The indicator will touch the conductive aluminum foil, which is connected to wires. When the indicator is moved to different positions, the different message will be sent to the cloud ("A", "B", "C", "D") so that the other device knows what position the indicator is at. 

For the output, we first experimented with RGB LED, attempting to use different colors of lights to indicate levels of progress. However, we eventually decided to use four LEDs in a row as they show the progress of work more clearly.

0
0

Storyboard


0

Schematic

0
String msg_name = "heavyWithTheHeat";
long lastPublishedAt = 0;
int publishAfter = 10000;

int LED_0 = D0;
int LED_1 = D1;
int LED_2 = D2;
int LED_3 = D3;

void setup() {
    Particle.subscribe( msg_name, LEDController);
    pinMode(LED_0, OUTPUT);
    pinMode(LED_1, OUTPUT);
    pinMode(LED_2, OUTPUT);
    pinMode(LED_3, OUTPUT);
}
void loop()
{
    Particle.publish("bad", "loop start");
    String new_msg_name = msg_name+System.deviceID();
  if( triCheck(0) ){
    Particle.publish(new_msg_name, "A");
  }
  if( triCheck(1) ){
    Particle.publish(new_msg_name, "B");
  }
  if( triCheck(2)){
    Particle.publish(new_msg_name, "C");
  }
  if( triCheck(3) ){
    Particle.publish(new_msg_name, "D");
  }

  delay(1000);
}

bool triCheck( int pin )
{
  int try1 = analogRead(pin);
  delay(50);
  int try2 = analogRead(pin);
  delay(50);
  int try3 = analogRead(pin);

  int goalValue = 4094;

  if( isBetween( try1, goalValue, 10) and  isBetween( try1, goalValue, 10) and isBetween( try1, goalValue, 10))
  {
    return true;
  }
  else
  {
    return false;
  }
}

bool isBetween(int num, int approx, int error)
{
  if ( num < approx - error || num > approx + error ){
    return false;
  }
  else{
    return true;
  }
}

void LEDController(const char *event, const char *data)
{
    String eventName = String(event);
    String deviceID = System.deviceID();

    if( eventName.indexOf( deviceID ) != -1 ){

      Particle.publish("same device?", "yes");
      return;
    }

    if( strcmp( data, "A")==0)
    {
        Particle.publish("tester", "A");

        digitalWrite(LED_0, HIGH);
        digitalWrite(LED_1, LOW);
        digitalWrite(LED_2, LOW);
        digitalWrite(LED_3, LOW);

    }
    else if( strcmp( data, "B")==0)
    {
        Particle.publish("tester", "B");
        digitalWrite(LED_0, HIGH);
        digitalWrite(LED_1, HIGH);
        digitalWrite(LED_2, LOW);
        digitalWrite(LED_3, LOW);

    }
    else if( strcmp( data, "C")==0)
    {
        Particle.publish("tester", "C");

        digitalWrite(LED_0, HIGH);
        digitalWrite(LED_1, HIGH);
        digitalWrite(LED_2, HIGH);
        digitalWrite(LED_3, LOW);

    }
    else if( strcmp( data, "D")==0)
    {
        Particle.publish("tester", "D");

        digitalWrite(LED_0, HIGH);
        digitalWrite(LED_1, HIGH);
        digitalWrite(LED_2, HIGH);
        digitalWrite(LED_3, HIGH);

    }
}
Click to Expand
x
Share this Project

Courses

49313 Designing for the Internet of Things (Undergrad)

· 22 members

A hands-on introductory course exploring the Internet of Things and connected product experiences.


About

For this project, we created physical display devices that allow people working remotely to share their progress.