Project 1 - Clock
Made by Stephanie Truong
Made by Stephanie Truong
Created: October 11th, 2017
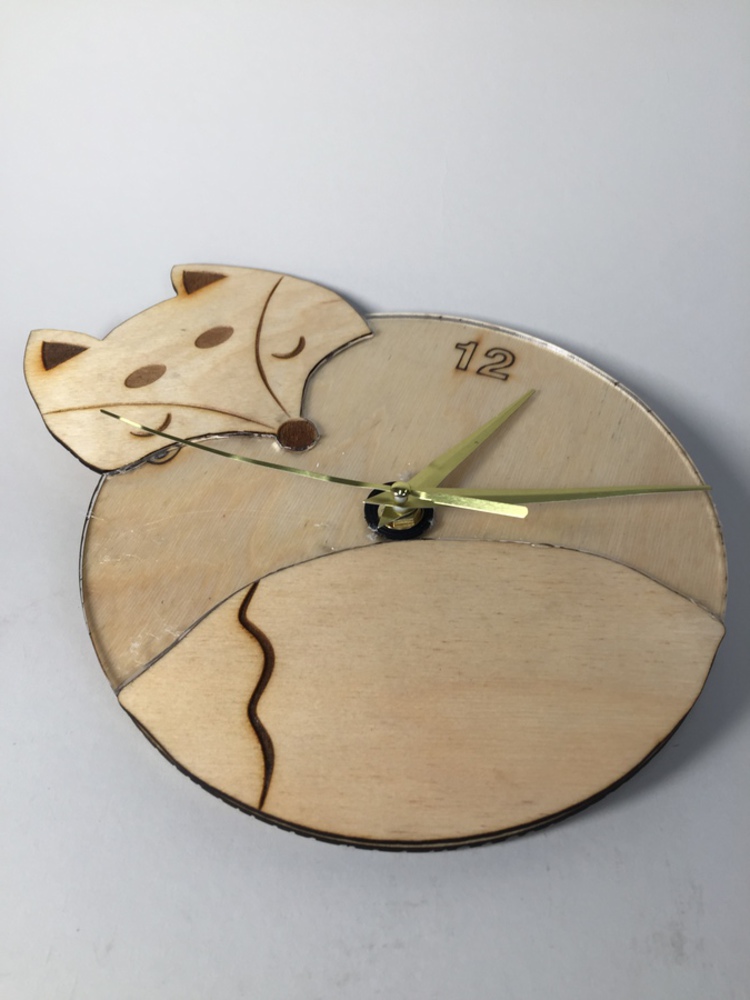
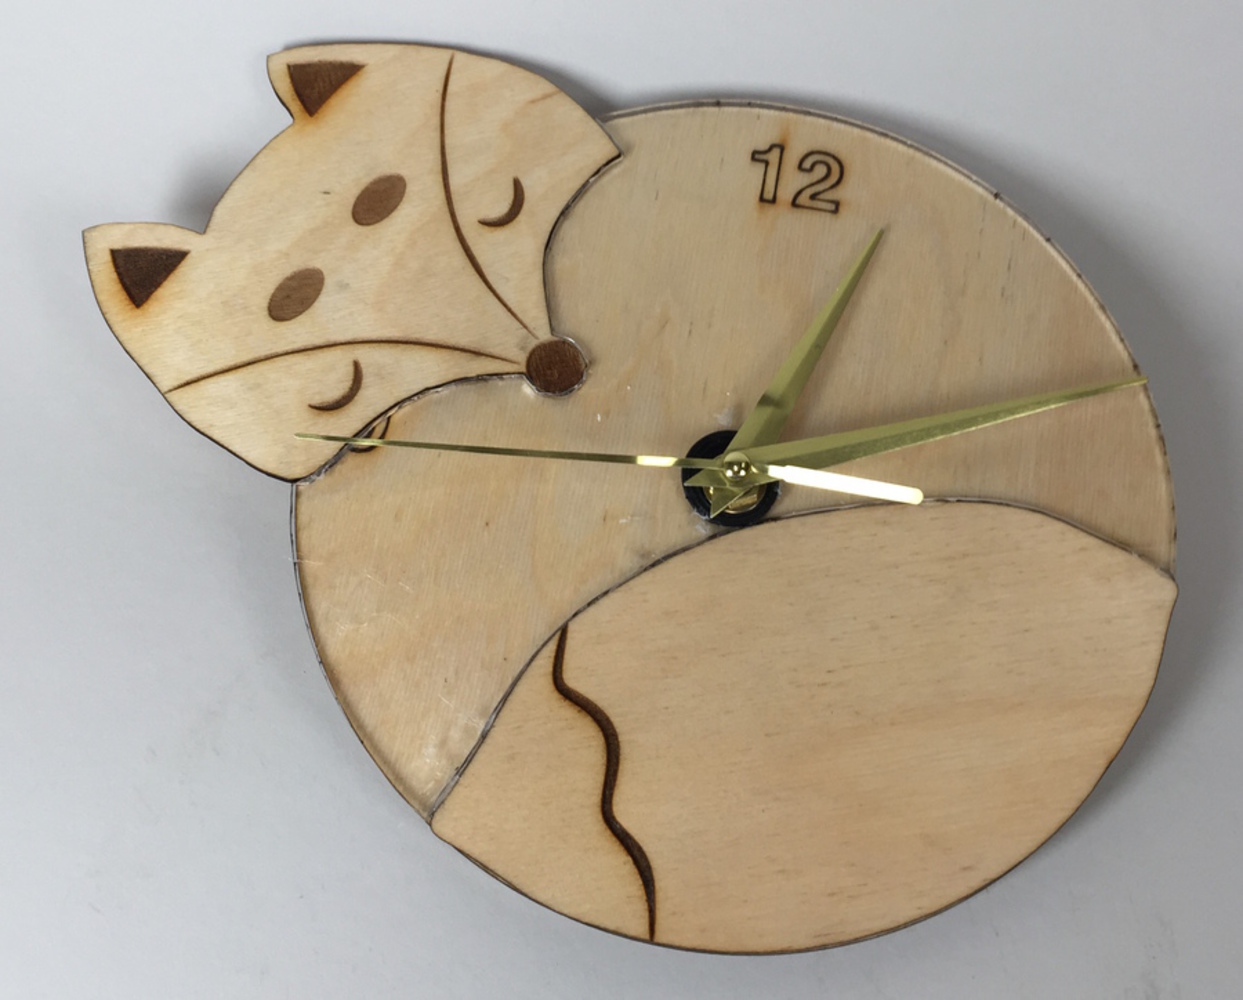
For my projects, I want to create a clock to put in my room. I wanted something cute that my sister will like as well since we'll be putting it in our home. My goal was to have something that also represent something I like like dogs and foxes. So I made a clock that was a mix of both.
BRAINSTORMING
When I was thinking of ideas, I was brainstorming about things I like. I also wanted to pick something that was easier to laser cut. I first wanted to do a clock inspired by Beauty and the Beast because I have recently saw the live-motion version of it. I googled inspirations for the clock since I wanted to make the clock look like the mirror in the movie. But then I realized it will be harder to laser cut all those roses on the side of the mirror.
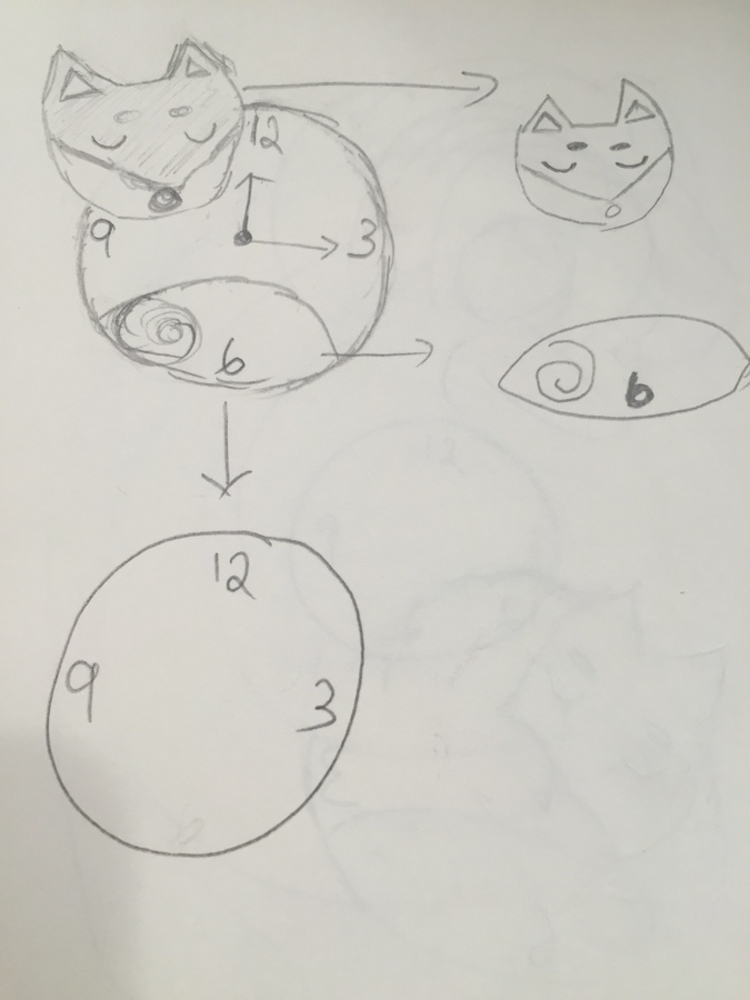
But then, I was also talking to my sister about Shiba Inu since that is the dog we wanted to get. So it got me brainstorming ideas to make my clock somwhat inspired by Shibu Inu. I saw a picture of a fox clock and tried to change it a bit to look like a shiba inu.
CREATING ON FUSION
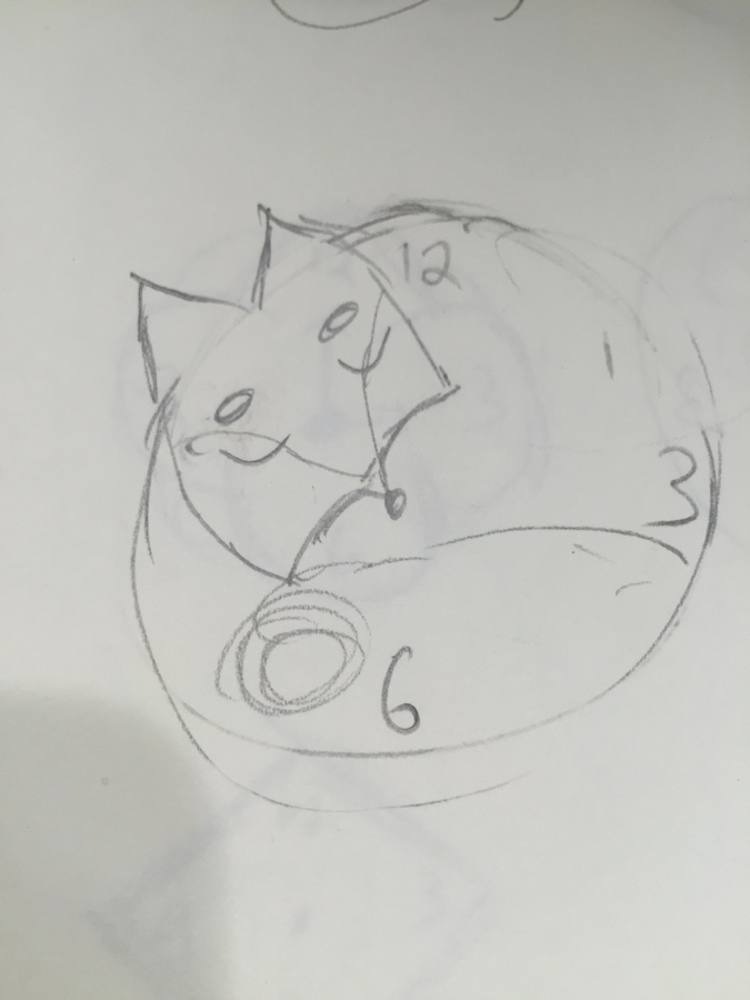
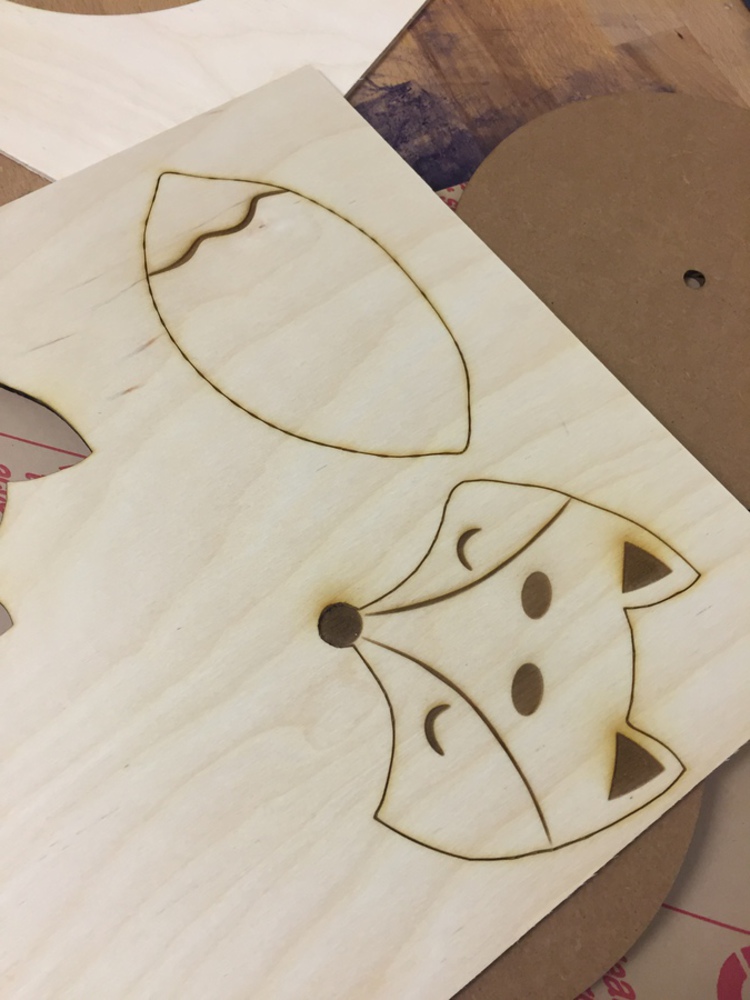
After creating all the sketches, I started to put it into Fusion. I used Fusion to create the shape of the overall clock. I tried to add more details into the face of the fox. It was kind of difficult so I went back and forth on Illustrator to make sure the details of the face was perfect. This is because there is so much details on the face and the accuracy was important to me.
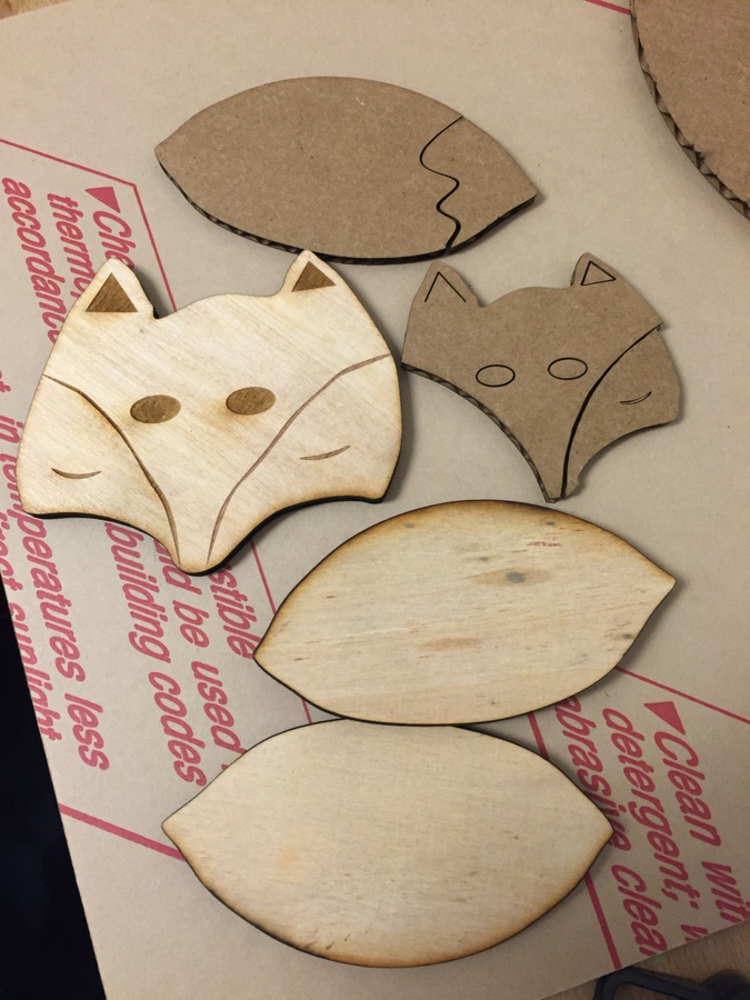
CUTTING OUT THE PIECES
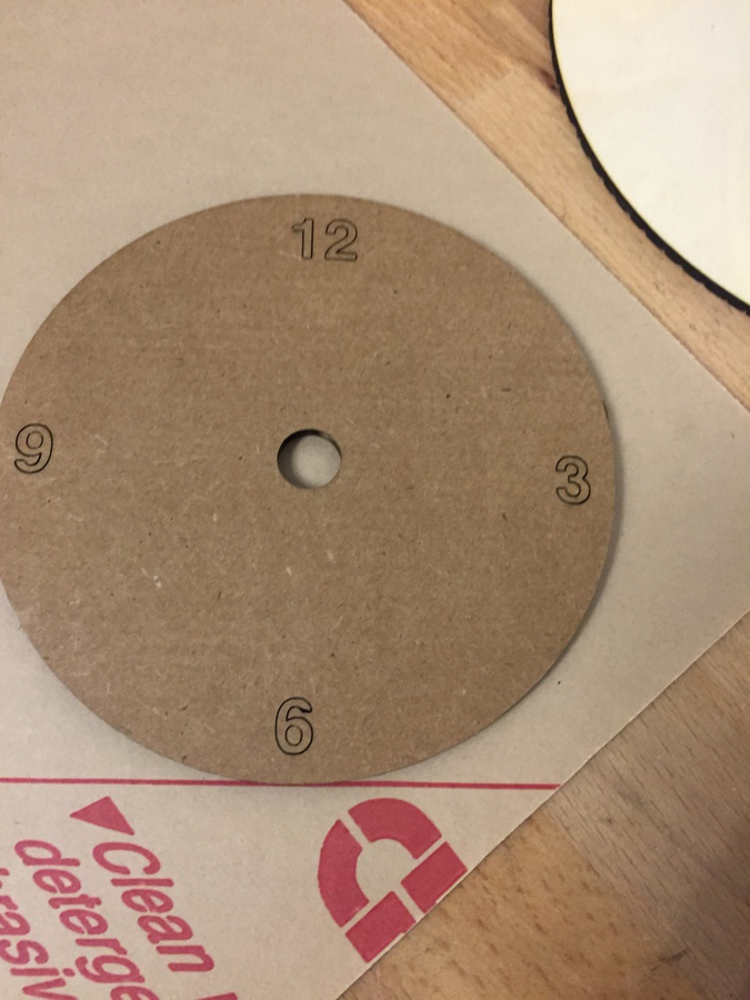
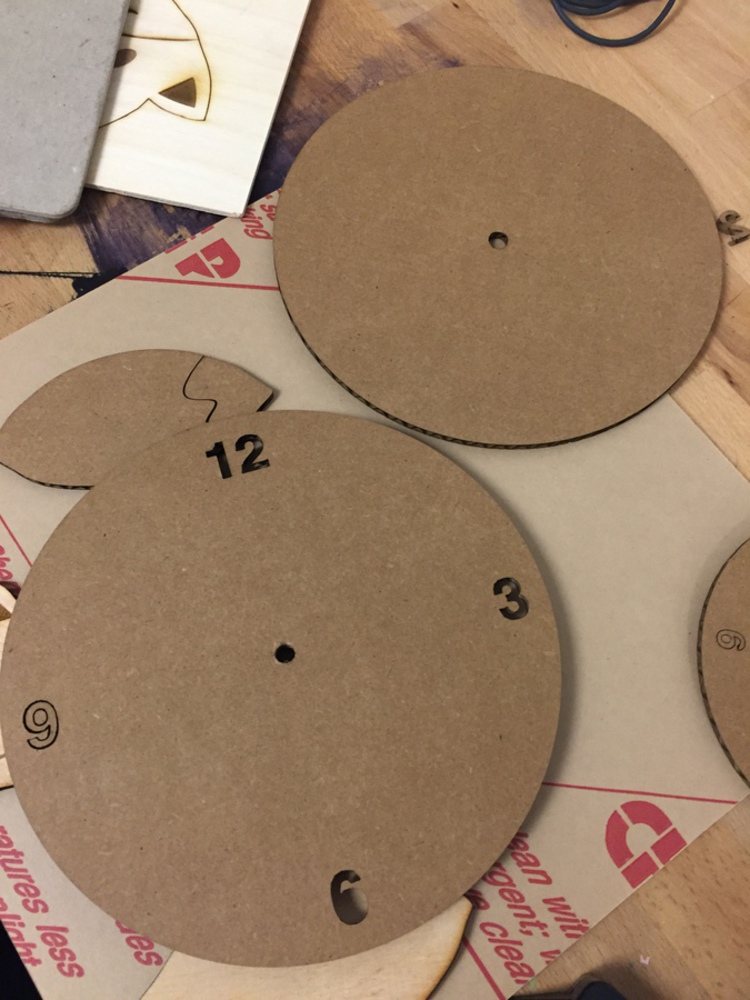
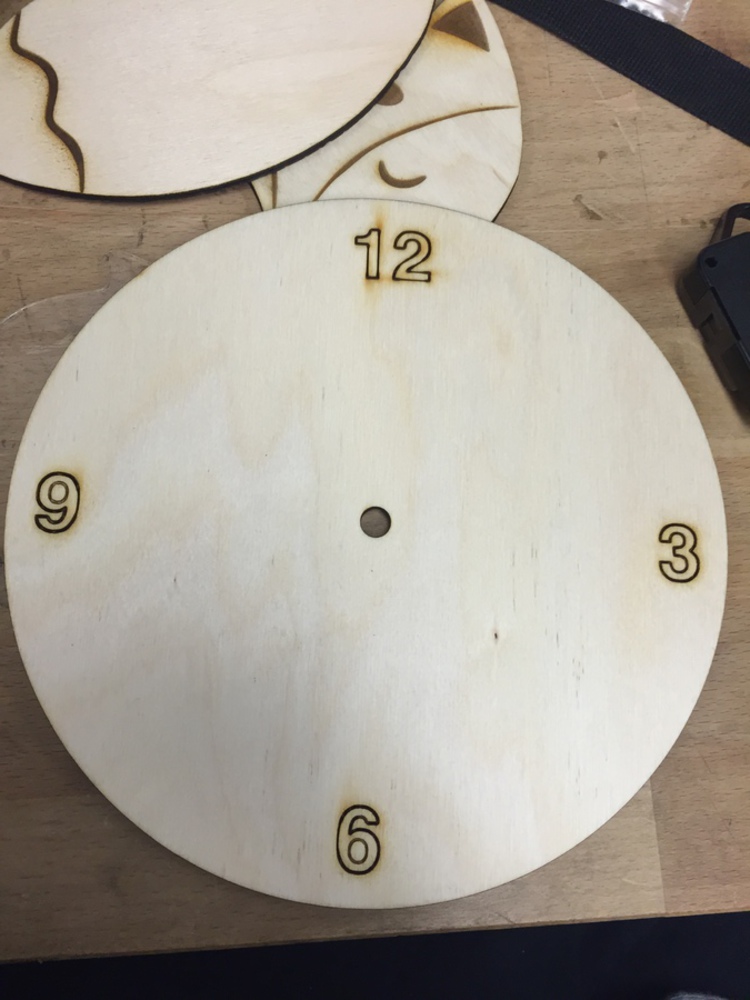
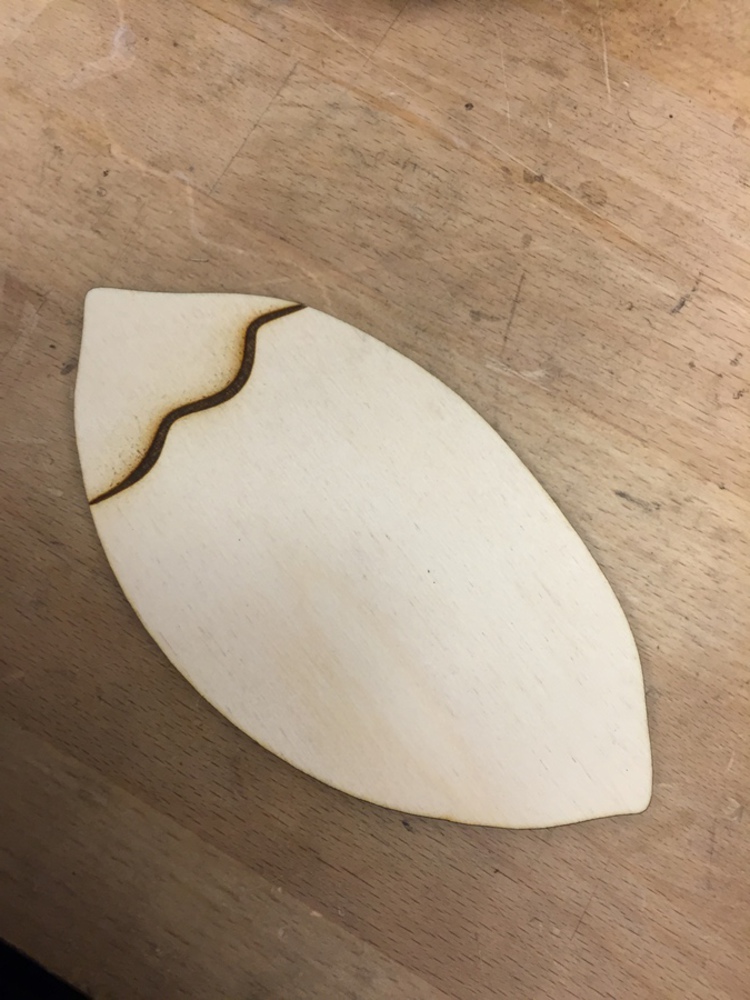
For my clock, I decided to create it out of birch plywood because it will look nice with my design. I first cut the overall clock shape with the number scored into it.
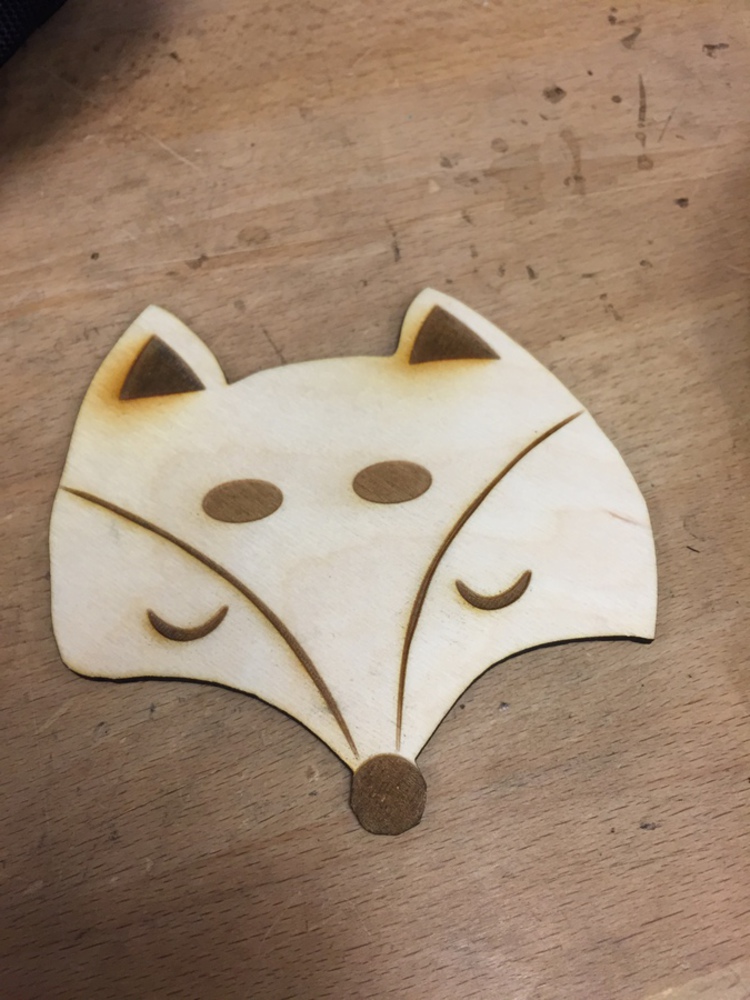
Then I created the head of the fox. Originally, in the picture, the fox's head was located on top of the clock. But I wanted to make it hanging since I wanted to see more of the base of the clock.
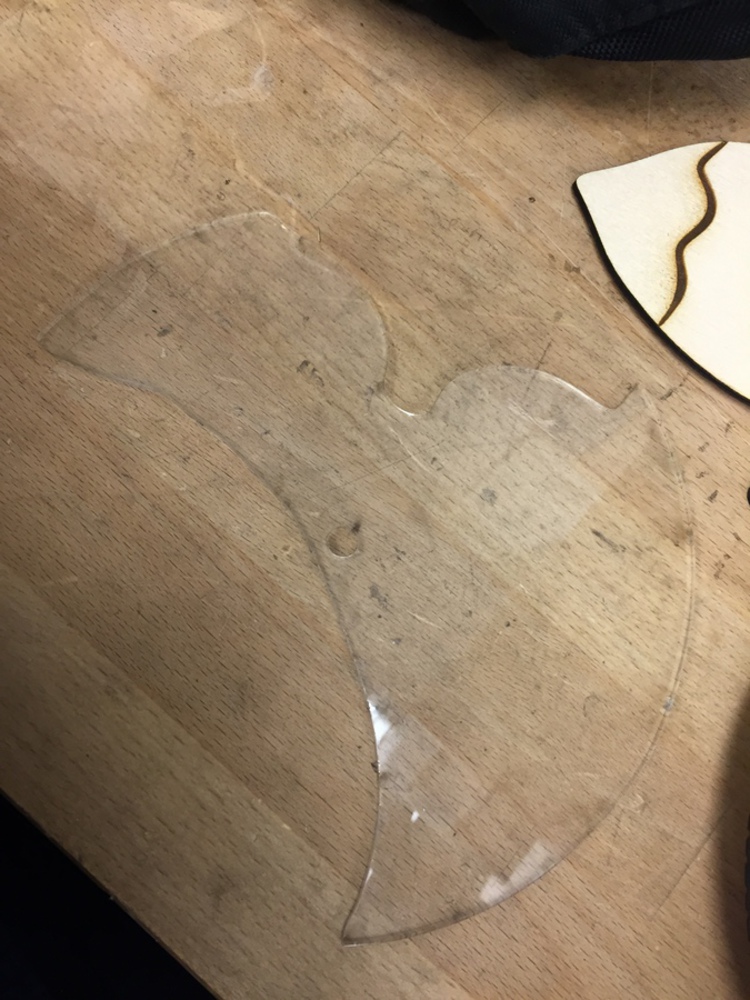
UH-OH ROAD BLOCK
After cutting the pieces for the head and tail, I realized that there was a problem. How was the handles on my clock suppose to move? The elevated piece of the head and tail will prevent the handles from moving smoothly. Therefore, Professor Larson suggested to cut out a clear acrylic piece to put in between the head and tail parts.
It was difficult to outline this part to fill in the gap between the head and tail. I did not want the lines to be too close that it was going to go on top of the wooden piece.
GLUING THE PIECES TOGETHER
It was difficult for me to figure out how to glue everything together. I tested the wood glue and the acrylic glue but none of them gave me the desire outcome. I glued the edge of the pieces together instead so that it can hold better and you would not have to see the glue.
Reflect on the process of making this project. What did you learn? What would you do differently?
I learned that for this project, it is better to start doing than trying to make my design perfect. I did a lot of test rounds but at the end, it was better for me to use the actual materials to see how my final product was. I like having to go back and edit my design. It is an iterative process. There are some times little things that I forget changing like the power and speed of the laser for certain cuts. It will be too light and does not cut it all the way through.
I also have trouble gluing the entire piece together. It was difficult to find the perfect glue for gluing the clear acrylic piece onto the wood. But it was interesting to see the different ways I can glue the pieces together to have the desire effect.
The only thing I would have done differently might be to add more indicators of the time for the clock. Right now, you can only see where 12 is. But I think it will have been really cool if I can have the numbers etched in to the different pieces I am gluing on but this will required a lot of accuracy when gluing the pieces together.
Digital Tooling (DigiTool) provides a platform for any CMU student to learn Digital Fabrication processes; all of which are very hands-on. Like these processes, this class is also very hands-on. I...more
~