Skill Dev II - Wei Liang
Made by Wei Liang
Made by Wei Liang
Created: November 15th, 2020
This is our second lab in DIoT class. I am able to know how sensors work and the characteristics of Argon (like, do not support SparkIntervalTimer.h so I can't use some sensors that I usually use on Phonton....).
Combine a switch and potentiometer. The switch should turn on and off the light while the potentiometer will fade up and down the light (but only when its on).
The task for Getting Inputs is the combination of switch and potentiometer. The tricky part is that the potentiometer shall only work when the LED is on. In this case, I put the code chunk of potentiometer inside the if condition that the button state is low. The code and video are attached.
// We will be using D2 to control our LED
int ledPin = D2;

// Our button wired to D4
int buttonPin = D4;

// Define a pin that we'll place the pot on
int potPin = A3;

// Create a variable to hold the pot reading
int potReading = 0;

// Create a variable to store the LED brightness.
int ledBrightness = 0;

void setup()
{

    // For input, we define the
    // pushbutton as an input-pullup
    // this uses an internal pullup resistor
    // to manage consistent reads from the device

    pinMode( buttonPin , INPUT_PULLUP); // sets pin as input

    // We also want to use the LED

    pinMode( ledPin , OUTPUT ); // sets pin as output


    // Create a cloud variable of type integer
    // called 'light' mapped to photoCellReading
    Spark.variable("pot", potReading );

}

void loop()
{
   // find out if the button is pushed
   // or not by reading from it.
    int buttonState = digitalRead( buttonPin );

    // remember that we have wired the pushbutton to
    // ground and are using a pulldown resistor
    // that means, when the button is pushed,
    // we will get a LOW signal
    // when the button is not pushed we'll get a HIGH

    // let's use that to set our LED on or off

    if( buttonState == LOW )
    {
    // turn the LED On
        digitalWrite( ledPin, HIGH);
        // Use analogRead to read the potentiometer reading
        // This gives us a value from 0 to 4095
        potReading = analogRead(potPin);

        // Map this value into the PWM range (0-255)
        // and store as the led brightness
        ledBrightness = map(potReading, 0, 4095, 0, 255);

        // fade the LED to the desired brightness
        analogWrite(ledPin, ledBrightness);

        // wait 1/10th of a second and then loop
        delay(100);
    }else{
    // otherwise
    // turn the LED Off
        digitalWrite( ledPin, LOW);

    }


}Add a photocell/resistor to the TMP36 circuit and post both temperature and light readings to the Particle cloud.
I use two separate analog pins for photocell and TMP36. Both the readings of photocell and TMP36 can be retrieved from the Particle cloud. The photocell reading will also serve as a brightness indicator of the LED - I use the reverse mapping. with 0 - 4095 maps to 255-0 as a negative linear relationship. I think it makes more sense since we only need additional lighting (LED in the example) when the ambiance light is low.
The code and video are attached.
// Define the Pin the Temperature sensor is on
int tempPin = A2;

// Create a variable that will store the temperature value
double temperature = 0.0;
double temperatureF = 0.0;

// Define a pin that we'll place the photo cell on
// Remember to add a 10K Ohm pull-down resistor too.
int photoCellPin = A5;

// Create a variable to hold the light reading
int photoCellReading = 0;

// Define a pin we'll place an LED on
int ledPin = D2;

// Create a variable to store the LED brightness.
int ledBrightness = 0;

void setup()
{
    // Register a Particle variable here
    Particle.variable("temperature", &temperature, DOUBLE);
    Particle.variable("temperatureF", &temperatureF, DOUBLE);

    // Create a cloud variable of type integer
    // called 'light' mapped to photoCellReading
    Particle.variable("light", &photoCellReading, INT);

    // Connect the temperature sensor to A0 and configure it
    // to be an input
    pinMode(tempPin, INPUT);
    // Set up the LED for output
    pinMode(ledPin, OUTPUT);
}

void loop()
{
    // Keep reading the sensor value so when we make an API
    // call to read its value, we have the latest one
    int reading = analogRead(tempPin);

    // The returned value from the device is going to be in the range from 0 to 4095
    // Calculate the voltage from the sensor reading
    double voltage = (reading * 3.3) / 4095.0;

    // Calculate the temperature and update our static variable
    temperature = (voltage - 0.5) * 100;

    // Now convert to Farenheight
    temperatureF = ((temperature * 9.0) / 5.0) + 32.0;

    // Use analogRead to read the photo cell reading
    // This gives us a value from 0 to 4095
    photoCellReading = analogRead(photoCellPin);

    // Map this value into the PWM range (0-255)
    // and store as the led brightness as reverse mapping
    ledBrightness = map(photoCellReading, 0, 4095, 0, 255);
    ledBrightness = 255 - ledBrightness;

    // fade the LED to the desired brightness
    analogWrite(ledPin, ledBrightness);

    // wait 1/10th of a second and then loop
    delay(100);
}Make a basic game which challenges you to reach the most force.
Set three levels of force: medium (>1000), hard (>1500) and extra hard (>2000).
If the player gets to medium - blink once; hard, twice; and extra hard three times.
Wait until the force sensor reading returns to zero before starting again.
This is a fun exercise as I can play the game after setting up. The tricky part is to use the if statement for different force ranges. I also use the ledBlink function we built in Lab 1 to make the code cleaner and easier to change the variables. Please note that the original analog read range is too narrow for me to differentiate, so I use 1000 interval for FSR readings.
// Define a pin that we'll place the fsr on
// Remember to add a 10K Ohm pull-down resistor too.
int fsrPin = A4;

// Create a variable to hold the light reading
int fsrReading = 0;

// Define a pin we'll place an LED on
int ledPin = D2;

// Create a variable to store the LED brightness.
int ledBrightness = 0;

void setup()
{

    // Create a cloud variable of type integer
    // called 'light' mapped to photoCellReading
    Particle.variable("force", &fsrReading, INT);

    // Set up the LED for output
    pinMode(ledPin, OUTPUT);
}

void loop()
{
    // Use analogRead to read the photo cell reading
    // This gives us a value from 0 to 4095
    fsrReading = analogRead(fsrPin);

    if (fsrReading > 1000 & fsrReading <= 2000) {
        ledBlink(1);
    } else if (fsrReading > 2000 & fsrReading <= 3000) {
        ledBlink(2);
    } else if (fsrReading > 3000) {
        ledBlink(3);
    } else {

    };

    // wait 1/10th of a second and then loop
    delay(100);
}

int ledBlink(int cnt)
{
    for(int i = 0; i < cnt; i++){
        // First... On
        digitalWrite(ledPin, HIGH);   // Turn ON the LED pins
        delay(500);
        // Now... Off
        digitalWrite(ledPin, LOW);   // Turn OFF the LED pins
        delay(500);               // Wait for 500mS = .5 second
    }
    // Make sure the LEDs to be OFF
    digitalWrite(ledPin, LOW);
    return 1;
}The final challenge for week 2 is the exercise to combine sensors and inputs. I came up with a system as follows:
The system will start when the ambient light drops to a certain level. The LED will be lit.
The starting point of the brightness of the LED will compensate for the ambient light drop.
Then we can use the potentiometer to adjust the brightness to achieve a personal ideal level for lighting comfort.
Other than that, I set up the FSR sensor for temporarily raising the brightness and system shutdown - if the force reading is less than 2000, i.e., we press the FSR sensor slightly, the LED will light up to its maximum brightness for 2 seconds. If the force reading is larger than 2000, then pressing the FSR sensor will shut down the system, namely turn off the LED>
The system can work as a personal lighting system in office space. When sunset is approaching and the ambient light is not sufficient, the personal lighting fixture will turn on. The occupant will be able to adjust its brightness by using the rotating button. However, if there is a task that requires high illuminance, the occupant can touch the button to temporarily raise the brightness of the lighting fixture for work. If the occupant would like to turn off the personal lighting system, they can press the button to do so. This system is handy and already being applied in the industry.
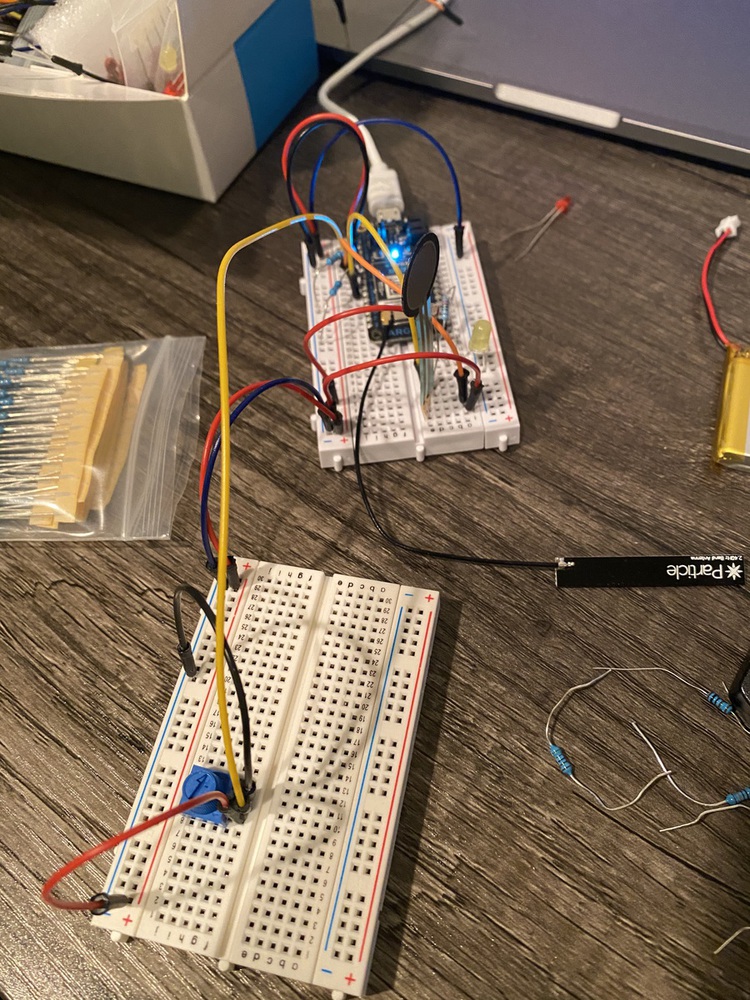
The setup is below. I also attach the code and demonstration video.
// Define a pin that we'll place the pot on
int potPin = A1;

// Create a variable to hold the pot reading
int potReading = 0;

// Define a pin that we'll place the fsr on
// Remember to add a 10K Ohm pull-down resistor too.
int fsrPin = A3;

// Create a variable to hold the light reading
int fsrReading = 0;

// Define a pin that we'll place the photo cell on
// Remember to add a 10K Ohm pull-down resistor too.
int photoCellPin = A5;

// Create a variable to hold the light reading
int photoCellReading = 0;

// Define a pin we'll place an LED on
int ledPin = D2;

// Create a variable to store the LED brightness.
int ledBrightness = 0;

int photoCellThres = 2047;

void setup()
{

    // Create a cloud variable of type integer
    // called 'light' mapped to photoCellReading
    Particle.variable("force", &fsrReading, INT);

    // Create a cloud variable of type integer
    // called 'light' mapped to photoCellReading
    Particle.variable("light", &photoCellReading, INT);

    // Set up the LED for output
    pinMode(ledPin, OUTPUT);
}

void loop()
{
    // Use analogRead to read the photo cell reading
    // This gives us a value from 0 to 4095
    fsrReading = analogRead(fsrPin);

    // Use analogRead to read the photo cell reading
    // This gives us a value from 0 to 4095
    photoCellReading = analogRead(photoCellPin);

    if (digitalRead(ledPin) == LOW) {
        if (photoCellReading < photoCellThres && digitalRead(ledPin) == LOW) {
            // turn the LED On
            digitalWrite( ledPin, HIGH);
            // Map this value into the PWM range (0-255)
            // and store as the led brightness
            ledBrightness = map(photoCellReading, 0, 4095, 0, 255);
            ledBrightness = 255 - ledBrightness;

            // fade the LED to the desired brightness
            analogWrite(ledPin, ledBrightness);
        };
    };


    if (digitalRead(ledPin)== HIGH) {
        if (fsrReading > 1000 && fsrReading <= 1500) {
            // fade the LED to the desired brightness
            digitalWrite( ledPin, HIGH);
            analogWrite(ledPin, 255);
            delay(2000);
        } else if (fsrReading > 1500 && fsrReading <= 2000) {
            digitalWrite( ledPin, HIGH);
            // fade the LED to the desired brightness
            analogWrite(ledPin, 127);
            delay(2000);
        } else if (fsrReading > 2000) {
            // fade the LED to the desired brightness
             digitalWrite(ledPin, LOW);
             delay(2000);
        } else if (digitalRead(ledPin)== HIGH) {
            // Use analogRead to read the potentiometer reading
            // This gives us a value from 0 to 4095
            potReading = analogRead(potPin);

            // Map this value into the PWM range (0-255)
            // and store as the led brightness
            ledBrightness = map(potReading, 0, 4095, 0, 255);

            // fade the LED to the desired brightness
            analogWrite(ledPin, ledBrightness);

        };
    };

    // wait 1/10th of a second and then loop
    delay(100);
}This lab let me know how to use the input devices and sensors separately and collectively. I also learn how to use if statement, and nested if statement. It helps me build the skills needed for the following week. I also learned how to create my own prototype design by doing practice exercise 2.