Skills Dev 2: Nicole
Made by Nicole Chu
Made by Nicole Chu
Skills Dev 2: Working with Inputs and Sensors
Created: December 13th, 2020
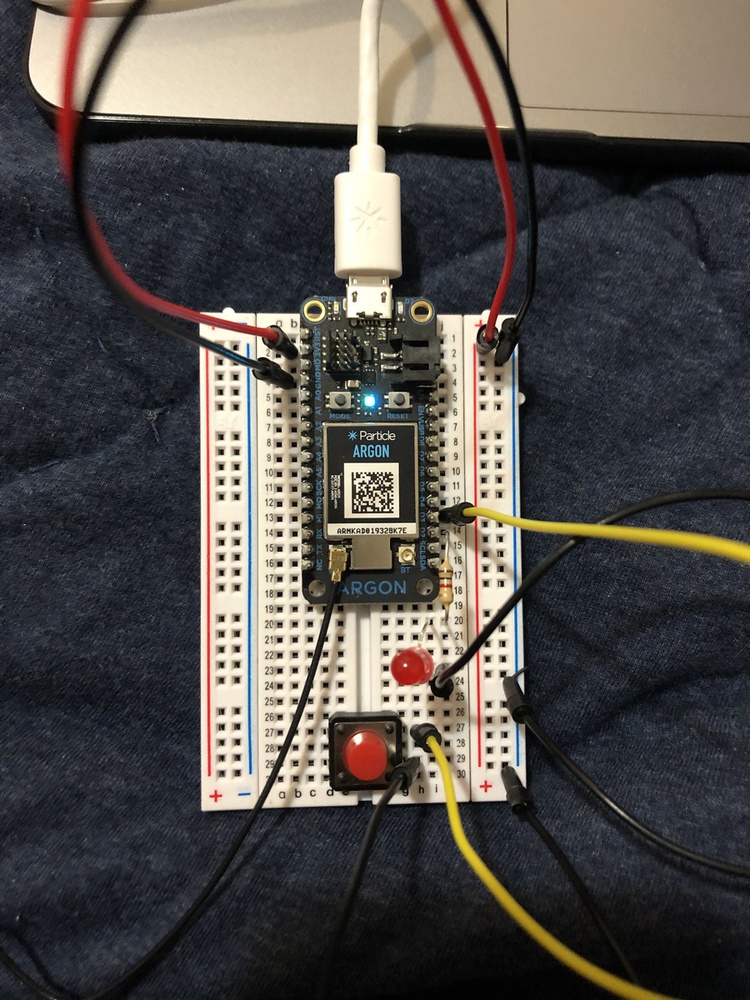
In this second Skills Dev, we explored input devices and sensors and worked to combine them with if statements to produce a desired action. After working through the Lab tutorials to understand basic inputs and sensors, I created a simple 2-in 1-out device, presented with a simple use case.
// We will be using D2 to control our LED
int ledPin = D2;

// Our button wired to D0
int buttonPin = D3;

void setup()
{

  // For input, we define the
  // pushbutton as an input-pullup
  // this uses an internal pullup resistor
  // to manage consistent reads from the device

  pinMode( buttonPin , INPUT_PULLUP); // sets pin as input

  // We also want to use the LED

  pinMode( ledPin , OUTPUT ); // sets pin as output

}

void loop()
{
   // find out if the button is pushed
   // or not by reading from it.
   int buttonState = digitalRead( buttonPin );

  // remember that we have wired the pushbutton to
  // ground and are using a pulldown resistor
  // that means, when the button is pushed,
  // we will get a LOW signal
  // when the button is not pushed we'll get a HIGH

  // let's use that to set our LED on or off

  if( buttonState == LOW )
  {
    // turn the LED On
    digitalWrite( ledPin, HIGH);
  }else{
    // otherwise
    // turn the LED Off
    digitalWrite( ledPin, LOW);
  }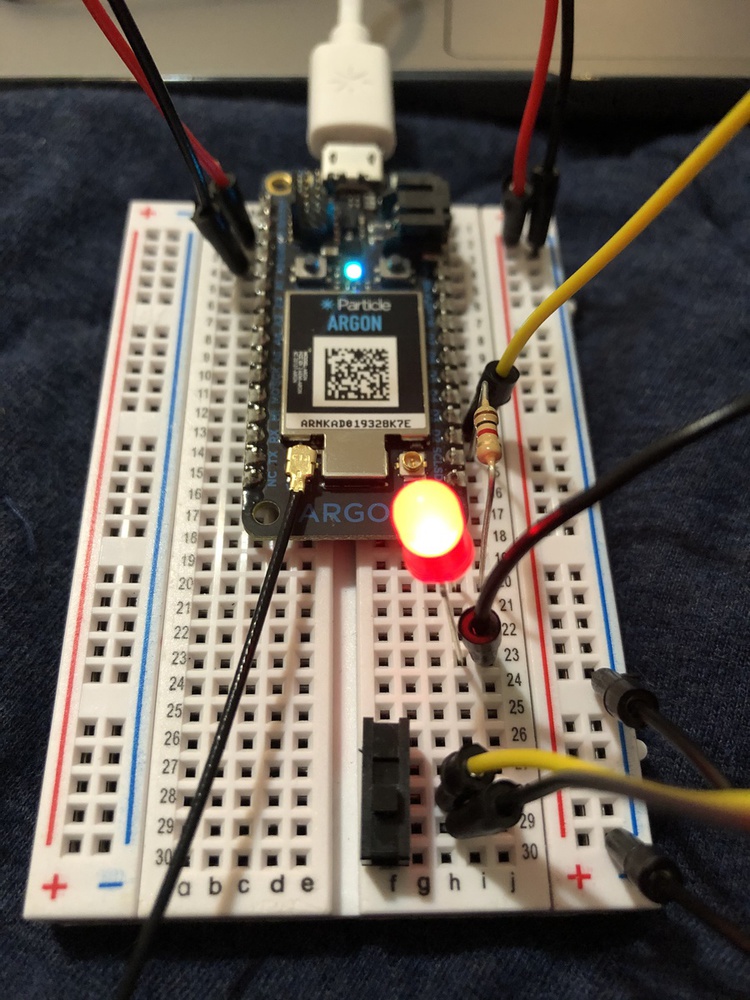
}// We will be using D1 to control our LED
int ledPin = D2;
// Our button wired to D3
// We wire D0 to the middle terminal on the switch
// And any of the two other terminals to ground
int switchPin = D3;
void setup()
{
// For input, we define the
// switch as an input-pullup
// this uses an internal pullup resistor
// to manage consistent reads from the device
pinMode( switchPin , INPUT_PULLUP); // sets pin as input
// We also want to use the LED
pinMode( ledPin , OUTPUT ); // sets pin as output
}
void loop()
{
// find out if the button is pushed
// or not by reading from it.
int buttonState = digitalRead( switchPin );
// Using a pulldown resistor we get a LOW
// Signal when its on
if( buttonState == LOW )
{
// turn the LED On
digitalWrite( ledPin, HIGH);
}else{
// otherwise
// turn the LED Off
digitalWrite( ledPin, LOW);
}
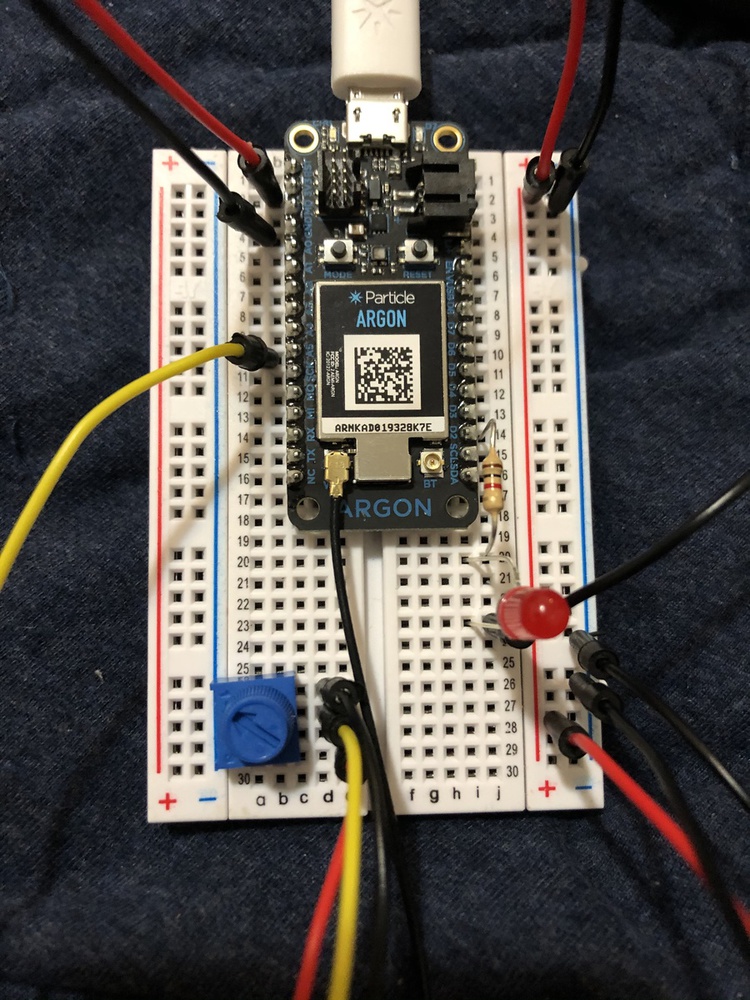
}// Define a pin that we'll place the pot on
int potPin = A5;
// Create a variable to hold the pot reading
int potReading = 0;
// Define a pin we'll place an LED on
int ledPin = D2;
// Create a variable to store the LED brightness.
int ledBrightness = 0;
//
void setup(){
// Set up the LED for output
pinMode(ledPin, OUTPUT);
// Create a cloud variable of type integer
// called 'light' mapped to photoCellReading
Spark.variable("pot", potReading );
}
void loop() {
// Use analogRead to read the potentiometer reading
// This gives us a value from 0 to 4095
potReading = analogRead(potPin);
// Map this value into the PWM range (0-255)
// and store as the led brightness
ledBrightness = map(potReading, 0, 4095, 0, 255);
// fade the LED to the desired brightness
analogWrite(ledPin, ledBrightness);
// wait 1/10th of a second and then loop
delay(100);
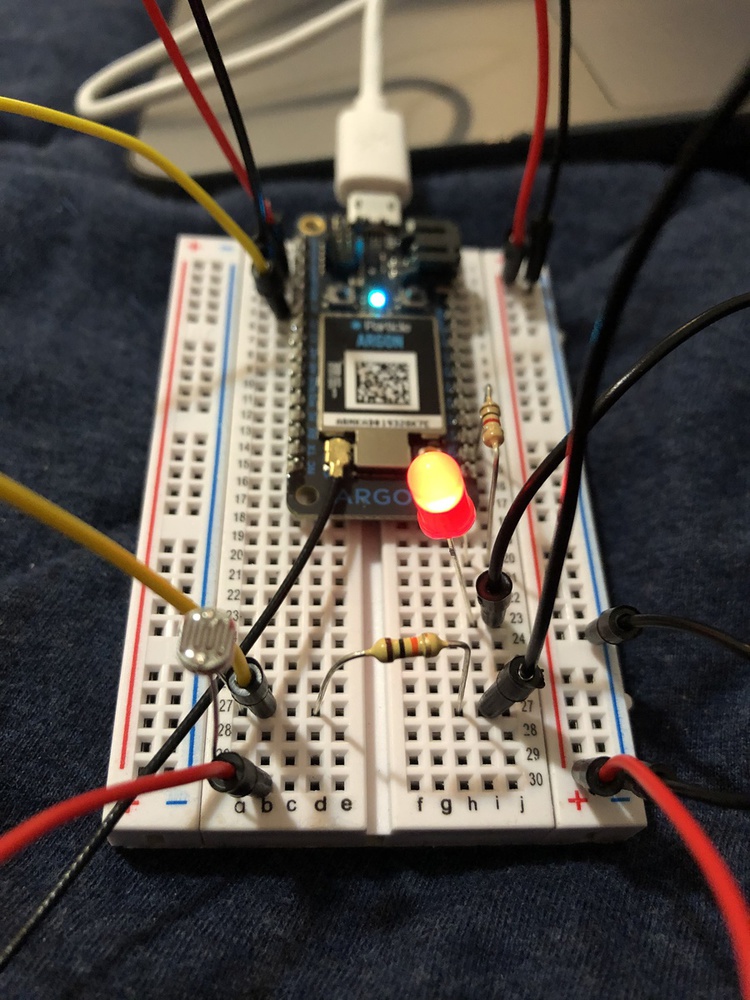
}// Define a pin that we'll place the photo cell on
// Remember to add a 10K Ohm pull-down resistor too.
int photoCellPin = A0;
// Create a variable to hold the light reading
int photoCellReading = 0;
// Define a pin we'll place an LED on
int ledPin = D2;
// Create a variable to store the LED brightness.
int ledBrightness = 0;
void setup()
{
// Set up the LED for output
pinMode(ledPin, OUTPUT);
// Create a cloud variable of type integer
// called 'light' mapped to photoCellReading
Particle.variable("light", &photoCellReading, INT);
}
void loop()
{
// Use analogRead to read the photo cell reading
// This gives us a value from 0 to 4095
photoCellReading = analogRead(photoCellPin);
// Map this value into the PWM range (0-255)
// and store as the led brightness
ledBrightness = map(photoCellReading, 0, 4095, 0, 255);
// fade the LED to the desired brightness
analogWrite(ledPin, ledBrightness);
// wait 1/10th of a second and then loop
delay(100);
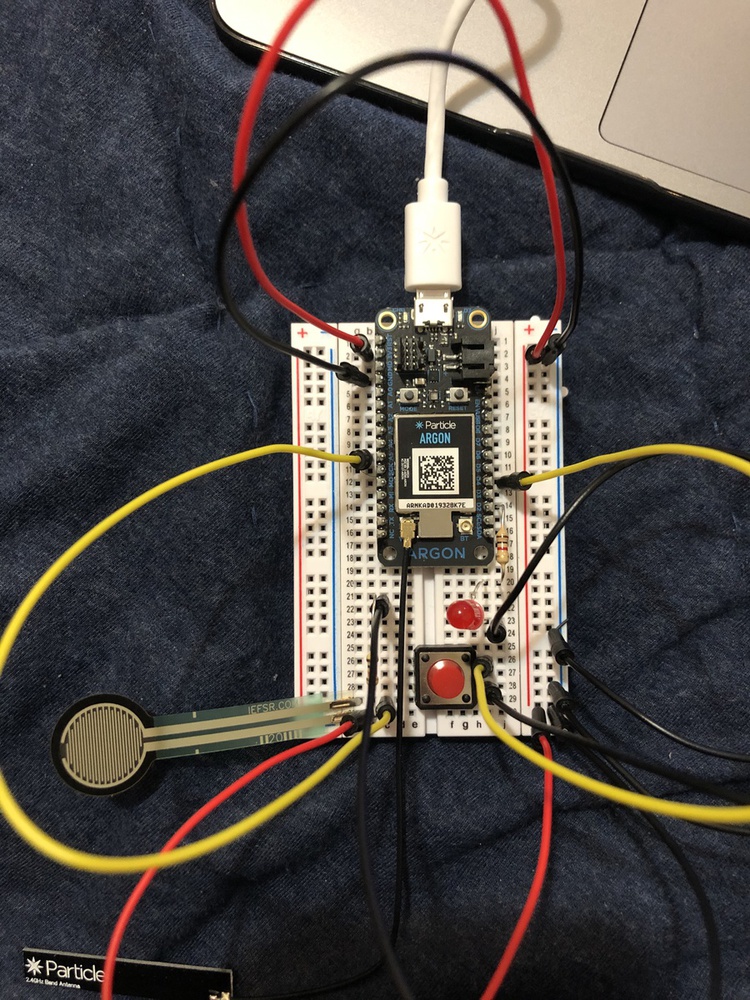
}Prepare a simple 2-in (sensors or inputs) 1-out (LED) device (i.e. your project will use three components (resistors and wire don't count!) and at least one must be a sensor). Present a really simple use case for a connected sensor device (perhaps solve a simple problem in your home).
For this final exercise, I combined a Force-Sensing Resistor and a pushbutton with an LED. If the button is pressed, then the LED will light up with a brightness proportional to the force detected on the FSR. A simple (maybe not simple) use case might be if a family member wants to communicate with you through your bedroom door, they will push the button and press the FSR according to how urgently they need you for something. This urgency will translate as LED brightness, which you are able to glance at from your desk.
// Our button wired to D4
int buttonPin = D4;

// Define a pin that we'll place the fsr on
int fsrPin = A5;

// Create a variable to hold the pot reading
int forceReading = 0;

// Define a pin we'll place an LED on
int ledPin = D2;

// Create a variable to store the LED brightness.
int ledBrightness = 0;

//
void setup(){

  pinMode( buttonPin , INPUT_PULLUP); // sets pin as input

  // Set up the LED for output
  pinMode(ledPin, OUTPUT);

  // Create a cloud variable of type integer
  // called 'light' mapped to photoCellReading
  Spark.variable("force", forceReading );
}

void loop() {

  // find out if the button is pushed
   // or not by reading from it.
   int buttonState = digitalRead( buttonPin );

  // Use analogRead to read the FSR reading
  // This gives us a value from 0 to 4095
  forceReading = analogRead(fsrPin);

  // Map this value into the PWM range (0-255)
  // and store as the led brightness
  ledBrightness = map(forceReading, 0, 4095, 0, 255);

  if( buttonState == LOW )
  {
    // fade the LED to the desired brightness
    analogWrite(ledPin, ledBrightness);
    delay(500);
  }else{
    // otherwise
    // turn the LED Off
    digitalWrite( ledPin, LOW);
  }

  // wait 1/10th of a second and then loop
  delay(100);
}After going through this activity, I felt like the beginning tutorials on inputs and sensors were actually very helpful to run through and provided helpful base code to add to for future projects. I particularly enjoyed the practice exercise and the freedom/creativity it provided, since it helped me think more practically about our final project in this class.
After this activity, I will move onto Skills Dev 3. I will also use some of the things we covered (like the practice exercise) for our final project.