Skills Dev II: Working with Inputs and Sensors

Made by bmkaufma · UNLISTED (SHOWN IN POOLS)

Monitor ambient temperature and turn on a light when the setpoint is reached. Once the light is on, the brightness will vary based on how bright the surroundings are.

Created: November 30th, 2022

0

Outcome

The outcome of this lab was a successful circuit and code that operated as intended. The circuit consists of a few key components - a temperature sensor, a photosensor, and an LED. The LED turns on when the temperature reading exceeds 75 degrees Fahrenheit. Once the LED has been triggered, the brightness is adjusted based on the reading from the photosensor. If the environment is brighter, the LED shines brighter, and vice versa.

0

Process

The first step in creating this device was to assemble the circuit and make sure everything was hooked up properly. This involved using a pull-up resistor on the photosensor as well as a current-limiting resistor on the LED. Once the circuit was complete, the code was written to read the values from the sensors and control the LED according to the readings. There were two issues I had when working with the temperature sensor. First, I had to determine how to convert the sensor reading into a useful value. To do this, I looked at the datasheet and found the conversion factor to change the reading to Celsius, and then converted that to Fahrenheit. The second issue was that I needed to change the temperature to actually test my circuit and code. The solution to this was to use my finger to heat up the sensor and trigger my set point to turn on the LED.

0

Reflection

During this project, I learned that its important to know what your sensor is actually reading. Datasheets are critical in understanding what you are doing. If you don't know what your sensor is giving you, there is not much you can do with the output. The only thing I would do differently is incorporate a potentiometer instead of the photosensor. The photosensor is a little tricky to work with and it would be easier to use a potentiometer to demonstrate the circuit.

0
Breadboard with Particle Argon, temperature sensor, photocell, and blue LED.
E97df616 10e3 48f8 975a 97bf90f3f097 1 105 c.thumb (2022)
0
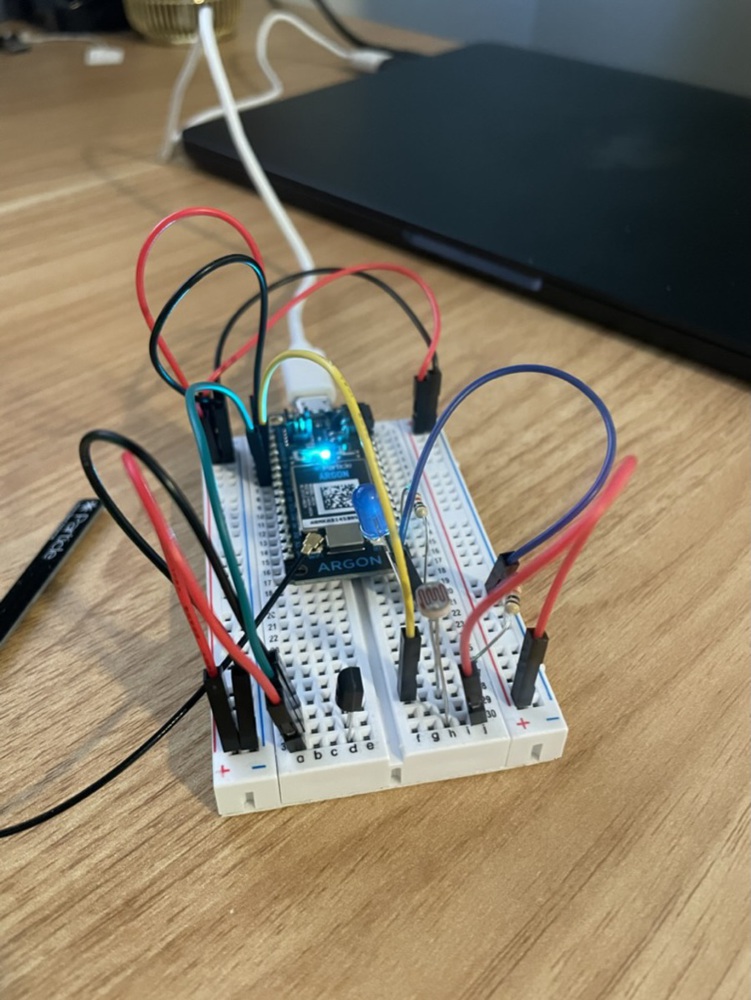
// Define a pin that we'll place the photo cell on
// Remember to add a 10K Ohm pull-down resistor too.
int photoCellPin = A0;
int tempSensePin = A1;

// Create a variable to hold the light reading
int photoCellReading = 0;
int tempSenseReading = 0;

// Define a pin we'll place an LED on
int ledPin = D2;

// Create a variable to store the LED brightness.
int ledBrightness = 0;
int tempConvert = 0;


void setup()
{
  // Set up the LED for output
  pinMode(ledPin, OUTPUT);
  
  // Create a cloud variable of type integer
  // called 'light' mapped to photoCellReading
  Particle.variable("light", &photoCellReading, INT);
  Particle.variable("temp", &tempSenseReading, INT);
  Particle.variable("tempConvert", &tempConvert, INT);
}


void loop()
{
  // Use analogRead to read the photo cell reading
  // This gives us a value from 0 to 4095
  photoCellReading = analogRead(photoCellPin);
  tempSenseReading = analogRead(tempSensePin);
  
  tempConvert = ((((tempSenseReading * 0.8) - 500) / 10) * 1.8) + 32;

if (tempConvert > 75)
{
    // Map this value into the PWM range (0-255)
     // and store as the led brightness
     // fade the LED to the desired brightness
    ledBrightness = map(photoCellReading, 1000, 4095, 0, 255);
}
else
{
    ledBrightness = 0;
}
 
 analogWrite(ledPin, ledBrightness);

  // wait 1/10th of a second and then loop
  delay(100);
}
Click to Expand
0
x
Share this Project

This project is only listed in this pool. Be considerate and think twice before sharing.


Courses

About

Monitor ambient temperature and turn on a light when the setpoint is reached. Once the light is on, the brightness will vary based on how bright the surroundings are.