NYC Skyline at Night Skirt
Made by Noel Lau
Made by Noel Lau
This is a project proposal to create a skirt, using laser cutting, soft circuitry, machine, and hand sewing skills developed in this course. It will be designed with inspiration from the New York City skyline.
Created: November 12th, 2016
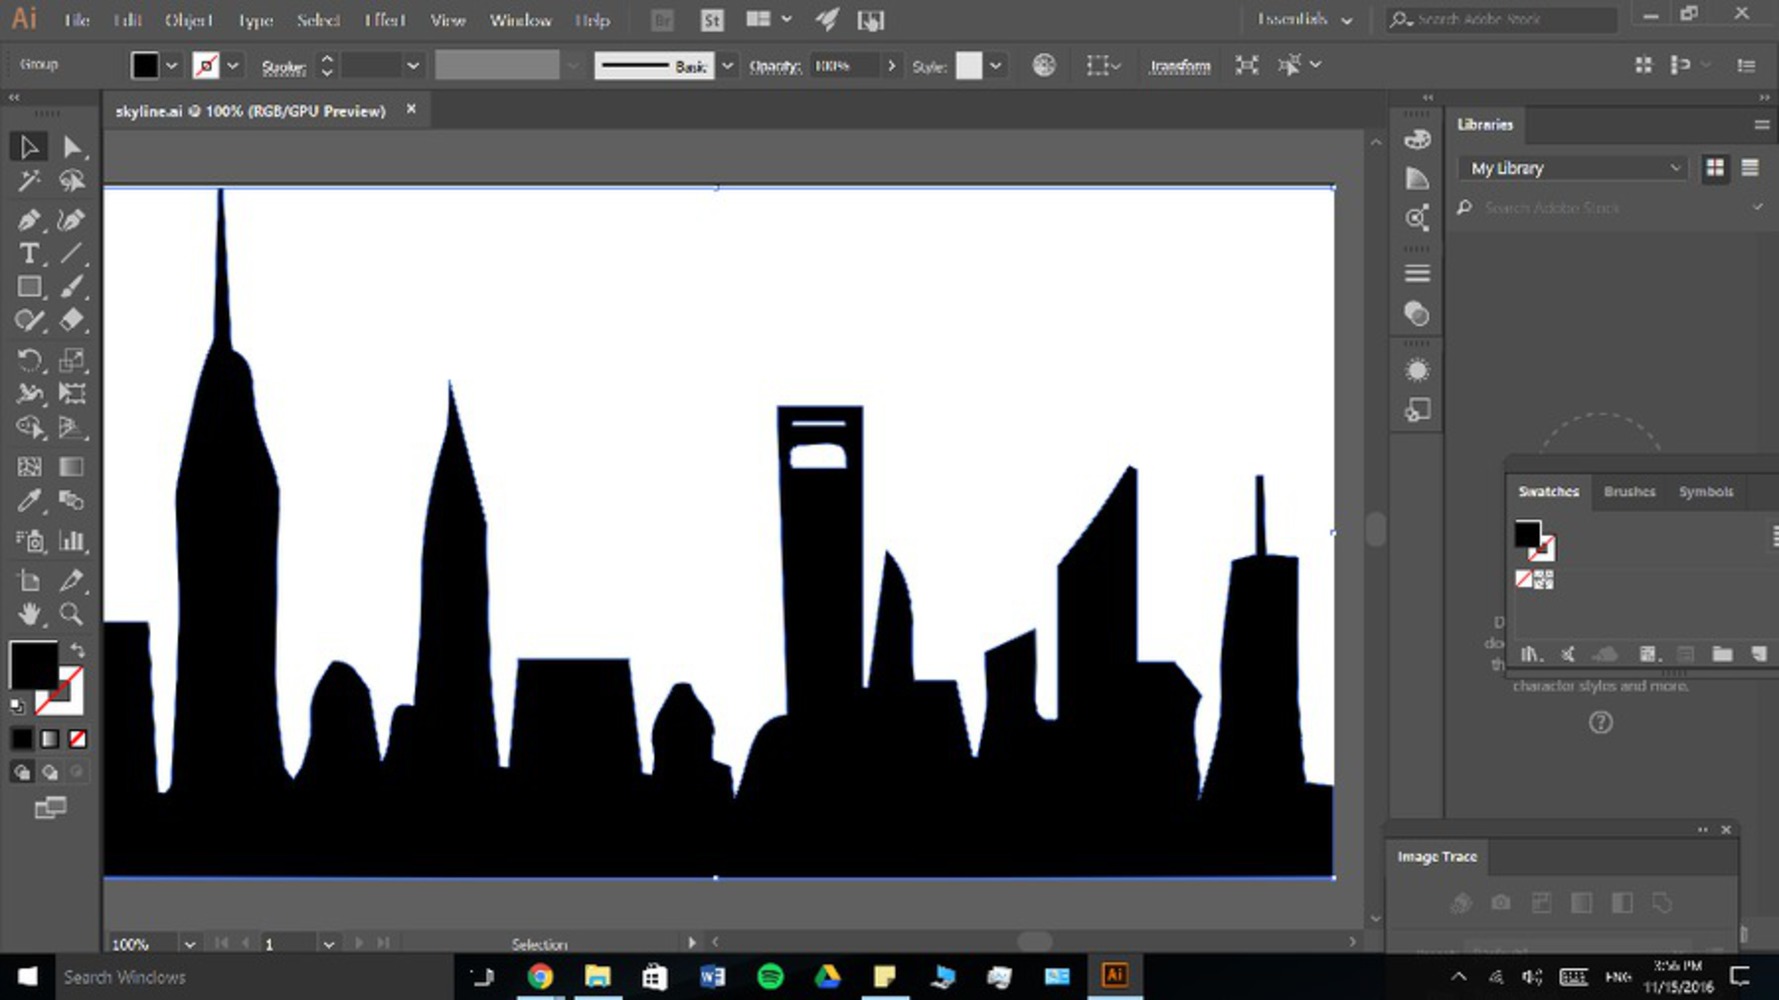
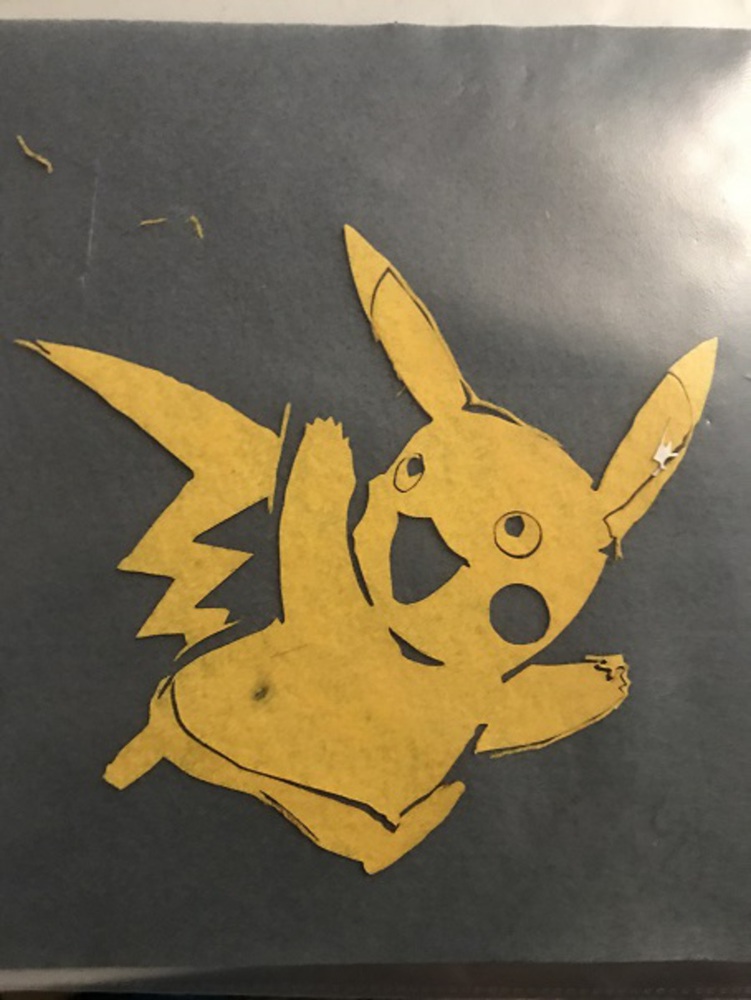
Cover Page clipart : https://thetomatos.com/free-clipart-13796/
This is a tribute to my hometown, New York City. I'm from Queens, and am very proud of the night time view of Manhattan. I was also inspired by Lunar Gala. When I first visited Carnegie Mellon as a prospective student, my host was an architecture student who showed me her studio. She showed me the website for Lunar Gala, and introduced it as one of the school's largest exhibitions of student work, with an emphasis on the integration of visual arts and technology. This project is the product of my introduction into this integration.
The skirt can also have a tulle layer serving as a petticoat, to give it a lolita-inspired look, but that is beyond the scope of this project proposal at the moment.
I wanted to invert the colors of a classic skyline silhouette image (using an outline like the one in the cover photo), so the "night sky" could be portrayed as the shapes of the buildings.
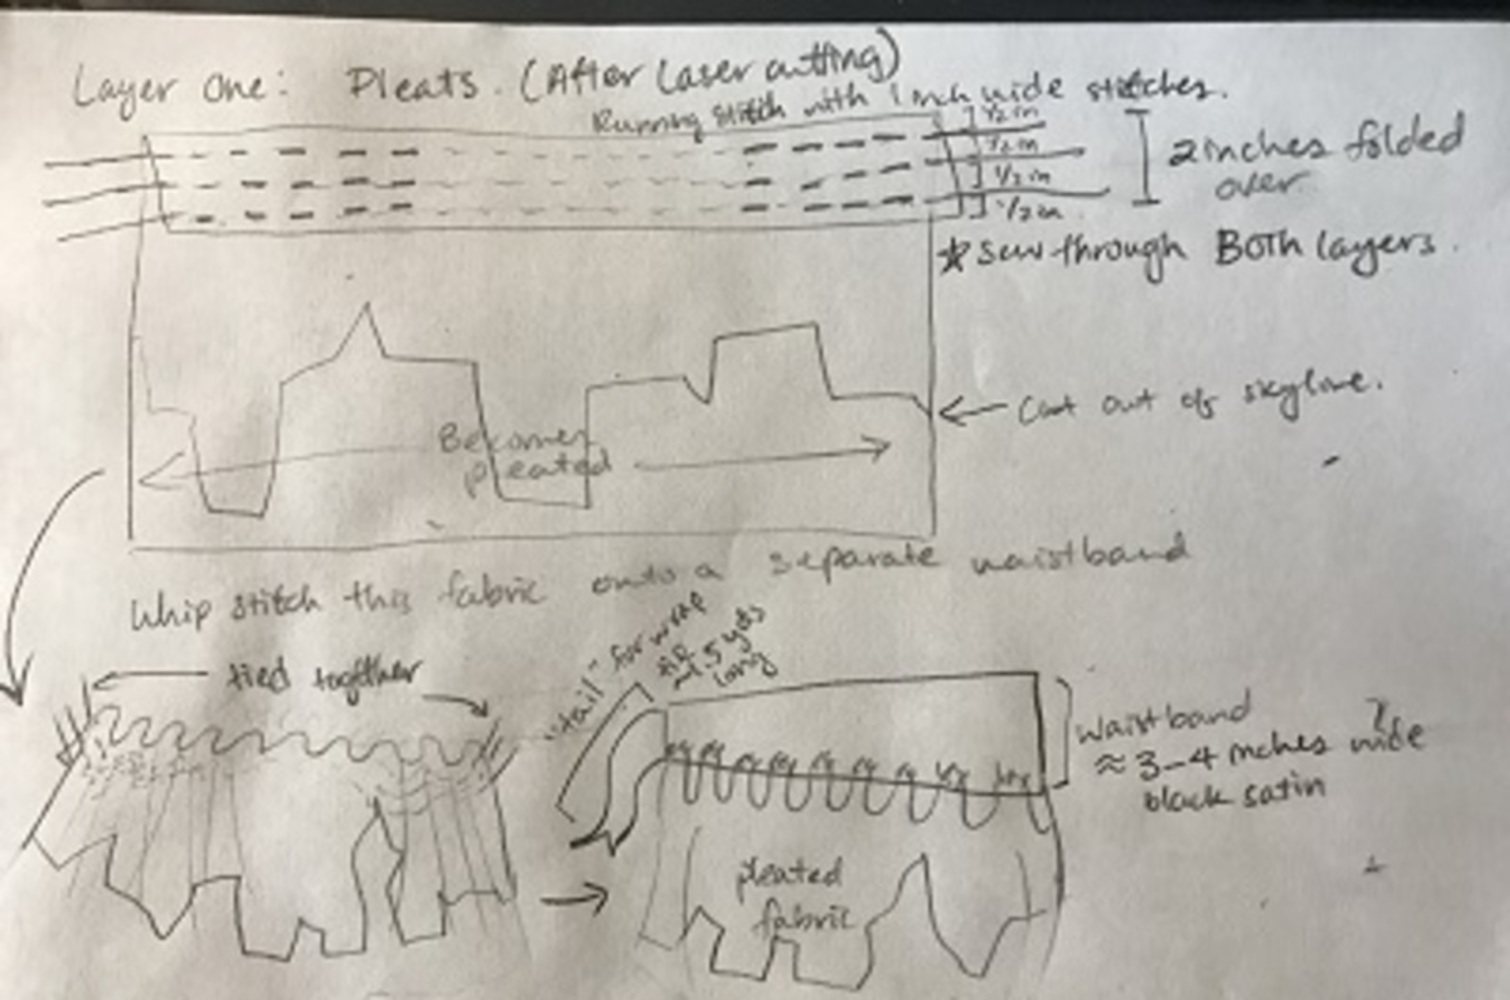
Layer One- Part One: Pleated Night Scene
I initially started with just a two layer box-pleated skirt design, however, if I were to laser cut the skyline into the fabric and then pleated it this way, much of the skyline would be hidden in the folds. I researched my pleat options with "The BB Guide to Different Pleats" available here: http://poshair.site/the-bb-guide-to-different-kinds-of-pleats/ and http://ths.gardenweb.com/discussions/2552335/what-type-of-drapery-pleat. To achieve a more full, ball-gown look, I designed the skirt with a tulle petticoat as an under-layer. Cartridge pleats allow a close fit at the waist, which gradually bellows out towards the bottom edges and shows the skyline design more, but must be done by hand. This site gives a basic idea of how cartridge pleats are made: http://www.elizabethancostume.net/cartpleat/.
Ideally, the waist line of the pleated layer will look like that of the first image of this site: http://thelacedangel.blogspot.com/2014/07/quick-and-easy-way-to-mark-cartridge.html. I can also reinforce the waist band with a thicker fabric as suggested in the site, like wool, to give the skirt more defined shape. Cartridge pleats also can use a separate waist band, so I plan to create a circle for the waist with a trailing appendage to be used as a wrap tie.
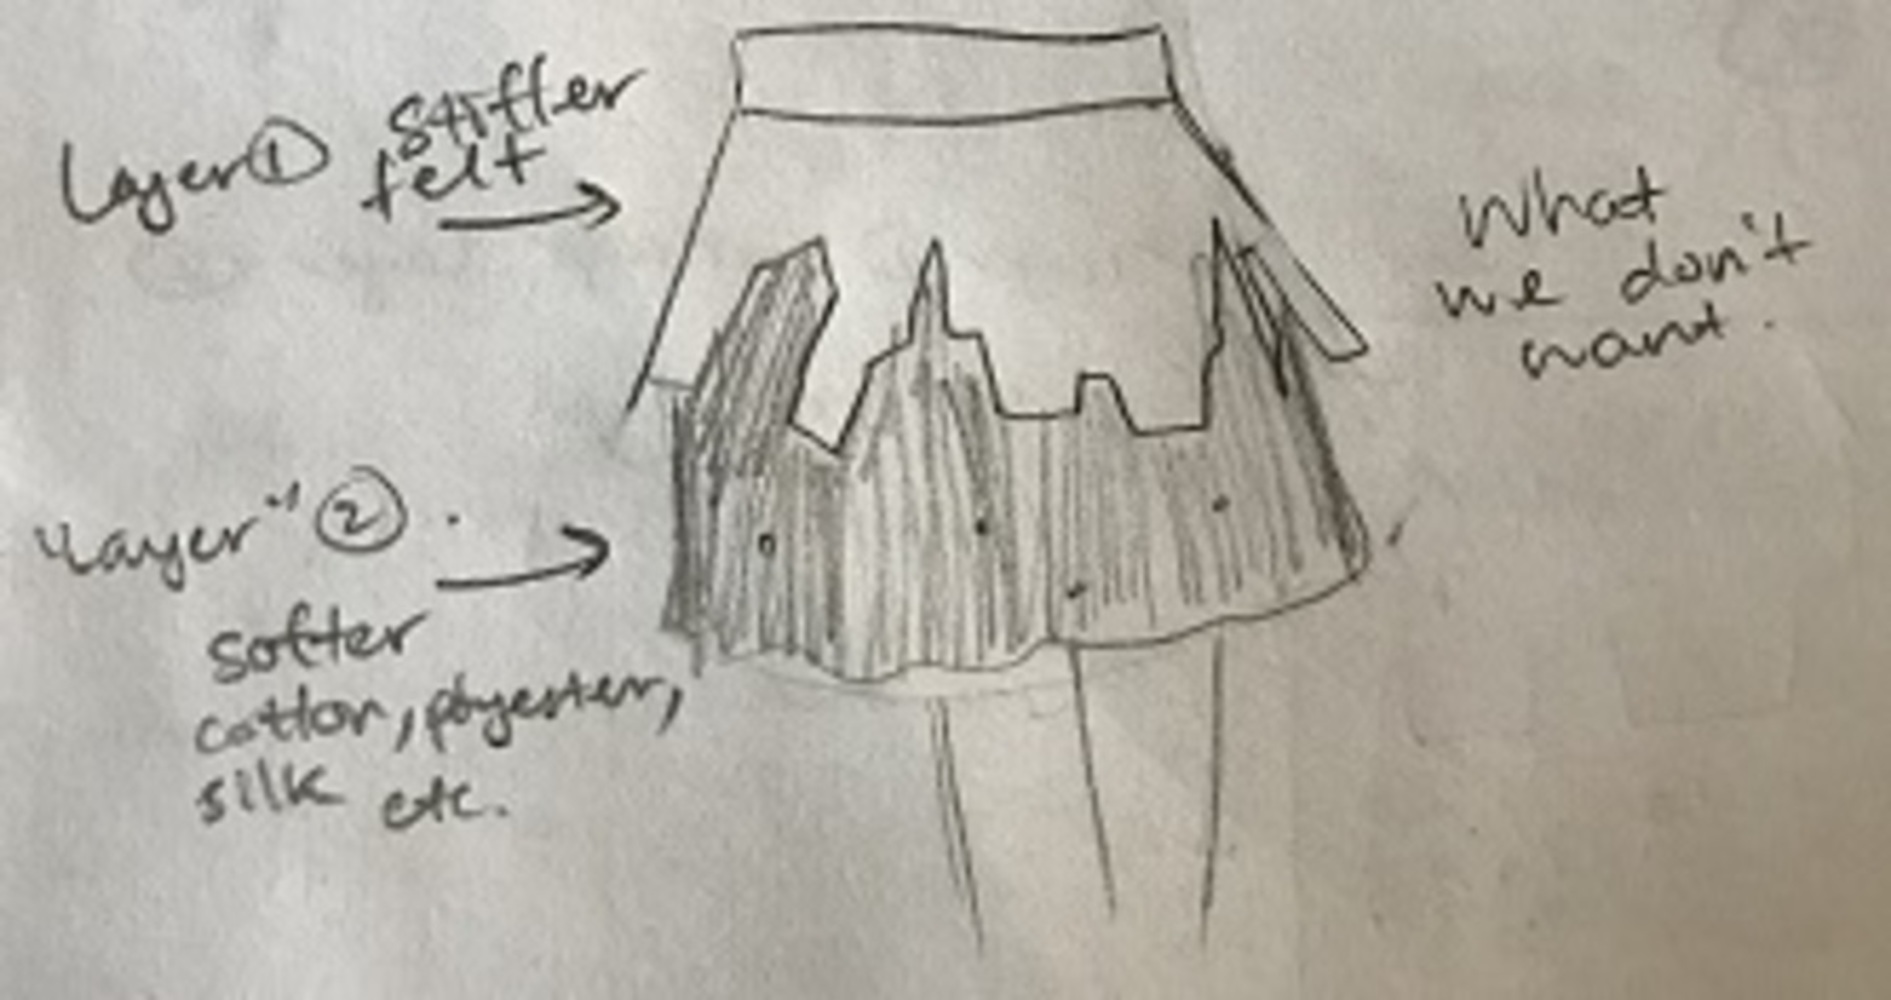
I also have to find a slightly stiff fabric that will hold shape well. Silk and similarly soft fabrics droop and take the shape of the surface it contacts. This may not work with the petticoat; I needed a fabric that could translate the pleats at the waist, to about 1/3 to midway down the skirt. Using this guide: http://www.derangeddesigns.com/fabricguide.html, I started to narrow my fabric selection to broadcloth, tweed, thick polyster, or felt. Textured fabric such as crepe fabric made from cotton or polyester could also offer a unique look to the skirt. In the end, I still decided on felt. The texture, stiffness, and boldness of the color of felt remind me of a scrapbook, or a children's book, which is complemented by the patterns made by the running stitch with conductive thread in layer two.
This is a rough sketch of the plan: http://tinypic.com/r/13ye6op/9
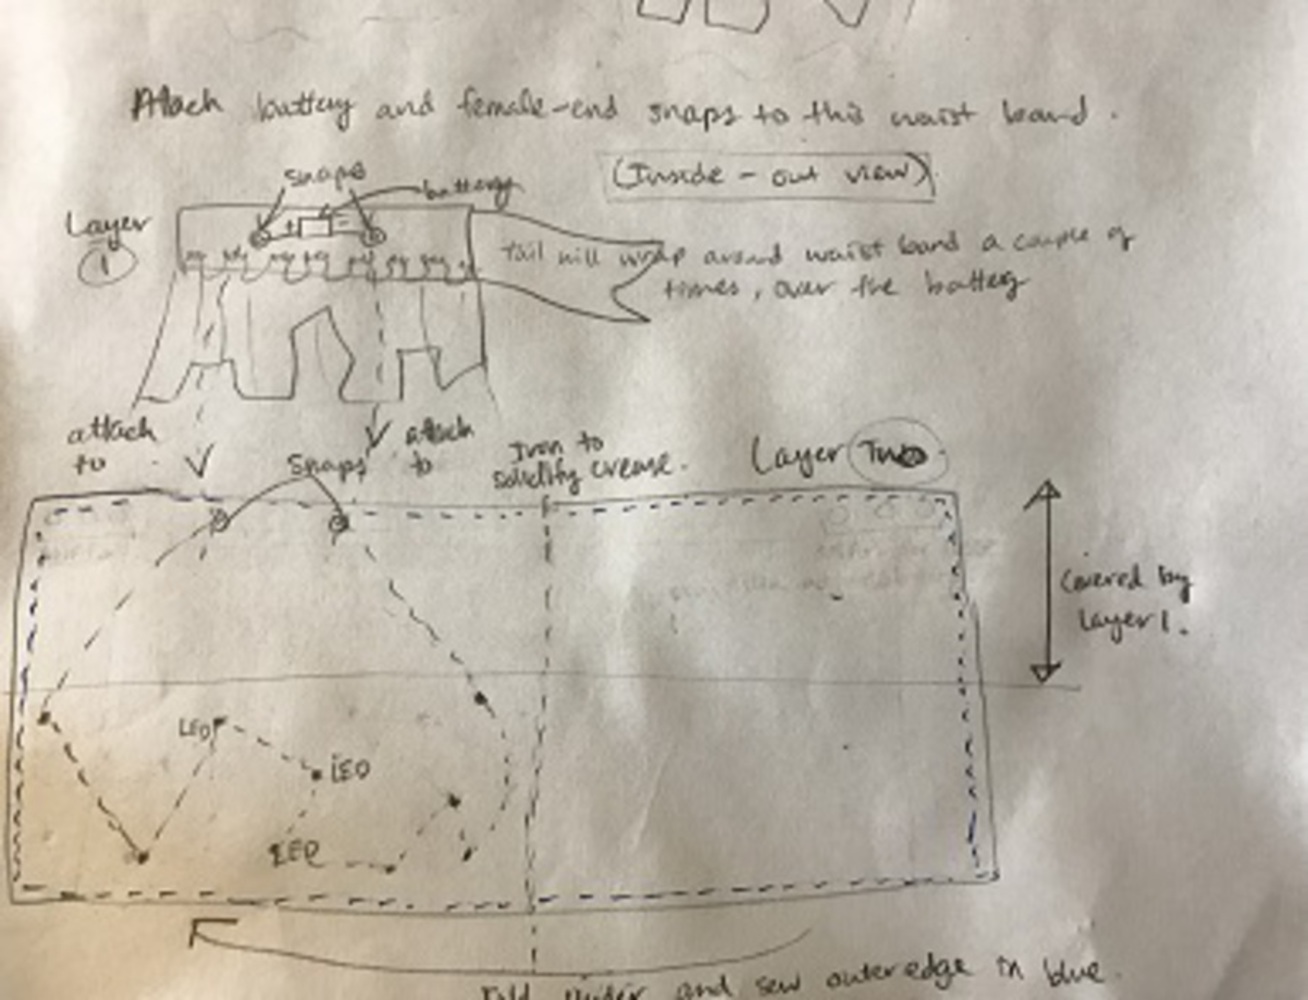
Layer Two: Soft Circuit Underskirt/ Starry Sky
I can use conductive thread on black fabric, which will be hand-sown with black thread onto the waist band of the tulle layer. The stiffness of the textiles used for this layer don't really matter, as long as it is slightly more stiff that silk or chiffon, and will likely just be felt, just like the first layer.
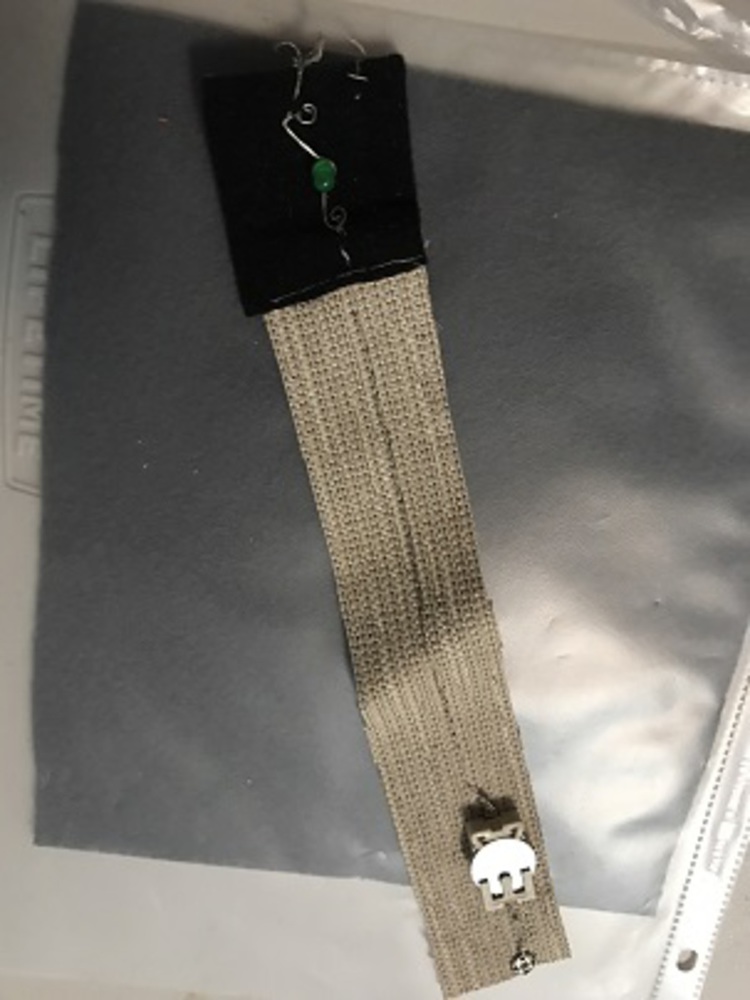
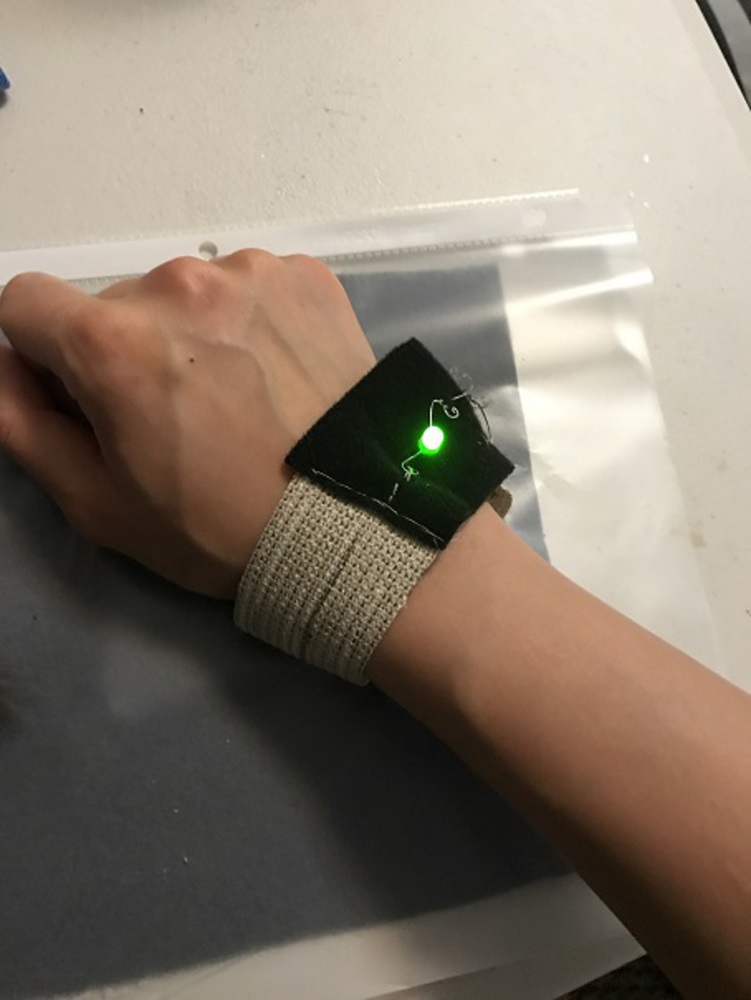
The threads will join about 6-8 LEDs as if they were interconnected constellations. In this case, the running stitch is sufficient for the design. The battery will sit on the outside of the waist band of this layer, under the tie wrap (on the back of the skirt, the conductive thread will run straight up to meet the terminals of the battery). Snaps will connect this layer and the outermost layer. to complete the circuit and turn on the LEDs for the duration of usage.
It was somewhat difficult to figure out a way to attach the battery inconspicuously without compromising comfort. The wrap tie waistband can help cover the battery on the waistband of the second layer. If I used a different, softer fabric, rather than felt, it would hang closer to the user's legs. . To prevent direct contact between the wearer and the circuits, this layer can be sewn from two layer of the fabric, so one side of the fabric has all the circuitry, and the other is between the user and the circuitry (the LEDs may produce heat).
I thought it would look something like this: http://tinypic.com/r/2cctmrp/9.
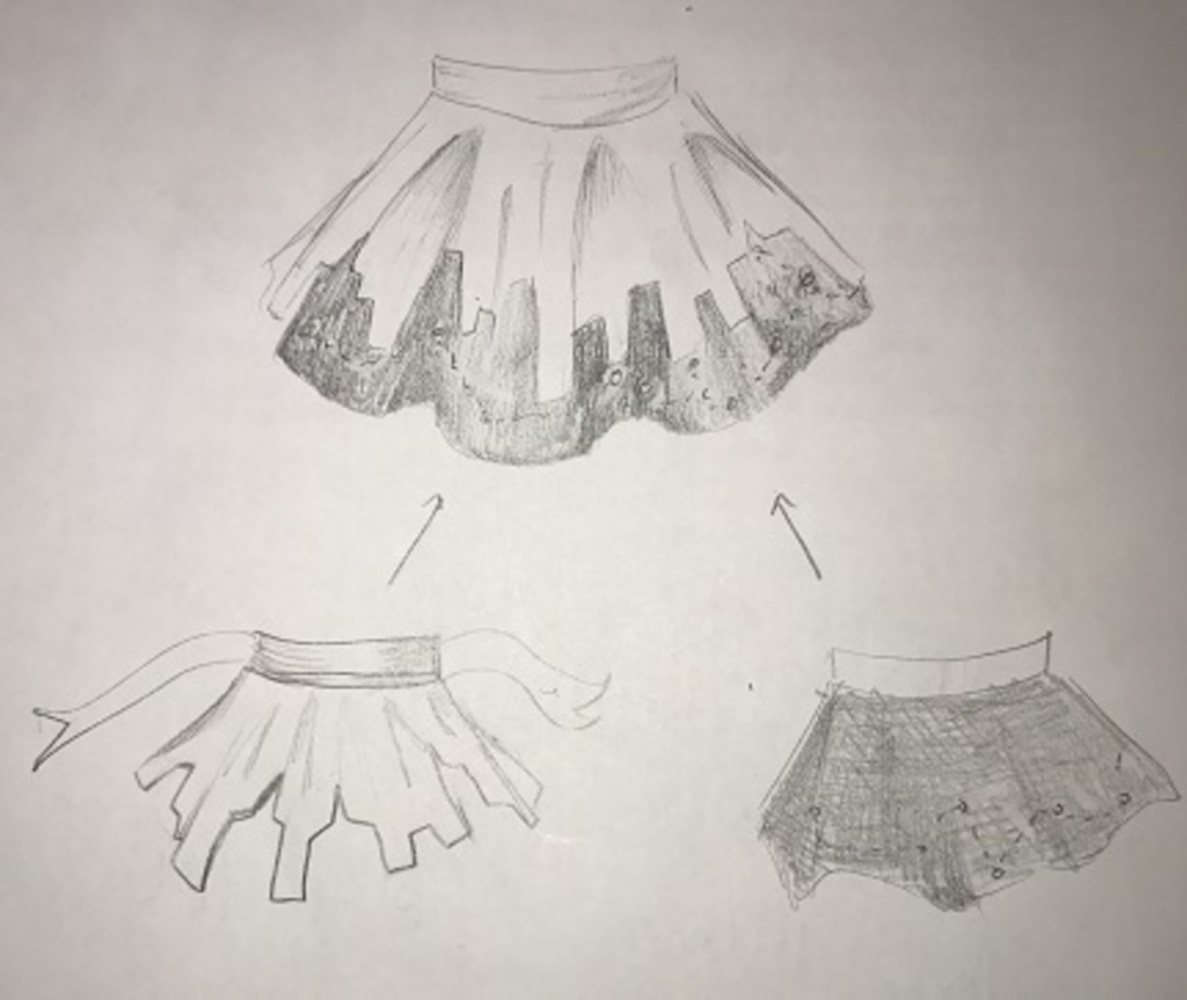
However, a skirt is usually not just a rectangular piece of fabric sewn together sporadically. I could use this pattern http://so-sew-easy.com/30-minute-easy-skirt-pattern/ and adjust the stretch to be wider, but this would look strange with the stiffer outer layer. This made me change my design dramatically: the two layers in the skirt are now more like one layer. The "second" layer is attached to the first, and since both are felt, it wouldn't look like this:
Much of the production process is explained in the above section. I will use laser cutting to create the intricate buildings design onto two tan pieces of canvas with the settings at speed 12, power 15, to try to limit the darkness of the burnt edges. Each piece will be the same design, with about 5 inches on each edge of each sheet for seams, and for me to use an X-acto knife to cut in my own portion of the skyline so sewing these panels together will still provide a continuous pattern. The reason I have two pieces is because the Rabbit laser cutter is not wide enough to cut 2 yards of fabric. Also, stretching the image to be 2 yards long will cause lengthwise distortion in the shapes that are cut.
Through http://www.wikihow.com/Whipstitch, I learned how to whip stitch the tops of the pleats onto the separate waistband. This also made it clear how the cartridge pleats allows for such defined, round folds in the clothing: we do not have to press the pleats into creases, or flatten the pleats for easy attachment to the waist band. The roundness is preserved by the whip stitch.
I will use hand sewing for the circuitry component of layer two, and also likely hand sew the tan to the black layer to make sure the shape is consistent.
My waist's circumference is 28 inches, and my hips are 38 inches around. The skirt will extend about 2 feet from the waist. The pleats are made with 1.5 inch wide running stitches. If the fabric is loosely gathered, I would need about 2 yards of fabric (with about 1 yard width) for each layer, so 4 yards total lengthwise. Extra fabric can be sewn together in long strips to be about 3 inches width-wise, and a few feet lengthwise for the wrap tie.
To give a clearer idea of the "layering" occurring, the skirt will be assembled with the two components shown here: To the left is layer 1, to the right is layer 2. As you can see in the first image below, the two layers look like they are sew with relatively the same measurements, technique, and shape.
The screenshot below depicts the process of creating the DXF file for laser cutting using Adobe Illustrator CC, as shown in class.
Reflect on the process of making this project. What did you learn? What would you do differently?
I wanted to combine some of the lessons and skills taught in this micro, to projects that were only simple concepts in the past. I like to plan cosplay projects and am practicing prop construction, so sewing skills, knitting, felting, weaving, crocheting, and soft circuitry are all skills that can be used to broaden the range of projects I can tackle.
Given the time span for the project proposal, I researched tulle petticoats and its design to find it too intricate, but definitely an interesting thing to learn in the future. Instead of a completely new design with a three-tier petticoat or having to build a two-ply underskirt for layer two, I will just use stiff fabric for the tan outer shell, and the black, wired inner shell. A lot of the problems I encountered were because of the stiffness of the fabric. Almost all of them were resultant from inconsistent stiffness, and inability to hold shape. I thought about stiffening the fabric with cornstarch, Elmer's glue, or fusible webbing, but this may interfere with the pleats. A small scale demonstration could be done to test the affect of different stiffeners on cotton, canvas, and jersey.
Making clothes is a incredibly more difficult than I had anticipated. The plan with two layers certainly had a hand in complicating things, because I had to design two separate systems, essentially, that had to collaborate flawlessly. I would be able to plan more clearly if I had more time and resources to practice fundamental skills. Since I have fire extinguisher training after the project deadline, I couldn't test fabrics with different settings and used the test runs from our last Soft Fabrication class and Jen Liu's notes found here: http://jenliujenliu.com/Files/07_LaserCuttingTextiles.pdf. I will pursue this kind of experimentation in the near future.
I think one of the coolest things I learned during this project was the shaping of clothing without patterns. The cartridge pleats are evident in a lot of the dress designs I am interested in making. It's amazing how the gathering of fabric around the waistline shapes the entire garment without specific cuts.
Here's a list of the things I've researched and learned for this project specifically:
Fabric composition, texture, heaviness/stiffness and categorization
Pleats, and how they are made
Whip Stitching
Different ways to make petticoats
Fabric stiffener and its uses
This is a project proposal to create a skirt, using laser cutting, soft circuitry, machine, and hand sewing skills developed in this course. It will be designed with inspiration from the New York City skyline.