Sword in the Stone

Made by Emily Zhu

The goal of this project is to prototype a container modeled after the "Sword in the Stone" in Arthurian legend.

Created: March 4th, 2018

0

Intention

The goal of this project was to 3D print a holder. My inspiration was the "Sword in the Stone" from Arthurian legend. For Booth, we determined that such a container would be a good way to integrate prizes by having visitors/participants "pull the sword from the stone" and open the lid to get their prize. I decided that this project would be a good chance to prototype such a container (the actual container for Booth will be too large to 3D print, unfortunately).

0

Research & Context

Some searches for reference images produced no consistent depiction of the sword in the stone, so I ended up basing the shape roughly around a cube to reflect how it was meant to fit in the corner of the Booth. Then, I looked for many images of rocks/boulders and swords to try to determine what approximate shapes/details the base and the handle needed. While I did not find any other "Sword in the Stone" containers, this container doesn't differ much from a solid "Sword in the Stone" since the shell/lid make minimal difference in the resulting shape.

0
Searches for References
Swordstonerefs.png.thumb
0

Sketch

Most of the sketches were pretty simple and focused on how I might be able to model the pieces in Fusion 360 and some potential printing limitations.

0
Sketches
Swordstone.thumb
0

Process & Procedure

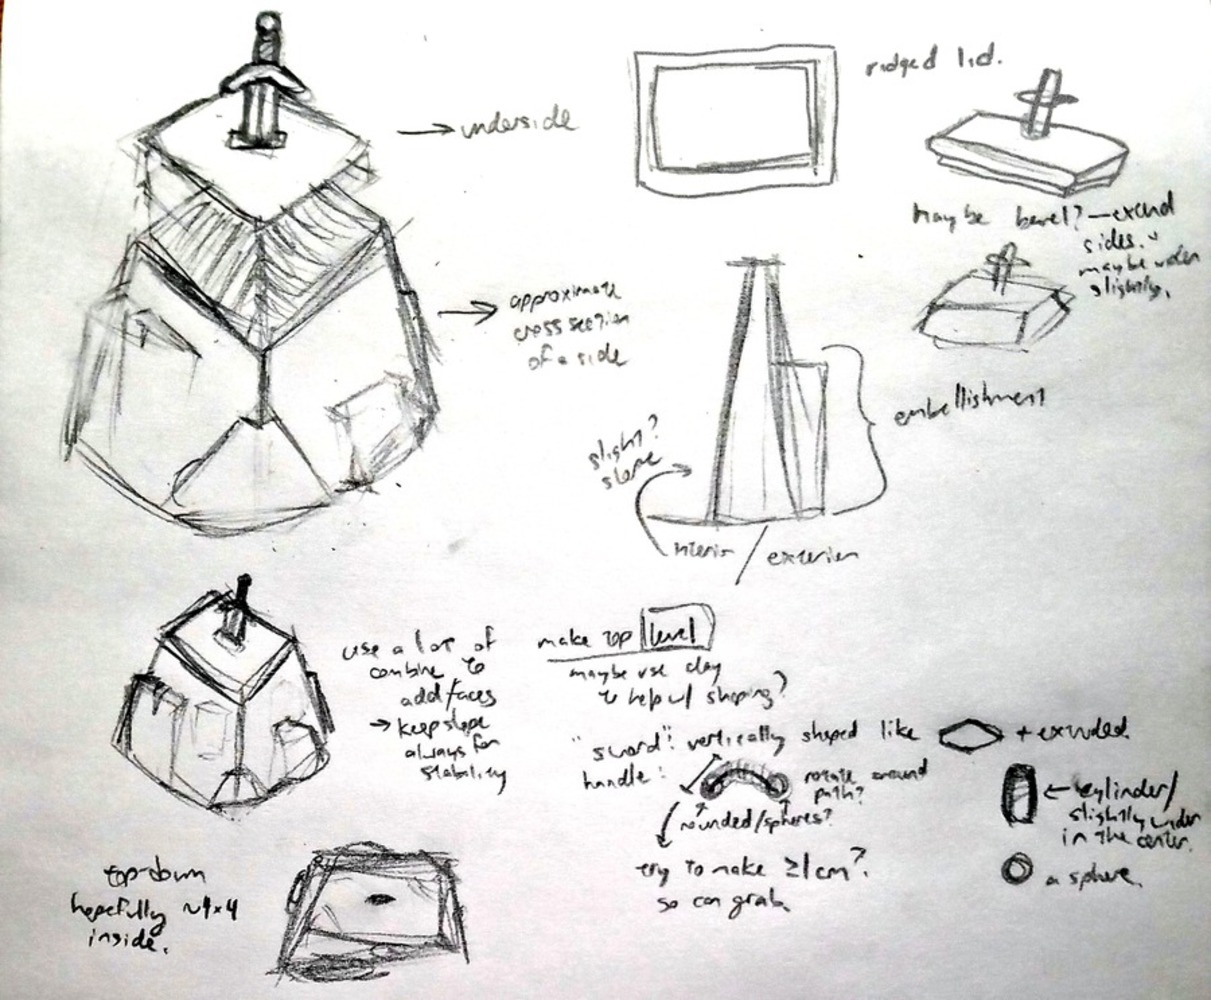
To model the holder, I worked exclusively in Fusion 360. Initially, my plan was to create a series of sketches offset from the X-Y plane to represent the horizontal cross-sections of the base and then to loft them together, adjusting the result in the sculpt environment. Unfortunately, these did not result in T-Splines which I could work with, so I had to take a different approach.

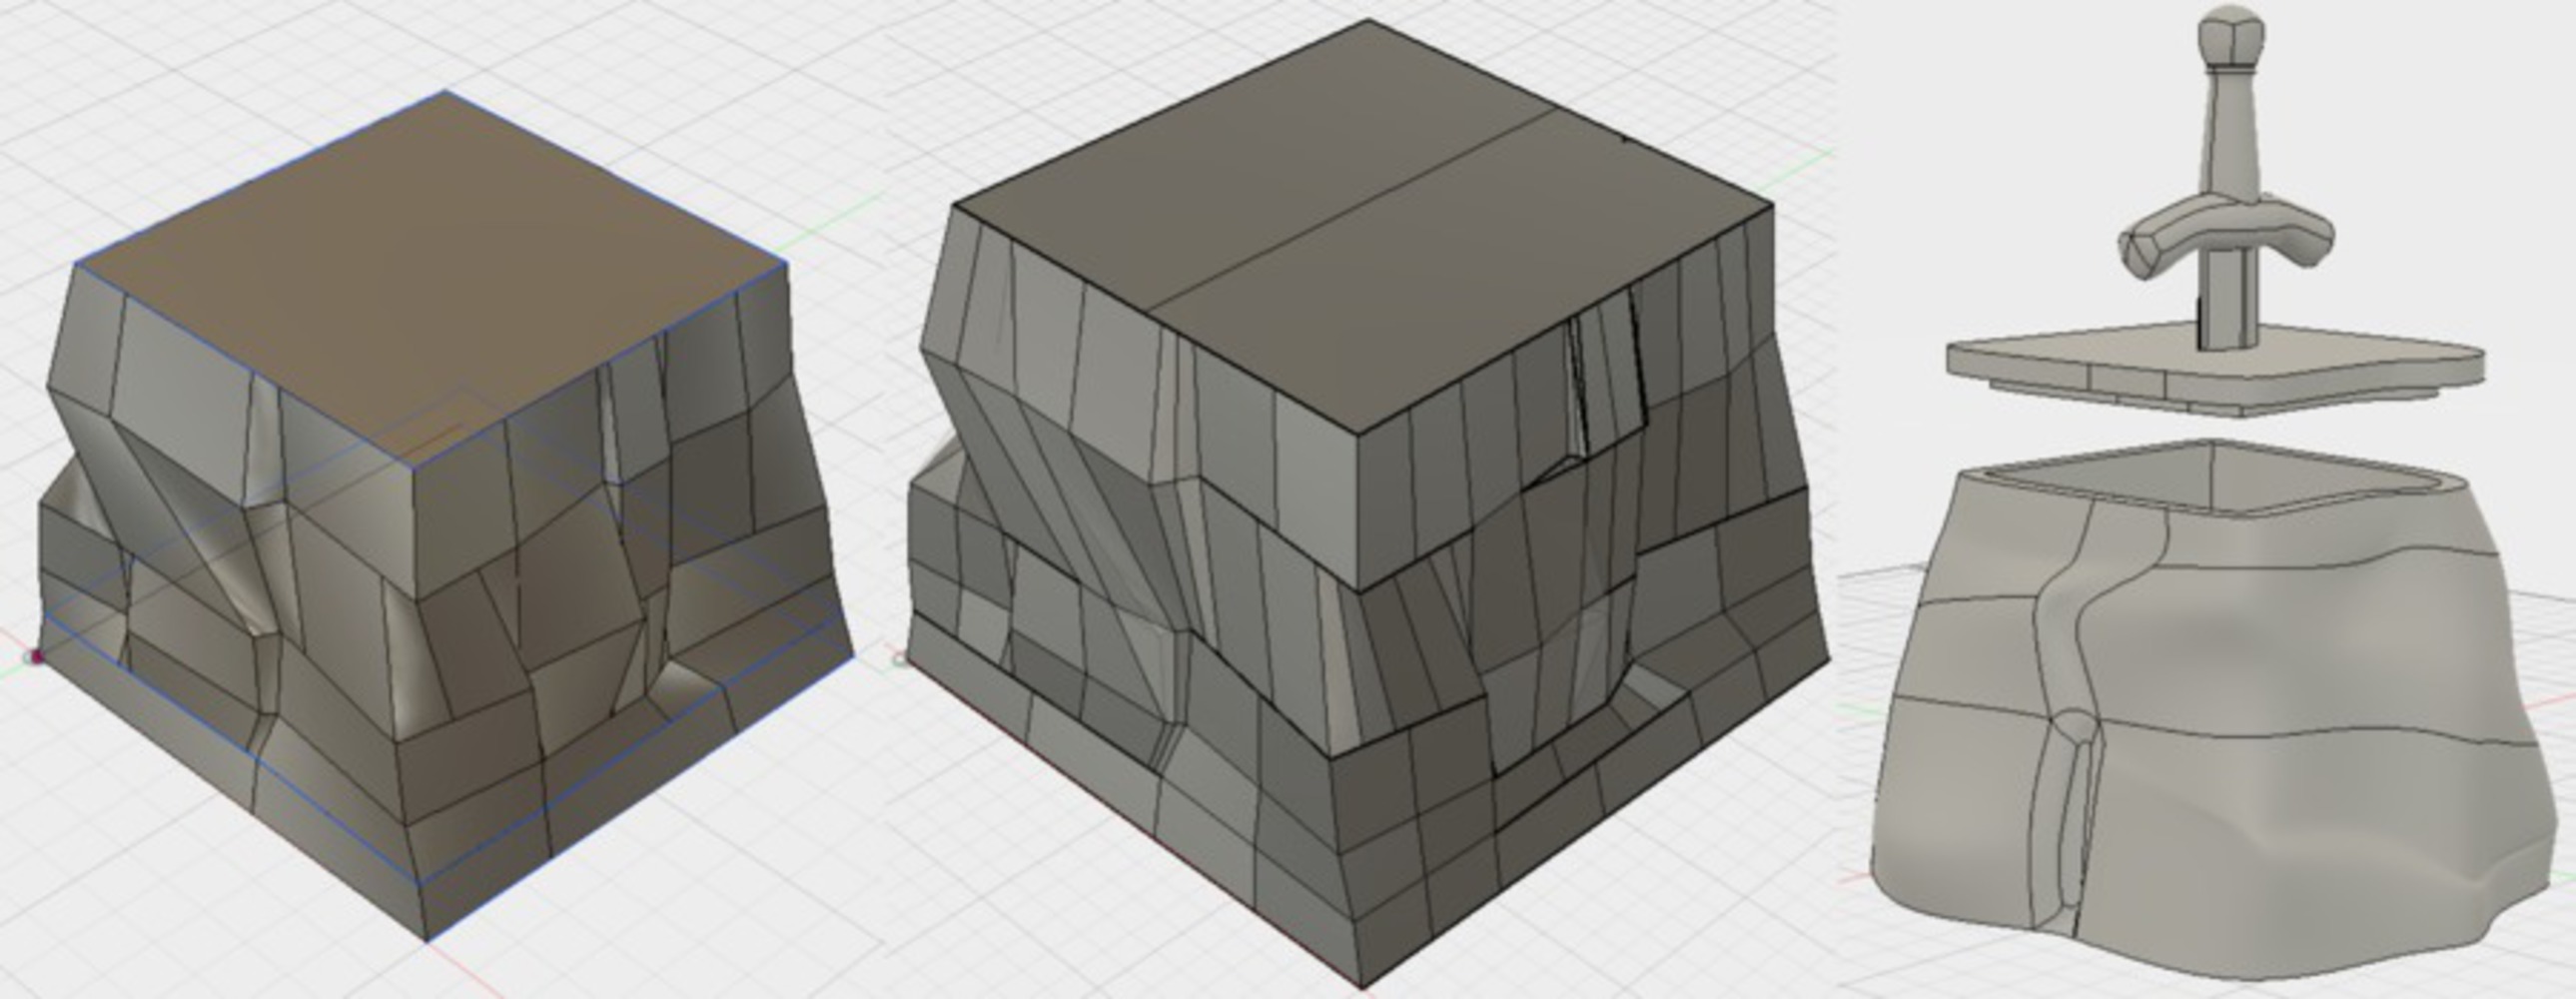
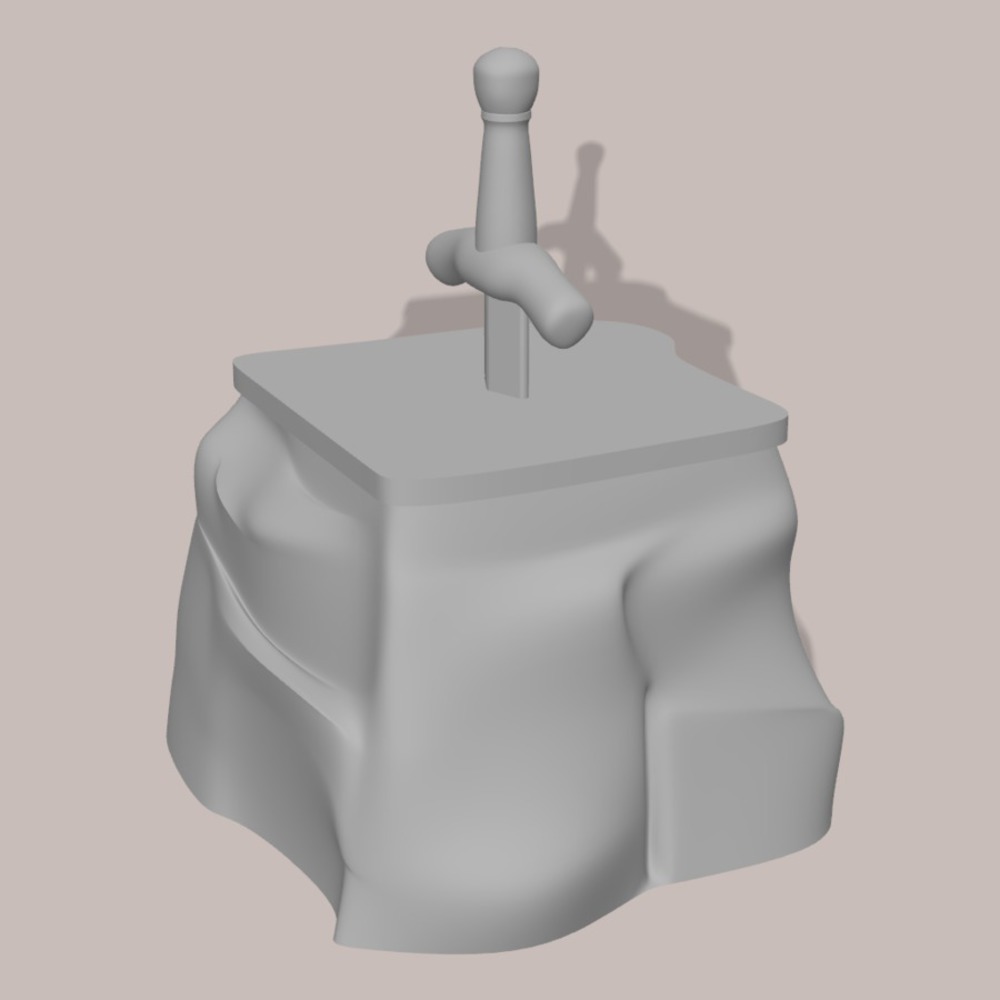
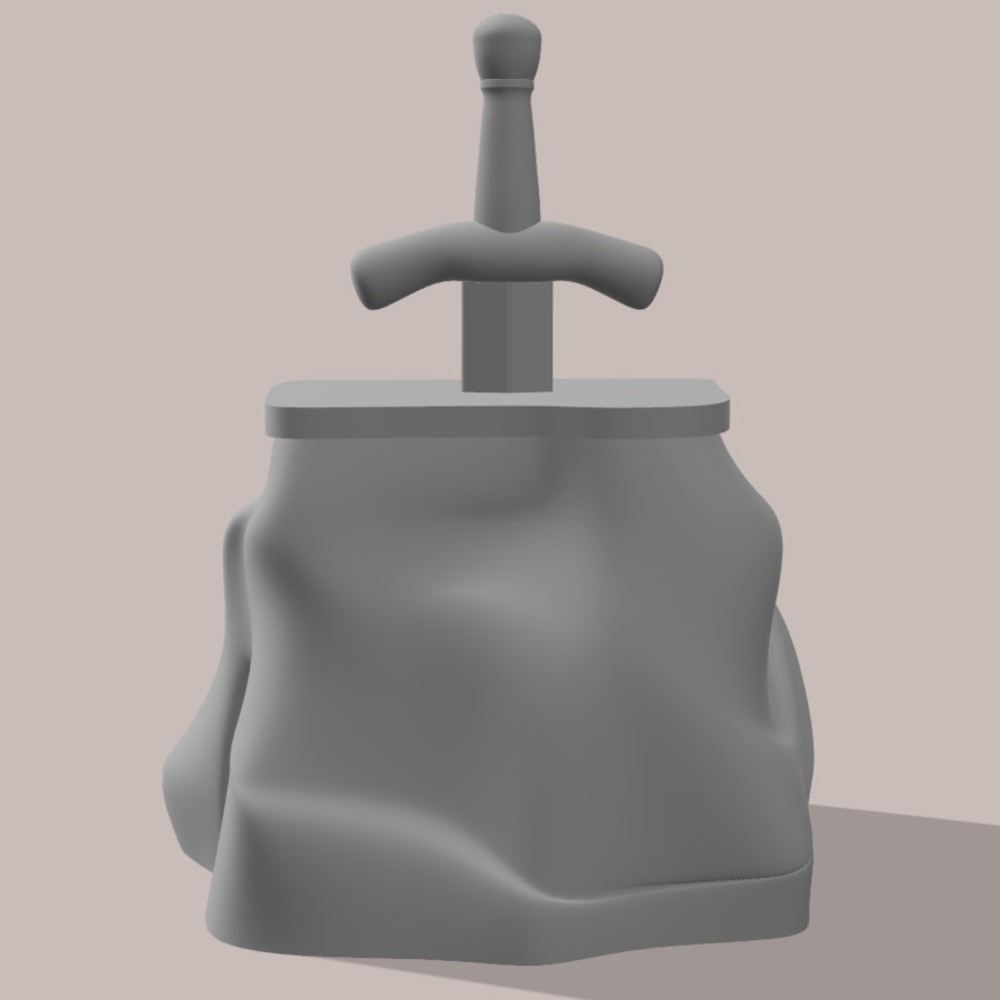
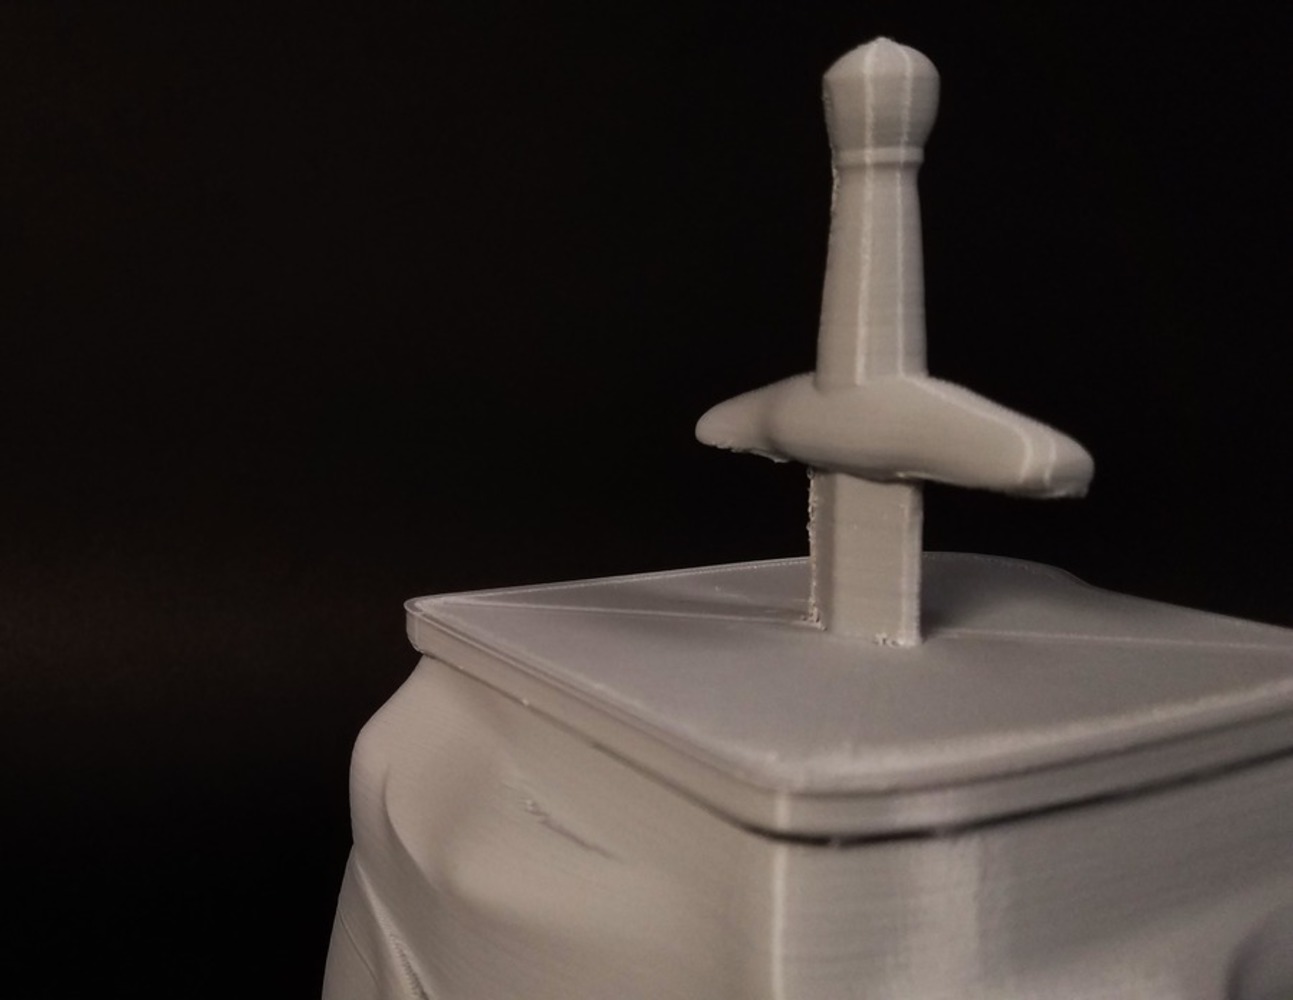
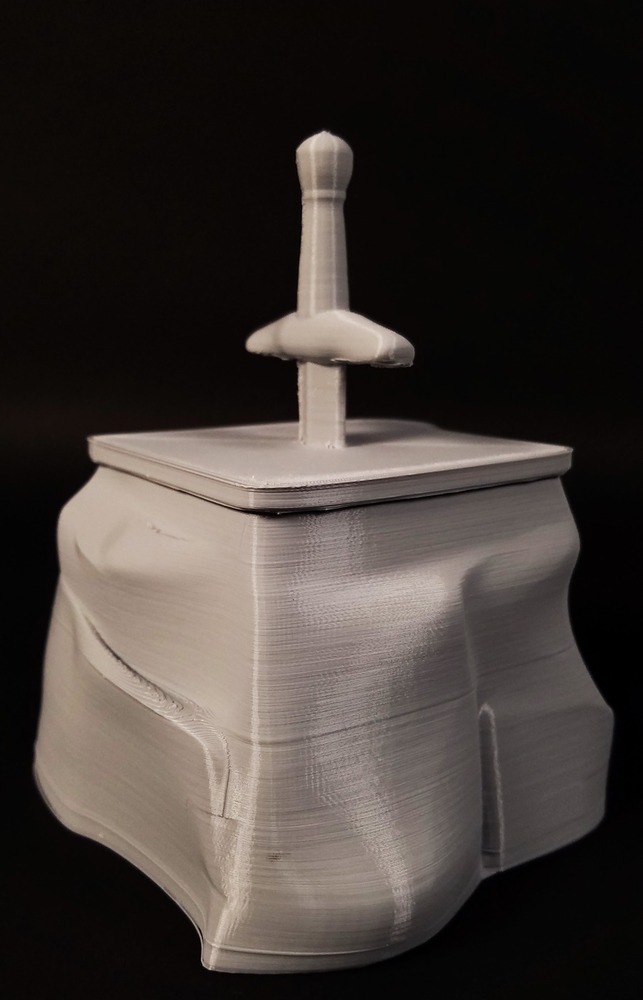
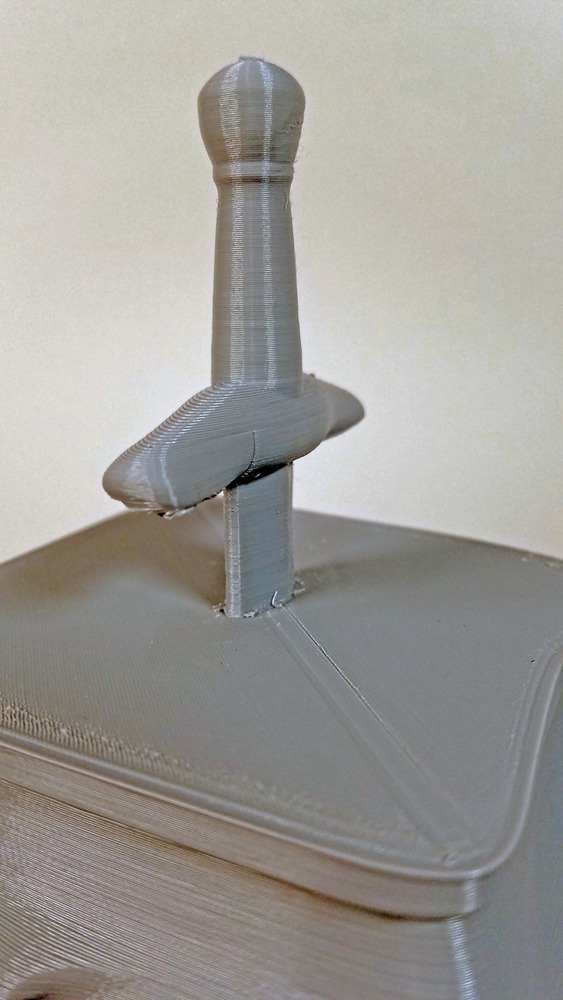
I then made a cube in the sculpt environment, adding many faces and moving them around with the Edit Form command until I was satisfied with the shape (fighting bad topologies/self-intersecting faces often). I then patched and made a solid BRep model from this. I extruded and scaled the top layer to make the lid. I used a shell along a reference body extruded from the top layer to make a smaller geometry to manually shell the body so that it would be 3mm thick at the top (I realize now that the "offset" command in the sketch palette may have done this more efficiently). I made another 1mm shell to make the lip. The handle then resulted from extruding a sketch (the blade), sculpting a cylinder (the grip), sweeping along a path (the guard), making a quadball/another cylinder (the pommel), and sculpting along symmetries to refine it all. I finally combined the bodies for the lid and exported an STL for the lid and the base, sending it to print.

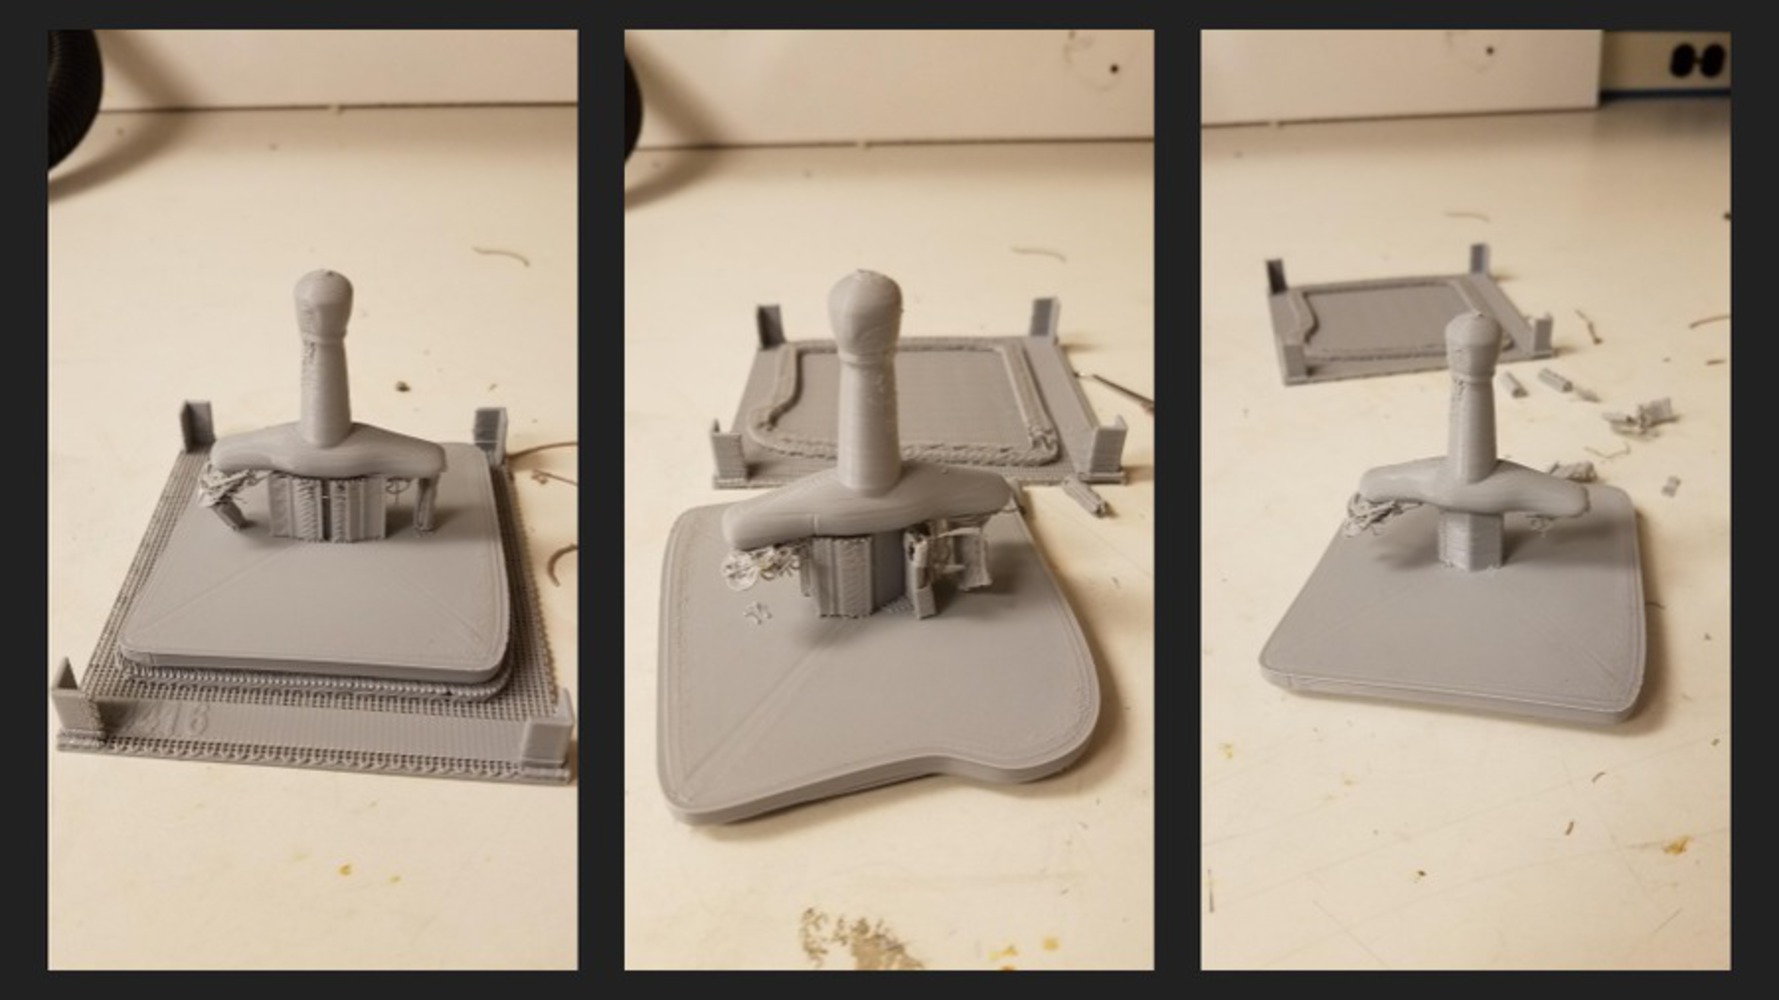
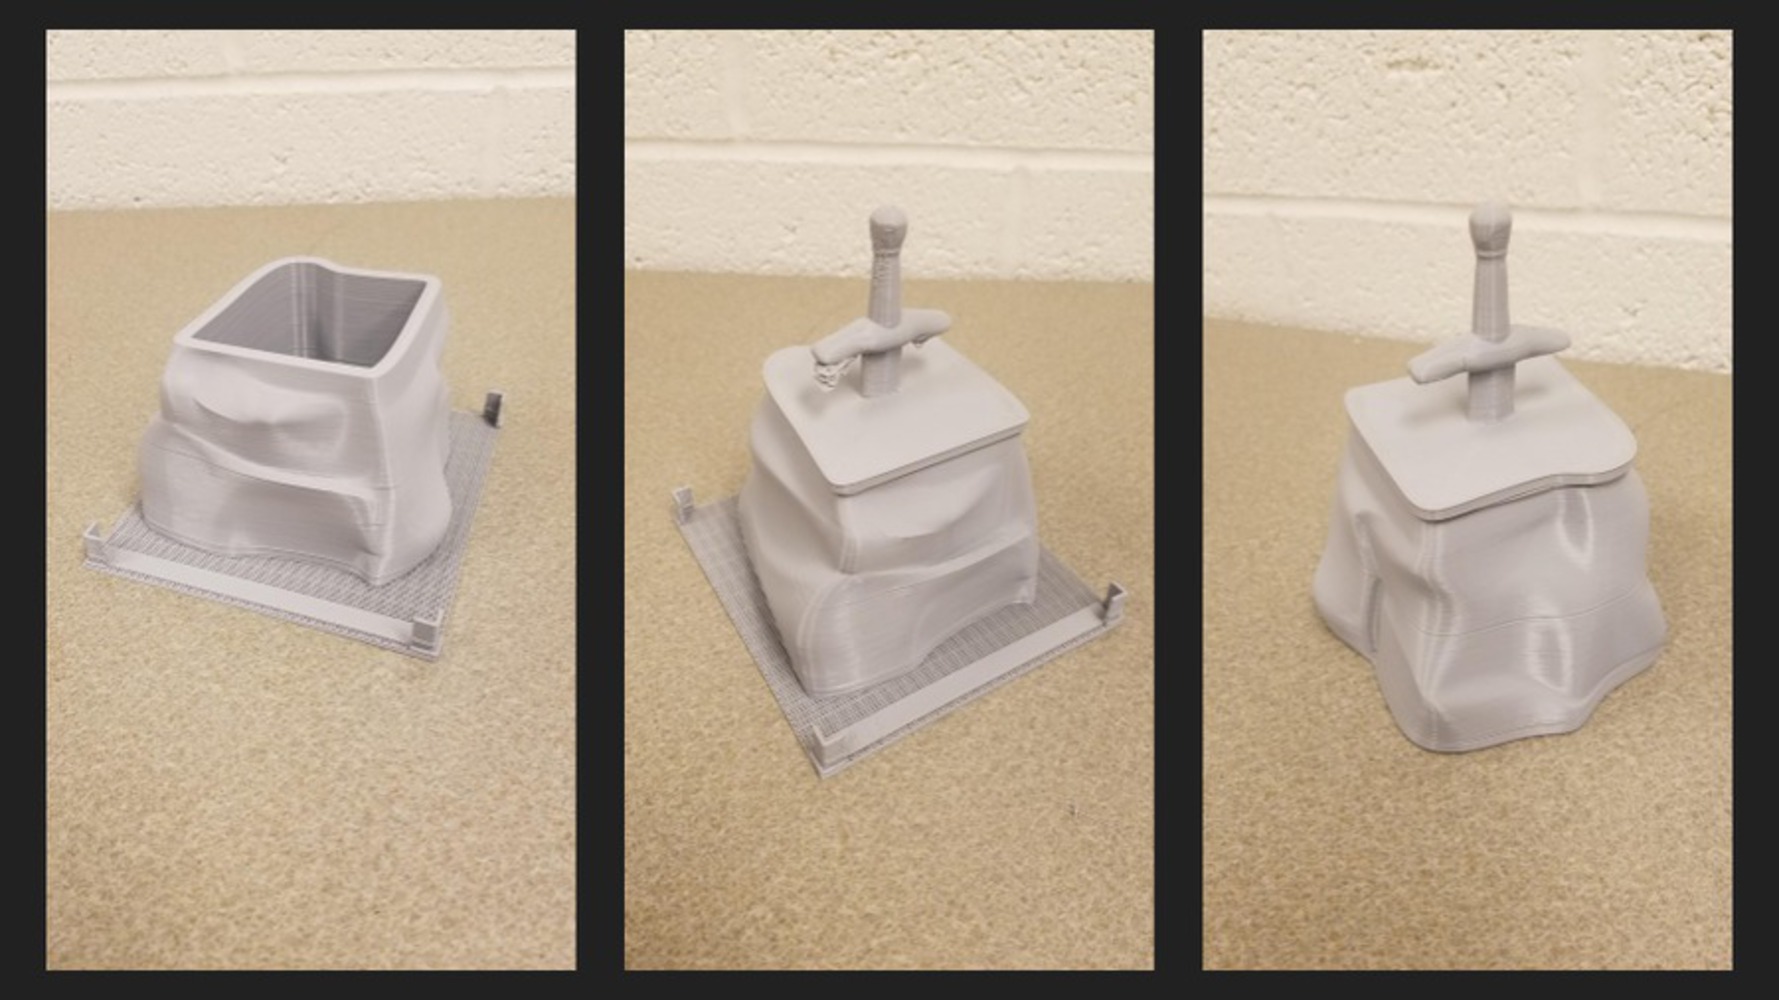
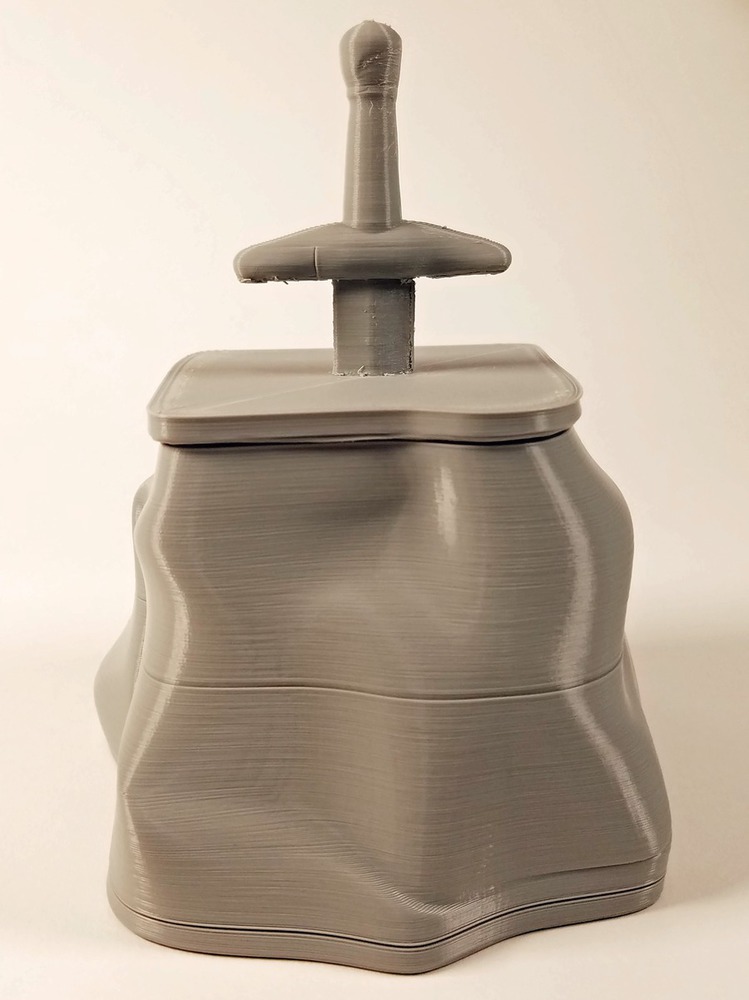
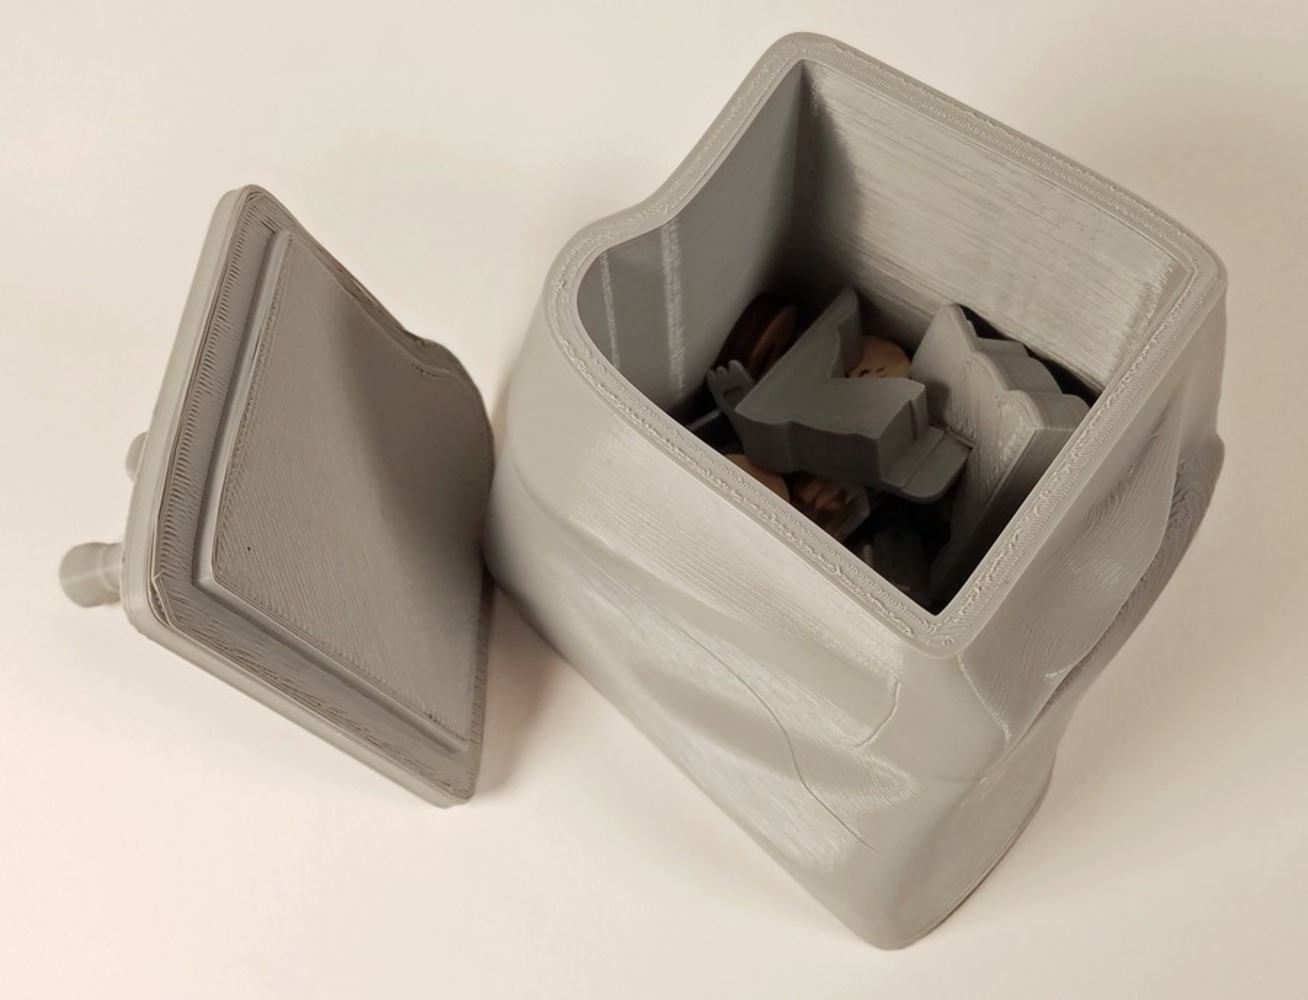
Unfortunately the round portion of the guard did not work well with the supports and ended up very stringy/messy. The rest of the supports around the blade were quite difficult to remove and required a fair amount of time with the dental tools. However, the lid did fit well in the base (perhaps a little loose, so I could have made the lip slightly bigger). Then, I used a utility knife to cut off the stringy parts so the handle ended up mostly flat. It looked pretty good/was still functional then, so I decided that I didn't need to reprint it. I also thought that the unpainted result looked fine as is, so I left it that way and proceeded to use it to start storing tiny parts for my next project.

0
Modeling Attempts
Swordstonemodels.thumb
0
Cleaning the Handle
Holder lidprocess.thumb
0
Assembling/Cleaning
Holder baseprocess.thumb
0

Two Renderings

0

Five Semi-professional photos

0

Reflection

I definitely found that Fusion 360 is not the optimal program for sculpting/3D-modeling like this, but unfortunately the learning curve to start 3D-modeling in some other program required more time than I had, so I just worked with Fusion/the sculpt environment to the best of my ability/limitations of the program. I learned that while 3D-printing is more tolerant of slight slopes outward than expected, ensuring adhesion to other supports is trickier and relies on flatter surfaces. Small supports are also fairly difficult to remove.

If I had more time, I would probably try to learn a different 3D-modeling software so that the overall process would be more streamlined. If I reprinted/remodeled, I would also make the guard flatter (if not completely flat) at the bottom so that it would adhere better to the supports and thus print nicer. Even so, I'm really happy with the final result so the clunky workflow still sufficed!

Many thanks to Professor Larson for her advice on configuring the printing options and cleaning the final product!

x
Share this Project

Courses

62-478 digiTOOL

· 65 members

Digital Tooling (DigiTool) provides a platform for any CMU student to learn Digital Fabrication processes; all of which are very hands-on. Like these processes, this class is also very hands-on. I...more


About

The goal of this project is to prototype a container modeled after the "Sword in the Stone" in Arthurian legend.