Back to Parent

Outcome


Presence

2023

Pranav Addepalli, Nicole Xiang

Credits

This project was built by Pranav Addepalli and Nicole Xiang in the 2023 edition of 48-528: Responsive Mobile Environments. Pranav and Nicole are both rising seniors studying Information Systems and Human-Computer Interaction. Special thanks goes to the professor, Daragh Byrne, and the teaching assistant, Zhenfang Chen, for their support throughout this project.


Description

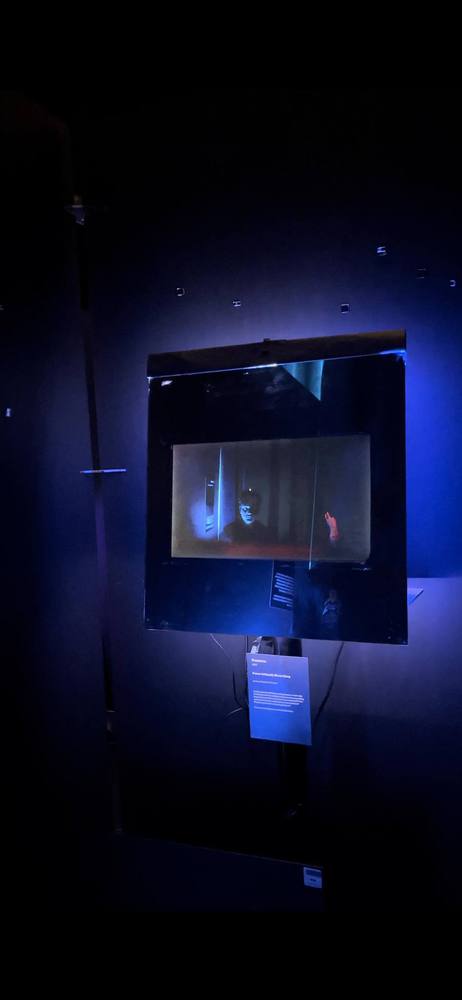
Presence aims to question the way we interact with everyday objects. Mirrors are rooted in reality, an object that is taken for granted to be a reflection of now. Especially in a fast-paced world today, our presence, or the state of existing, is often overlooked as we focus on everything that is and/or about to happen. But have you thought about what affects this current state?

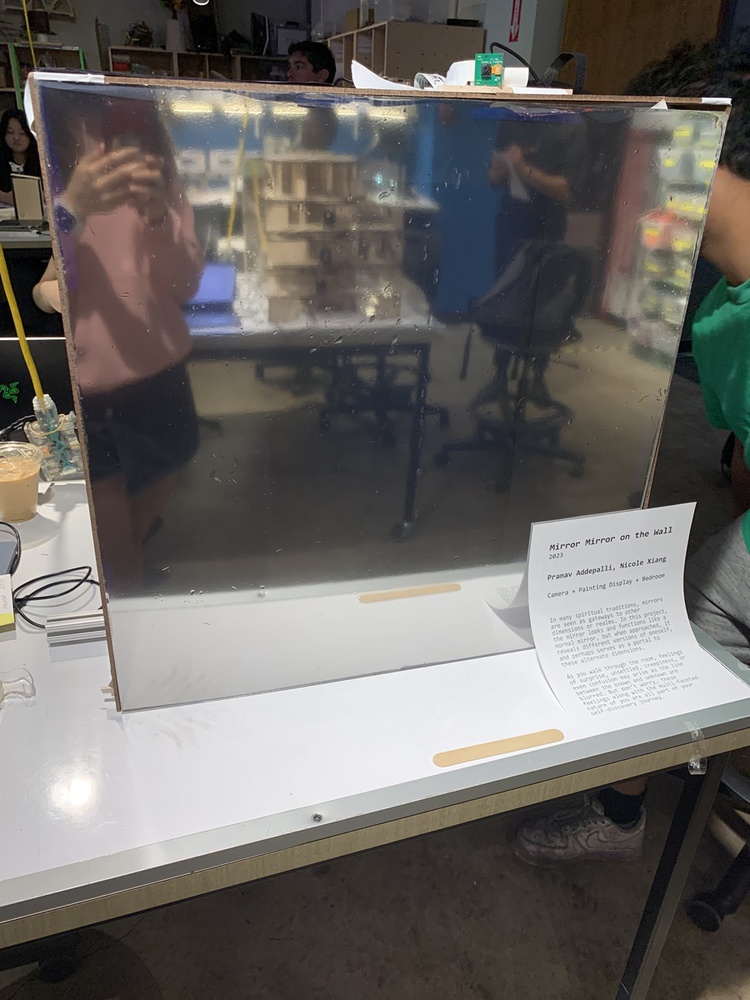
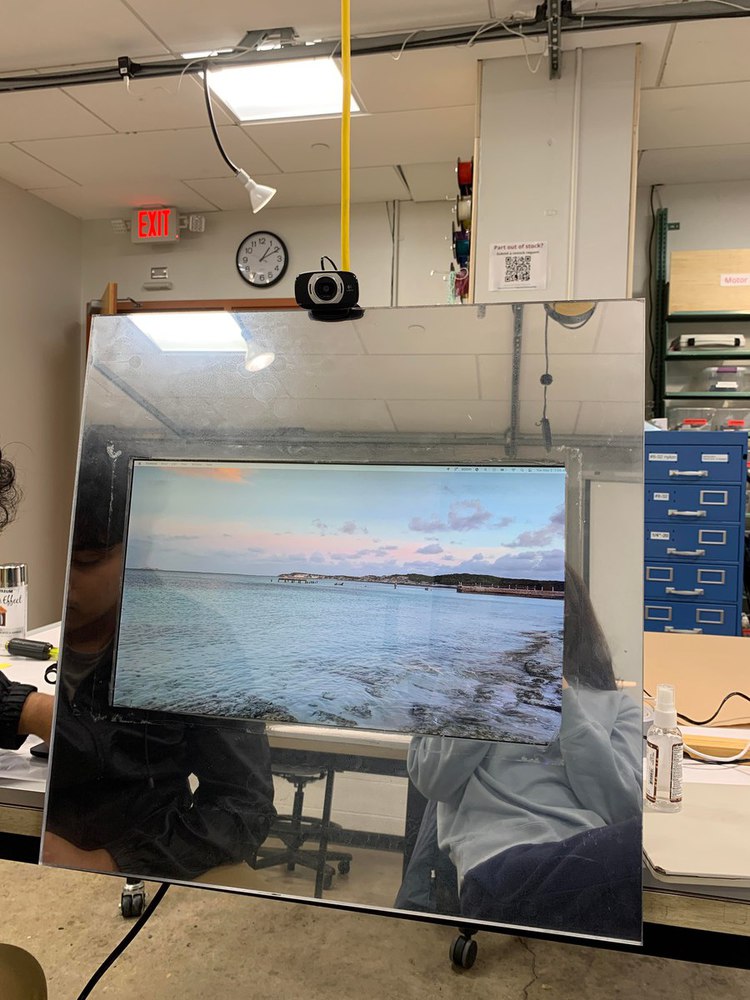
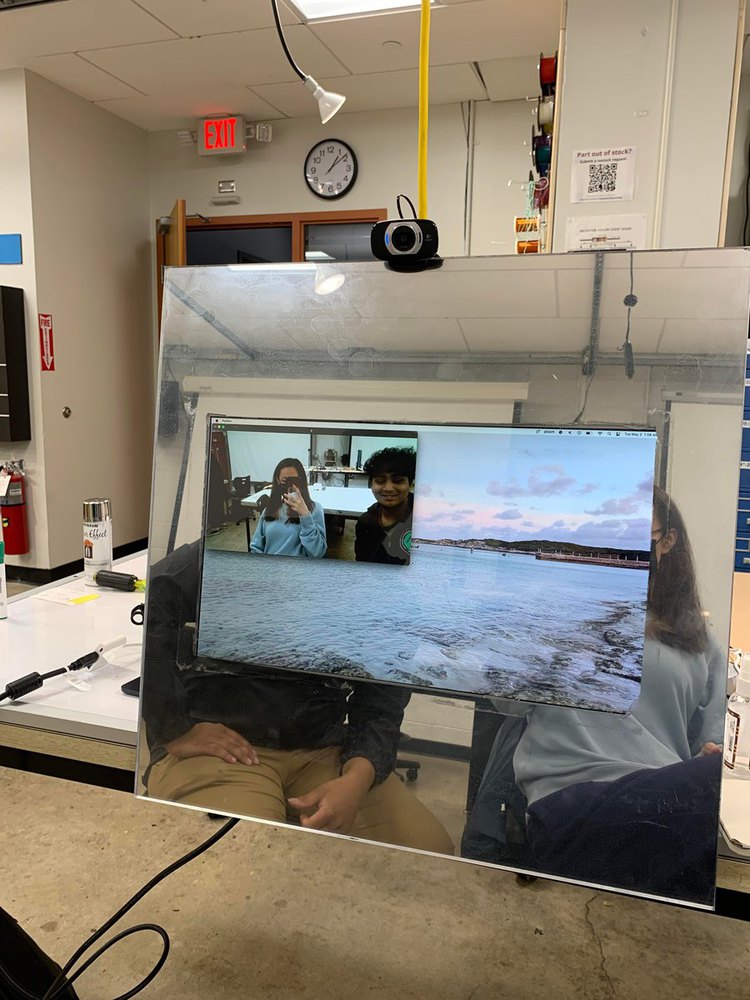
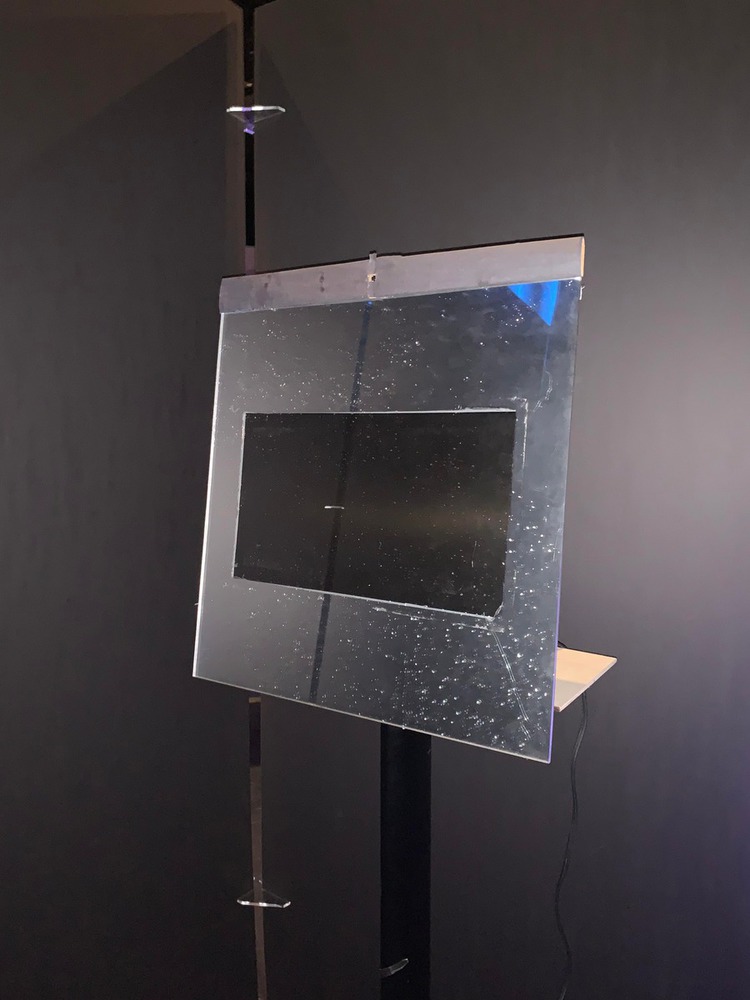
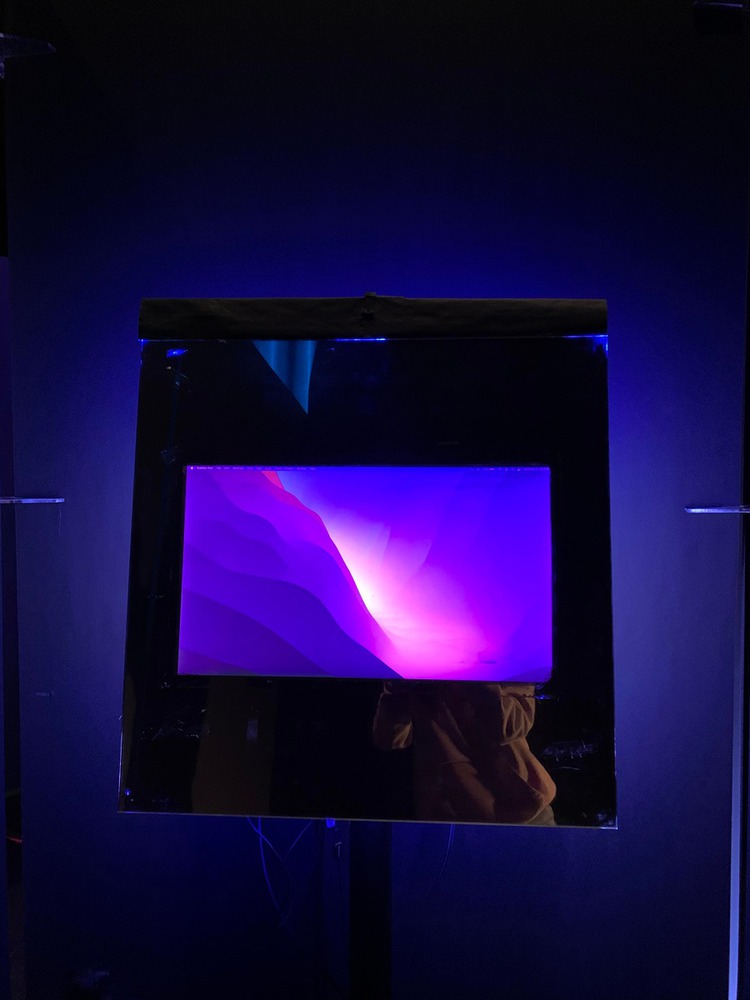
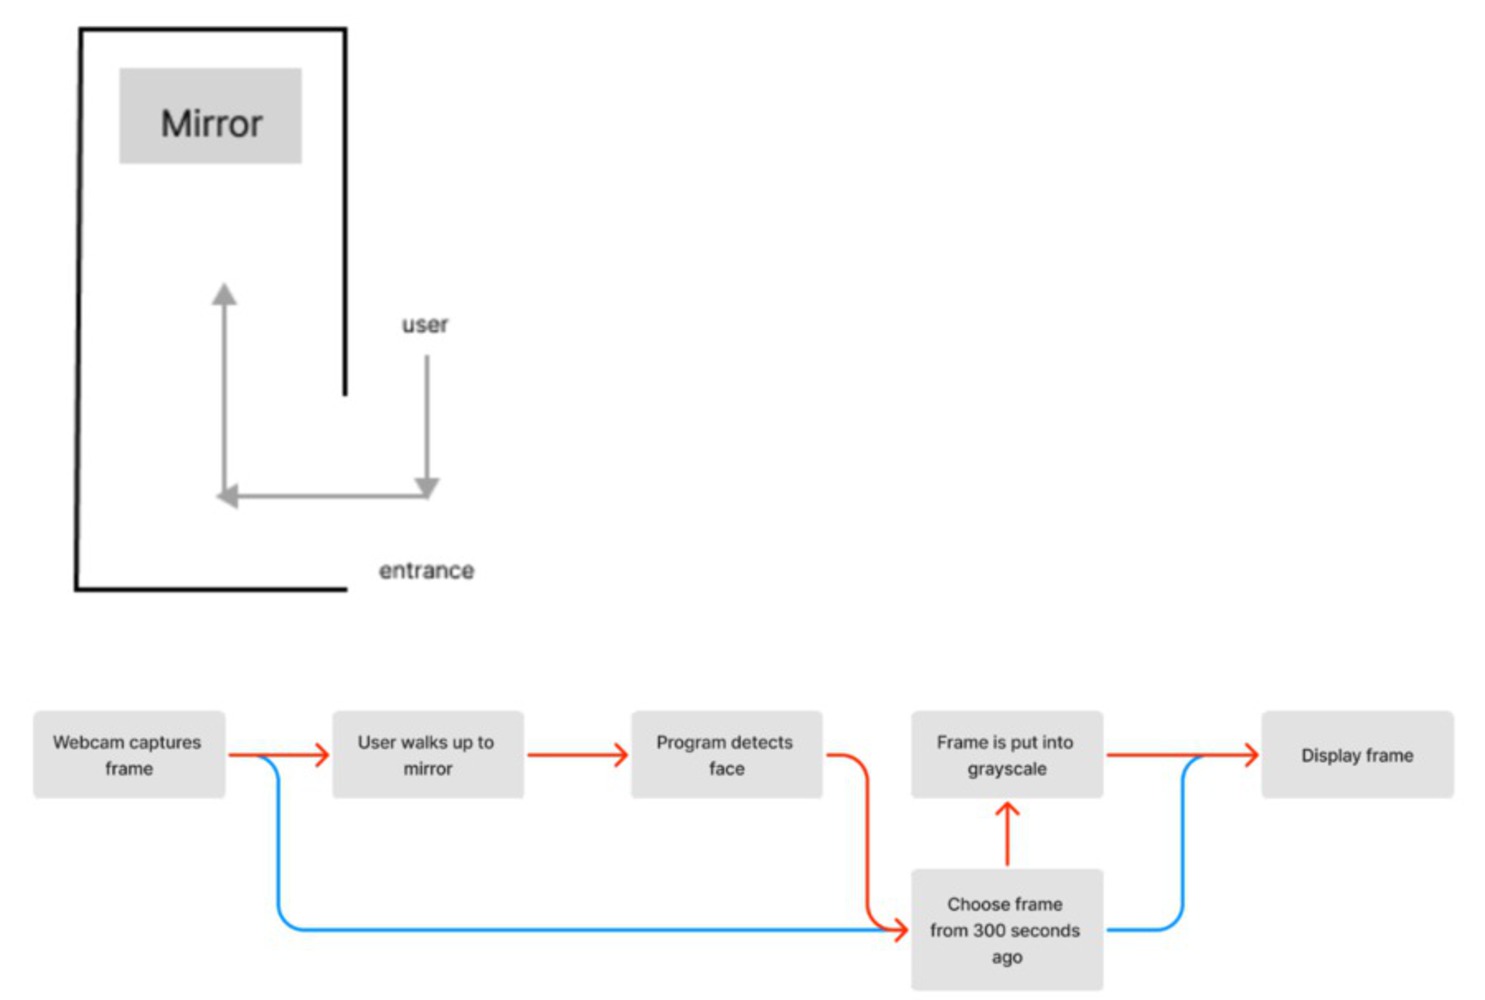
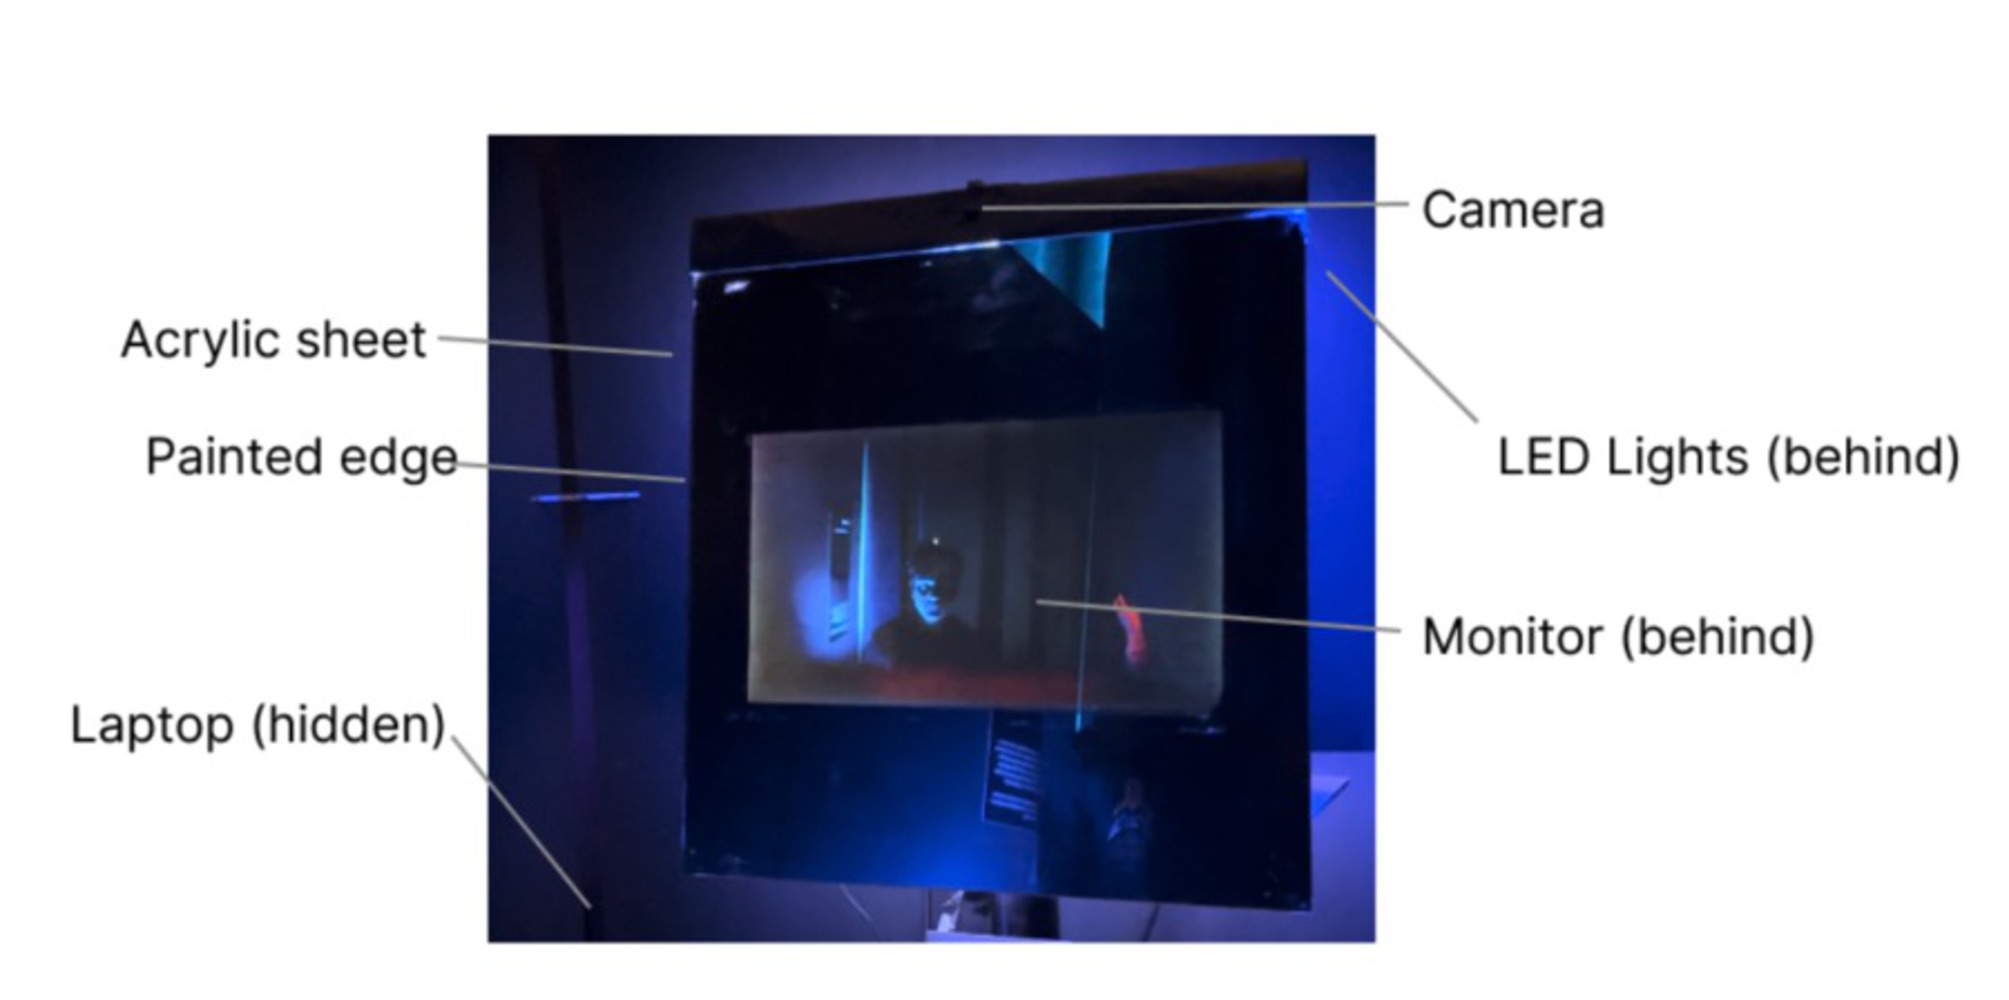
Our project aims to explore the concept of relativity, and show that the past and the now are interdependent. The project consists of a mirror with a built-in display that, when someone walks up to it and is detected by a hidden camera, will show the person reflected like a mirror, but also lagged behind and in grayscale. This intentional delay changes the way we interact with regular mirrors -- rather than see yourself, you see the version of you that led to this new perception of you.


Video demo: https://vimeo.com/824940337?share=copy


344300723 784004939904403 5810259215736449163 n.thumb
Show Advanced Options

Creative Documentation 

Process

The project can be broken down into 4 phases: ideation, pivot, software implementation, and physical setup.

Phase 1: Ideation

With our first prototype “Mirror Mirror on the Wall”, we tested out ways we can incorporate a mirror into a smart environment. Using the feedback we received from critique, we shifted our project direction from style filters to “going back in time”. However, after researching existing tools and raspberry pi functionalities, we realized that it is too difficult to recreate the past (i.e. what users would look like / be doing in the 1900s) in the given timeframe. This is when we struggled a bit because we had many different ideas for what we could do with a mirror but none of them felt meaningful enough. After discussing with Daragh, one idea we had was a mirror that will detect your emotion — whether you are happy, sad, or angry — and filter the display accordingly. However, the openAI tool we found for emotion recognition has a low accuracy, which led us to narrowing down emotions to just smiles. The idea then became the mirror wants to control you by only showing the normal mirror display when you smile, and when you don’t, it puts on a distorted image of you. This smile detector algorithm worked pretty well and we were finally able to move forward with a set idea. 

Img 3713.thumb
Show Advanced Options

Phase 2: Pivot

Two days before the exhibition, it seemed like our project (the mirror and monitor) was either moved to somewhere else or was taken. We were able to find the monitor but the mirror was missing. Since there wasn’t a lot of time left, we decided to go to Home Depot and see if they had any mirror film to remake the mirror. There was no luck finding the correct film; however, we did find reflective spray paint which actually turned out to be better than the film.

This rebuild of the project also made us wonder once again what is the purpose/goal we are trying to achieve. We started thinking: “What does the mirror really mean/represent?”, “Do we need a Raspberry Pi?”, “What kind of camera should we use?”, etc. These questions made us step back and that’s when a new idea popped up: relativity. Everything around us and everything that we do is connected in some way. What we do a second ago affects what we are doing right now but we often don’t realize that; instead, we focus on the future: what will happen, what can go wrong, and how can I improve it? A mirror always reflects on the now, so what if our mirror reflects on the immediate past to visualize how everything is dependent on each other? With this, we want to remind our audience that the current moment is the most important and by seeing the past, they see the version of them that led to this new perception of themself.

343607647 544973077811864 3216170882761311798 n.thumb
Show Advanced Options
343577267 993991671970051 2333837820627923384 n.thumb
Show Advanced Options

Phase 3: Software

Once we decided on the new idea of creating a delay mirror effect, we started implementing the software. This mainly consists of 1) detecting the face 2) creating a buffer for storing frames so that we can grab video frames captured a few seconds ago 3) image filter when a face is detected, and 4) LED light color which changes based on whether the user is in the mirror. We spent a lot of time exploring what kinds of filter are possible (see videos below). In the end, because of time limits (the day before the exhibition), we decided to go with a straightforward gray filter (which symbolizes the past) when faces are detected. There was also some difficulty connecting the Arduino (which controlled the LED strip) and the mirror display algorithms so we had to drop the color change feature and just sticked to one color animation.    

344785366 620268766815618 1214749464631329269 n.thumb
Show Advanced Options

Phase 4: Physical Set Up

Lastly, we needed to connect the monitor and mirror so that the mirror lays directly on the monitor. In addition, because the table stand we had for the exhibition has a small surface area, we had to make sure whatever that’s holding everything needs to be small but strong enough. In the end, we used duct tape to connect the monitor and mirror and the monitor stand to hold up both parts, as well as a wood stick on the back to balance out the force going forward (see image). One other problem we had was getting enough light for the camera at the exhibit (which was pretty dark). Luckily, we were able to find a spot to put light that provides just enough brightness for the camera to see.  

343566526 209967578439915 4568304406721602119 n.thumb
Show Advanced Options
Img 4079.thumb
Show Advanced Options
342111532 574359811189413 8402943877003728981 n.thumb
Show Advanced Options
341998402 251852423889274 8563158163560798224 n.thumb
Show Advanced Options

Build

We used the following resources to create our final exhibit:

  • 24”x24”x1/4” clear acrylic sheet
  • Rust-Oleum Specialty 6 oz. Mirror Effect Spray Paint
  • 20” Monitor
  • Macbook Air laptop
  • USB webcam
  • LED light strip WS2812B
  • Arduino Uno

The final product was placed on a 4-foot tall speaker stand, borrowed from the IDeATe Media Lab. We planned for interactions in our exhibit to be single-user, with people coming in from the side and looking into the mirror for a few minutes. The interaction was very simple in that there is no explicit action a user needs to take. Instead, we play on the simplicity and agency offered by regular mirrors, where people just walk up to one and look into it. The interaction that people had with our project was in their exploration of why the display was lagged, why it turned grayscale, and overall experimenting with the display.

Screen shot 2023 05 09 at 6.09.28 pm.thumb
Show Advanced Options

The blue flow is the normal experience when there is nobody there, and the red flow is when a user walks up to the mirror.

While developing our project, we experimented with some other technologies. We also used:

  • Raspberry Pi 3B+
  • Raspberry Pi 5MP Camera Module
  • Arduino Nano 33 BLE
  • Reflective window film

We used the mirror effect spray paint to cover the back of the acrylic sheet, leaving a square in the center that was the size of the monitor. This way, after turning the sheet over, we were able to have a mirrored bezel around the monitor screen. We took the front cover of the monitor off so that it could be flush with the back of the acrylic. We used hot glue to attach the monitor to the acrylic.

We attached a small black piece of cardboard above the mirror to hide the USB webcam. The webcam was connected to the Macbook, which was hidden next to the exhibit. The Macbook was used because our alternative, a Raspberry Pi 3, did not have the processing power or software packages to support the program we were running for the entire exhibit.

The LED light strip was attached to the back of the acrylic along the edge. An Arduino Uno was used to power and control it.

Screen shot 2023 05 09 at 6.09.45 pm.thumb
Show Advanced Options

On the Macbook, we ran a Python program that used OpenCV and the Haar cascade models for facial detection as well as read from, augment, and display images from the camera. The source code for our exhibit is below. 

Full code can be found here: https://github.com/pranavaddepalli/rme-final

Show Advanced Options

Reflection

Because we rushed the final project and scaled down our ideas throughout the process, we were not confident in our final installation. However, we learned through the exhibit that the agency our project offered to people made it so that they actually really liked it. We received comments from people telling us about their different experiences and interpretations of the project, indicating how powerful simplicity can be. We’d like to introduce the installation better with clearer object labels and exhibit labels, as well as improve the lighting to make the interaction smoother. Overall, we found this project surprisingly successful.

Roadmap

In the future, to see this as a real exhibit piece, the product will need to improve in its presentation. Mounting the mirror on the wall would bring more realism to the project as well as present it better. This can be done in areas where the walls are stronger, rather than the foam core walls used in our exhibit. The screen can also be better integrated with the rest of the mirror to not seem like it is an actual screen. This could be done using reflective film, or by making the entire mirror a large screen with film on top to make it seem like a mirror. An open challenge is finding a way to hide the camera so that the mirror appears to be more real. Currently, we have placed the camera above, but it might be possible to drill a hole in the actual mirror and hide the camera behind it. Research will need to be done in order to find out the best way to hide the camera.

In addition, the room of the exhibit should be connected with the interaction. We hope to see an experience where users walk up to the mirror, and instead of just the screen going grayscale, the lighting around also turns white and starts to flicker. Through this, we want to make the user think they are looking into the past. In addition, we want to incorporate audio into this project. Instead of just showing images from before, it would be interesting to also play audio using a surround sound speaker setup from a few seconds ago. Building this immersive experience would involve figuring out how to connect different devices, including a microphone, speakers, lighting, and the mirror itself.

To achieve this in the next 12 weeks, finding a new place to do the exhibit would be the first step. Ideally, it would be in a real, isolated room with strong walls, customizable lighting, and the ability to embed speakers in the room. Then, basic tests of connectivity with the room would need to be conducted. After this, the program will need to be modified so that it can trigger these devices to change and play different things during the interaction. Doing this will enable us to scale up the project while keeping the core functionality the same.

Drop files here or click to select

You can upload files of up to 20MB using this form.