48675_LAB01: Web Connected LEDs
Made by Phoebe
Made by Phoebe
Learn how to control LEDs and other electrical output devices over the web with the Particle Argon platform
Created: October 30th, 2022
//PHOEBE DEGROOT - 03102022
//lab1_ledcontrol v1
//Web control of two led state and blink via web
//written for Particle Argon
#define numLEDs 2
int blinkDelay = 800; //blink delay in millis
int set = 1;
//struct containting LED data
typedef struct {
uint8_t pin;
uint8_t state;
uint8_t blinkCt;
unsigned long timer;
}LED;
LED LED01 = {D2, LOW, 0, 0};
LED LED02 = {D3, LOW, 0, 0};
LED *pLED; //pointer to the current LED
LED myLEDs[] = {LED01, LED02};
void init(){
pinMode(LED01.pin, OUTPUT);
pinMode(LED02.pin, OUTPUT);
digitalWrite(LED01.pin, LOW);
digitalWrite(LED02.pin, LOW);
}
void setup() {
init();
Particle.function("led",ledControl);
}
void ledBlink(LED *tLED){
//fn to blink led given pointer to LED object
if (millis()-tLED->timer>blinkDelay){
if (tLED->state == HIGH){
tLED->state = LOW;
//decr blinkCt every low switch
if (tLED->blinkCt>0) {tLED->blinkCt--;}
}
else if (tLED->state == LOW){
tLED->state = HIGH;
}
digitalWrite(tLED->pin, tLED->state);
tLED->timer = millis();
}
}
void loop() {
pLED = &LED01;
if (pLED->blinkCt != 0){
ledBlink(pLED);
}
pLED = &LED02;
if (pLED->blinkCt != 0){
ledBlink(pLED);
}
}
int ledControl(String command){
command.toUpperCase();
String subcmd="";
if (set == 1) pLED = &LED01;
else if (set == 2) pLED = &LED02;
if (command == "HIGH"){
pLED->state = HIGH;
pLED->blinkCt = 0;
digitalWrite(pLED->pin, HIGH);
}
else if (command == "LOW"){
pLED->state = LOW;
pLED->blinkCt = 0;
digitalWrite(pLED->pin, LOW);
}
else if (command == "BLINK"){
pLED->state = LOW;
pLED->blinkCt = -1;
}
else if (command == "BLINK3"){
pLED->state = LOW;
pLED->blinkCt = 3;
}
else if (command.charAt(5) == ':'){
//Use "BLINK:N" to blink led N times
subcmd = command.substring(6);
if (subcmd.toInt() >= 0){
pLED->blinkCt = subcmd.toInt();
pLED->state = LOW;
}
}
else if (command.charAt(2) == 'D'){
//Use "LEDN" to send commands to LEDN
subcmd = command.substring(3);
if (subcmd.toInt() >0 and subcmd.toInt()<= numLEDs){
set = subcmd.toInt();
}
}
else{return -1;}
return 1;
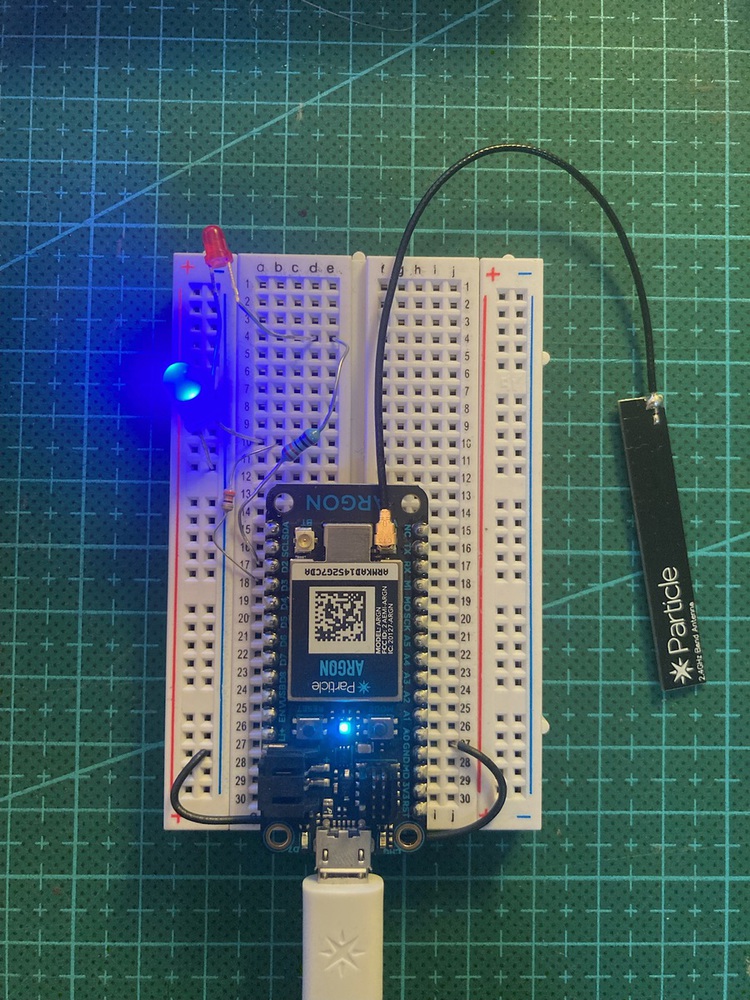
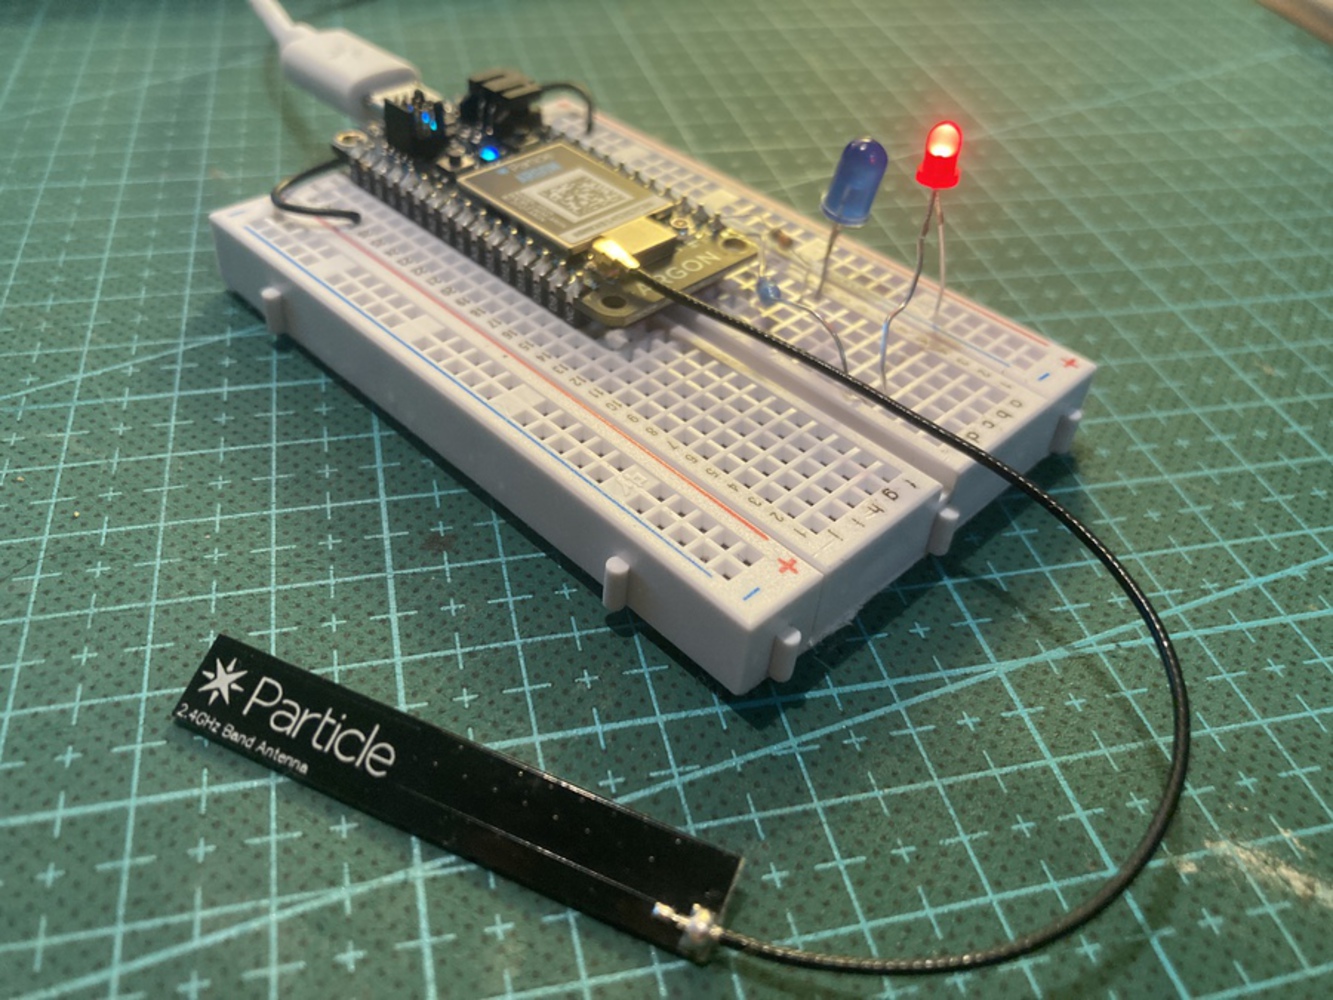
}In this project I got acquainted with the particle platform to make a web-connected led. Using the Particle console environment the user can enter text to select an led to control, turn that led on or off and set the led to blink either a given number of times or indefinitely.
The code uses a couple strategies to handle user input and control of each led - a tree of if-else statements takes the user's command and matches it to a set command. For commands that set a variable I created a substring to split up the text and integer components of the command. A structure stores variables for the LED including pin, current state, timer and blink count so that any number of LEDs could operate and blink independently without interference. I managed to get a pointer to function so that I could more easily assign and re-assign values to the specified LEDs.
I have a good amount of experience with arduino devices so I used this lab as an opportunity to try a couple of methods I am less familiar with in order to make the code more functional - such as structs and pointers. After getting the "HIGH"/ "LOW" function to work I wrote a function to blink the led using a timer method so it doesn't cause the code to block. I made a counter that can be set and decreases after each blink to allow the user to set a number of blinks to show. I thought about making another app specifically for setting the blink number but decided to just add it via checking if the user writes "BLINK:[number of blinks]". The actual implementation just checks if the 6th character is ':' and converts the rest of the string to an integer. I used a similar method for setting the LED. You could write any input with the 3rd char as "D" and it would try to set the LED - so it's definitely not a perfect solution!
I tried for a while using a list of the LED objects but that method doesn't actually allow me to assign values to the LED objects in the list - I attempted a number of different methods to make an array of the LED objects but there are some confusing problems with how structs and arrays interact. I found with this code if there is an issue the IDE just refused to compile without an error - so after some gnashing of teeth I gave up and just set each LED address manually - eventually I'd like to return to this so I can more easily scale with any number of objects.
Pointers are very funky - they allow me to make sort of temporary objects that I can assign values to which then transfer to the pointed object - in this case I used a pointer pLED so that in the ledControl function I could first set pLED to whichever led the user had selected and then any variables would be assigned to that pointer. I think there are alternative methods like making a function for assigning values to the LED object - maybe a class? Below I posted my code prior to adding the second LED and the pointers.
One issue I definitely felt was the lack of a serial monitor for debugging the code - it was very difficult to figure out what was going on sometimes. I attempted to use the Particle build environment which did have a serial monitor although there were some different things that tripped me up with that method.
At some point I my code was crashing the board firmware if I entered more than one command - unsure what happened here but it got me acquainted with reflashing the firmware on the board. I expect this will come in handy in the future.
As mentioned above there are a couple of less optimal bits in this code - namely handling user input and handling object pointing. I think I could figure out the latter with a little more time. For the former I would probably want to create a function to parse user input in a more flexible way.
I was definitely stoked to get my pointers working correctly as I still find pointers to be pretty confusing. I spent a lot more time on this lab than expected - but felt I have gotten a lot more familiar with troubleshooting the particle. Without the serial monitor and more info on how the web input works I feel a little in the dark about handling different user inputs - but I am sure that will become clearer over time.
One thing I really need to be better at is checking functions work before I write whole blocks of code that use them. I found myself commenting out several sections of code so I could figure out what wasn't working - especially with things like pointers where I was sometimes misusing them entirely. It would definitely save me time to validate a function first.
//WIP web led test
// single led functions

int LED01 = D2;
int blinkDelay = 1000; //blink delay in millis
int LED_state = LOW;
int blinkCt = 0;

void setup() {

    pinMode(LED01,OUTPUT);
    Particle.function("led",ledControl);
    digitalWrite(LED01, LED_state);

}

void loop() {
    if (blinkCt != 0){
        //Single var for blink mode, var -1 used for stay on
        //Blink count decrements once every high blink
        ledBlink();

    }
}


int ledControl(String command){
    String subcmd="";
    if (command == "HIGH"){
        LED_state = HIGH;
        blinkCt = 0;
    }
    else if (command == "LOW"){
        LED_state = LOW;
        blinkCt = 0;
    }
    else if (command == "BLINK"){
        LED_state = LOW;
        blinkCt = -1;
    }
    else if (command == "BLINK3"){
        LED_state = LOW;
        blinkCt = 3;
    }
    else if (command.substring(0:6)=="BLINK:"){
        subcmd = command.substring(6);
        if (subcmd.toInt() >= 0){
            blinkCt = subcmd.toInt();
            LED_state = LOW;
        }
    }
    else{
        return -1;
    }

    digitalWrite(LED01, LED_state);
    return 1;
}

void ledBlink(){
    static unsigned long timer;
    if (millis()-timer>blinkDelay){
        if (LED_state == HIGH){
            LED_state = LOW;
            if (blinkCt>0) blinkCt--;
        }
        else if (LED_state == LOW){
            LED_state = HIGH;
        }
        digitalWrite(LED01, LED_state);
        timer = millis();

    }

}