AR Translations
Made by mtegene
Made by mtegene
I want to create an application that aids in language learning. Building your vocabulary is an important aspect of learning a new language, and I believe it would be helpful if common objects were annotated (using AR) in the language you are trying to learn. That is what my projects attempts to do.
Created: May 10th, 2017
DISCLAIMER: All the technology I need for my project to work as envisioned does not exist or is not readily available right now (technology like object recognition) so my project in a sense is "hard-coded" to only work in one specific place (one room) currently. The hope is, as technology advances and becomes more readily available, I can pop that into the project and make it work as envisioned.
GENERAL PROJECT PROCESS DESCRIPTION:
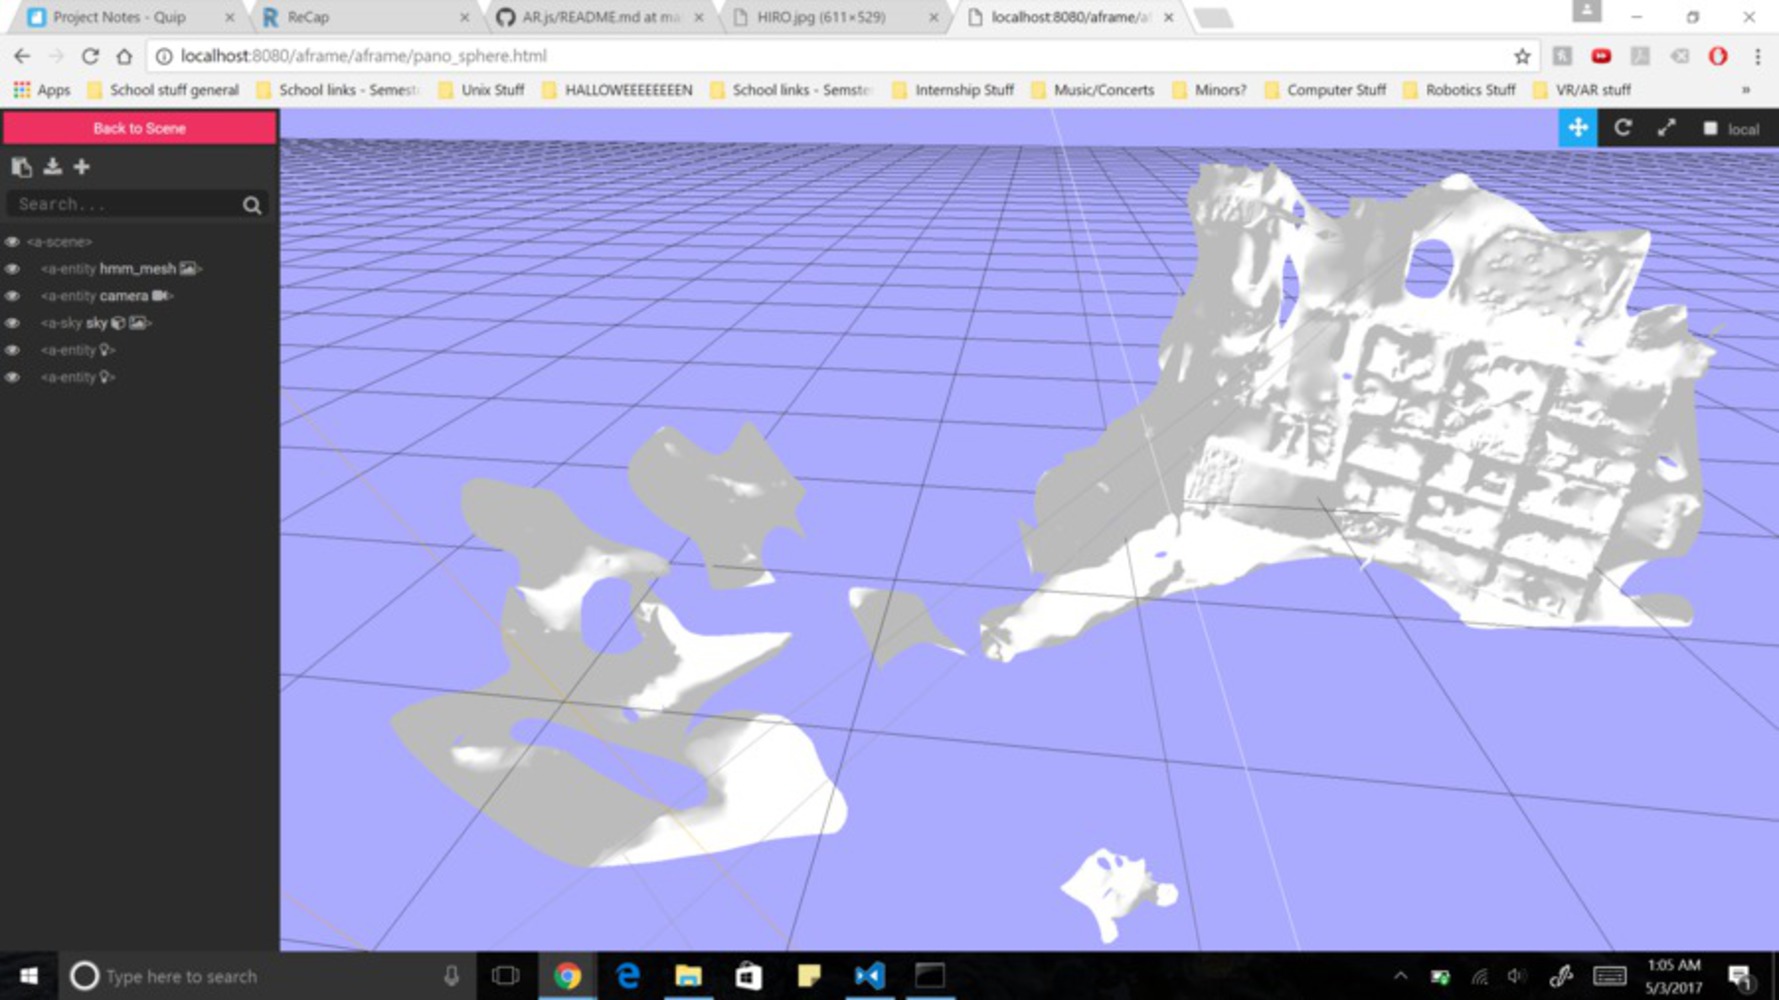
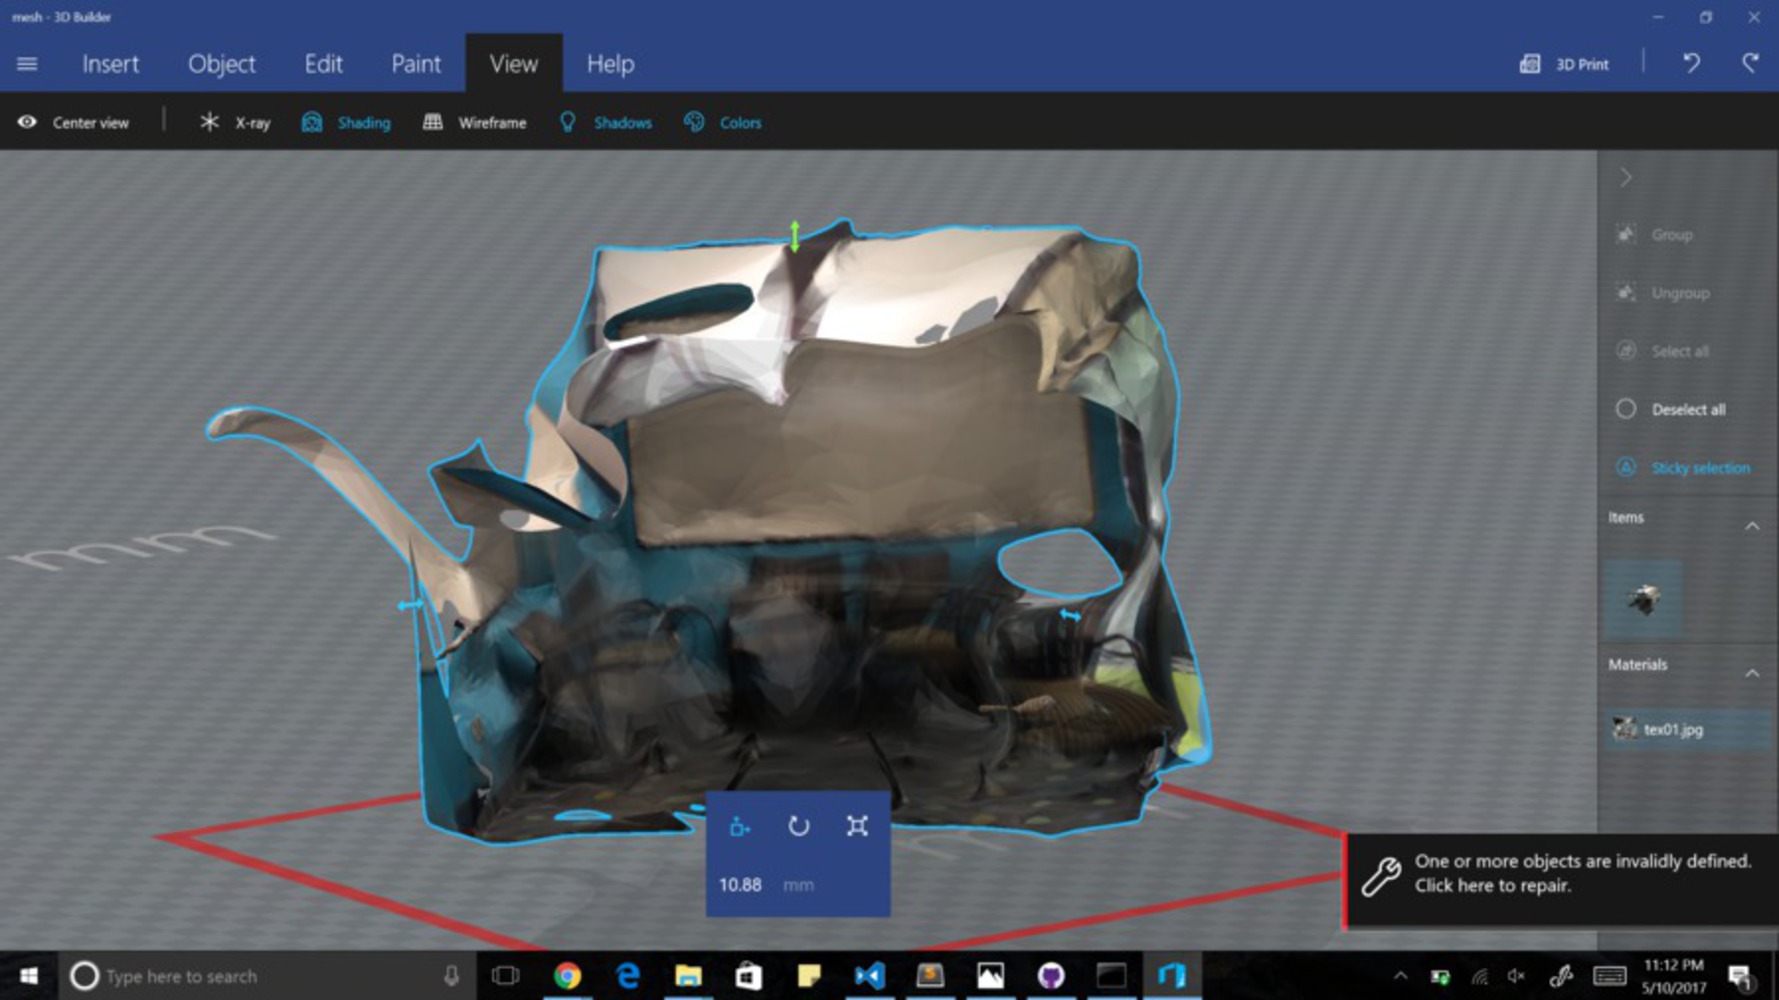
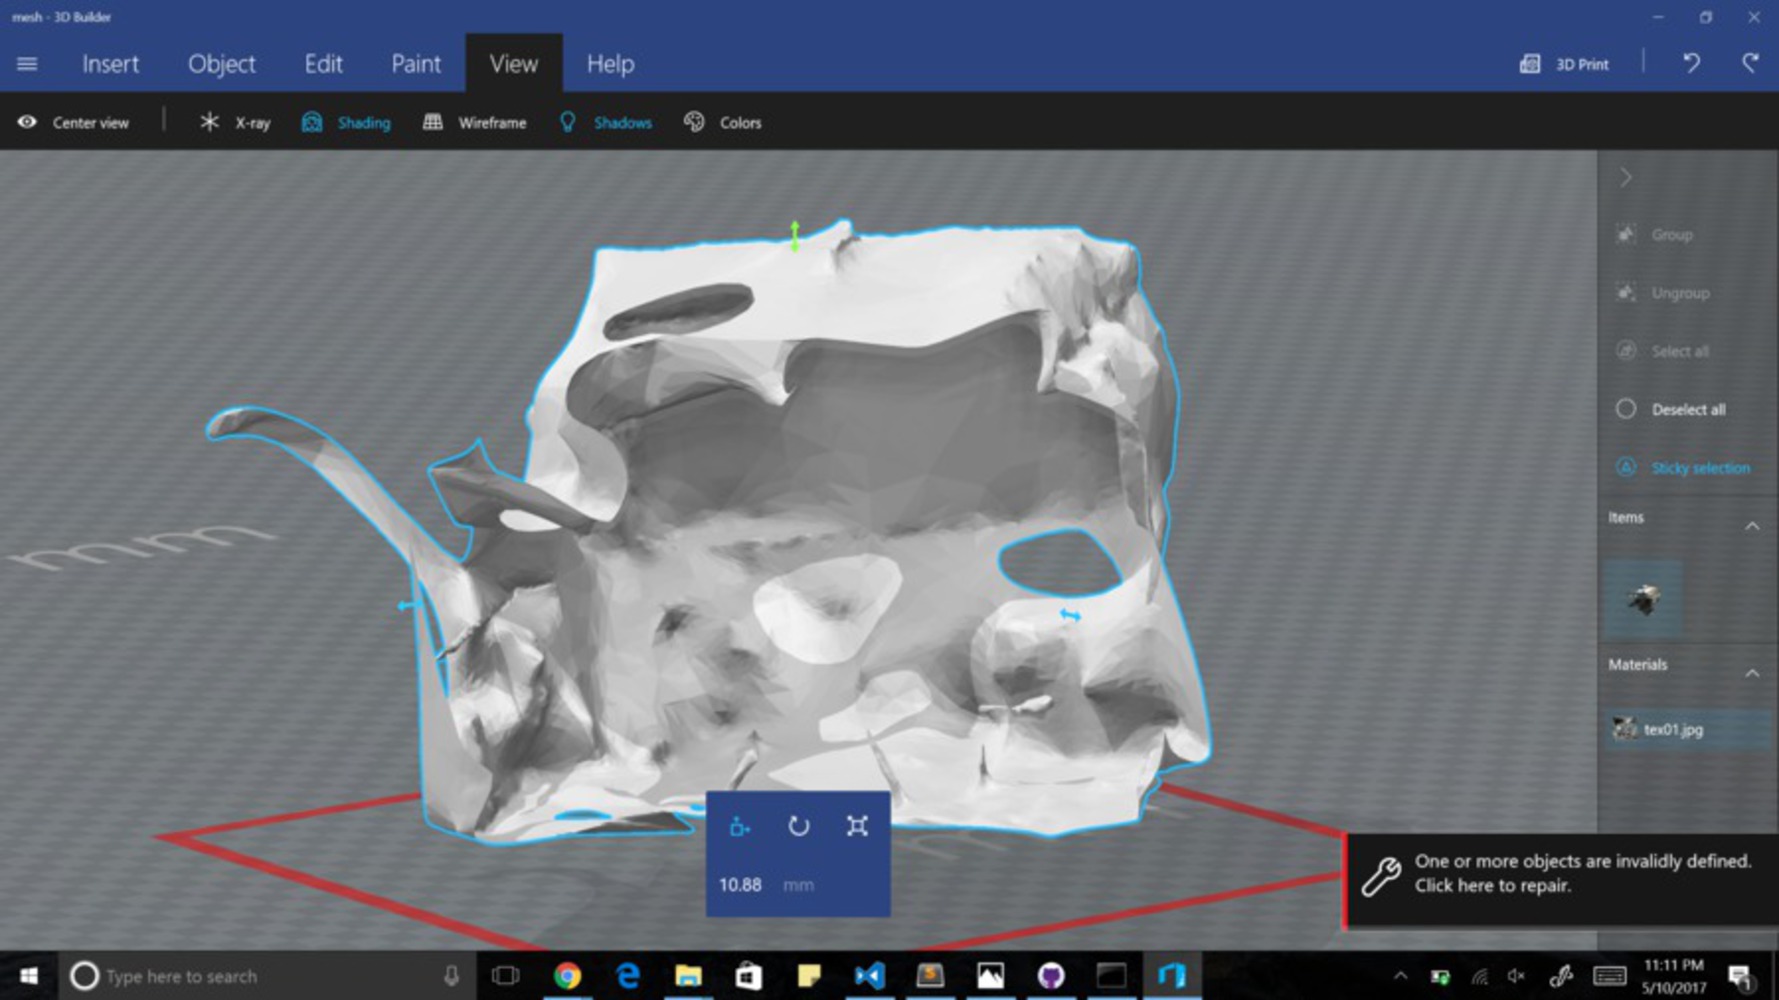
Creating A Rendering of the Room: Because efficient, accurate, readily-available object recognition does not currently exist, I have to recreate the room in an online rendering so that I can manually annotate the objects in a different language (and display these annotations in Augmented Reality). The technology to create a room rendering that is accurate is not readily available, so I tried doing it through photogrammetry and ReCap/ReMake. I used a Ricoh to take panoramic pictures of the room, used my code to change those panoramic pictures to 6 side-view pictures, and funneled those pictures into ReCap/ReMake to try to produce a rendering of the room.
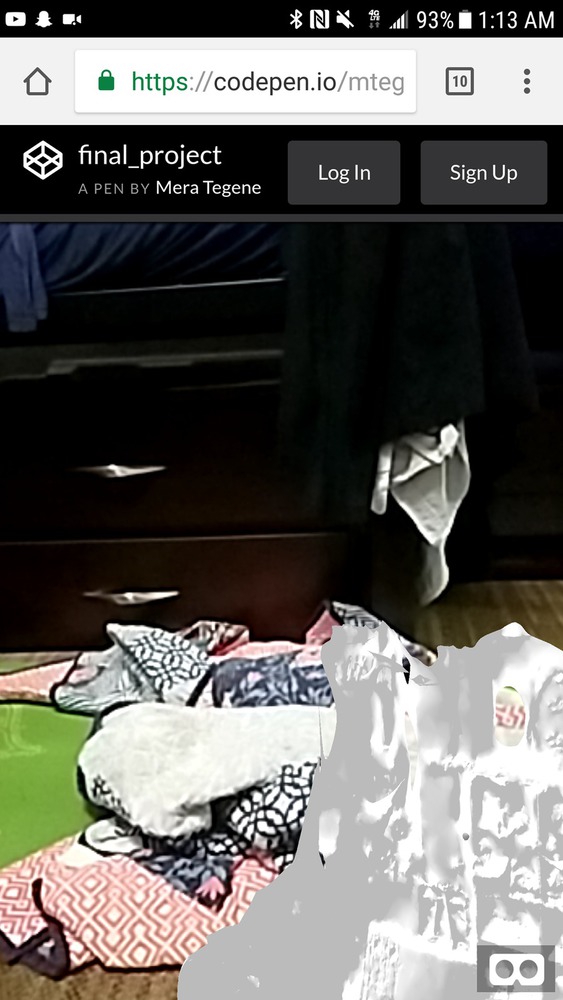
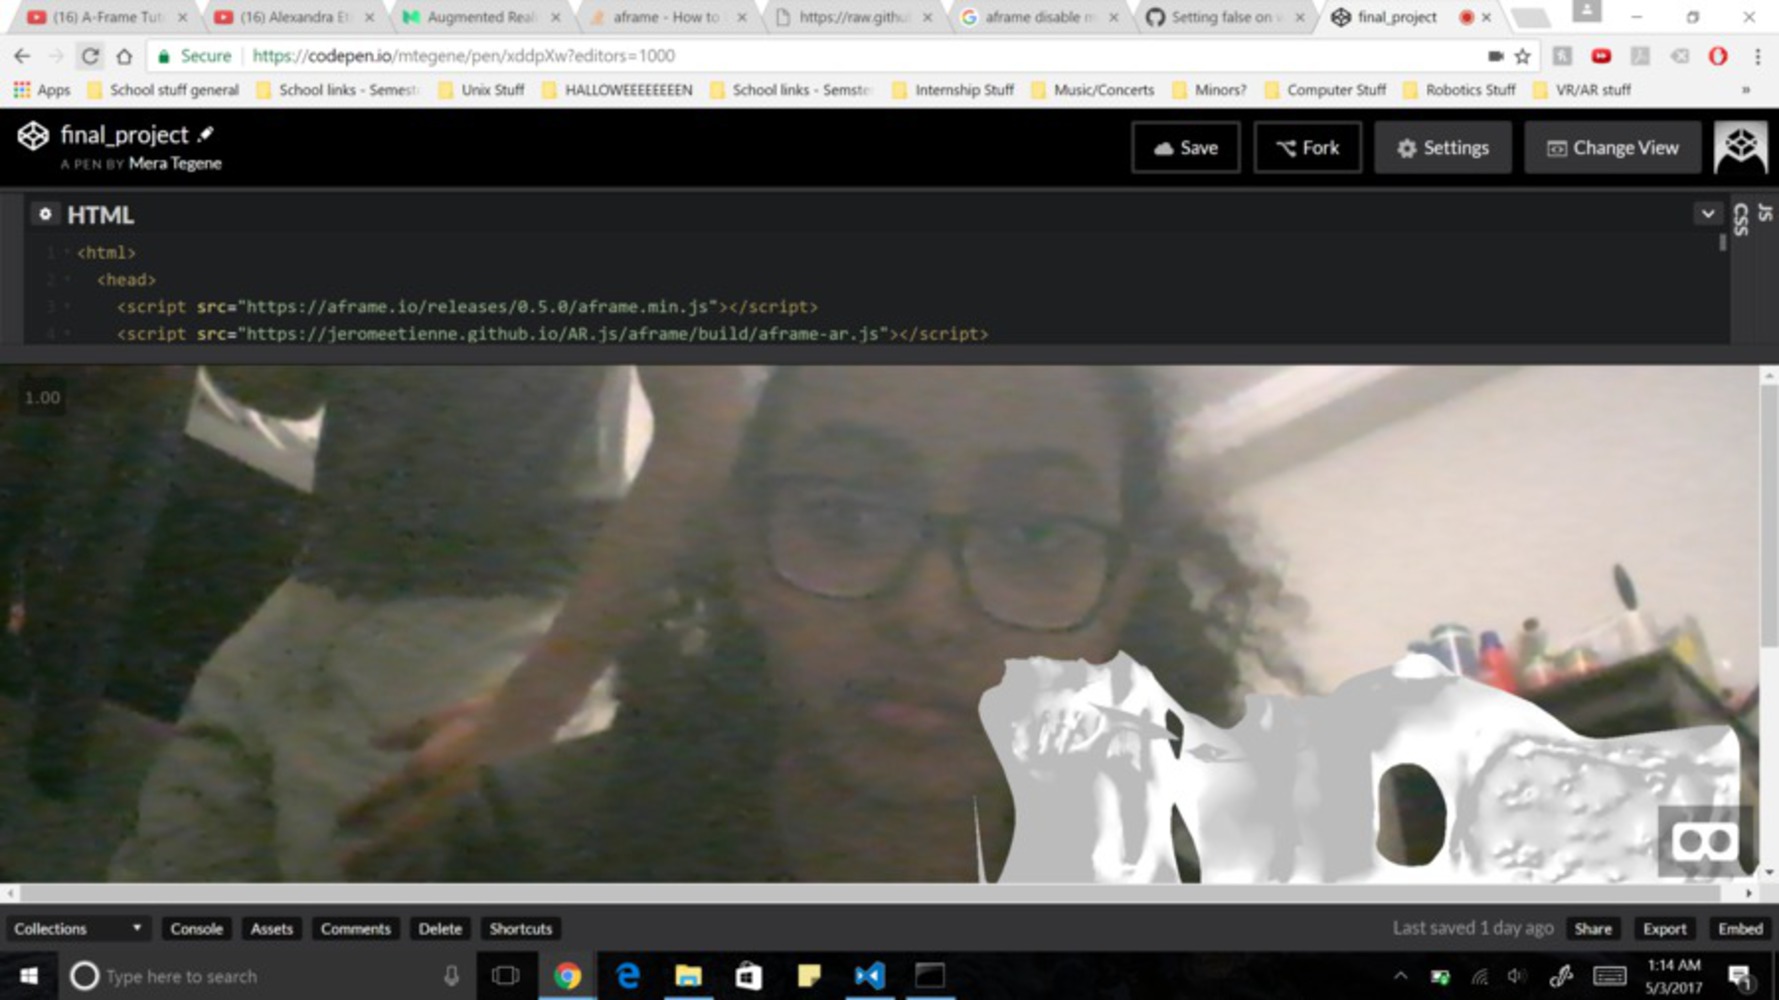
Displaying renderings in AR: I used AR.js and Aframe to display the rendering in Augmented Reality (AR). I hosted everything on glitch because I use WebSockets to communicate with the Vive Tracker which should be attached to the mobile device displaying everything. I need the Vive Tracker because mobile devices do not have accurate enough location tracking that I can easily use to figure out how the device is moving. By using the Vive Tracker, I can know where the mobile device is in the room and that allows me to know portion of the rendering I should be displaying (that's what the mover code does).
## This is the code that changed the panoramic picture into the respective 6 side
## pictures, so that I could funnel these pictures into ReMake/ReCap to from photos
## to 3D renderings of the room through photogrammetry

import math
import numpy as np
import cv2
import cv

def changing_uv_to_xyz(width, height):
    X, Y = np.meshgrid(np.linspace(-1.0, 1.0, width), np.linspace(-1.0, 1.0, height))
    Z = np.ones((width, height))
    return (X, Y, Z)

def rotating(coords, dir, width, height):
    X, Y, Z = coords
    R = compute_rot(dir)
    coords_rotated = R.dot([X.reshape(-1), Y.reshape(-1), Z.reshape(-1)])
    X_mod = coords_rotated[0, :].reshape(width, height)
    Y_mod = coords_rotated[1, :].reshape(width, height)
    Z_mod = coords_rotated[2, :].reshape(width, height)
    return (X_mod, Y_mod, Z_mod)

def compute_rot(dir):
    if ("front" == dir): #f
        return np.array([[-1.0, 0.0, 0.0],[0.0, 1.0, 0.0],[0.0, 0.0, 1.0]])
    elif ("left" == dir): #l
        return np.array([[1.0, 0.0, 0.0],[0.0, 0.0, 1.0],[0.0, 1.0, 0.0]])
    elif ("back" == dir): #b
        return np.array([[-1.0, 0.0, 0.0],[0.0, -1.0, 0.0],[0.0, 0.0, -1.0]])
    elif ("right" == dir): #r
        return np.array([[-1.0, 0.0, 0.0],[0.0, 0.0, -1.0],[0.0, 1.0, 0.0]])
    #figure out the next 2
    elif ("up" == dir): #u
        return np.array([[0.0, 0.0, 1.0],[0.0, 1.0, 0.0],[1.0, 0.0, 0.0]])
    else:               #down
        return np.array([[0.0, 0.0, -1.0],[0.0, 1.0, 0.0],[-1.0, 0.0, 0.0]])

def compute_trans (dir):
    if(dir == "up"):
        return 5 #y z
    elif(dir == "down"):
        return 6 #y z
    elif(dir == "left"):
        return 2 #x z
    elif(dir == "right"):
        return 4 #x z
    elif(dir == "front"):
        return 1 #identiy matrix
    else: #(dir == "back")
        return 3 #x z

def changing_into_theta_phi(coords_mod, src_width, src_height):
    X, Y, Z = coords_mod
    radius = (X ** 2.0 + Y ** 2.0) ** 0.5
    thetas = np.arctan2(X, Y)
    phis = np.arctan2(Z, radius)

    #now adust the thetas and phis to like the actual sorce image size
    thetas_shrunk = ((thetas / math.pi)) #now everything is from (-1.0, 1.0)
    thetas_shrunk_shifted = thetas_shrunk + 1.0 #now everything is from (0.0, 2.0)
    thetas_shrunk_some_more = thetas_shrunk_shifted * 0.5 #now everything is from (0.0, 1.0)
    thetas_mod = thetas_shrunk_some_more * src_width

    phis_shrunk = ((phis / math.pi)) #now everything is from (-0.5, 0.5)
    phis_shrunk_shifted = phis_shrunk + 0.5 #now everything is from (0.0, 1.0)
    phis_mod = phis_shrunk_shifted * src_height

    return (thetas_mod, phis_mod)

if __name__ == '__main__':
    source_images = [cv2.imread("C:\\Users\\Mitu\\Documents\\16457_project_stuff\\more_panos\\smaller_room_1\\Pic1.JPG"),
                     cv2.imread("C:\\Users\\Mitu\\Documents\\16457_project_stuff\\more_panos\\smaller_room_1\\Pic2.JPG"),
                     cv2.imread("C:\\Users\\Mitu\\Documents\\16457_project_stuff\\more_panos\\smaller_room_1\\Pic3.JPG"),
                     cv2.imread("C:\\Users\\Mitu\\Documents\\16457_project_stuff\\more_panos\\smaller_room_1\\Pic4.JPG"),
                     cv2.imread("C:\\Users\\Mitu\\Documents\\16457_project_stuff\\more_panos\\smaller_room_1\\Pic5.JPG"),
                     cv2.imread("C:\\Users\\Mitu\\Documents\\16457_project_stuff\\more_panos\\smaller_room_1\\Pic6.JPG"),
                     cv2.imread("C:\\Users\\Mitu\\Documents\\16457_project_stuff\\more_panos\\smaller_room_1\\Pic7.JPG"),
                     cv2.imread("C:\\Users\\Mitu\\Documents\\16457_project_stuff\\more_panos\\smaller_room_1\\Pic8.JPG")]
    #This is where I stored the panoramic images that I used

    dirs = ["front", "left", "back", "right", "up", "down"]

    count = 1

    for img in source_images:
        for dir in dirs:
            (X, Y, Z) = changing_uv_to_xyz(2048, 2048)
            (X_mod, Y_mod, Z_mod) = rotating((X, Y, Z), dir, 2048, 2048)
            (U, V) = changing_into_theta_phi((X_mod, Y_mod, Z_mod), 5376, 2688) ##5376, 2688
            pic = cv2.remap(img, np.array(U, dtype=np.float32),  np.array(V, dtype=np.float32), cv2.INTER_LINEAR)
            cv2.imwrite("C:\Users\\Mitu\\Documents\\16457_project_stuff\\more_panos\\smaller_room_1\\pics\\pic" + str(count) + "_" + str(compute_trans(dir)) + ".jpg", pic)
            #testing\\pics\\pic" + str(count) + "_" + str(compute_trans(dir)) + ".jpg", pic)
count = count + 1<!-- This is the code for making the AR work on you mobile device and make the rendering
appear. It access the git hub project that has all the necessary files I import (like
the rendering and the mover code).-->
<html>
<head>
<script src="https://aframe.io/releases/0.5.0/aframe.min.js"></script>
<script src="https://jeromeetienne.github.io/AR.js/aframe/build/aframe-ar.js"></script>
<script type="text/javascript" src="https://rawgit.com/mtegene/reality_computing_final_project/master/js/mover.js"></script>
</head>
<body>
<a-scene embedded artoolkit='sourceType: webcam;'>
<a-assets>
<a-asset-item id="mesh"
src="https://raw.githubusercontent.com/mtegene/reality_computing_final_project/master/renderings/mesh2.obj"></a-asset-item>
<a-asset-item id="texture" src="https://raw.githubusercontent.com/mtegene/reality_computing_final_project/master/renderings/tex2.mtl"></a-asset-item>
</a-assets>
<a-entity id="camparent" position="0 0 0" mover>
<a-camera id="camera" rotation="0 90 0" aframe-injected="" look-controls="enabled: false"></a-camera>
</a-entity>
<a-entity id="mesh_1" position="-3.5 -0.77 0" rotation="-76 64 23" obj-model="obj: #mesh"></a-entity>
</a-scene>
</body>
</html>I have to actually scale these renderings to accurately represent the portion of the room they are a rendering of. And after that I would have to annotate them.
(This is not too difficult of a task, just kind of tedious, so I have put it off because I want the rest of the project to work properly before doing this part.)
//code for mover component of the camera parent that is supposed to move the camera
//around according to the Vive Tracker (through a web socket)
//The WebSocket stuff is done by using Professor Pyry's code

AFRAME.registerComponent('mover', {
  init: function() {

    var socket = new WebSocket("wss://rapid-fountain.glitch.me/");

    socket.onmessage = function (evt) {
      var msg = JSON.parse(evt.data);

      if (msg[0] === "broadcast")
      {
        var pos = (msg[2]).postion;
        var dir = (msg[2]).quaternion;

        this.el.setAttribute("position", {x: pos[0], y: pos[1], z: pos[2]});

        var theObject3D = document.querySelector('#camparent').object3D;
        theObject3D.quaternion = dir
      }
    };

    socket.send(JSON.stringify(["register", "vive"]));
  }
});https://rapid-fountain.glitch.me/
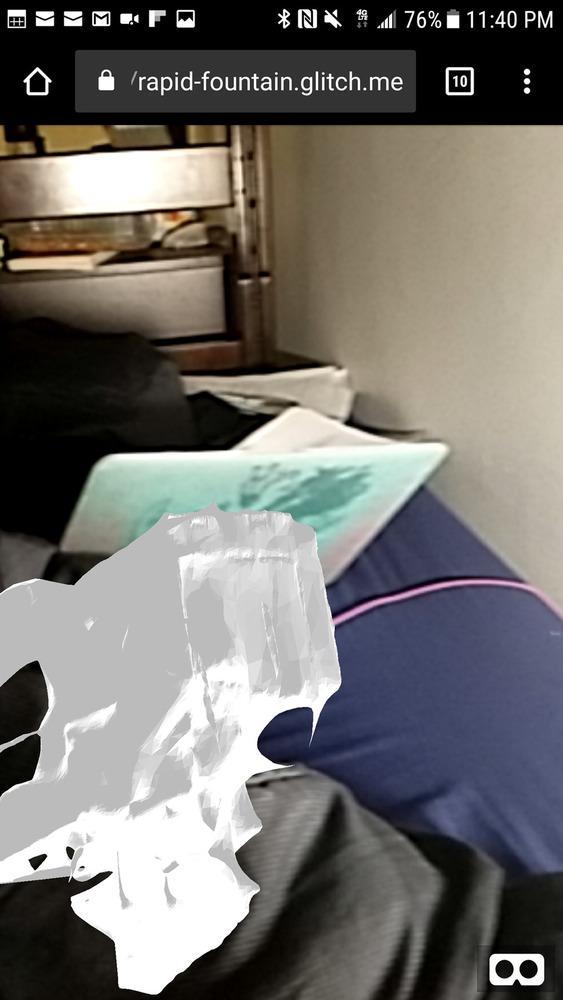
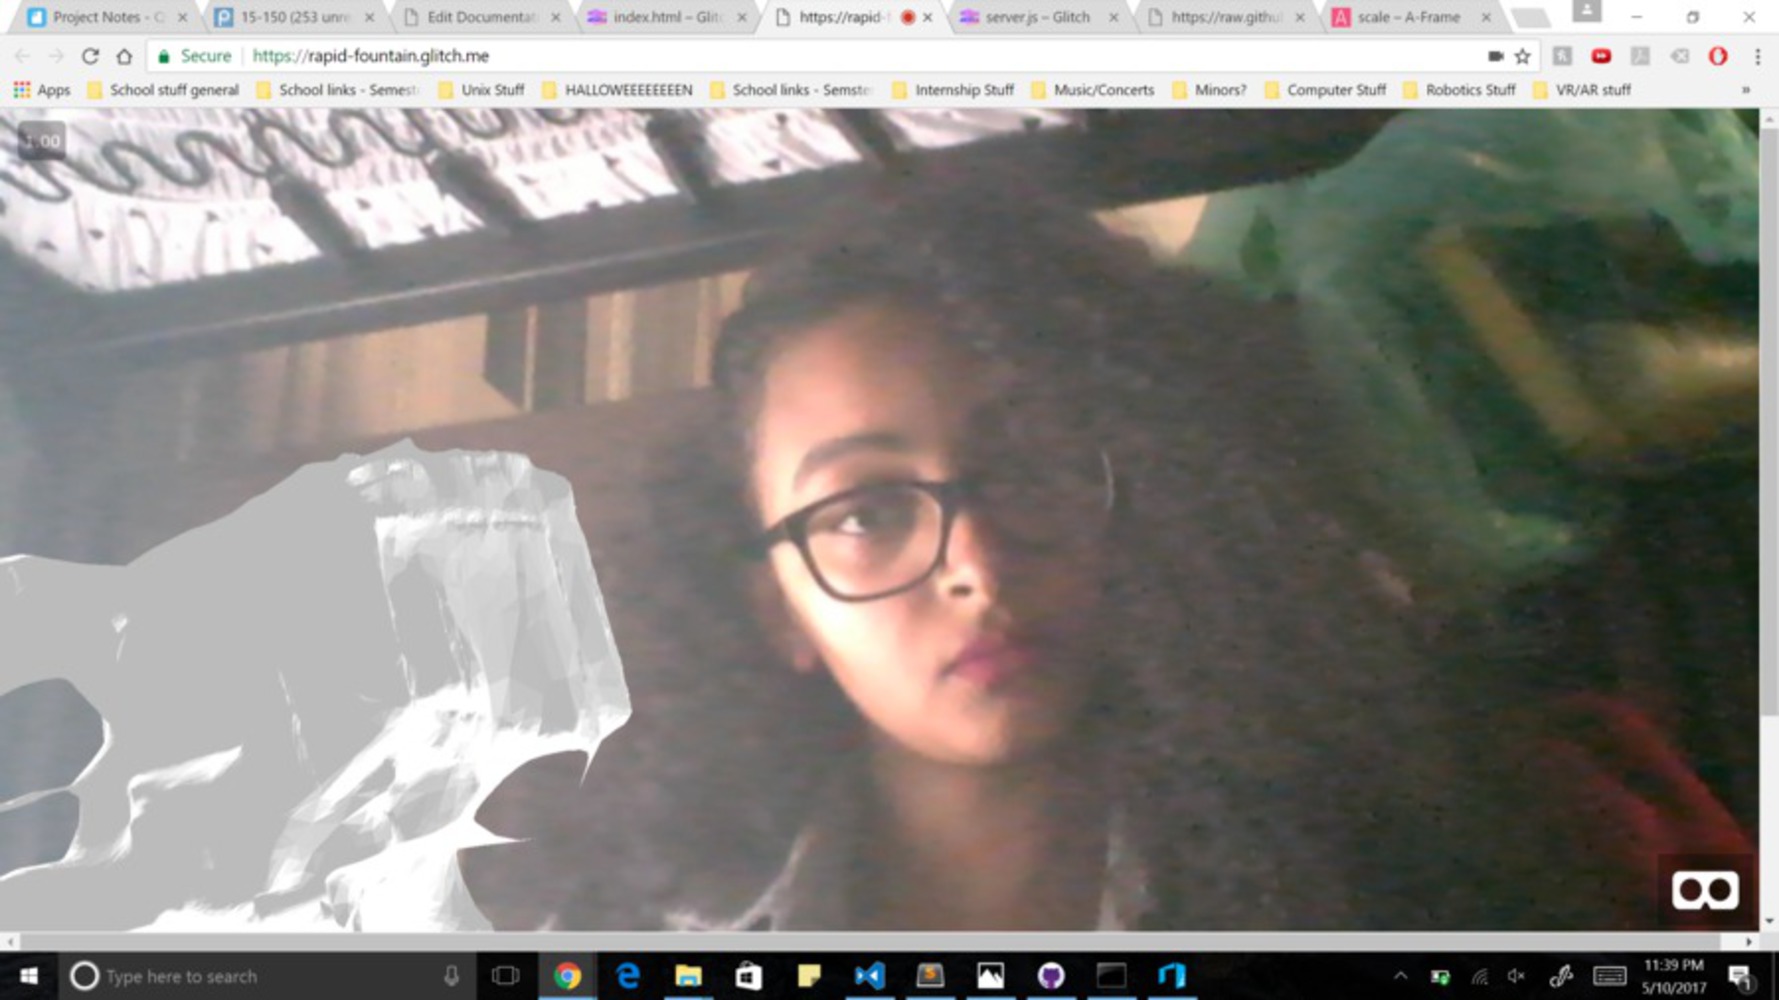
This is the link to the website. Run this on your mobile device with a Vive tracker attached.
https://github.com/mtegene/reality_computing_final_project
This is the link to the git hub project, where you can find the mover code and some of the renderings I made.
DISCLAIMER: project is still not done because I need to do the scaling and annotating, and more importantly, make sure the Vive Tracker's information is being correctly used to modify what is displayed.
I want to create an application that aids in language learning. Building your vocabulary is an important aspect of learning a new language, and I believe it would be helpful if common objects were annotated (using AR) in the language you are trying to learn. That is what my projects attempts to do.