Kenny Harsono - Working with Inputs & Sensors
Made by kharsono
Made by kharsono
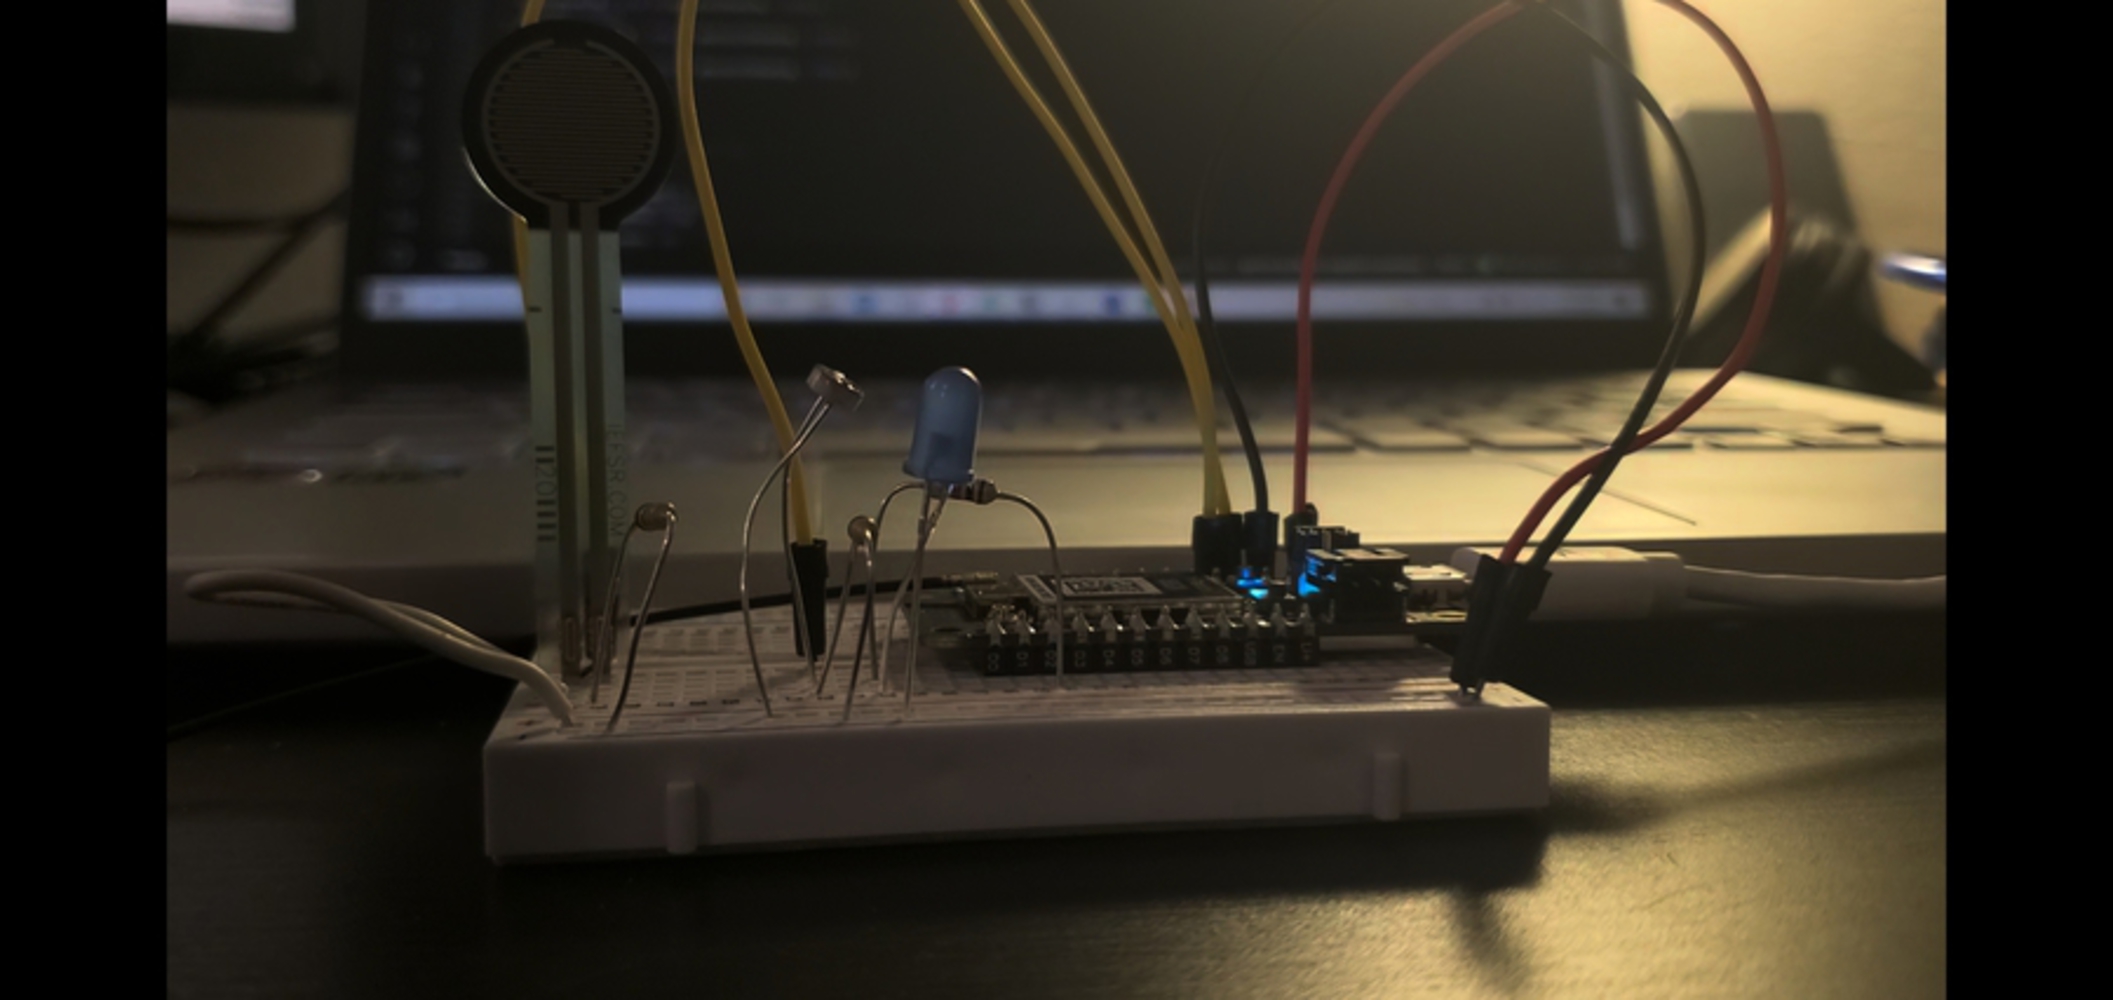
Force sensor & photoresistor inputs are being explored as a rudimentary example of when home lights should be turned on.
Created: November 3rd, 2021
Working with Inputs & sensors explore the array of input sensors, with an LED to notify users how much sensors senses data: Photoresistor, Photoresistor Inversion, Filtering & Force sensor integration.
// Ex 1
int photoCellPin = A0;
int photoCellReading = 0;
int ledPin = D2;
int ledBrightness = 0;

void setup()
{
  pinMode(ledPin, OUTPUT);

  // Create a cloud variable of type integer called 'light' mapped to photoCellReading
  Particle.variable("light", &photoCellReading, INT);

}

void loop()
{
  // This gives us a value from 0 to 4095
  photoCellReading = analogRead(photoCellPin);

  // Map this value into the PWM range (0-255)
  ledBrightness = map(photoCellReading, 0, 4095, 0, 255);

  // fade the LED to the desired brightness
  analogWrite(ledPin, ledBrightness);

  // wait 1/10th of a second and then loop
  delay(100);
}// Ex 1.1
int photoCellPin = A0;
int photoCellReading = 0;
int ledPin = D2;
int ledBrightness = 0;
void setup()
{
pinMode(ledPin, OUTPUT);
// Create a cloud variable of type integer called 'light' mapped to photoCellReading
Particle.variable("light", &photoCellReading, INT);
}
void loop()
{
// This gives us a value from 0 to 4095
photoCellReading = analogRead(photoCellPin);
// Map this value into the inverted PWM range
ledBrightness = map(photoCellReading, 0, 4095, 255, 0);
// fade the LED to the desired brightness
analogWrite(ledPin, ledBrightness);
// wait 1/10th of a second and then loop
delay(100);
}int photoCellPin = A0;
int photoCellReading = 0;
int ledPin = D2;
int ledBrightness = 0;
void setup()
{
pinMode(ledPin, OUTPUT);
// Create a cloud variable of type integer called 'light' mapped to photoCellReading
Particle.variable("light", &photoCellReading, INT);
}
void loop()
{
// This gives us a value from 0 to 4095
photoCellReading = analogRead(photoCellPin);
if (photoCellReading < 2000) {
ledBrightness = 255;
}
else {
ledBrightness = 0;
}
// fade the LED to the desired brightness
analogWrite(ledPin, ledBrightness);
// wait 1/10th of a second and then loop
delay(100);
}2 parts: Brief in getting the sensor data online (video 1) + integrating outputs with if statements (video 2).
These 2 sensors integration represents a proof-of-concept for an autonomous lighting being turned on, when the sun sets (dim environment) or when the user steps in the house (high force).
Following Conditions:
- Dim environment ONLY: Fast blink 5 times
- High Force ONLY: Medium blink 3 times
- Dim environment & high force: Long 1 blink
int photoCellPin = A0;
int photoCellReading = 0;
int forcePin = A1;
int forceReading = 0;
int ledPin = D2;
int ledBrightness = 0;

void setup()
{
  pinMode(ledPin, OUTPUT);

  // Create a cloud variable of type integer called 'light' mapped to photoCellReading
  Particle.variable("light", &photoCellReading, INT);
  Particle.variable("force", &forceReading, INT);
}

void loop()
{
  // This gives us a value from 0 to 4095
  photoCellReading = analogRead(photoCellPin);
  forceReading = analogRead(forcePin);

  if (forceReading > 2000 && photoCellReading < 2000) {
      blink(1, 2000);
  }
  else if (forceReading > 2000 && photoCellReading > 2000) {
      blink(3, 500);
  }
  else if (forceReading < 2000 && photoCellReading < 2000) {
      blink(5, 200);
  }
  else {
      ledBrightness = 0;
  }

  // wait 1/10th of a second and then loop
  delay(100);
}

void blink(int times, int del) {
    for (int i=0; i < times; i++) {
        analogWrite(ledPin, 255);
        delay(del);
        analogWrite(ledPin, 0);
        delay(del);
    }
}The biggest takeaway from this project is the resistor values that accompanies the sensors. The sensor's sensitivity increases as pull-down resistor values decrease, however, this may be counterproductive as high sensitivity may not be desired.
Another note is the diversity of the devices, specifically trying out different kinds of output since the topic we learnt this week revolves around ambient devices provoking different senses.