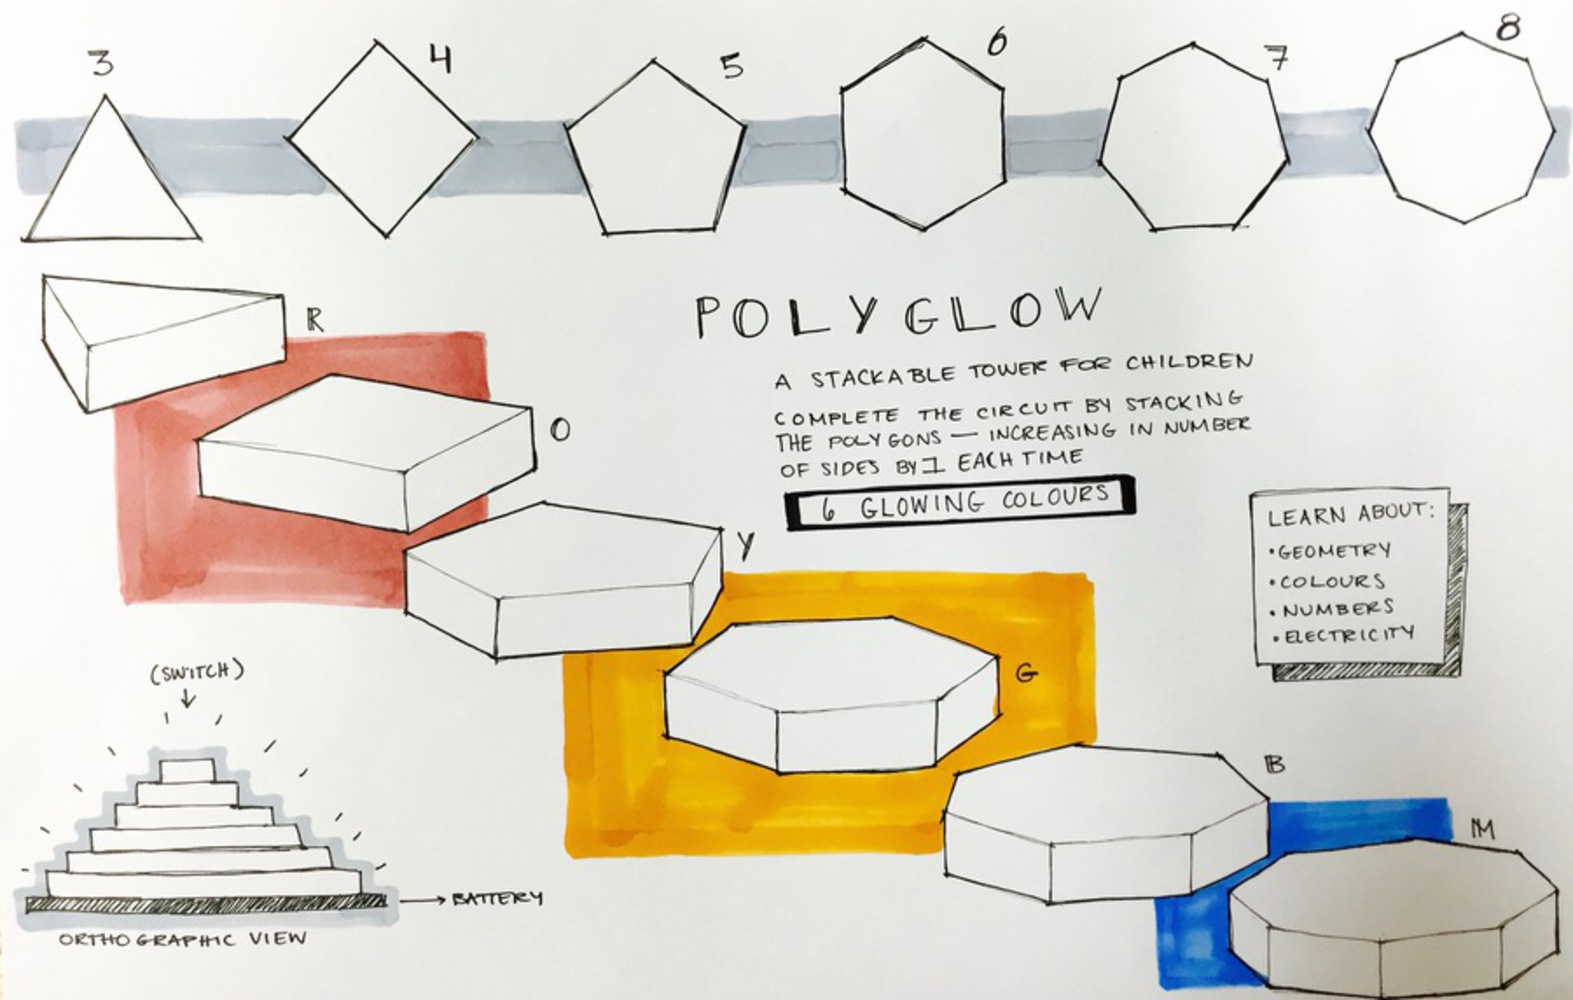
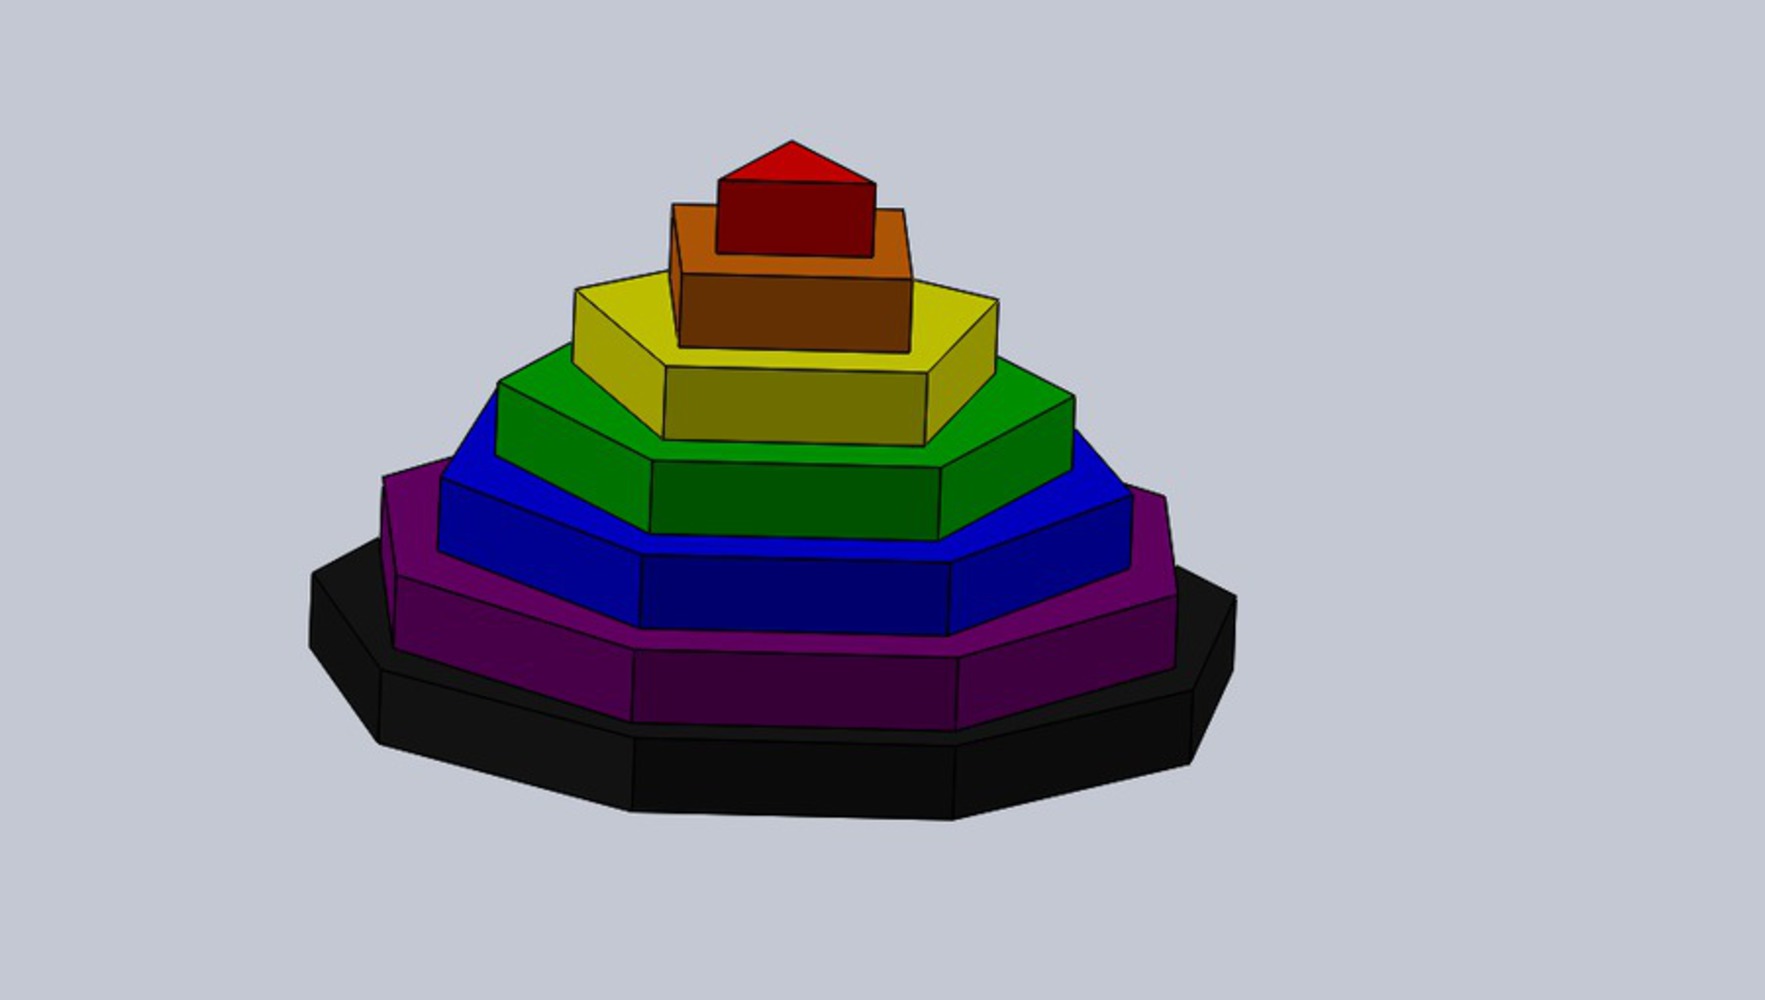
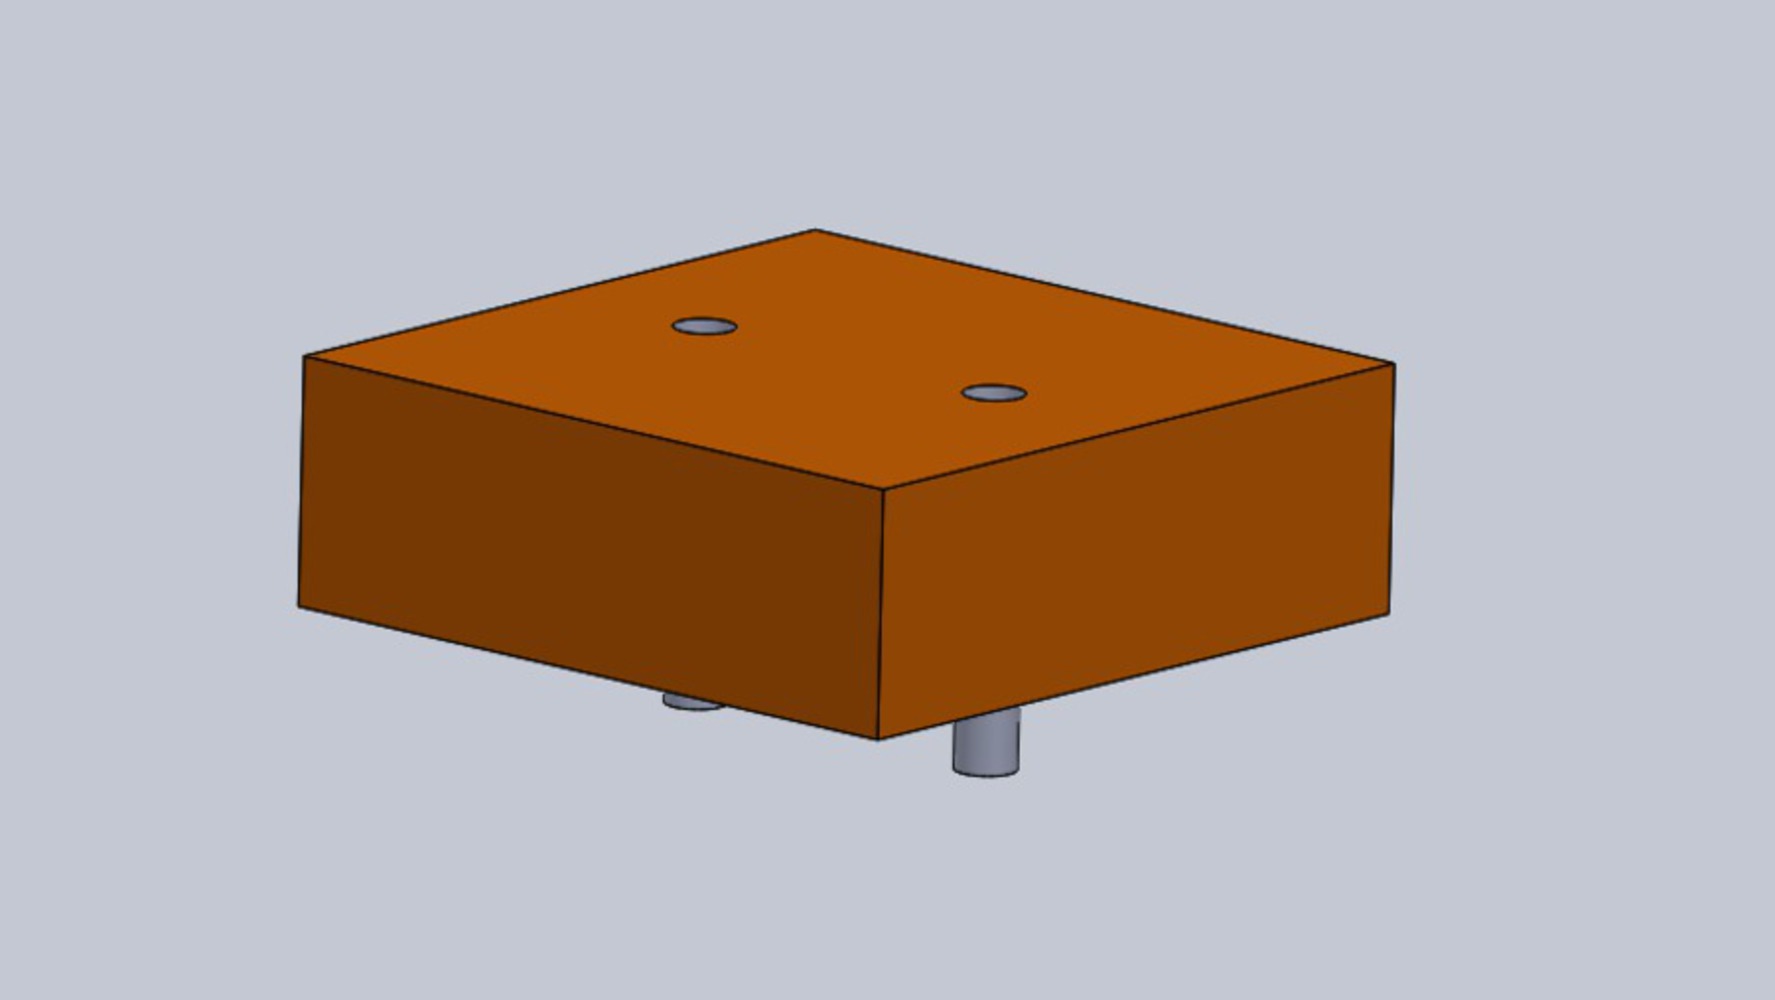
Created: February 13th, 2016

0

Description

The PolyGlow works like typical children's building blocks, save they light up when connected together. These blocks would introduce children to the concepts of circuits and electricity. This toy came from Angee's love of Light-Brite as well as legos. Children can learn basic polygons, colors, numbers, and some motor skills, while also learning the concept of a switch and completing a circuit.

0

Manufacturing

The main blocks and base will be laser cut from translucent acrylic and fit together like puzzle boxes at the edges. We will have to CAD files for each individual block since they are all different shapes.

For the electrical connection, we are thinking of using small (1/8") cylinder stock aluminum. We will drill holes in the stock that mate with aluminum pegs (maybe turned on a lathe or shaved down in another manner) to connect the circuit.

We will order a big plastic switch to attach to the top block to make it easy for the child to switch on and off the circuit.

We will order LED strips in coordinating colors to the acrylic to add to the circuit.

We may also use the laser cutter for cutting adhesive vinyl for decorations on the sides of the shapes, such as numbers and color names.

0

Preliminary CAD Models

0

Reflection

Our initial design was intentionally simple due to the time frame of our project. We only made minor changes with the electrical connections and our CAD models. This toy meets aesthetic standards, but we are concerned with how much the children will actually learn about electricity. Our other concern is the level of interaction that this toy provides; it may not be entertaining enough to keep the attention of kids. As we move forward, we are trying to create a deeper level of interaction and a more enriching learning experience for the kids who play with our toy.

As the kids played with our toy, we noticed a number of things we would change in the second iteration. We would like to have bigger connections that are easier to put together. This would be easier for the kids to handle and would prevent them forcing the connection in the wrong orientation. We would also use a slower drying epoxy so that we could do a neater job of putting the polygons together.

All in all, the 4th grade kids seemed to enjoy our project, despite the fact that it was designed for a much younger age group. There was a large range of knowledge base about electricity, but they all seemed to be interested in learning about how circuits work and how our project was utilizing different circuit configurations. This was a pretty effective and visually appealing way to teach parallel and series circuits and we hope to improve upon this as we move into our third project, RGB Glow.

0

Building

0

Sarika solders the connections to the LED strips.

0

Angee hot glues the LEDs to ensure the safety of our toy.

0

Matching the strips of LEDs with the appropriate polygon boxes.

0

Our box of materials.

0

The Finished Product!

x
Share this Project

Courses

39-245 Rapid Design through Virtual and Physical Prototyping

· 0 members

Introduction to rapid design through virtual and physical prototyping. The class will cover the design process, problem solving methods, interdisciplinary team work, current industrial practice, an...more


Focused on
About

~