PoliTherm (The Political Thermometer)
Made by Travis Chambers and Jonathan Dyer
Made by Travis Chambers and Jonathan Dyer
PoliTherm is a thermometer that changes temperature and lighting arrangement based upon the sentiment of the Twitterverse on a given politician, whose name is displayed via the screen.
Created: February 19th, 2017
When we set out to create PoliTherm we wanted a way to express the current partisan political climate that was more than visual. By adding the temperature aspect to the project we aimed to allow people to literally feel the effect of their words. Originally, we aimed to create a wearable but found that there were too many electronics to allow the user to fit comfortably on the wearer. As such, we moved to a design that allowed the PoliTherm to hold space similar to a clock, a peripheral that fades into the background but is readable at a glance, while at the same time drawing attention with the "touch here!" signs.
The idea for this project came from a wearable project created in Physical Computing a couple of years ago called "The Burn Band" that increased its temperature anytime the hashtag #FeelTheBurn was used on Twitter. Their project focused on Bernie Sanders during his rise to political fame but with our project, we capitalized on the attention being paid to politics during Trump's first 100 days. Our device reflects a sentiment analysis on Bernie Sanders as well as other well known like Barack Obama, Donald Trump and Cory Booker.
When we found that the electronics were too bulky for the wearable format we researched similar projects and learned about the Cryoscope that allows you to touch the weather by heating or cooling a metal slab corresponding to a forecast of tomorrow’s temperature We then created a similar interface and casing to it. We also wanted to give the PoliTherm a form factor that allowed it to fade into the periphery of view after entering a room, so we decided to add a hook that allowed it to be hung on a wall.
The development of PoliTherm had several different steps each with its own hurdles to overcome.
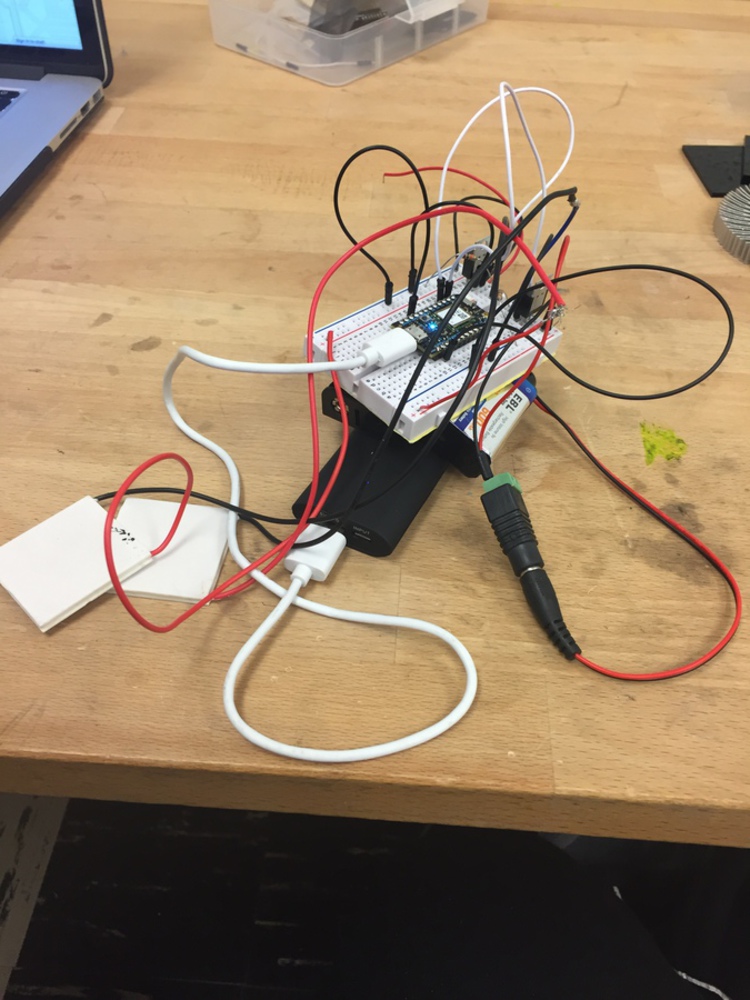
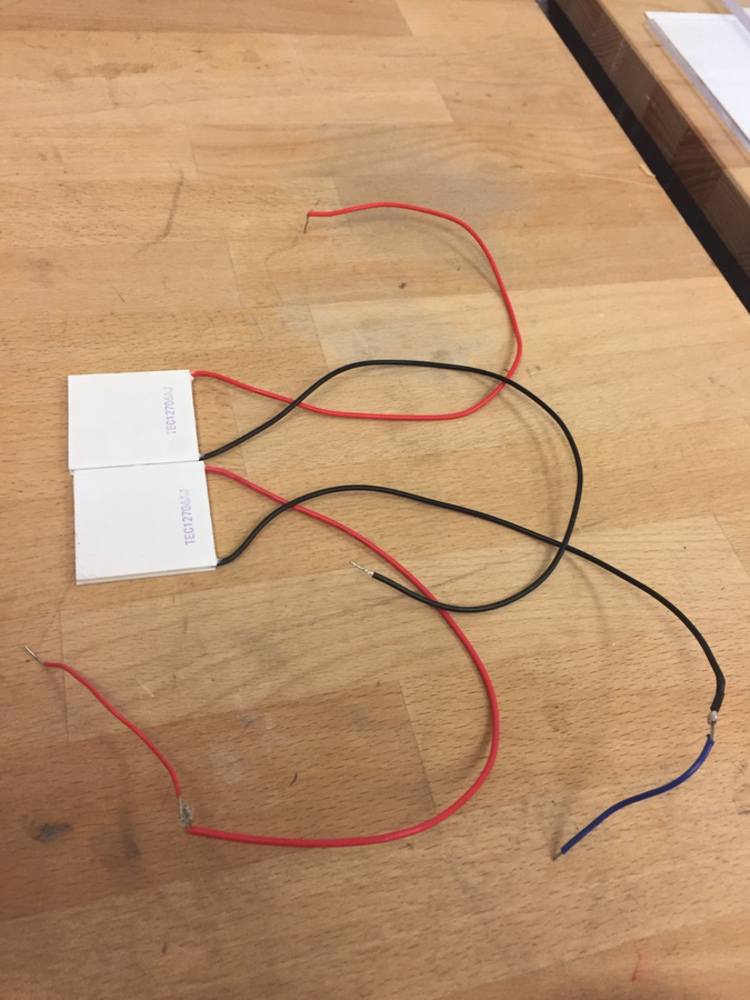
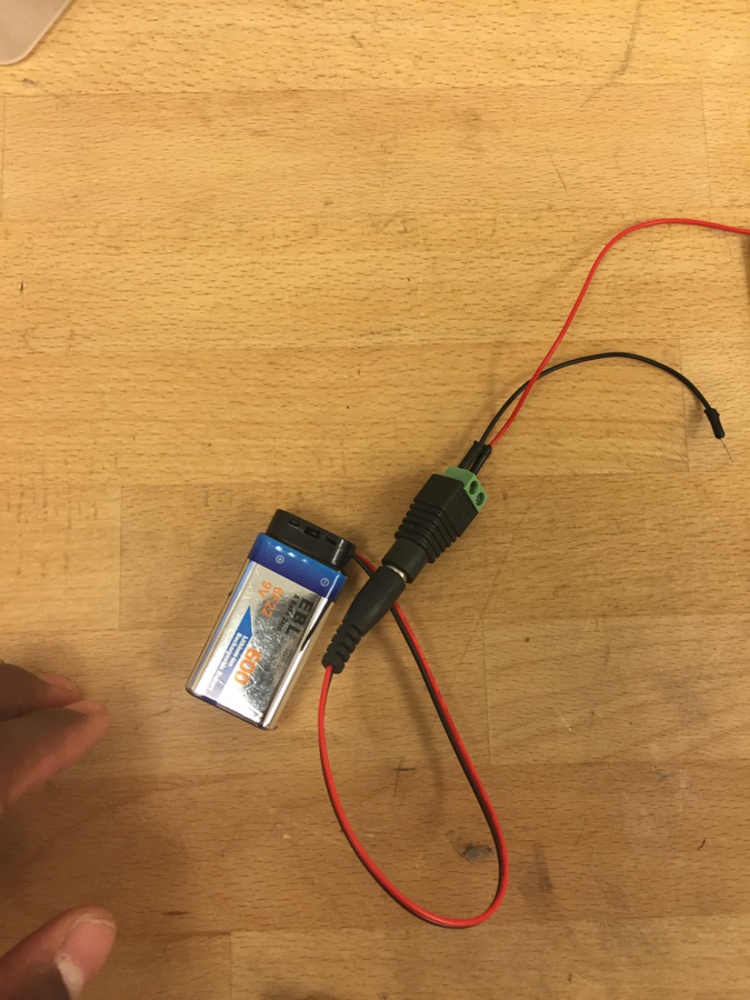
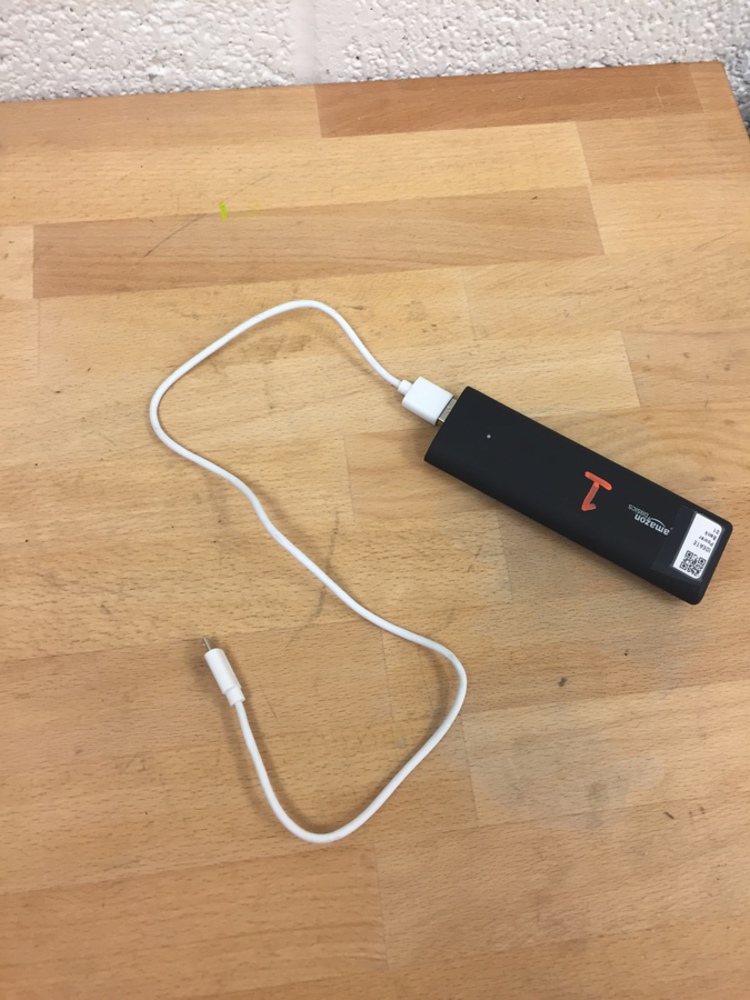
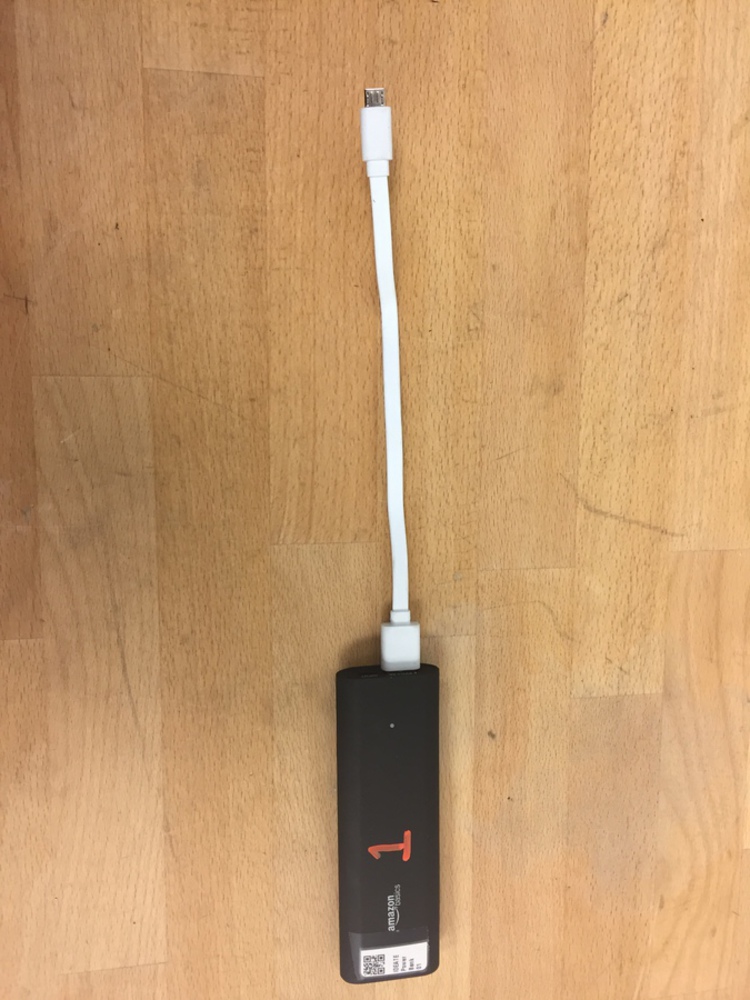
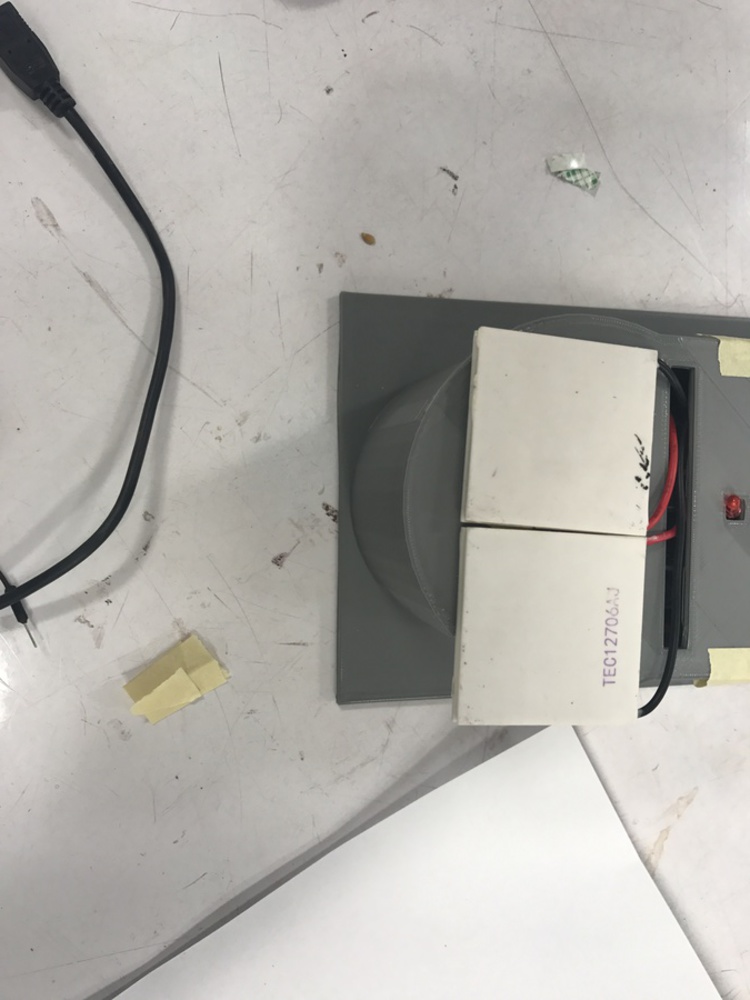
To start, JD worked on the hardware: learning how to use the Peltier Thermoelectric coolers that provided the changes in temperature, and making the hardware portable. Simultaneously, Travis worked on developing a Python script that scraped Twitter to compile tweets on a given Twitter handle (i.e. of the politician) and used an API to run a sentiment analysis on each to give a corresponding score. After both parts were developed independently, they were brought together using IFTTT's maker channel to call a function written in the Particle Dev IDE. Originally, the user could input the name of a politician and the temperature would change (hot or cold) to reflect the sentiment analysis of the particular politician. This step of the project was very taxing as it involved the most debugging of code and dealing with completely new hardware (Peltier junction) and software (Sentiment API).
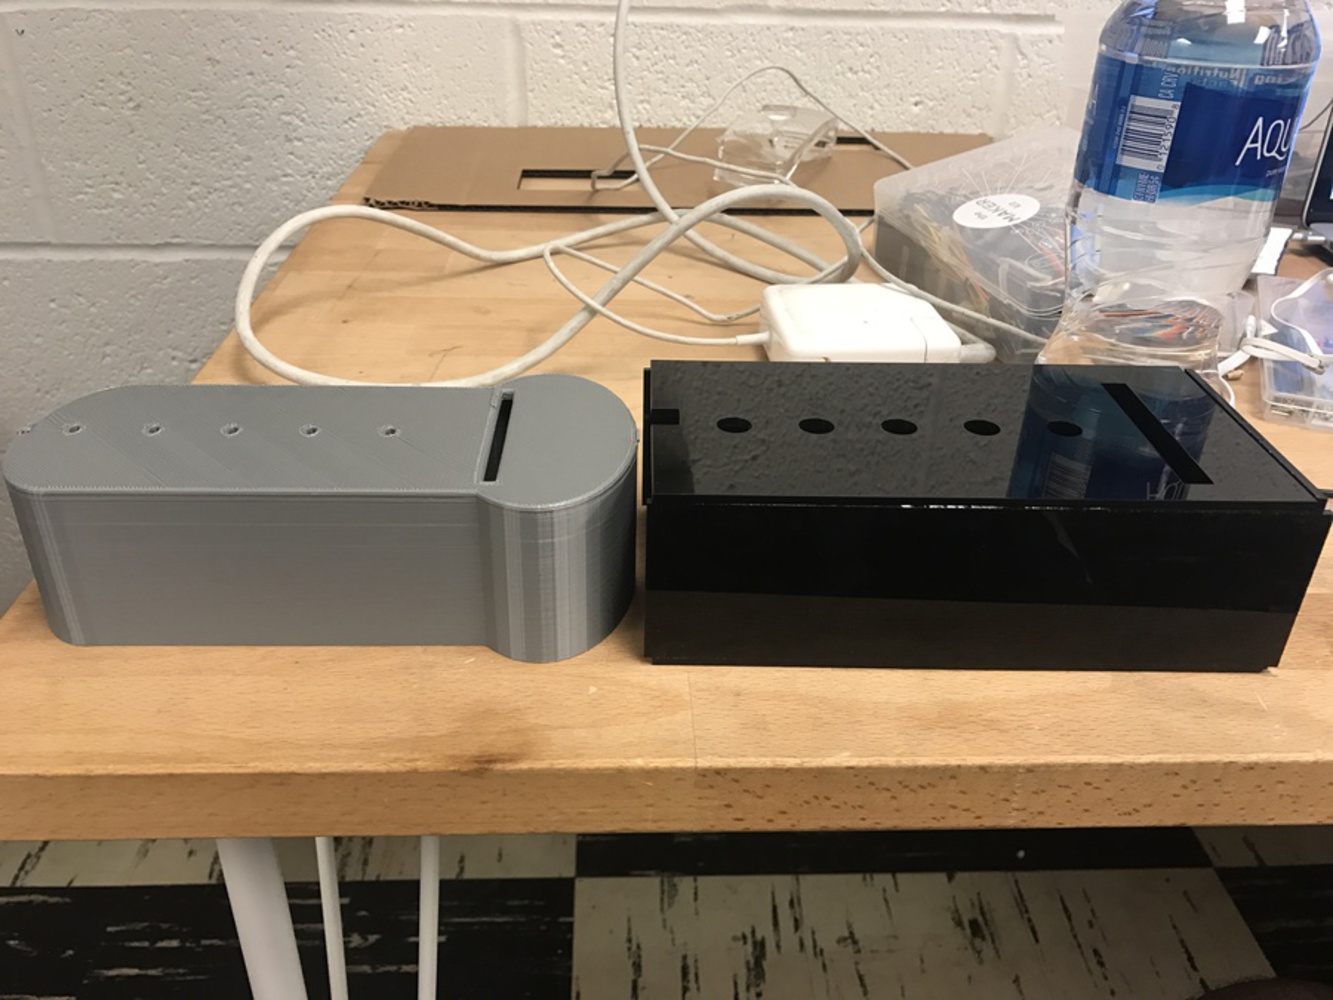
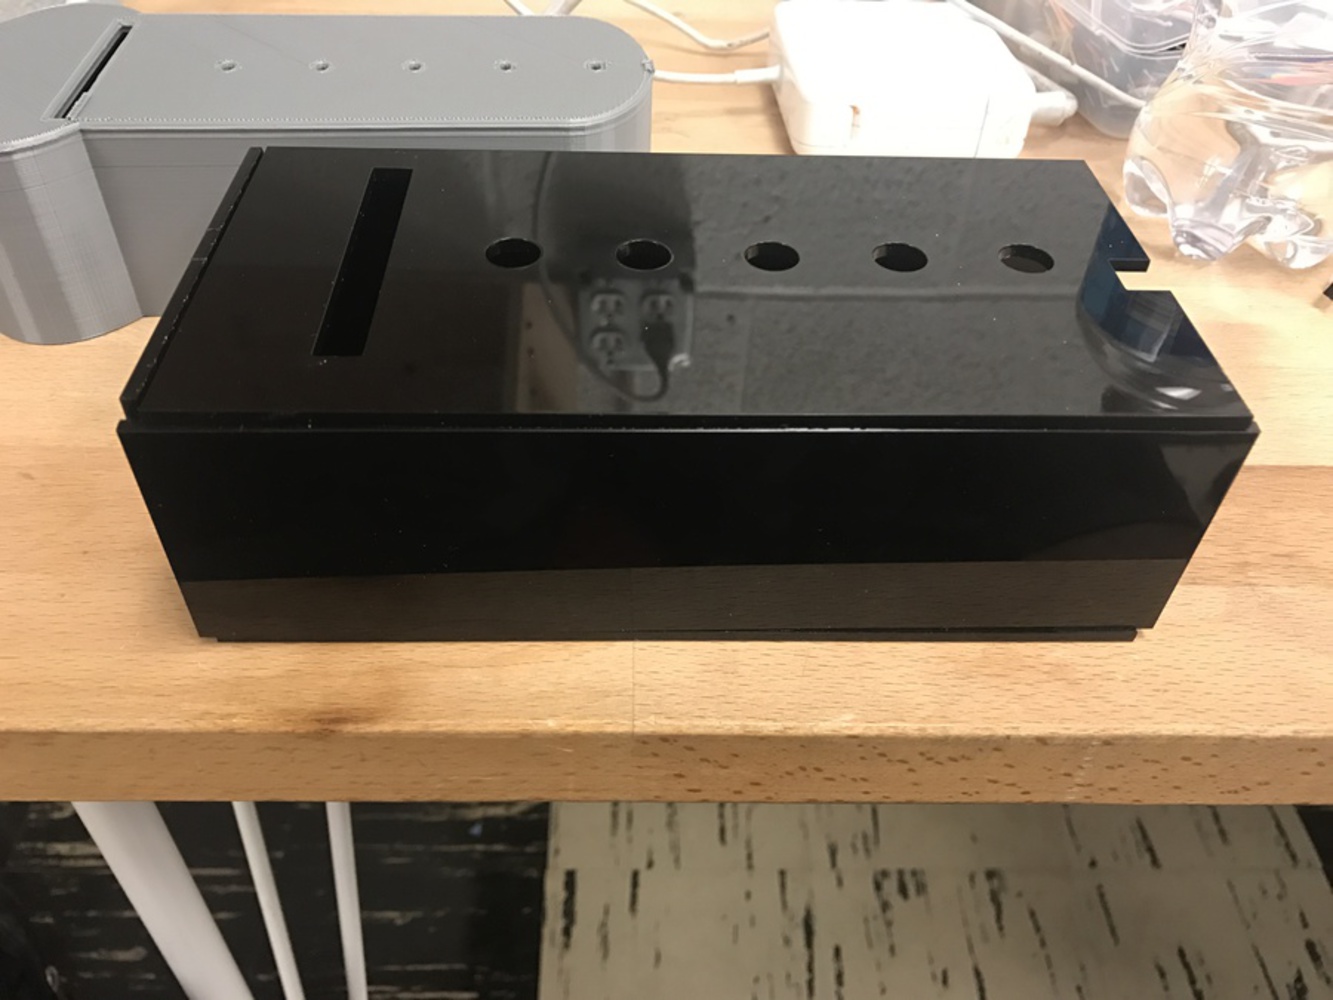
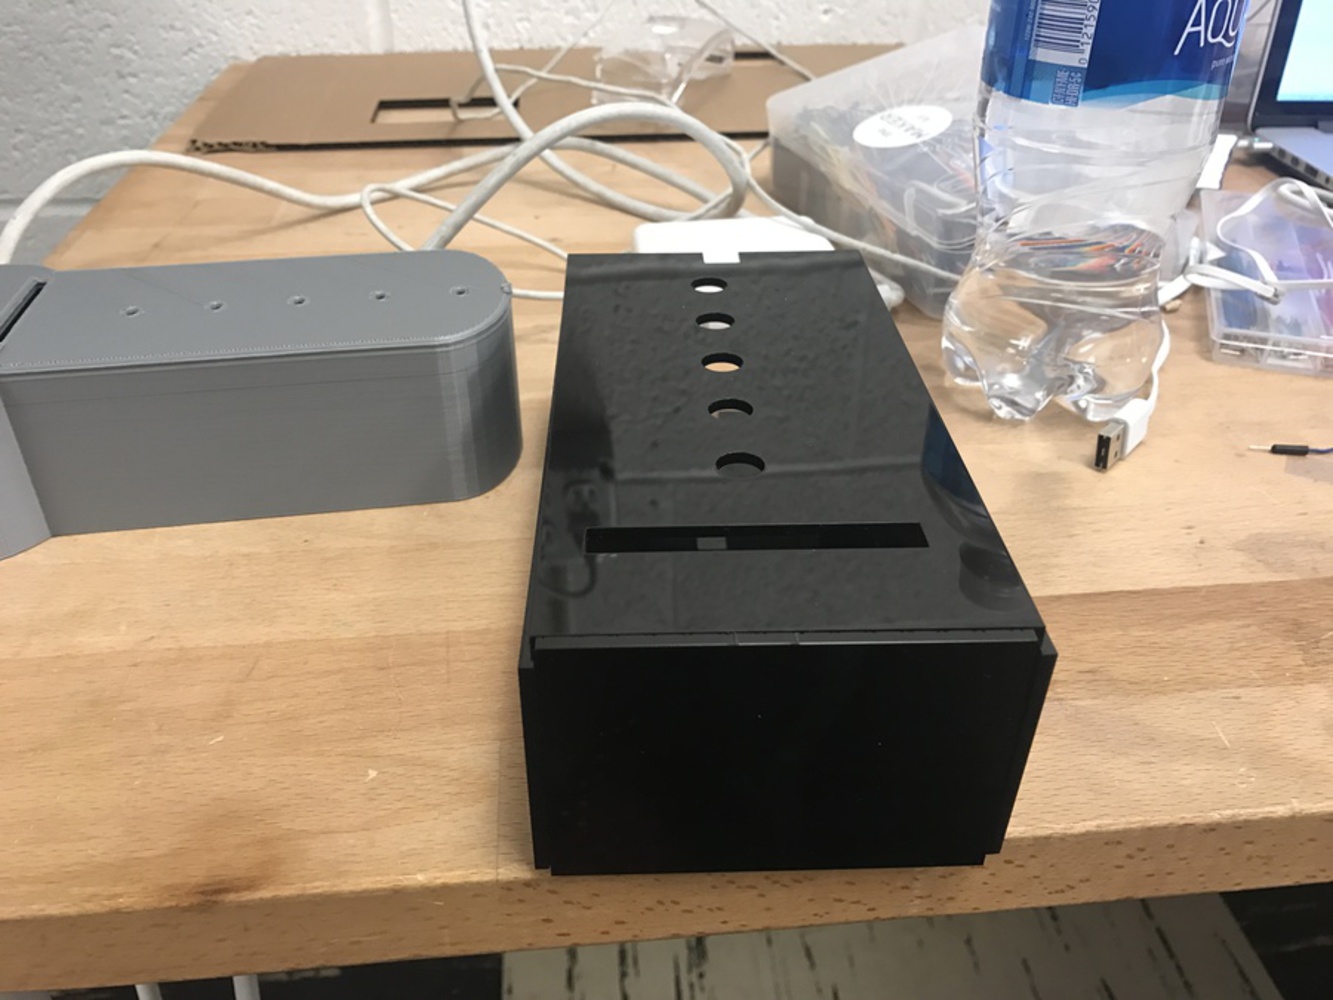
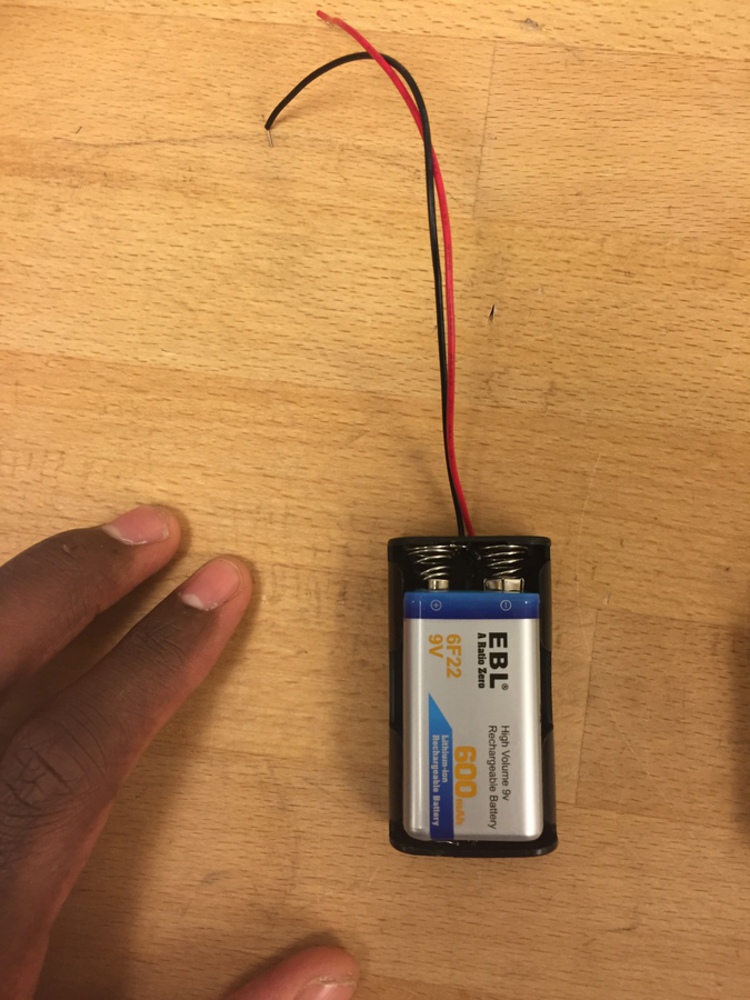
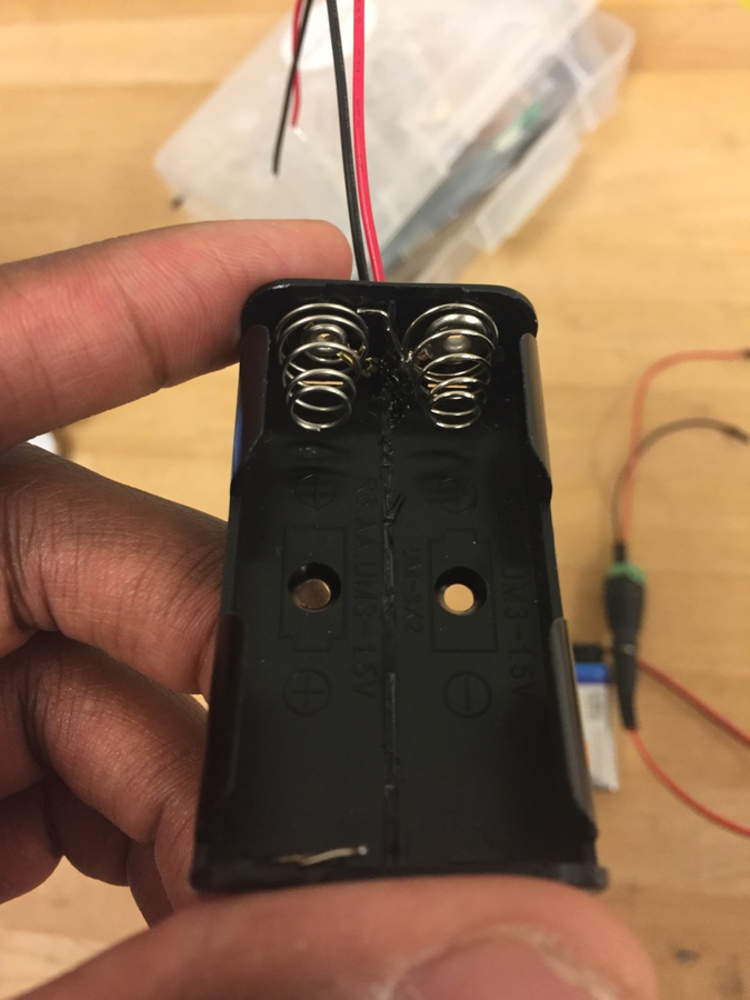
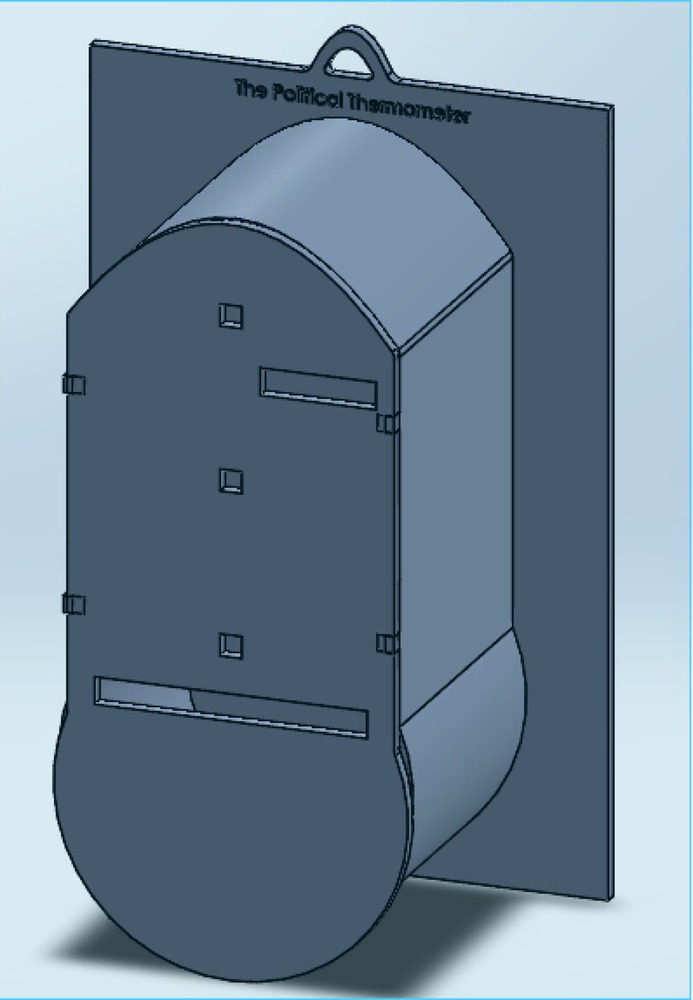
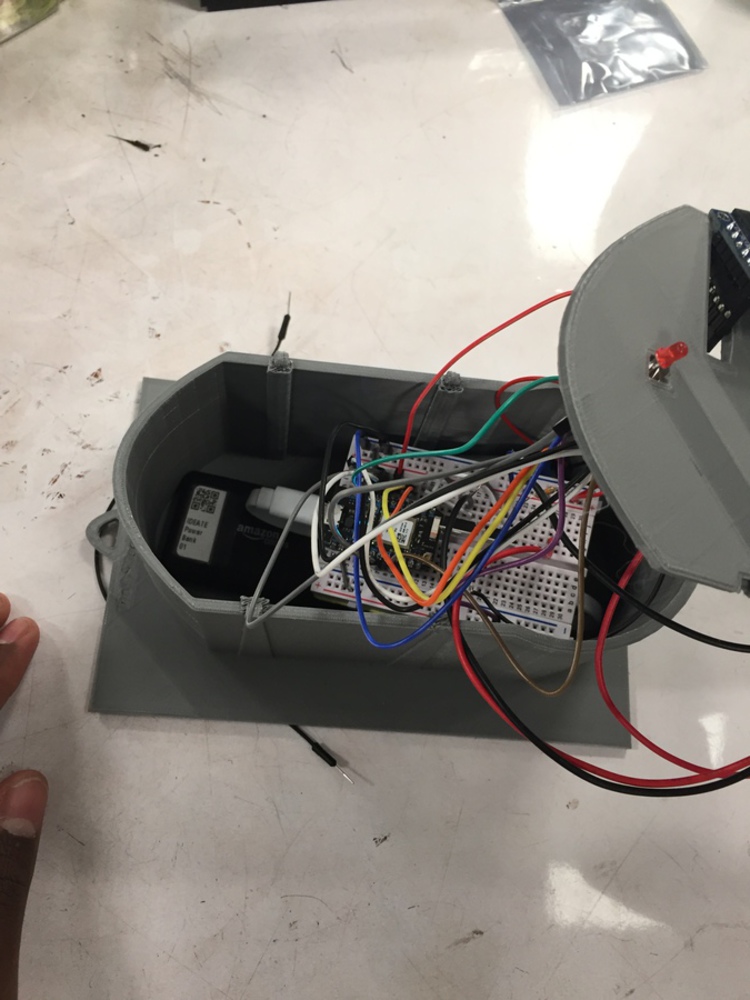
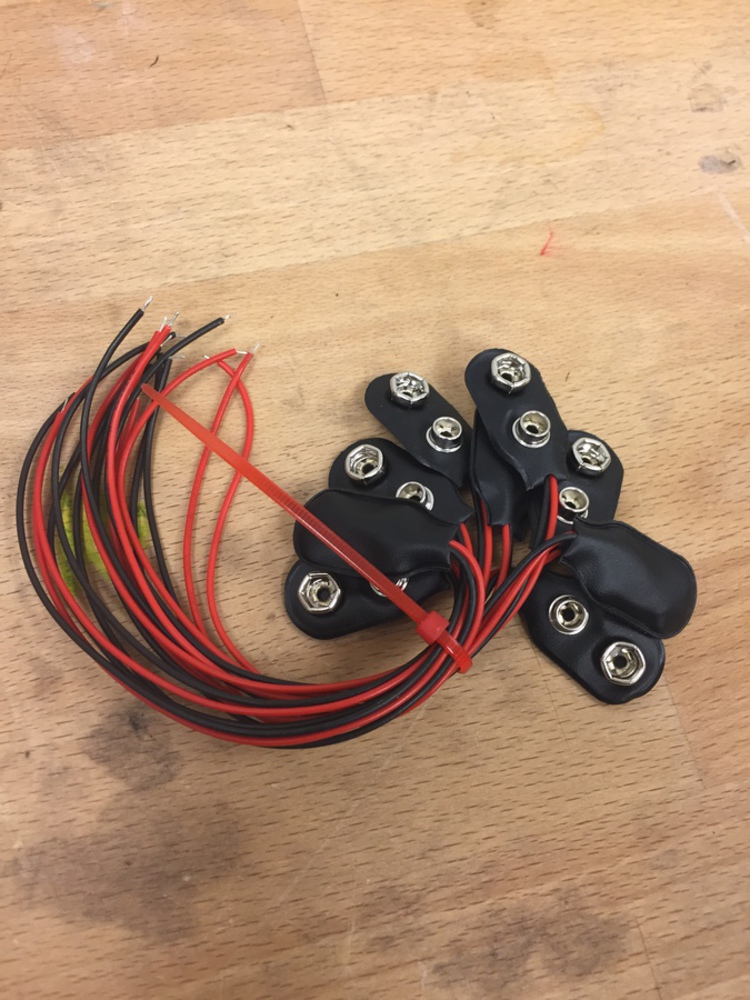
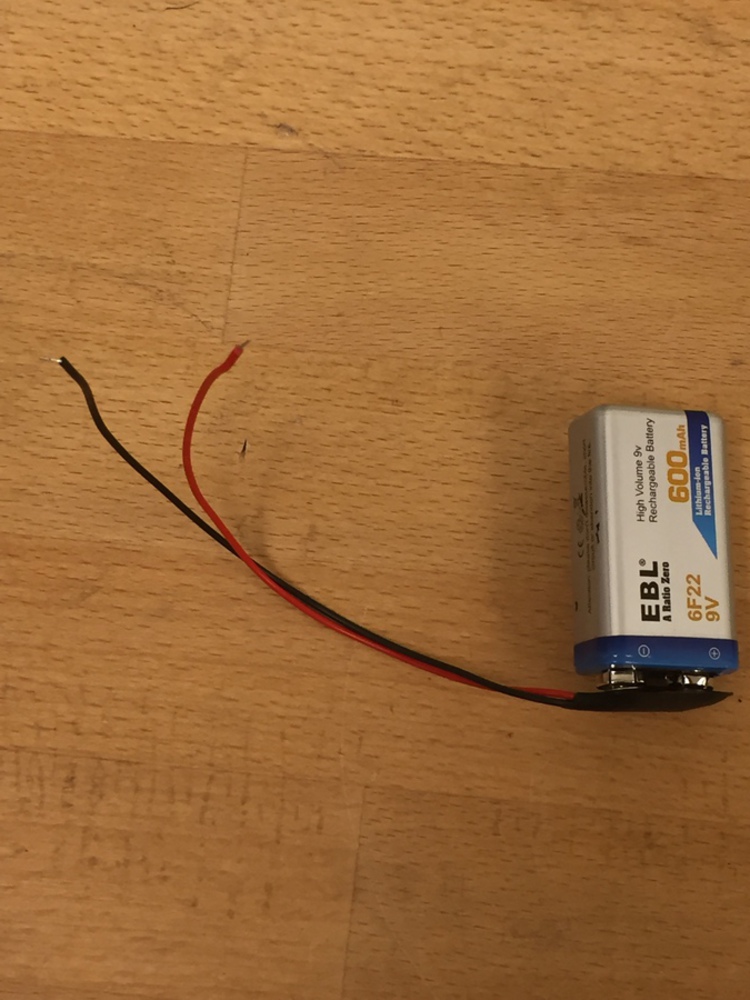
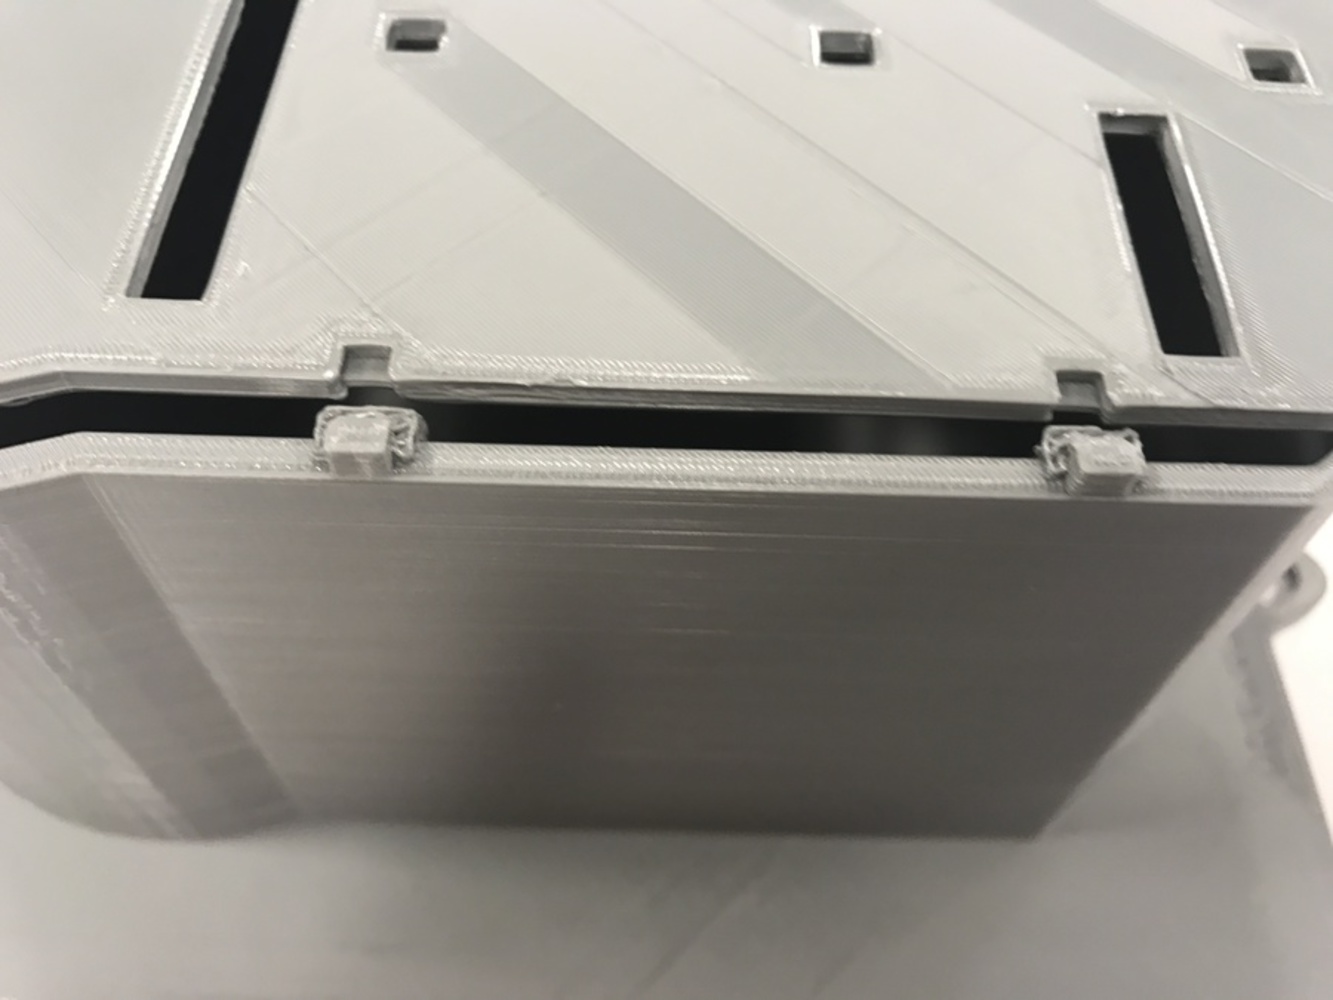
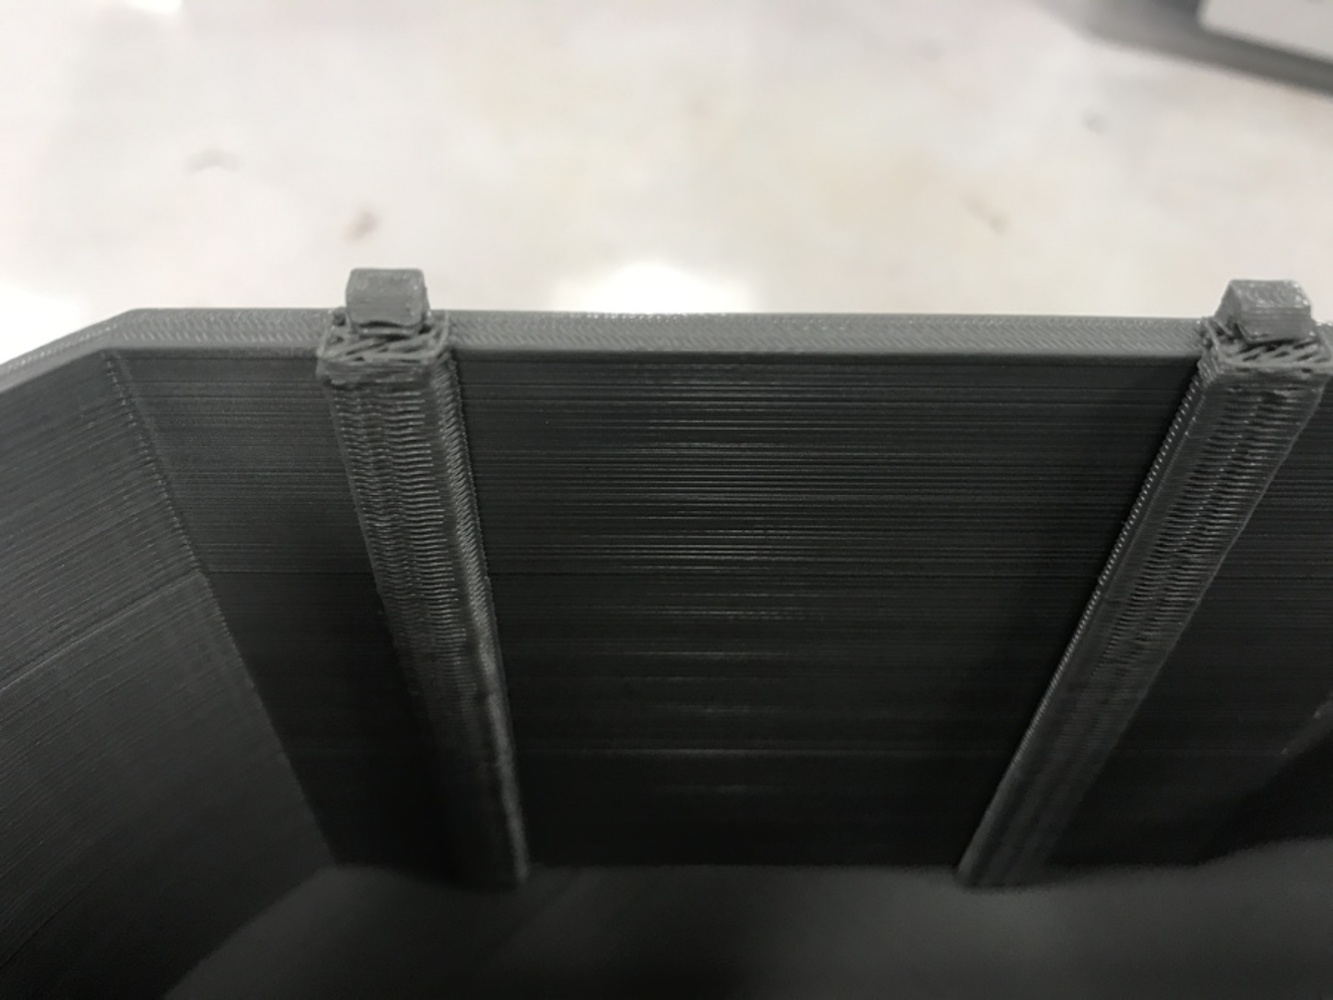
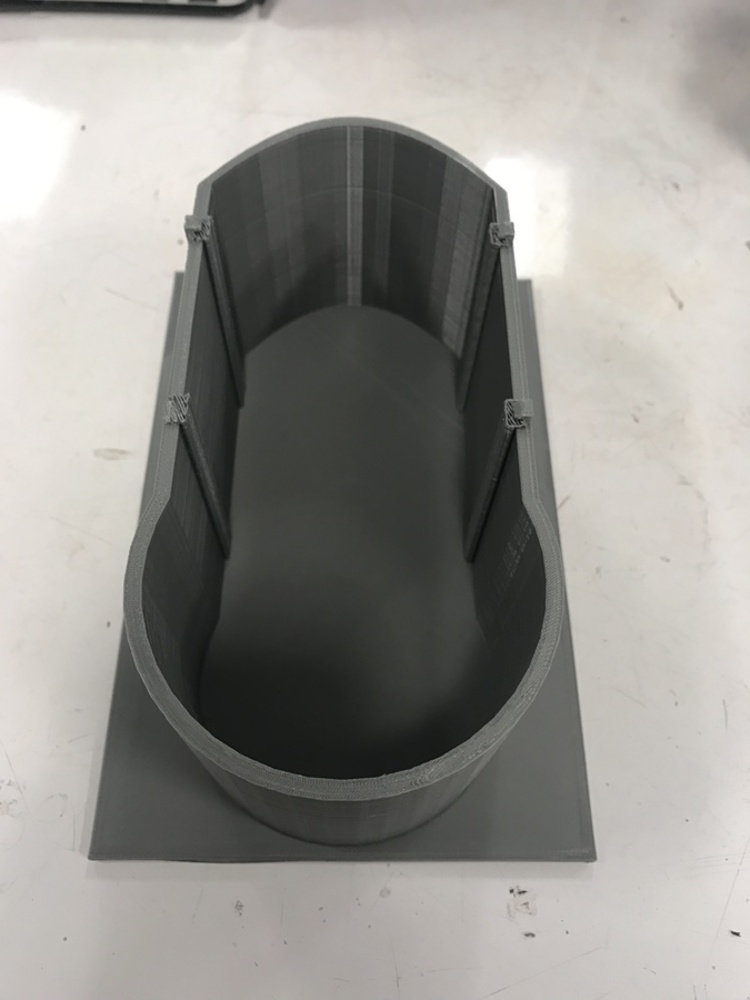
Though the first step of the project was taxing, it was completed within a couple of days, and as such the group relaxed (our first mistake) and used the extra time as an opportunity to teach one another new skills, confident that we could achieve a decent fidelity prototype regardless. Travis taught JD how to use and call the different API's while JD gave Travis a crash course in Solidworks. JD coded the switch to an improved API led by Travis while Travis created the casing under JD's direction. The group then faced a series of unforeseen circumstances: the amount of wires in the initial prototype caused the group to order wires that could lay flat in the breadboard, there were no 9V battery caps available in the lab so they also had to be ordered, the wire for the battery pack was also too long so it had to be switched out for and shorter one and to cap it off, there was a long wait to use the 3D printer preventing time to test and iterate on the design, causing the group to have to resort to a laser cut version of the casing after the 3D print came out with incorrect dimensions (see pictures below). After all the group's work, we had to bring a prototype to demonstrate in class that did little more than the proof of concept that we created.
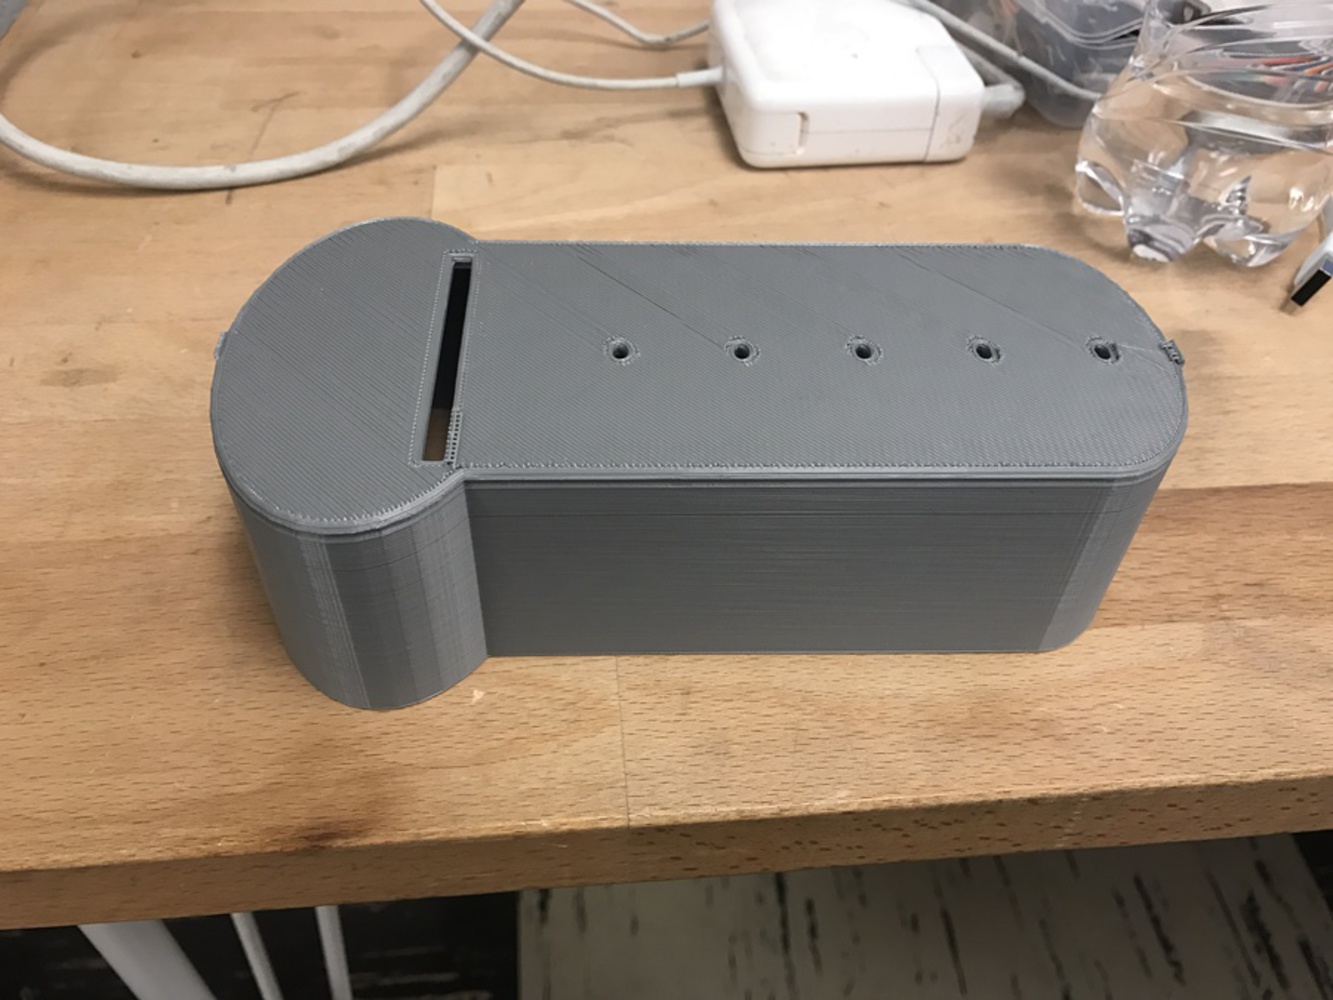
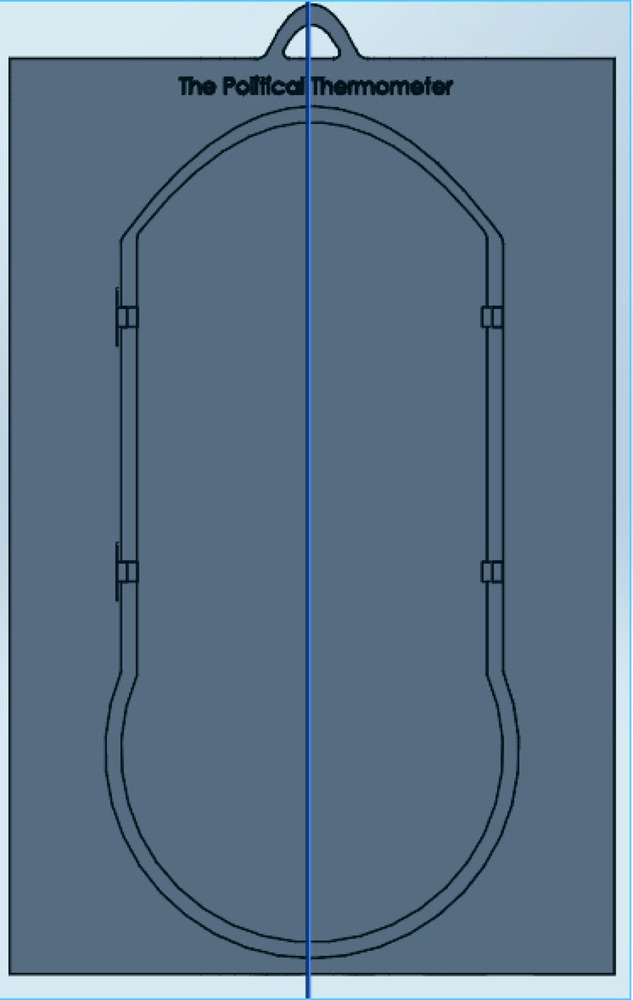
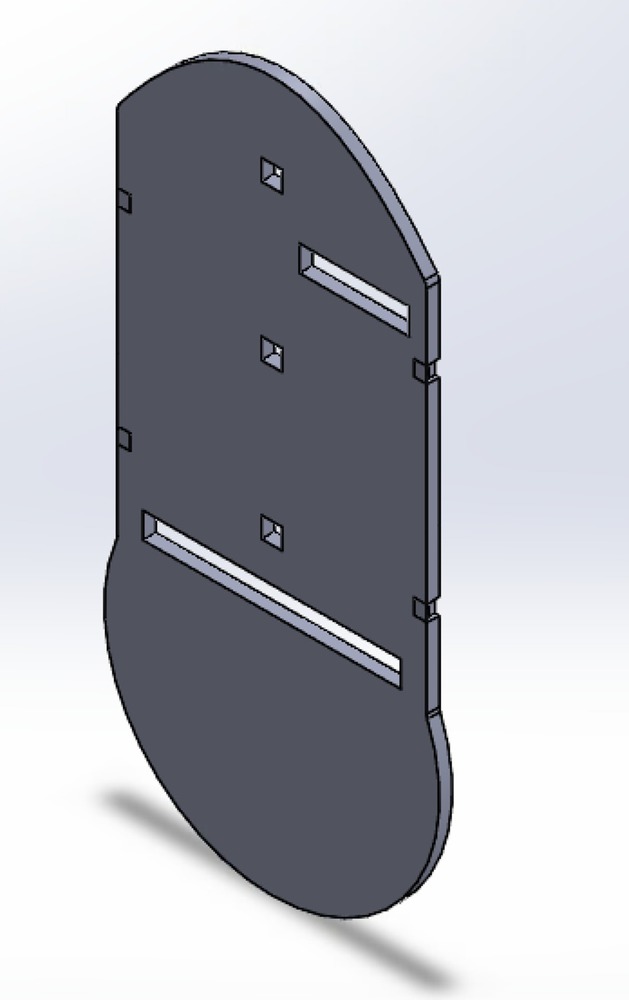
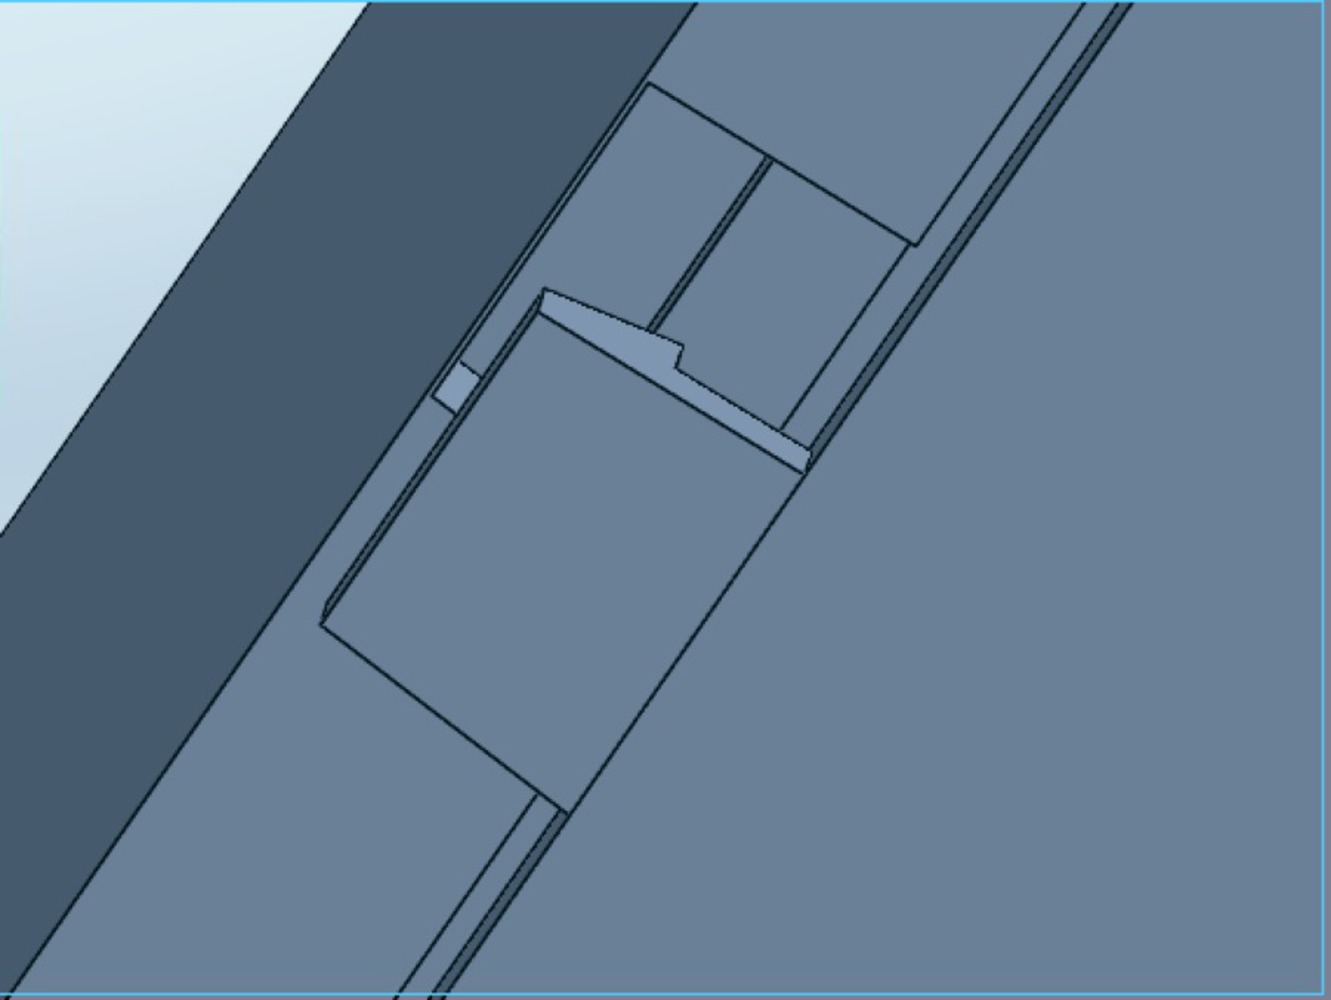
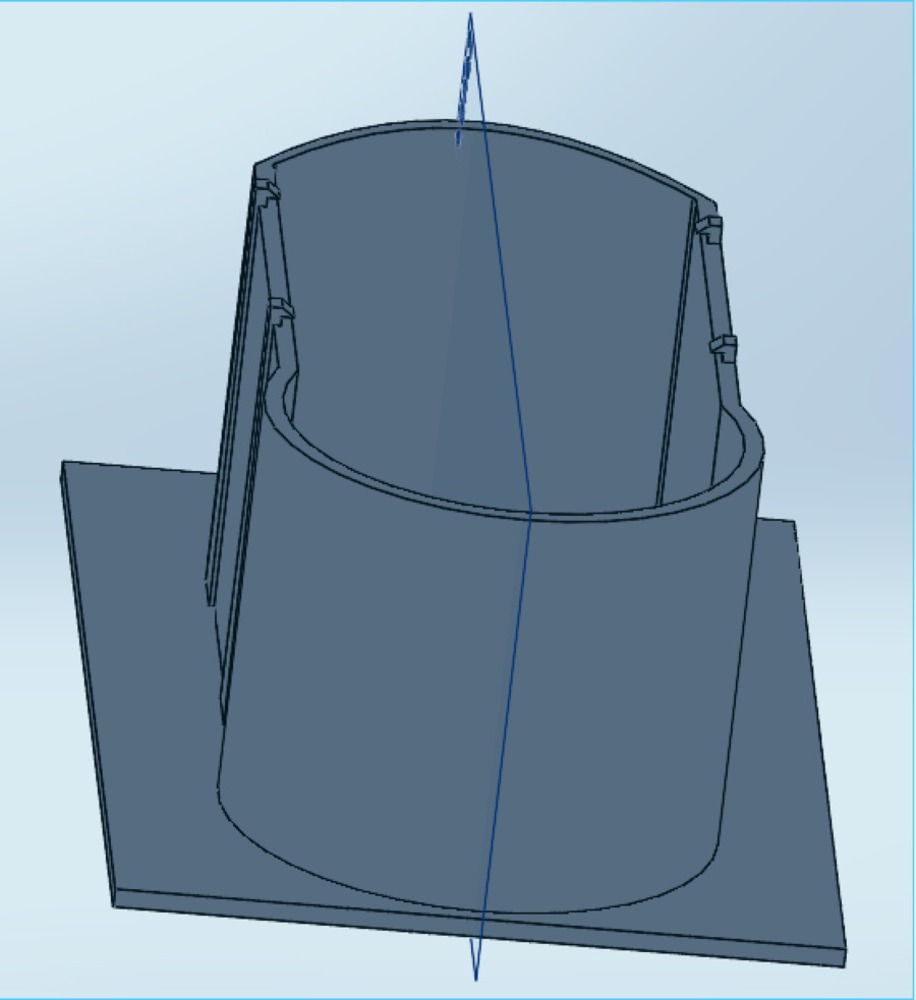
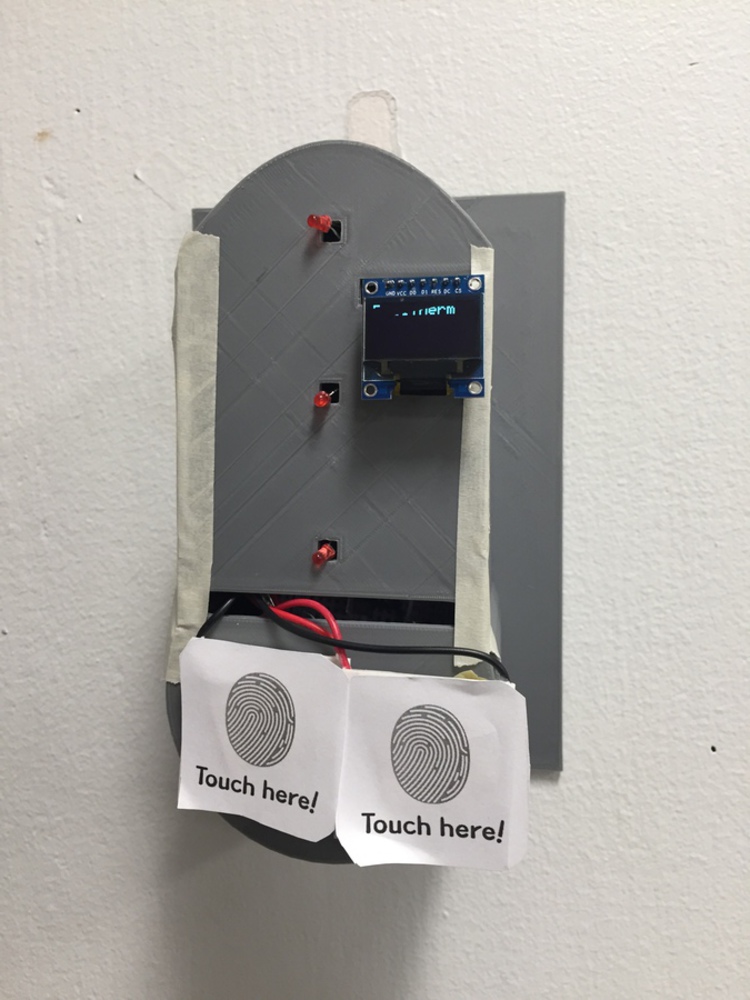
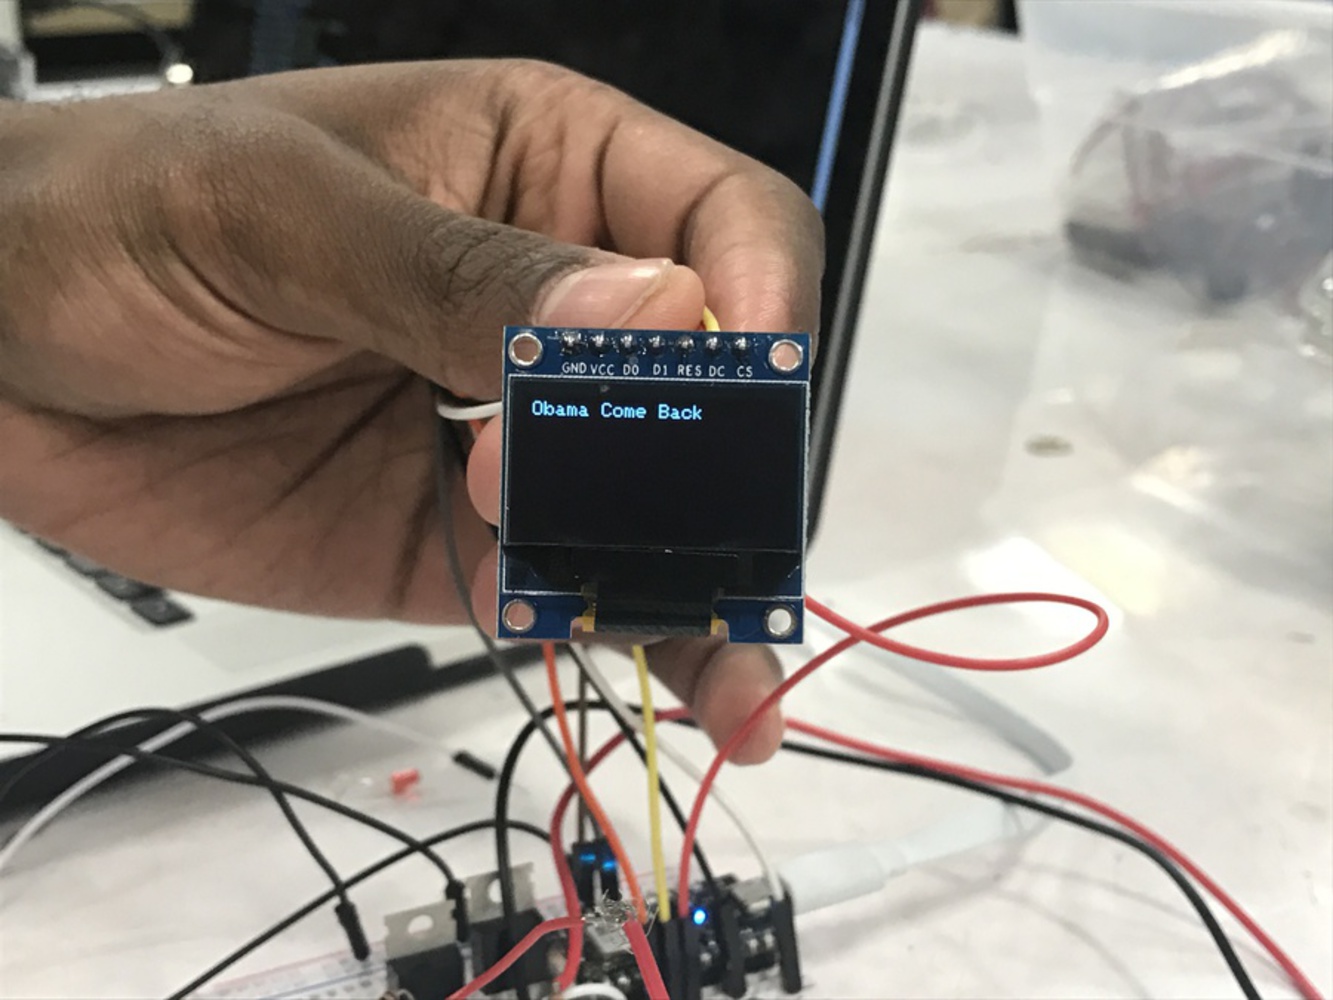
Despite the challenges faced developing the project, we used the time we had left (Friday to Sunday) to switch back to the tasks most related to our backgrounds (JD [Mechanical Engineering] to hardware & Travis [Information Systems] to Software) allowing us to create a project closer to our original vision. JD redesigned the casing: a hook was added to allow it to be hung up, a space was added to fit a screen, the slit for the Peltier devices was widened, the words "Political Thermometer" engraved in the base, the number of LEDs was changed to 3 and snapfit connections were added between the top and base. The parts that were ordered (9V battery caps & lay-flat wires) came and allowed the electronics to be more compact. Travis also changed the python script to cycle through a list of the most popular politicians allowing PoliTherm to stand alone as an ambient device. The device came a long way but was still a couple of iterations from being finished as the snap fit connections were too exact for the 3D printer and as a result did not work properly (forcing us to close the device with tape) and though added attention had been paid to improving the casing, the interaction between the user and the Peltier devices was underdeveloped.
Our final product is a thermometer that can be hung up on a wall and felt throughout the day to learn the current Twitter sentiment of the displayed politician. The python script will randomly choose a politician from a pre-programmed list at a given time of day, currently it is 12:00 pm, and find the current sentiment of the chosen politician. In the next iteration the user would be able to change the list of politicians that are cycled through and also set what time the politician will be chosen. As mentioned before, the Sentiment140 API was the planned API because of it's capability to analyze multiple tweets at one time using a twitter specific sentiment analysis algorithm but we moved to the DatumBox API because the Sentiment140 API was not reliable. The DatumBox API was not as robust as we were not able to analyze multiple tweets at a time forcing us to use the basic sentiment analysis rather than the twitter specific. We used the Maker IFTT API to send the sentiment value and the name of the politician to the photon board. The casing was designed using SolidWorks and 3D printed using the NVbots printer. We designed the casing in two parts, the face and the base, in order to allow us to open the case and access the circuit if there was ever a need. In order to mimic the red mercury of an actual thermometer the face contains space for three red LEDs that light up when the sentiment is positive and turn off when the sentiment is negative. A screen was also added when we made the decision to rotate through a list of politicians so that a user would know what politician was being analyzed.
// This #include statement was automatically added by the Particle IDE.
#include <Adafruit_SSD1306.h>

#include "Adafruit_GFX.h"

//Control the mosfets for each peltier
int t1 = D1;
int t2 = D2;

//Power level 1 (0 to 99%)
int p1 = 0;
int p2 = 0;

//These are value from 0 to 255 that actually control the MOSFET via PWM
int p_level1 = map(p1, 0, 99, 0, 255);
int p_level2 = map(p2, 0, 99, 0, 255);

//variable holding input from twitter
String command = "a";

//leds
int l1 = D0;
int l2 = D6;
int l3 = D7;

//OLED Screen Control
#define OLED_DC     D3
#define OLED_CS     D4
#define OLED_RESET  D5
Adafruit_SSD1306 display(OLED_DC, OLED_RESET, OLED_CS);
#define LOGO16_GLCD_HEIGHT 16
#define LOGO16_GLCD_WIDTH  16
#if (SSD1306_LCDHEIGHT != 64)
#error("Height incorrect, please fix Adafruit_SSD1306.h!");
#endif
String pName = "Politherm"; //variable to hold politician name


void setup() {
    Serial.begin(9600);
    display.begin(SSD1306_SWITCHCAPVCC);
    display.display();
    delay(1000);
    display.clearDisplay();
    Serial.begin(9600);
    Particle.subscribe("searches", finds);
    Particle.variable("p1",p1);
    Particle.variable("p2",p2);
    Particle.variable("command",command);
    pinMode(t1, OUTPUT);
    pinMode(t2,OUTPUT);
    pinMode(l1, OUTPUT);
    pinMode(l2, OUTPUT);
    pinMode(l3, OUTPUT);

}

void finds(const char *event, const char *data){
  //receiving command
  String d = data;
  command = d.substring(0,1);
  pName = d.substring(1);
  Serial.print("infinds=");
  Serial.println(pName);
  Serial.println(command);

  //turning command into output
  if(command =="a")
  {
    p1 = 40;
    p2 = 0;
    digitalWrite(l1, HIGH);
    delay(100);
    digitalWrite(l2, HIGH);
    delay(100);
    digitalWrite(l3, HIGH);
    delay(100);
  }
  else if(command == "b")
  {
    p1 = 0;
    p2 = 40;
    digitalWrite(l1, LOW);
    delay(100);
    digitalWrite(l2, LOW);
    delay(100);
    digitalWrite(l3, LOW);
  }
  else if(command == "o")
  {
    p1 = 0;
    p2 = 0;
    digitalWrite(l3, LOW);
    delay(100);
    digitalWrite(l3, LOW);
    delay(100);
    digitalWrite(l3, LOW);
  }

  p_level1 = map(p1, 0, 100, 0, 255);
  p_level2 = map(p2,0,100,0,255);

  // write to the appropriate pin
  analogWrite(t1, p_level1); //Write this new value out to the port
  analogWrite(t2, p_level2);
  Serial.print(" p1=");
  Serial.print(p_level1);
  Serial.print(" p2=");
  Serial.println(p_level2);
  delay(1000);
}

void loop() {
  display.clearDisplay();
  display.setCursor(0,0);
  display.setTextColor(WHITE);
  display.setTextSize(2);
  display.println(pName);
  display.display();
  display.startscrollright(0,21);
}try:
import json
except ImportError:
import simplejson as json
# Import the necessary methods from "twitter" library
from twitter import *
import requests
import random
from datetime import datetime as dt
# Variables that contains the user credentials to access Twitter API
ACCESS_TOKEN = '<<Twitter ACCESS TOKEN>>'
ACCESS_SECRET = '<<Twitter ACCESS SECRET>>'
CONSUMER_KEY = '<<Consumer KEY>>'
CONSUMER_SECRET = '<<Consumer SECRET KEY>>'
oauth = OAuth(ACCESS_TOKEN, ACCESS_SECRET, CONSUMER_KEY, CONSUMER_SECRET)
twitter = Twitter(auth=oauth)
#List of politicians to cycle through
politicians = {"Barack Obama" : "@BarackObama", "Paul Ryan" : "@SpeakerRyan",
"Cory Booker": "@CoryBooker", "Donald Trump":"@realDonalTrump", "POTUS" : "@POTUS", "Elizabeth Warren" : "@SenWarren",
"Bernie Sanders" : "@BernieSanders", "Kelleyanne Conway" : "@KelleyannePolls", "Mike Pence" : "@mike_pence",
"John McCain" : "@SenJohnMcCain"}
def run():
#Only run the code at a certain time of day
if(dt.now().hour == 12 and dt.now().minute == 0):
politicianName = random.choice(list(politicians.keys()))
politicianHandle = politicians[politicianName]
makeReq(politicianName,politicianHandle)
def searchTweets(politicianName, politicianHandle):
#Search twitter for the chosen politician
tweets = twitter.search.tweets(q=politicianHandle, result_type='recent', lang='en', count=60)['statuses']
corpus = ''
#Build a corpus of the tweets to be analyzed all at once
for tweet in tweets:
tweetText = tweet["text"]
tweetText = tweetText.replace(politicianHandle,"")
corpus = corpus + " ---- " + tweetText
return corpus
def makeReq(politicianName,politicianHandle):
sentiment = makeAPICall(politicianName, politicianHandle)
#In the photon board code:
#'a' = Positive sentiment
#'b' = Negative sentiment
#'o' = Neutral Sentiemnt
data = "o"
if(sentiment > 0):
data = "a"
elif(sentiment < 0):
data = "b"
payload = {'value1' : data, 'value2' : politicianName }
print(payload)
requests.post("https://maker.ifttt.com/trigger/TwitterSearch/with/key/<<Maker IFTT KEY>>", data=payload)
def makeAPICall(politicianName, politicianHandle):
sentimentVal = 0
#Run twitter search multiple times because the datumbox request has a max corpus length
for i in range(10):
r = requests.post("http://api.datumbox.com/1.0/SentimentAnalysis.json",
params={"api_key":<<DatumBox API KEY>>, "text": searchTweets(politicianName, politicianHandle)})
sentiment = r.json()["output"]['result'
if(sentiment == "positive"):
sentimentVal+=1
elif(sentiment == "negative"):
sentimentVal -= 1
return sentimentVal
run()Both members of the team learned a good amount about topics that we were unfamiliar with (APIs & SolidWorks) but at the sacrifice on efficiency in our project. While both skills are best learned when one can do it themselves, given the short time it may have been better to simply show the other what they'd done when developing their part of the project.
Given the long turnaround time for 3D prints (some rapid prototyping huh?) we should have created CAD as soon as possible so we could print it out the cases and correct mistakes as quick as possible.
A choice was made to make a project that was not as "fined tuned" as it could have been to allow the makers to learn and despite how hard it was, I think both members of the team would agree that we were better off in the long run by learning a new skill.
PoliTherm is a thermometer that changes temperature and lighting arrangement based upon the sentiment of the Twitterverse on a given politician, whose name is displayed via the screen.