Flagstaff Hill Project
Made by atesfaye, Richard Dong and mspettel · UNLISTED (SHOWN IN POOLS)
Made by atesfaye, Richard Dong and mspettel · UNLISTED (SHOWN IN POOLS)
Created: December 13th, 2019
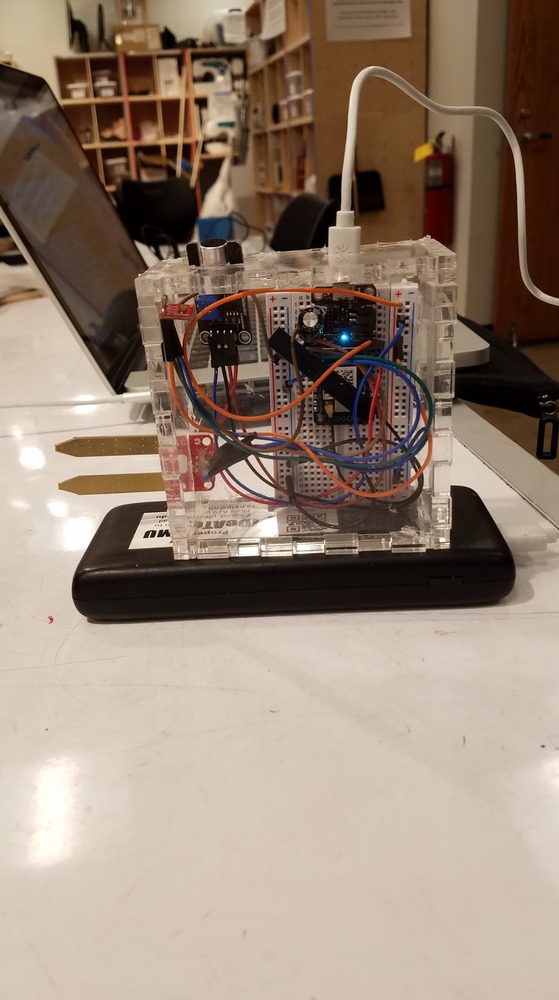
Our product can be extended to support multiple sensors. For our demo, we only had one sensor and made the radius of impact very large. Ideally, we would have more sensors and each sensor would affect a smaller part of the board.
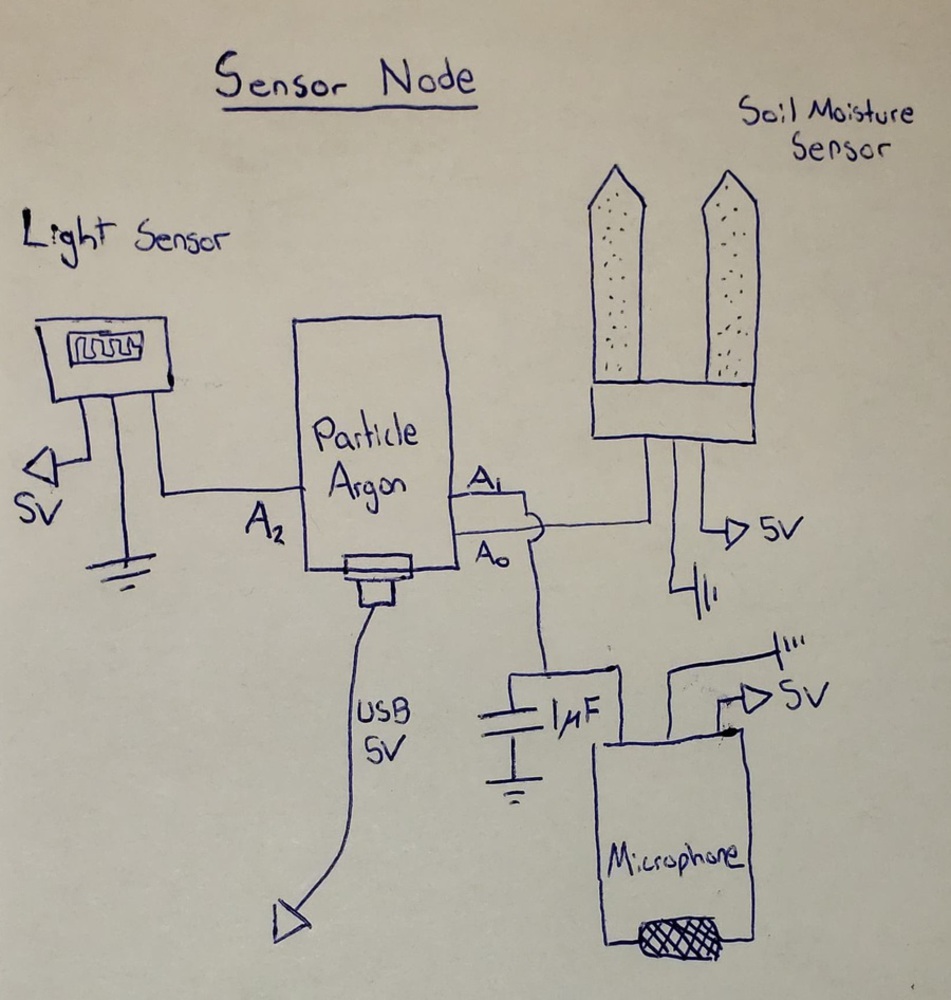
Sensor Node
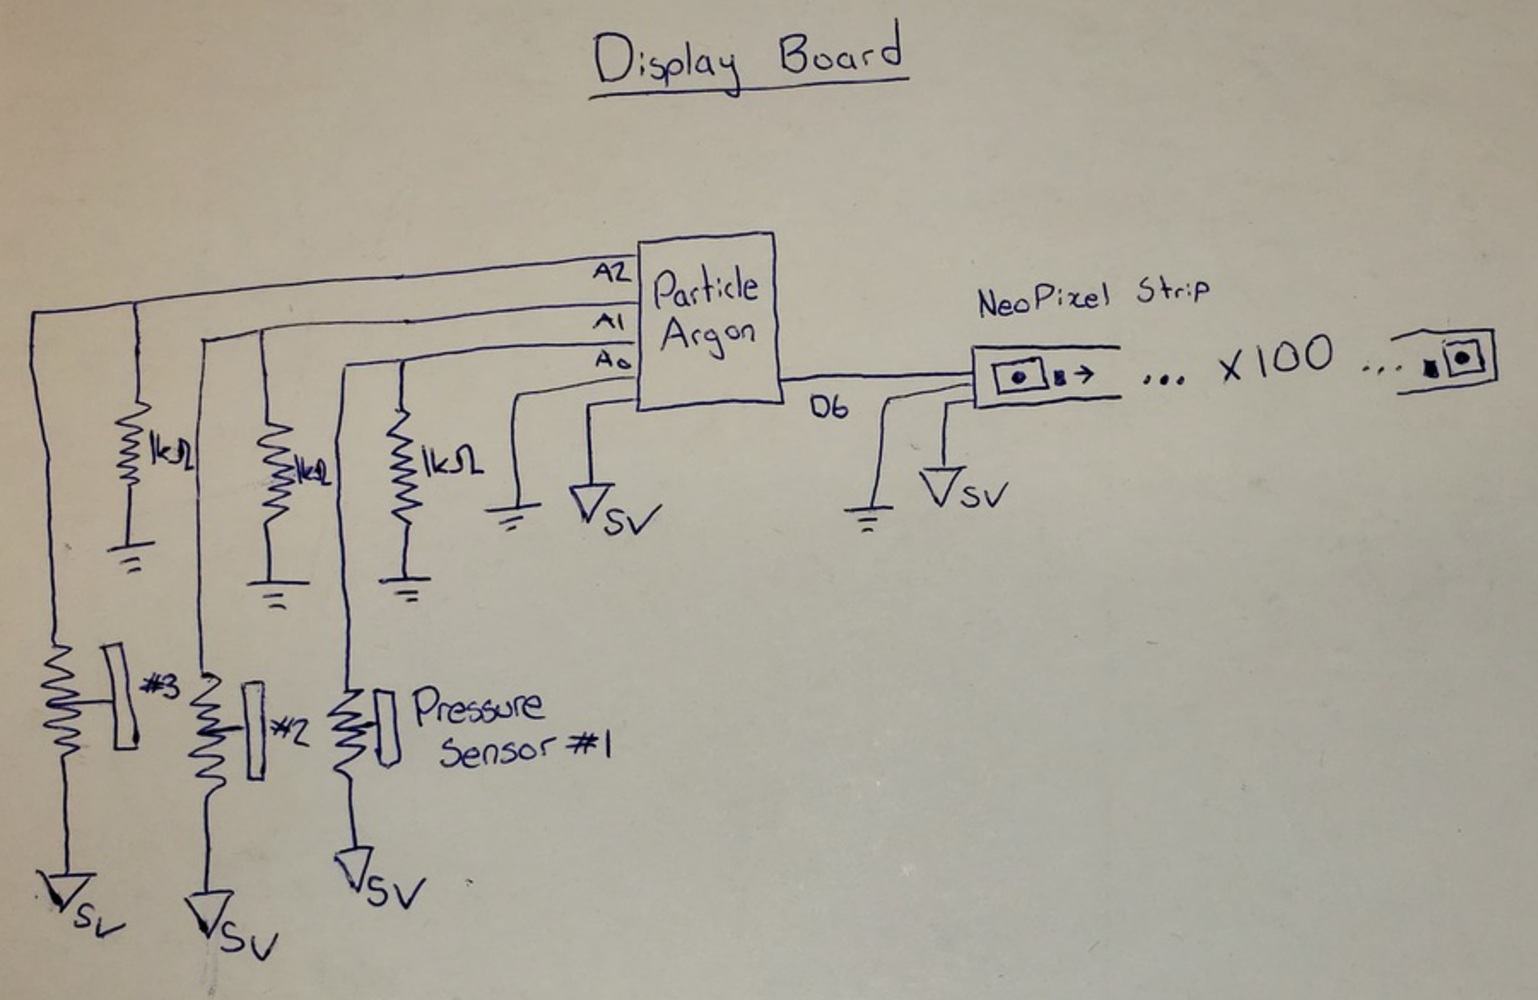
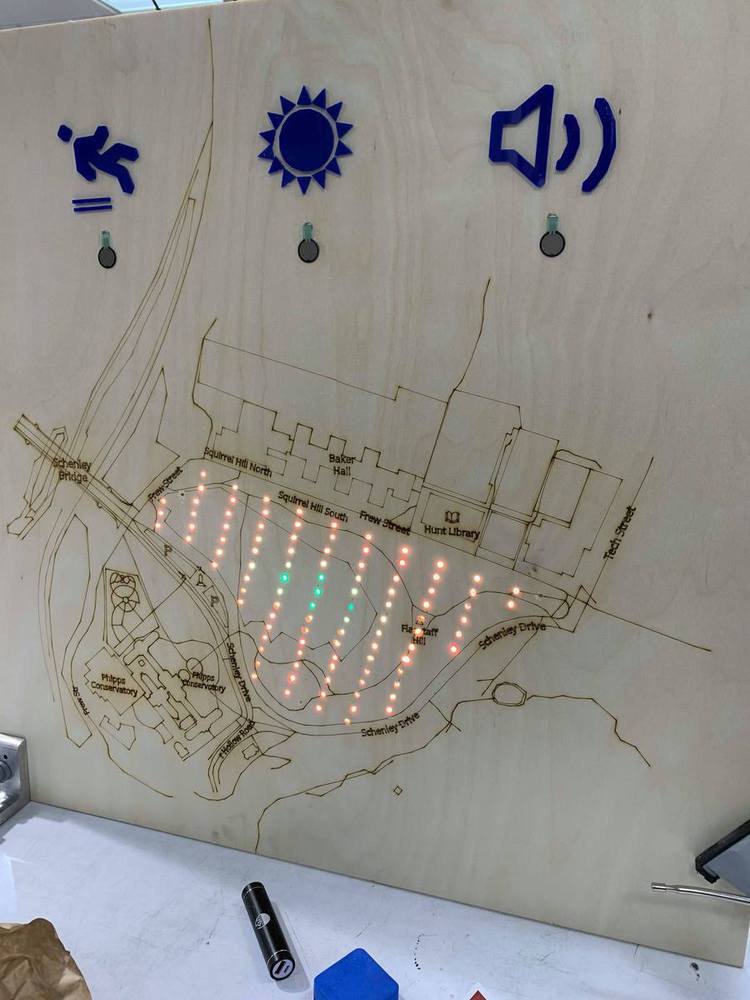
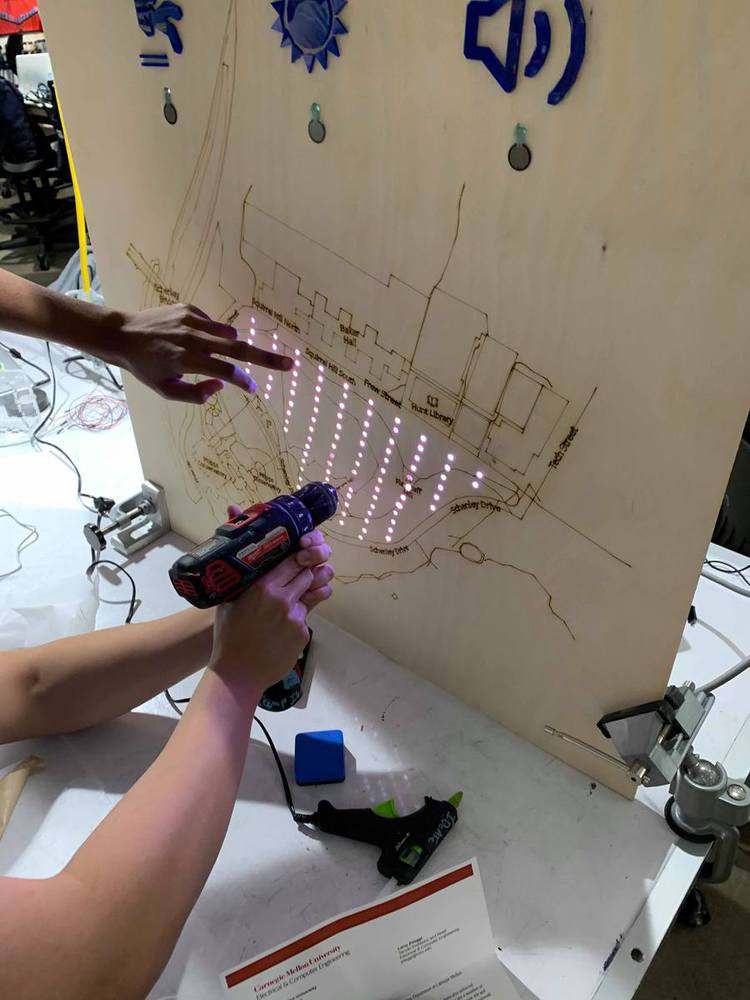
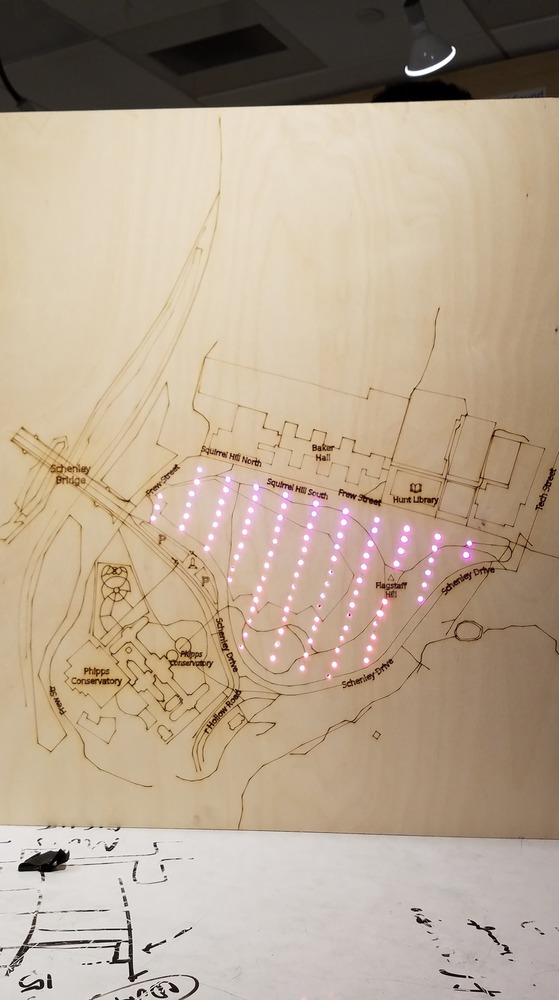
Display Board
| |||||||||||||||||||||||||||||||||||||||||||||||||||||||||||||||||||||||||||
int moisture_pin = A1;

// //int microphone_dpin = D7;, not using
int microphone_apin = A0;

int light_sensor_pin = A2;

int moisture_level, mic_level, light_level;


char *buffer;

void setup() {

    moisture_level = 255;
    mic_level = 255;
    light_level = 0;

    // //Serial.begin(9600);
    pinMode(moisture_pin, INPUT);
    pinMode(light_sensor_pin, INPUT);

    pinMode(microphone_apin, INPUT_PULLDOWN);

    buffer = (char*)calloc(200, sizeof(char));
}


void loop() {
    moisture_level = (255 - max(0, min(255, analogRead(moisture_pin) / 8)));
    mic_level = 255 - max(0, min(analogRead(microphone_apin) / 8, 255));
    //mic_level = 255 - max(0, min(255, map(analogRead(microphone_apin), 0, 4095, 0, 255)));
    light_level = max(0, min(255, analogRead(light_sensor_pin) / 4));

    //char buffer[200];
    sprintf(buffer, "moisture = %d, micval %d, lightlevel = %d", moisture_level, mic_level, light_level);


    Particle.publish("data", buffer, PRIVATE, WITH_ACK);

    delay(2000);
}// This #include statement was automatically added by the Particle IDE.
#include <neopixel.h>
#include "math.h"
#define PIXEL_PIN D6
#define PIXEL_COUNT 101
#define PIXEL_TYPE WS2812
#define NUM_ROWS 14
#define NUM_COLS 11
int matrix[NUM_ROWS][NUM_COLS] = {0};
Adafruit_NeoPixel strip = Adafruit_NeoPixel(PIXEL_COUNT, PIXEL_PIN, PIXEL_TYPE);
int wet_button = A0;
int sun_button = A1;
int sound_button = A2;
int action_id = -1;
int action_value, action_row, action_col;
int moisture_level = -1;
int mic_level = -1;
int light_level = -1;
void markInvalid(int col, int startRow, int endRow) {
for(int i = startRow; i < endRow; i++) {
matrix[i][col] = -1;
}
}
void setup() {
//Serial.begin(9600);
strip.begin();
strip.show();
pinMode(wet_button, INPUT);
pinMode(sun_button, INPUT);
pinMode(sound_button, INPUT);
//mark invalid locations
markInvalid(0, 0, 3);
markInvalid(0, 6, NUM_ROWS);
markInvalid(1, 6, NUM_ROWS);
markInvalid(2, 7, NUM_ROWS);
markInvalid(3, 9, NUM_ROWS);
markInvalid(4, 14, NUM_ROWS);
markInvalid(5, 14, NUM_ROWS);
markInvalid(6, 13, NUM_ROWS);
markInvalid(7, 13, NUM_ROWS);
//markInvalid(8, 5, 7);
markInvalid(8, 12, NUM_ROWS);
markInvalid(9, 6, NUM_ROWS);
markInvalid(10, 2, NUM_ROWS);
Particle.subscribe("data", receiveData, MY_DEVICES);
}
void receiveData(const char *event, const char *data) {
sscanf(data, "moisture = %d, micval %d, lightlevel = %d", &moisture_level, &mic_level, &light_level);
}
float calc_dist(int r1, int c1, int r2, int c2) {
return sqrt((r1-r2)*(r1-r2) + (c1-c2)*(c1-c2));
}
void updateLights() {
uint32_t c = strip.Color(100, 100, 0);
int index = 0;
for (int i =0; i < NUM_ROWS; i++) {
for(int j =NUM_COLS-1; j >= 0; j--) {
int real_c;
if(i % 2 == 1) {
real_c = NUM_COLS - 1 - j;
}else {
real_c = j;
}
if(matrix[i][real_c] != -1) {
if(action_id != -1) {
int action_value;
if(action_id == 0) {
action_value = moisture_level;
}
else if(action_id == 1) {
action_value = light_level;
}else {
action_value = mic_level;
}
float dist = calc_dist(i, real_c, action_row, action_col);
if (dist == 0) {
dist = 1;
}
float value = action_value / dist;
if(dist > 5) {
c = strip.Color(0, 255, 0);
} else {
c = strip.Color(255 - ((int) value), (int)value, 0);
}
}
strip.setPixelColor(index, c);
index++;
}
}
}
strip.show();
}
bool isButtonPressed(int pin) {
int analogValue = analogRead(pin);
//char buffer[100];
//sprintf(buffer, "%d\n", analogValue);
//Particle.publish("buttons", buffer, PRIVATE, WITH_ACK);
return analogValue > 20;
}
void loop() {
if(isButtonPressed(wet_button)) {
//Particle.publish("button", "wet", PRIVATE);
action_id = 0;
action_row = 5;
action_col = 5;
//action_value = 120;
}
if(isButtonPressed(sun_button)) {
//Particle.publish("button", "sun", PRIVATE);
action_id = 1;
action_row = 5;
action_col = 5;
//action_value = 0;
}
if(isButtonPressed(sound_button)) {
//Particle.publish("button", "sound", PRIVATE);
action_id = 2;
action_row = 5;
action_col = 5;
//action_value = 255;
}
updateLights();
delay(500);
}We used the following tutorials/examples to help develop the code for the sensor module and the board module.
https://learn.adafruit.com/adafruit-neopixel-uberguide/arduino-library-use
https://learn.sparkfun.com/tutorials/temt6000-ambient-light-sensor-hookup-guide/all
We uploaded the laser cutting models to the following Google Drive folder.
https://drive.google.com/open?id=1s2Wa-pNTN3liXMfSXcQAOiC2Qn2m5CZt
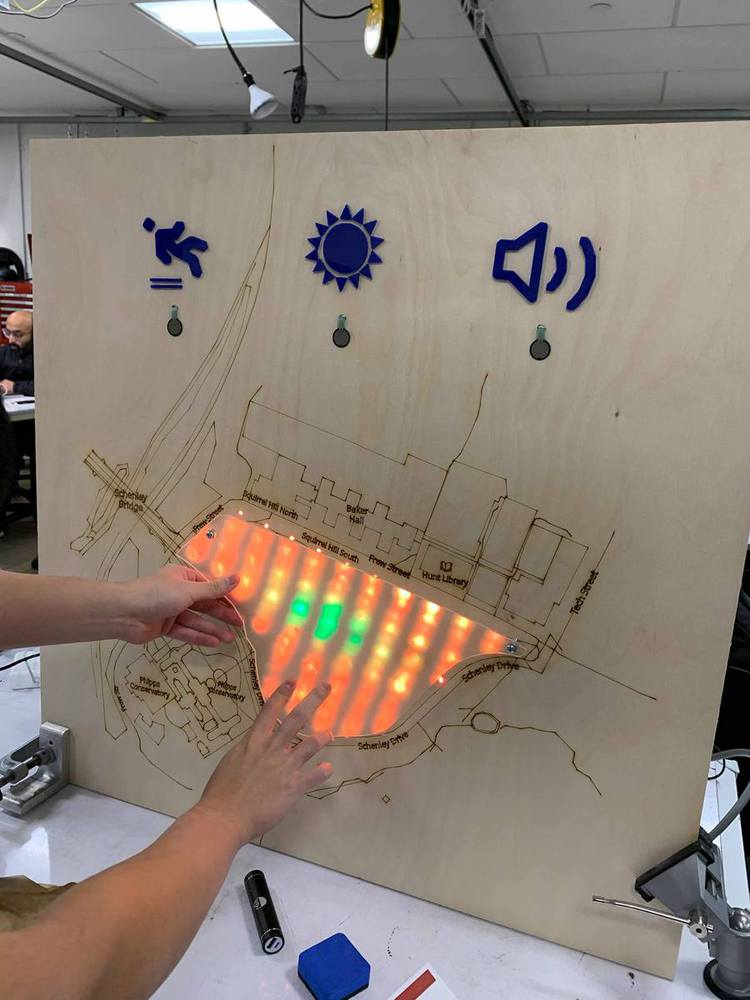
The main design question we faced was whether to display raw sensor data on the map or to act on the data for people and display which areas are good for what activities.
After talking with the experts for Deep Local we decided to give as much power and freedom to the user as possible. Only an individual themselves know what conditions they are searching for. Whether they want to read a book in the sun or the shade is not something we can rightfully decide.
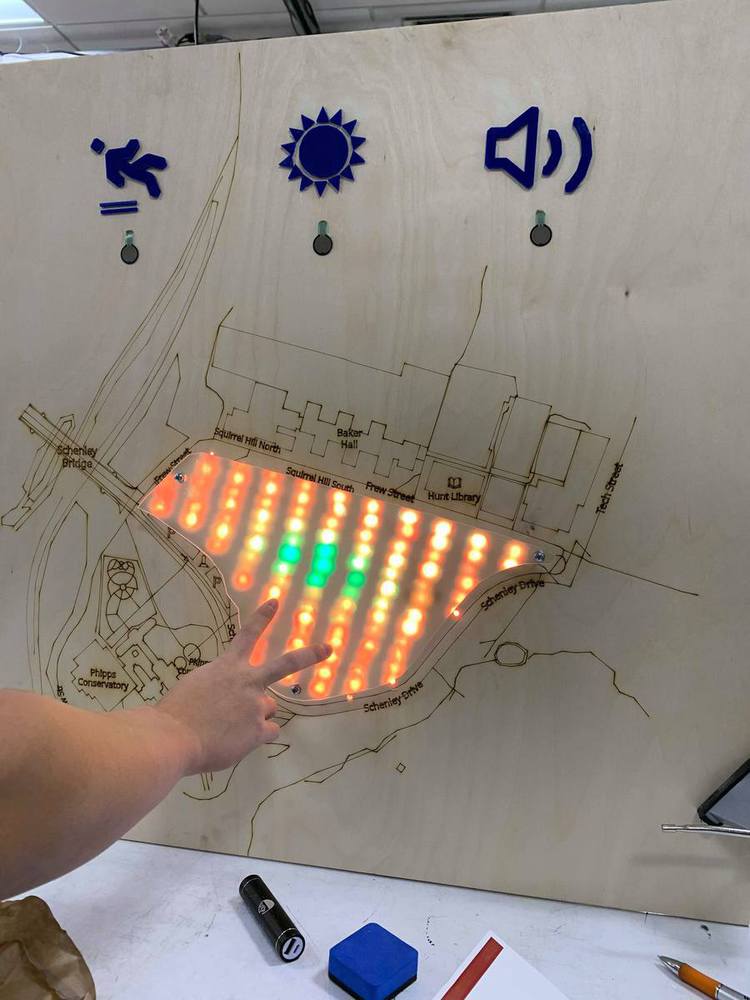
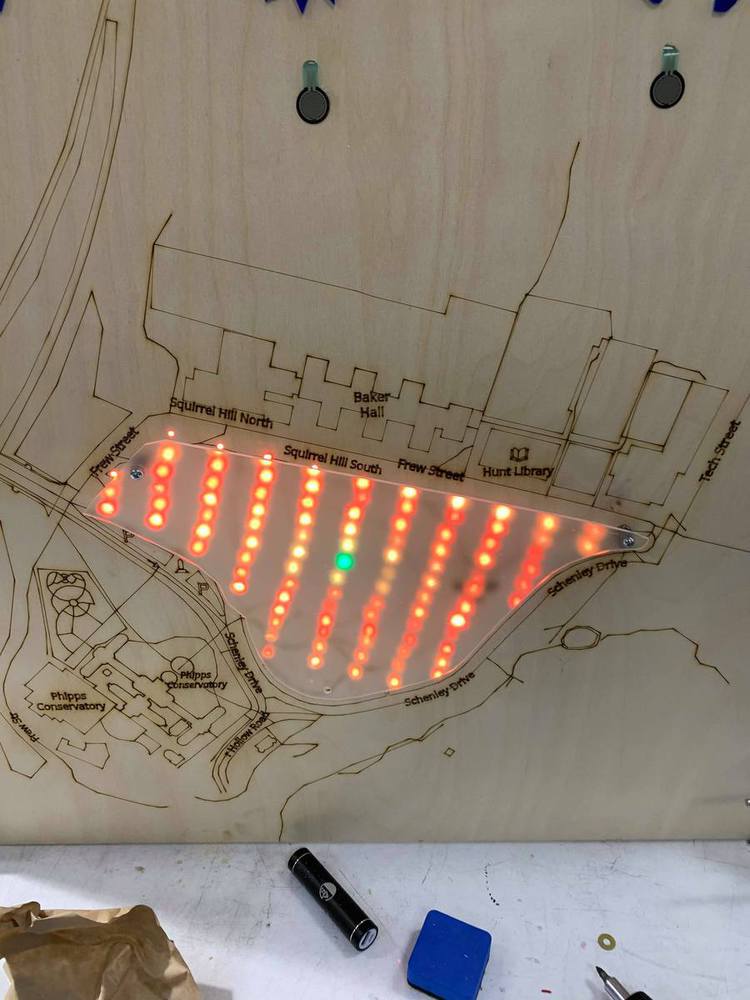
Another design challenge was figuring out how to help users quickly orient themselves on the map. We allow users to press down on the diffused LED panel to see the details underneath on the map.
This project is only listed in this pool. Be considerate and think twice before sharing.
Thermostats, locks, power sockets, and lights are all being imbued with smarts making them increasingly aware and responsive to their environment and users. This course will chart the emergence of ...more
~