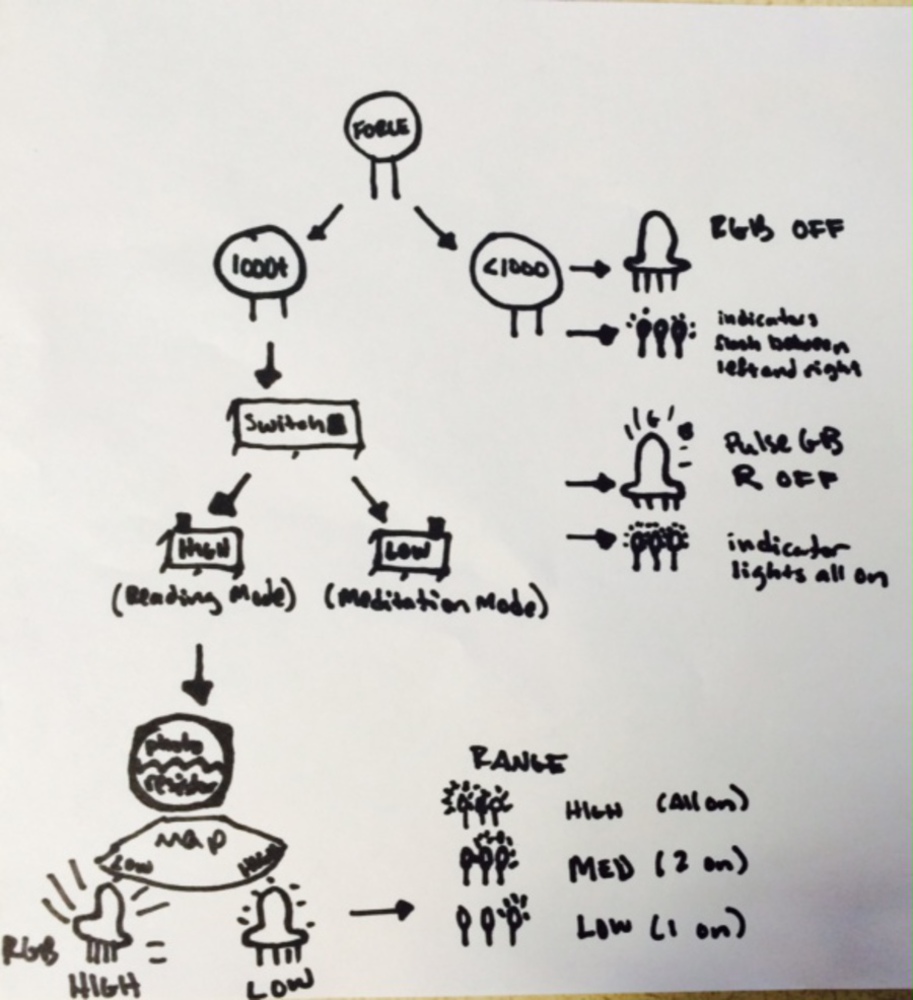
This product will know when you have sat down in your favorite lounge chair, and then, has two modes: Reading Mode and Meditation Mode. For Reading Mode, based on the outside light available, the system will adjust the lighting by the chair so that you don’t have to get up and turn on a lamp as it gets dark. For Meditation Mode, the lighting will adjust to a pulsating blue-green light. Indication lights will show you what mode you are in, and the relative light level. (see below for a decision map).
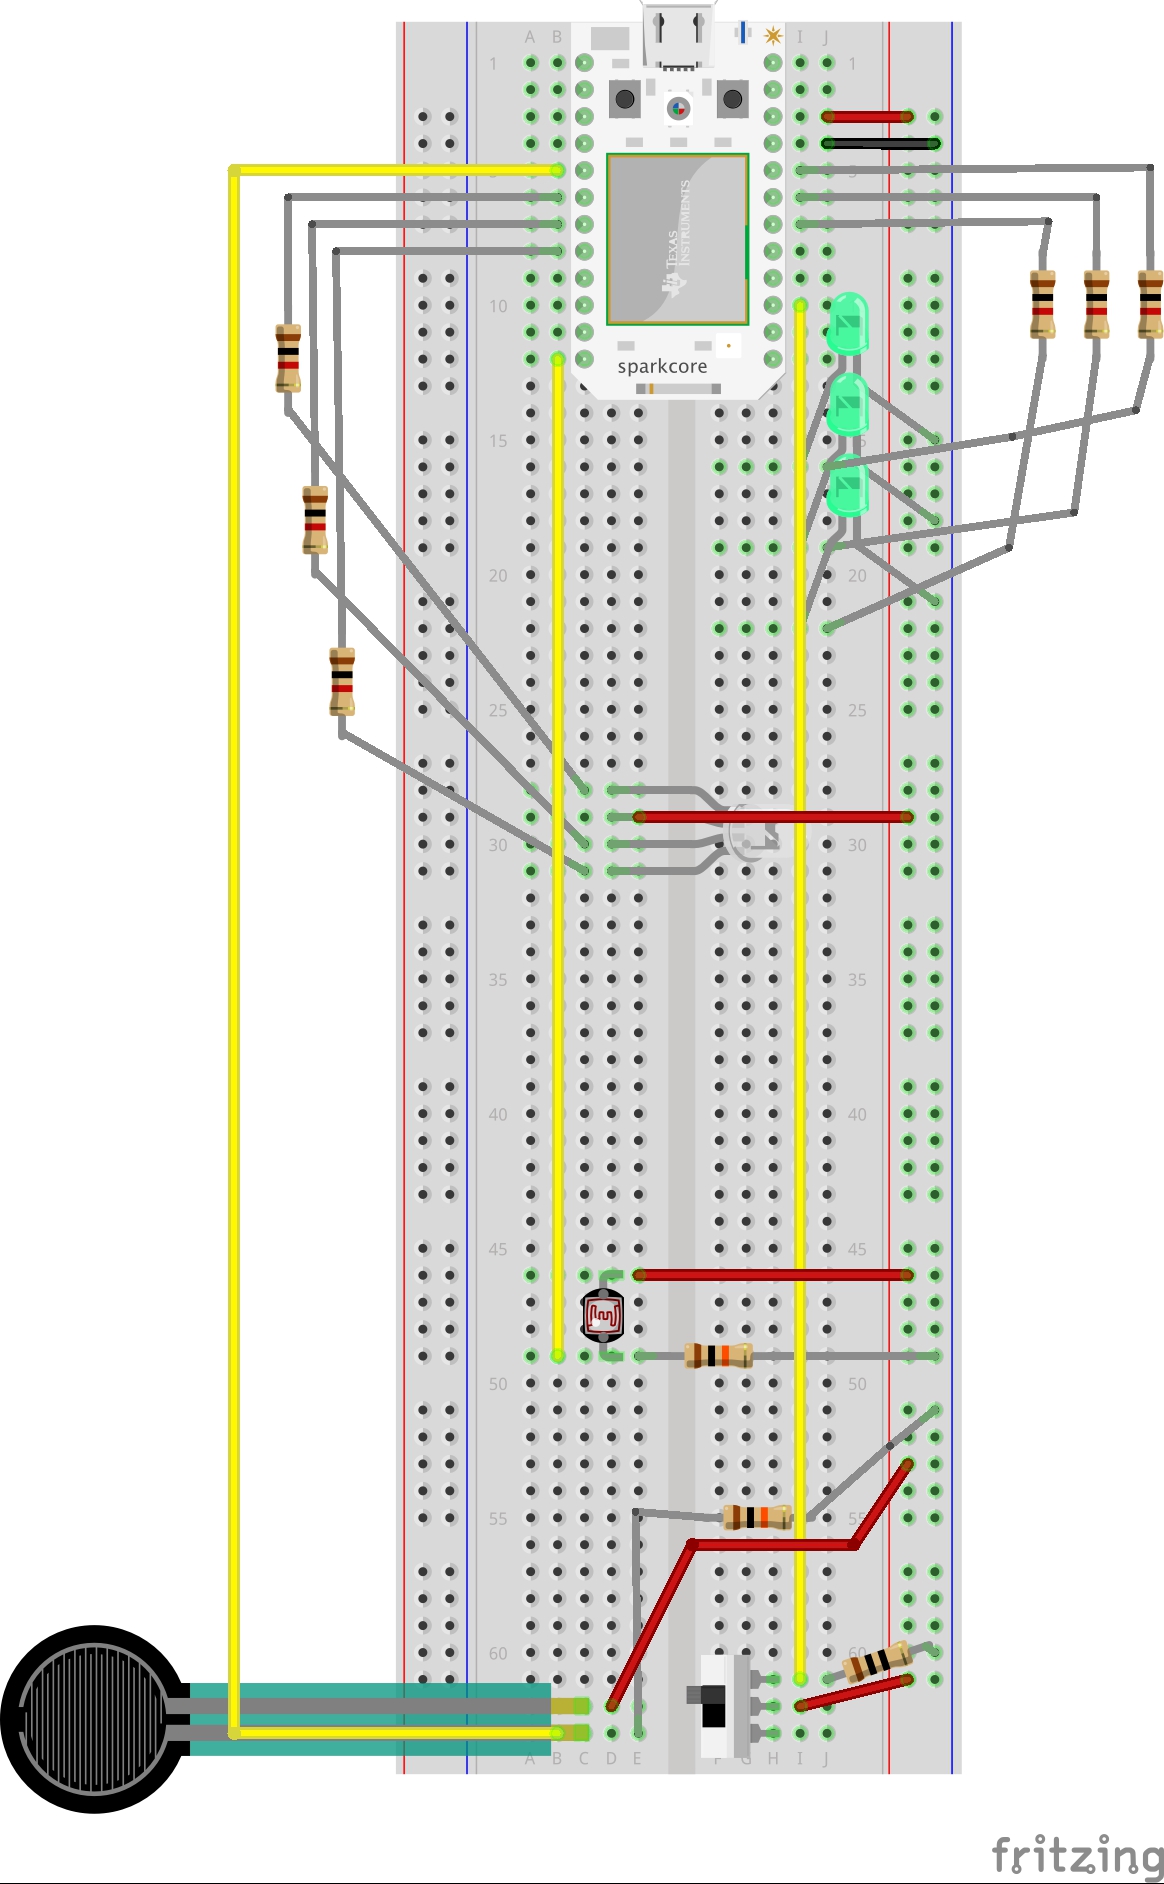
1. Input = Force Sensor.
I used a force sensor to detect someone sitting on the chair to activate it. Anything over 1000 will turn the light on, otherwise it stays off, though the indicator lights let you know it's active.
2. Input = Switch
A. If the switch is in Meditation Mode (LOW), the RGB light will pulse with the blue-green only (red = LOW).
B. If the switch is in Reading Mode (HIGH), the RGB light will be all on.
3. Input = Photoresistor
The RGB light is now controlled by the photoresistors, which is mapped to shine at the inverse of the light coming in to the photoresistors. Ie, if the photoresistor is getting the max light, the RGB will be at the minimum level, and if the photoresistor is taking in no light, the RGB will be at the max level.
Finally, both sensor variables were available on the Spark Cloud (screenshot below)
Reflection:
For the pulsing GB light, I did not like a pulse pattern I used on a previous project, so I went looking for a smoother one. I thought I found it in a sin wave-based function, found here: https://www.sparkfun.com/tutorials/329
I did use that code, but I am still not happy with the rhythm of the pulse. I want it to feel more like it's breathing, so I will have to work on understanding how I can adjust that code or split it into 2 parts to give me the outcome I'm looking for.
I was, overall, quite happy with the outcome. I took it to the Intermediate level, and if I were to go further, I believe I could achieve the advanced level challenge.
I also would, as a next-level challenge, add a third case to "Reading Mode" where the lamp would be off if the ambient light was above some level, and then otherwise would map from a mid-level range so that the light never got too dim (which is pointless). Also, I believe that the lamp being on could cause the photoresistor to detect high light levels and turn off, thus initiating a blinking or pulsating lamp, so I would have to think how to avoid this.
Code used in addition to my own:
*Much from Darragh's tutorials
*Sin wave pulse from https://www.sparkfun.com/tutorials/329
Tutorial used in addition to Darragh's:
*https://learn.sparkfun.com/tutorials/switch-basics